
MediaWiki is a tool created to help you collect and organize knowledge and make it available to people inside and outside your organization. It is a very powerful, multilingual, extensible, customizable, reliable, and free of charge. Being a free to use and open source software gives you the flexibility to customize it to suit your needs.
In this guide we show you how to install and configure MediaWiki in Ubuntu 24.04 and Debian 12 system with Apache as the web server. The server used can be newly installed or a web server already used for hosting other applications.
🔑 Unlock the complete Ubuntu Desktop learning journey by purchasing our best selling ebook: The Ultimate Ubuntu Desktop Handbook.
Step 1: Update System
Update your Ubuntu or Debian system before you start installing MediaWiki dependencies and packages:
sudo apt update -y
sudo apt -y full-upgrade
Reboot if the updates dictate that a system restart be perfomed.
sudo rebootStep 2: Install MariaDB database server
Next we install MariaDB database server:
sudo apt update -y
sudo apt -y install mariadb-server
Run the commands below to secure your database server:
$ sudo mysql_secure_installation

NOTE: RUNNING ALL PARTS OF THIS SCRIPT IS RECOMMENDED FOR ALL MariaDB
      SERVERS IN PRODUCTION USE!  PLEASE READ EACH STEP CAREFULLY!

In order to log into MariaDB to secure it, we'll need the current
password for the root user. If you've just installed MariaDB, and
haven't set the root password yet, you should just press enter here.

Enter current password for root (enter for none):
OK, successfully used password, moving on...

Setting the root password or using the unix_socket ensures that nobody
can log into the MariaDB root user without the proper authorisation.

You already have your root account protected, so you can safely answer 'n'.

Switch to unix_socket authentication [Y/n] n
 ... skipping.

You already have your root account protected, so you can safely answer 'n'.

Change the root password? [Y/n] Y
New password:
Re-enter new password:
Password updated successfully!
Reloading privilege tables..
 ... Success!


By default, a MariaDB installation has an anonymous user, allowing anyone
to log into MariaDB without having to have a user account created for
them.  This is intended only for testing, and to make the installation
go a bit smoother.  You should remove them before moving into a
production environment.

Remove anonymous users? [Y/n] Y
 ... Success!

Normally, root should only be allowed to connect from 'localhost'.  This
ensures that someone cannot guess at the root password from the network.

Disallow root login remotely? [Y/n] Y
 ... Success!

By default, MariaDB comes with a database named 'test' that anyone can
access.  This is also intended only for testing, and should be removed
before moving into a production environment.

Remove test database and access to it? [Y/n] Y
 - Dropping test database...
 ... Success!
 - Removing privileges on test database...
 ... Success!

Reloading the privilege tables will ensure that all changes made so far
will take effect immediately.

Reload privilege tables now? [Y/n] Y
 ... Success!

Cleaning up...

All done!  If you've completed all of the above steps, your MariaDB
installation should now be secure.

Thanks for using MariaDB!
Change authentication plugin to force root user authentication:
$ sudo mariadb -u root
ALTER USER 'root'@'localhost' IDENTIFIED BY 'new_password';
FLUSH PRIVILEGES;
QUIT;
Confirm you can’t get to MySQL shell without password:
$ sudo mariadb -u root
ERROR 1045 (28000): Access denied for user 'root'@'localhost' (using password: NO)

$ mysql -u root -p
Enter password:
Welcome to the MariaDB monitor.  Commands end with ; or \g.
Your MariaDB connection id is 46
Server version: 10.11.8-MariaDB-0ubuntu0.24.04.1 Ubuntu 24.04

Copyright (c) 2000, 2018, Oracle, MariaDB Corporation Ab and others.

Type 'help;' or '\h' for help. Type '\c' to clear the current input statement.

MariaDB [(none)]>
Step 3: Install PHP on Debian | Ubuntu
Install PHP and all required extensions:
sudo apt install -y git php php-mysql php-xml php-mbstring php-apcu php-intl imagemagick inkscape php-gd php-cli php-curl php-bcmath libapache2-mod-phpSample Output:
The following additional packages will be installed:
  apache2 apache2-bin apache2-data apache2-utils fig2dev fonts-tuffy imagemagick-6-common imagemagick-6.q16 lib2geom1.2.0t64
  libapache2-mod-php8.3 libapr1t64 libaprutil1-dbd-sqlite3 libaprutil1-ldap libaprutil1t64 libatkmm-1.6-1v5 libblas3 libboost-filesystem1.83.0
  libcairomm-1.0-1v5 libfftw3-double3 libgc1 libgfortran5 libglibmm-2.4-1t64 libgsl27 libgslcblas0 libgtkmm-3.0-1t64 libimage-magick-perl
  libimage-magick-q16-perl libimath-3-1-29t64 libjxr-tools libjxr0t64 liblapack3 liblqr-1-0 libmagick++-6.q16-9t64 libmagickcore-6.q16-7-extra
  libmagickcore-6.q16-7t64 libmagickwand-6.q16-7t64 libnetpbm11t64 libopenexr-3-1-30 libpangomm-1.4-1v5 libpotrace0 libsigc++-2.0-0v5 libwmf-bin
  netpbm php-common php8.3 php8.3-apcu php8.3-bcmath php8.3-cli php8.3-common php8.3-curl php8.3-gd php8.3-intl php8.3-mbstring php8.3-mysql
  php8.3-opcache php8.3-readline php8.3-xml python3-bs4 python3-cssselect python3-html5lib python3-lxml python3-numpy python3-scour
  python3-soupsieve python3-webencodings
Customize PHP parameters:
sudo vim /etc/php/8.*/apache2/php.iniSet Maximum allowed size for uploaded files to at least 20M:
upload_max_filesize = 20MSet the maximum amount of memory a script may consume to 128M
memory_limit = 128MStep 4: Install MediaWiki with on Ubuntu 24.04|Debian 12
Let’s now download the official MediaWiki tarball:
cd /tmp/
wget https://releases.wikimedia.org/mediawiki/1.43/mediawiki-1.43.0.tar.gz
Extract the file downloaded:
tar -xvzf mediawiki-*.tar.gz
rm mediawiki-*.tar.gz
Move the resulting folder to /var/www directory:
sudo mv mediawiki-* /var/www/html/mediawikiSet correct directory permissions:
sudo chown -R www-data:www-data /var/www/html/mediawikiAllow HTTP and HTTPS traffic on ports 80 and 443 through the firewall:
sudo ufw allow 80/tcp
sudo ufw allow 443/tcp
Step 5: Configure MediaWiki on browser
Navigate your browser to http://serverip_or_hostname/mediawiki/mw-config/index.php to initiate MediaWiki configuration.
Example:
http://192.168.20.11/mediawiki/mw-config/index.phpChoose language and select “Continue”.
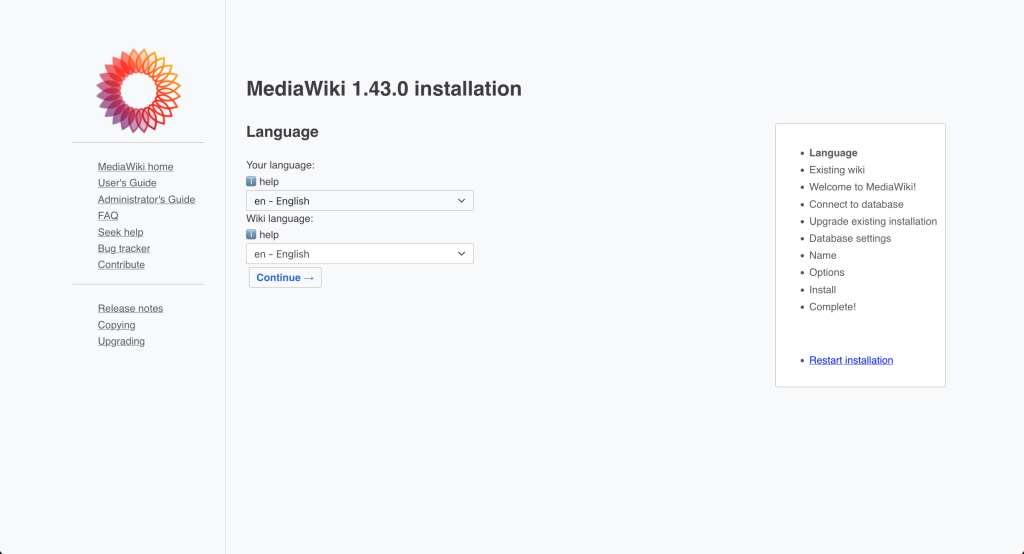
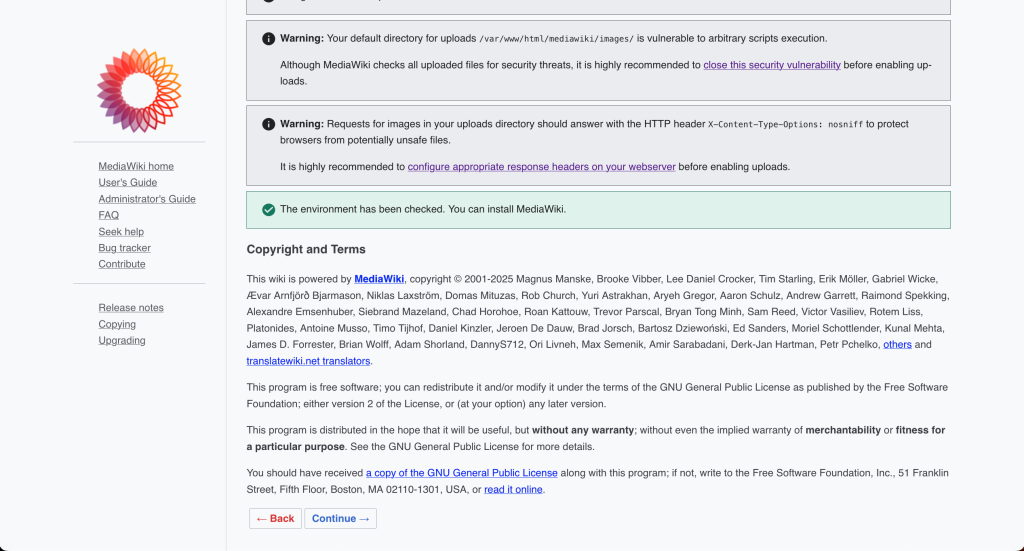
Proceed with the installation by clicking on “Continue”.
Input root database user credentials and database name to create.
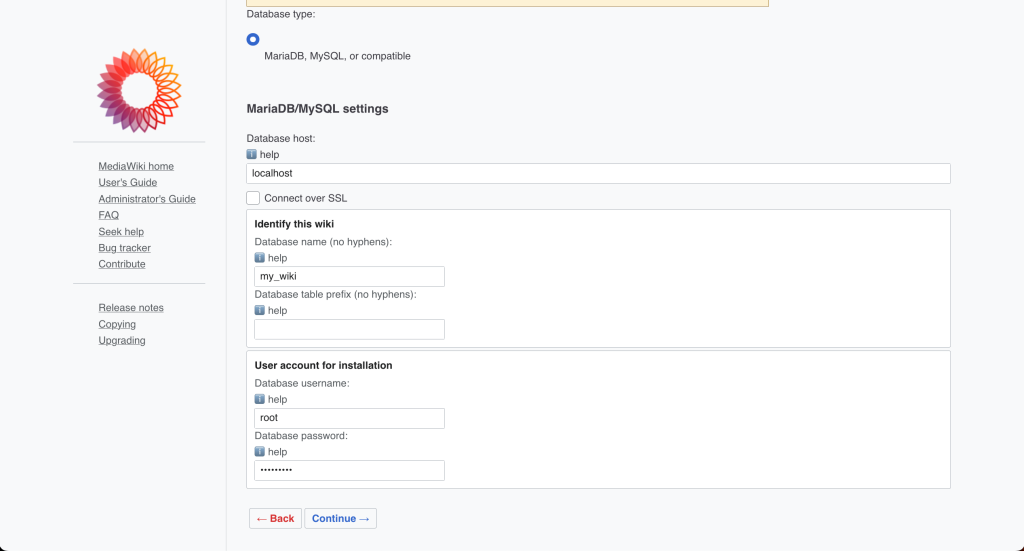
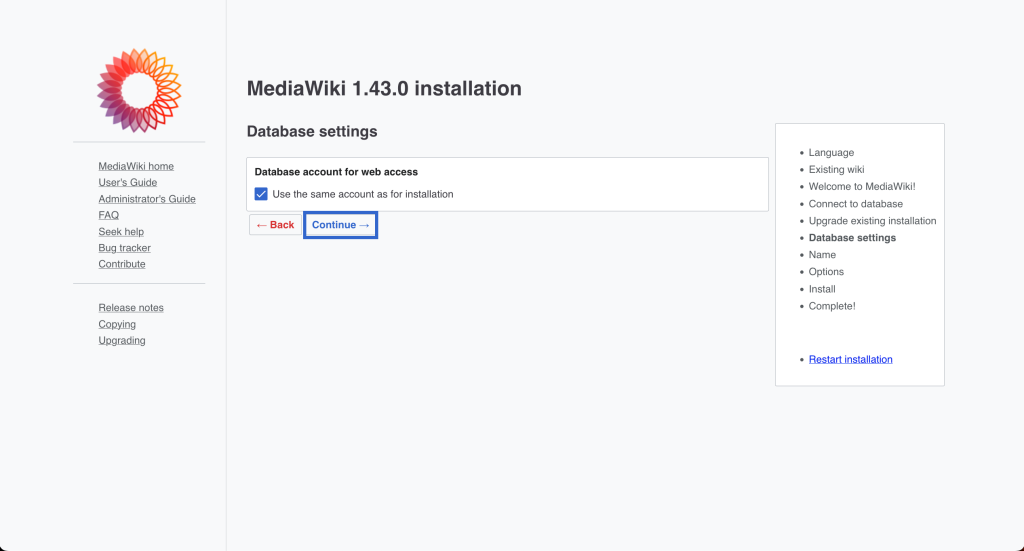
Confirm database settings.
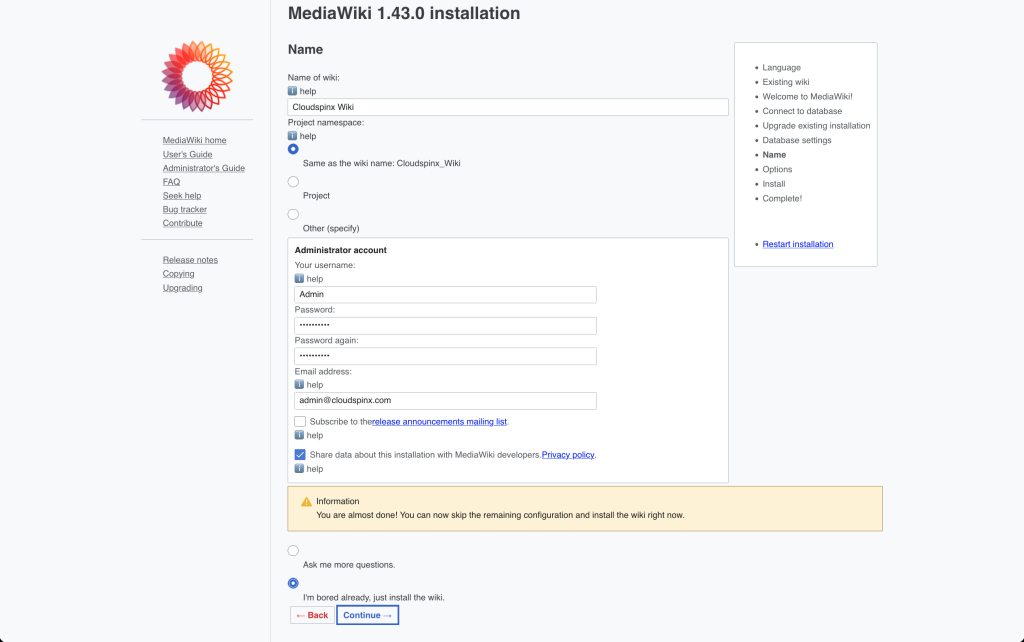
Enter admin username, password and email address.
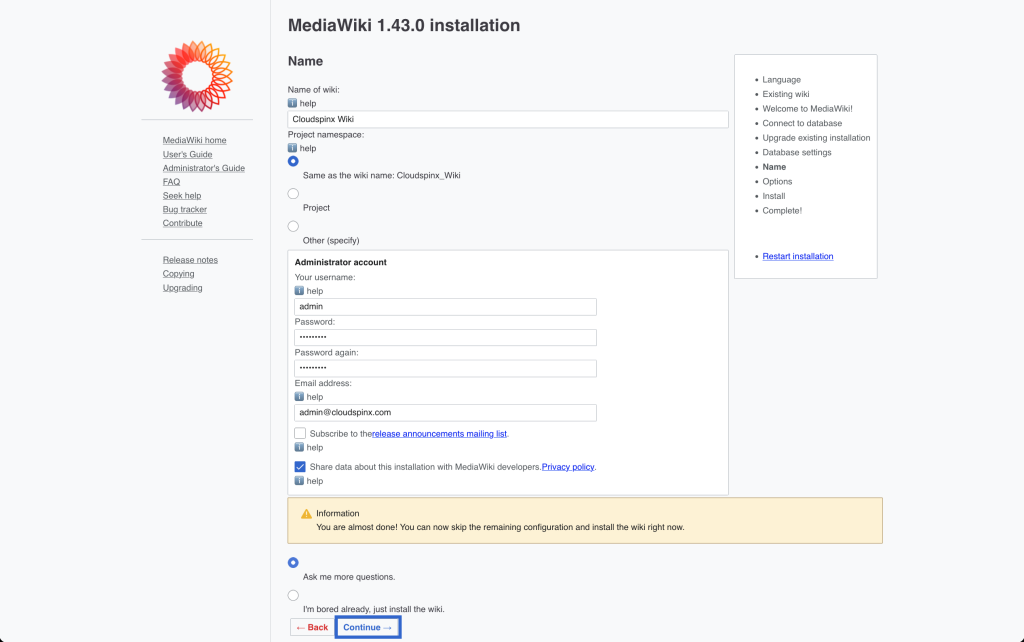
You can choose to proceed to Install wiki or provide some more details:
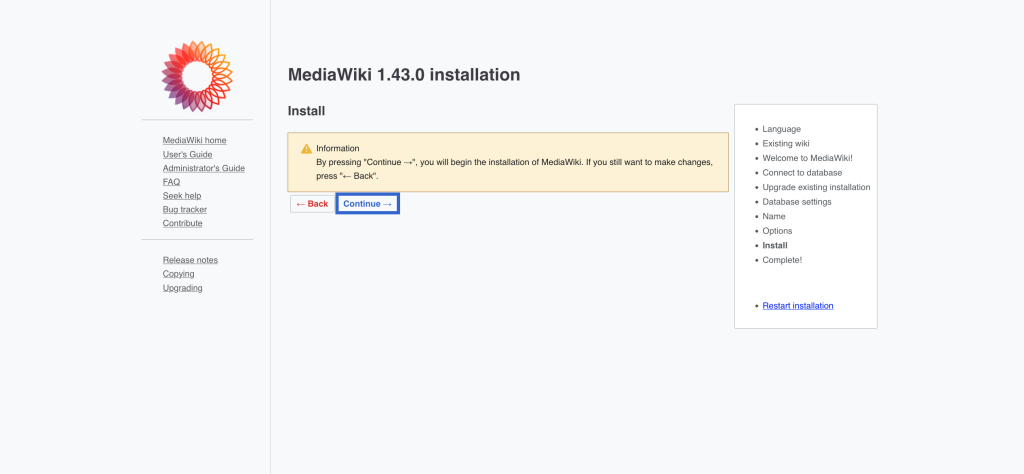
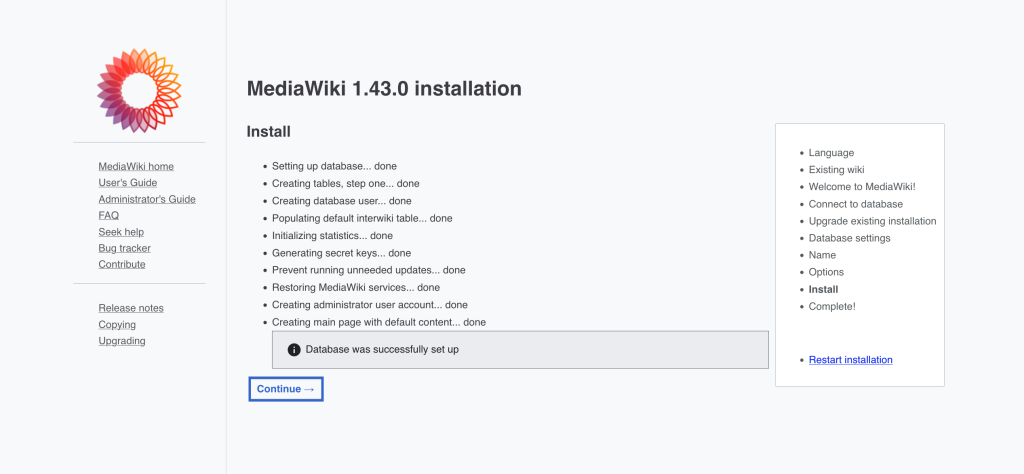
Press “Continue” to begin installation of MediaWiki.
Click Continue to complete the Installation:
The installer will generate a LocalSettings.php file which contains all your configurations and is downloaded automatically. You can also click on the link to install it.
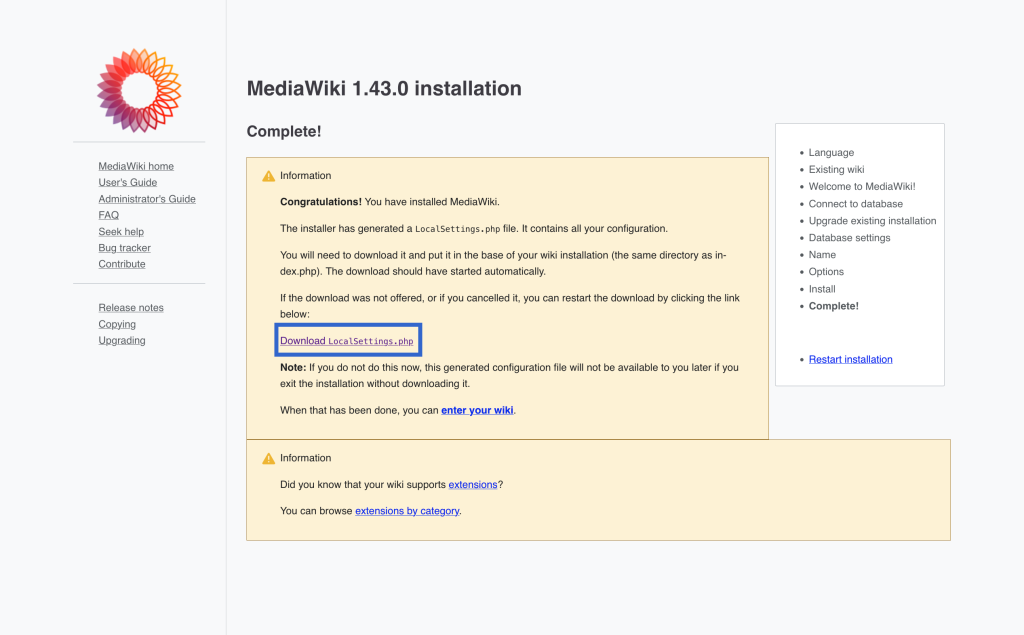
Download the file and put it in the base of your wiki installation:
sudo mv LocalSettings.php /var/www/html/mediawiki/Copying the file over ssh.
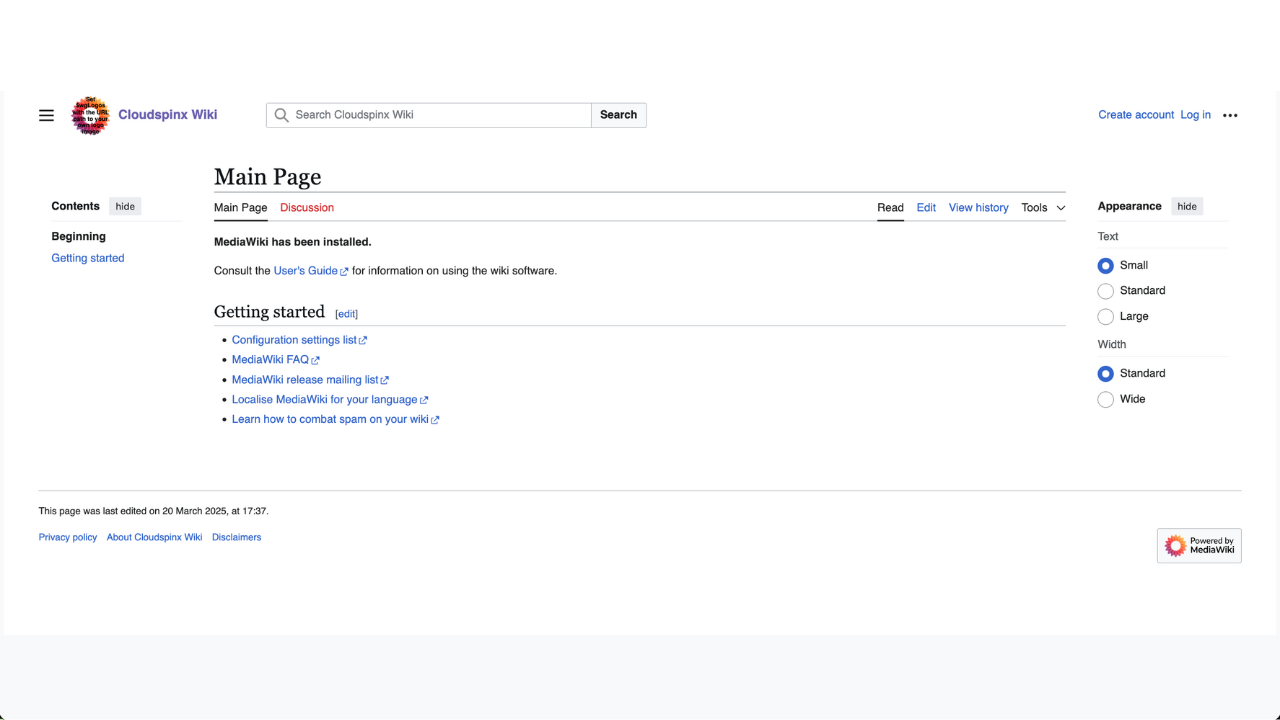
scp ~/Downloads/LocalSettings.php root@serverip:/var/www/html/mediawiki/LocalSettings.phpClick on enter your wiki.
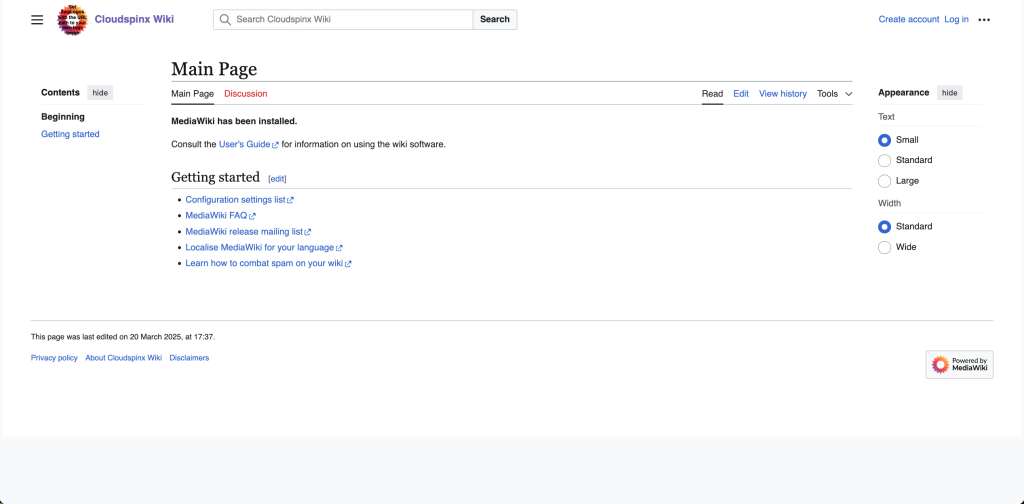
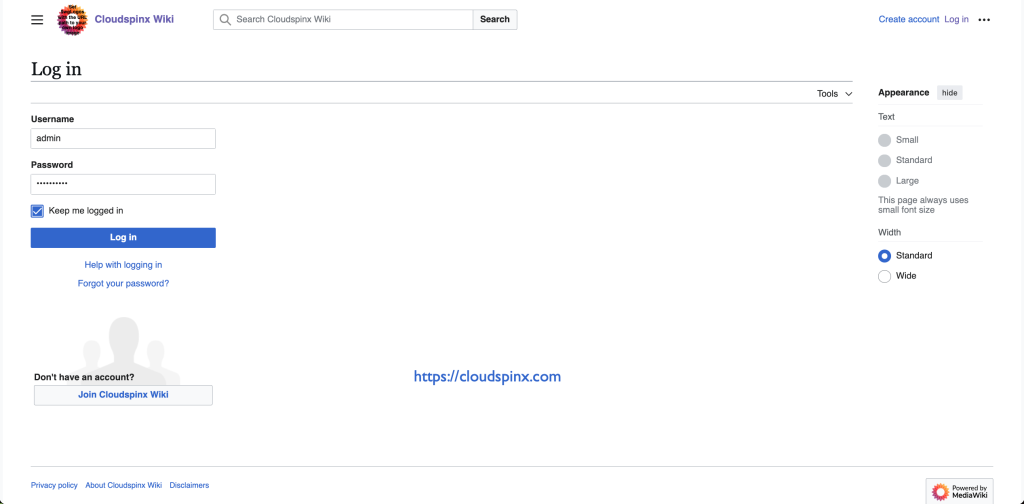
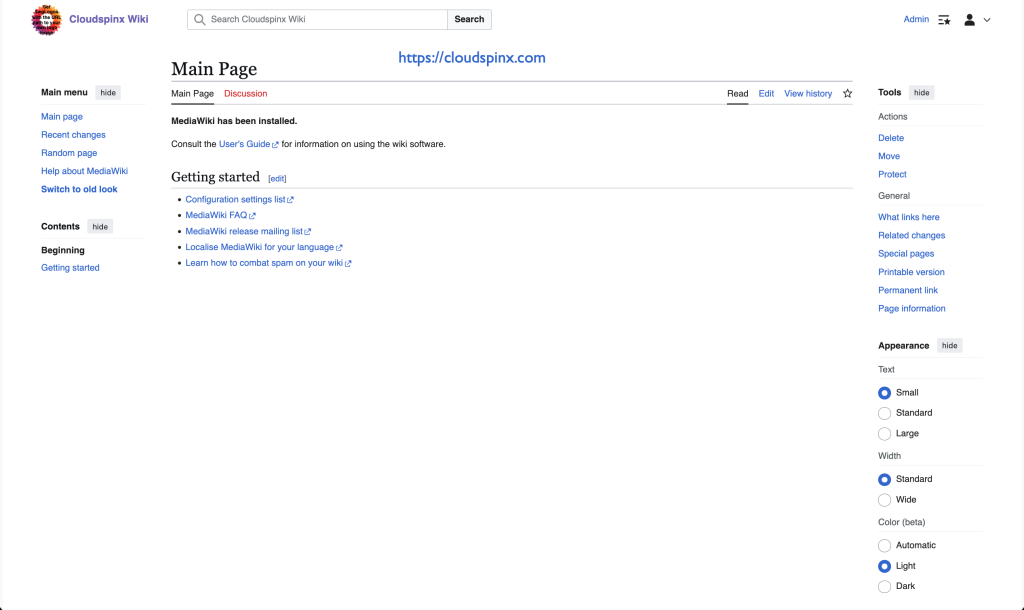
Then click on Login and the enter your admin credentials.
You should now have a working installation of MediaWiki on Ubuntu|Debian Linux system.
I hope this guide was helpfull. Here are more guides on Ubuntu and Debian:


