

Caching is the process of temporarily holding the most frequently queried data in transient memory. This reduces data load time as well as providing ease of access to the database.
Application developers usually use a 3-tier architecture in the creation of usable and adjustable applications. The tier includes a presentation layer (user interface), an application layer (business logic), and a data layer (databases and file storage).
- Presentation Layer: this is the interface that users interact with. It translates tasks and results from machine readable to human readable making the user to understand what’s going on.
- Application Layer: processes commands, makes logical decisions and processes data between the user interface and the database.
- Data Layer: this is the actual storage location for both data and files.
These layers are able to work and be maintained independently, and frequently be set up in separate hosts. For every data query, the application makes, its speed is limited by network performance. Data retrieval plays a crucial role in user experience and is a vital requirement in most commercial applications.
What is Memcached?
Memcached is a free & open-source, distributed memory object caching system that’s generic in nature, used to speed up dynamic web applications by reducing database load. It stores data in memory, based on a key-value pair.
Memcached ease of use, fast deployment, and an API that is widely available on favored programming languages e.g., python, PHP, java among others.
Installation of Memcached on Debian 12/11
This guide will be taking you through the installation and configuration of Memcached on the Debian 11/10 Operating System. Debian repository already has Memcached packages installed making it easier for us to use the APT package manager to install it.
We start by updating the system packages, as displayed below:
sudo apt update -y
sudo apt full-upgrade
Once done we install Memcached by running the following command:
$ sudo apt install memcached
Reading package lists... Done
Building dependency tree... Done
Reading state information... Done
The following packages were automatically installed and are no longer required:
  linux-image-6.1.0-25-amd64 linux-image-6.1.0-30-amd64
Use 'sudo apt autoremove' to remove them.
Suggested packages:
  libanyevent-perl libcache-memcached-perl libmemcached libterm-readkey-perl libyaml-perl
The following NEW packages will be installed:
  memcached
0 upgraded, 1 newly installed, 0 to remove and 0 not upgraded.
Need to get 212 kB of archives.
After this operation, 611 kB of additional disk space will be used.
Get:1 http://deb.debian.org/debian bookworm/main amd64 memcached amd64 1.6.18-1 [212 kB]
Fetched 212 kB in 0s (602 kB/s)
Selecting previously unselected package memcached.
(Reading database ... 163349 files and directories currently installed.)
Preparing to unpack .../memcached_1.6.18-1_amd64.deb ...
Unpacking memcached (1.6.18-1) ...
Setting up memcached (1.6.18-1) ...
adduser: Warning: The home dir /nonexistent you specified can't be accessed: No such file or directory
Created symlink /etc/systemd/system/multi-user.target.wants/memcached.service → /lib/systemd/system/memcached.service.
Processing triggers for man-db (2.11.2-2) ...
To verify its installation, run the command below:
$ sudo systemctl status memcached
● memcached.service - memcached daemon
     Loaded: loaded (/lib/systemd/system/memcached.service; enabled; preset: enabled)
     Active: active (running) since Fri 2025-03-21 20:15:13 EAT; 2min 17s ago
       Docs: man:memcached(1)
   Main PID: 1707 (memcached)
      Tasks: 10 (limit: 7032)
     Memory: 4.1M
        CPU: 63ms
     CGroup: /system.slice/memcached.service
             └─1707 /usr/bin/memcached -m 64 -p 11211 -u memcache -l 127.0.0.1 -P /var/run/memcached/memcached.pid

Mar 21 20:15:13 debian systemd[1]: Started memcached.service - memcached daemon.
Memcached configuration on Debian 12/11
To configure Memcached we edit Memcached configuration file, /etc/memcached.conf. However, the majority of users stick to Memcached default settings, without tweaking the configuration file Memcached listens on the localhost. A localhost connection does not require any configuration to be made on the server.
We can modify the Memcached configuration by running:
$ sudo vim /etc/memcached.confIn the file below, locate localhost IP 127.0.0.1. replace it with your actual server IP.
# memcached default config file
# 2003 - Jay Bonci <[email protected]>
# This configuration file is read by the start-memcached script provided as
# part of the Debian GNU/Linux distribution.

# Run memcached as a daemon. This command is implied, and is not needed for the
# daemon to run. See the README.Debian that comes with this package for more
# information.
-d

# Log memcached's output to /var/log/memcached
logfile /var/log/memcached.log

# Be verbose
# -v

# Be even more verbose (print client commands as well)
# -vv

# Start with a cap of 64 megs of memory. It's reasonable, and the daemon default
# Note that the daemon will grow to this size, but does not start out holding this much
# memory
-m 64

# Default connection port is 11211
-p 11211

# Run the daemon as root. The start-memcached will default to running as root if no
# -u command is present in this config file
-u memcache

# Specify which IP address to listen on. The default is to listen on all IP addresses
# This parameter is one of the only security measures that memcached has, so make sure
# it's listening on a firewalled interface.
-l 127.0.0.1

# Limit the number of simultaneous incoming connections. The daemon default is 1024
# -c 1024

# Lock down all paged memory. Consult with the README and homepage before you do this
# -k

# Return error when memory is exhausted (rather than removing items)
# -M

# Maximize core file limit
# -r

# Use a pidfile
-P /var/run/memcached/memcached.pid
For remote connections to the server, an extra configuration is required. We will need to append the firewall to allow UDP port 11211 to be listened to by Memcached. Then will have to allow the port on the firewall by running this command.
sudo ufw allow from 0.0.0.0 to any port 11211
sudo ufw reload
Next, we are going to install Memcached additional tools with help of the command below.
sudo apt install -y libmemcached-toolsMemcached is now installed and well configured. We are going to test with a simple PHP script running on an Apache webserver. If you do not have PHP and Apache installed, run this command to install.
sudo apt install apache2 php libapache2-mod-phpOn the screen output below, select Y then press Enter to continue.
Reading package lists... Done
Building dependency tree... Done
Reading state information... Done
The following packages were automatically installed and are no longer required:
  linux-image-6.1.0-25-amd64 linux-image-6.1.0-30-amd64
Use 'sudo apt autoremove' to remove them.
The following additional packages will be installed:
  apache2-data apache2-utils libapache2-mod-php8.2 php-common php8.2 php8.2-cli php8.2-common php8.2-opcache php8.2-readline
Suggested packages:
  apache2-doc apache2-suexec-pristine | apache2-suexec-custom php-pear
The following NEW packages will be installed:
  apache2 apache2-data apache2-utils libapache2-mod-php libapache2-mod-php8.2 php php-common php8.2 php8.2-cli php8.2-common php8.2-opcache
  php8.2-readline
0 upgraded, 12 newly installed, 0 to remove and 0 not upgraded.
Need to get 5,124 kB of archives.
After this operation, 23.2 MB of additional disk space will be used.
Do you want to continue? [Y/n] y
We now install Memcached PHP Extension by running the command.
sudo apt install php-memcachedWhen Memcached is installed, it integrates itself with phpinfo file. This helps in checking and verifying that is recognized by the webserver. To see this information, create phpinfo.php file in /var/www/html.
$ sudo vim /var/www/html/phpinfo.phpAdd lines below in the file.
<?php
// Show all information, defaults to INFO_ALL
phpinfo();
?>
Load the file in the browser with http://server_ip/phpinfo.php. Replace server_ip with your server IP. When you scroll down the page you should be able to see Memcached information indicated as one below.

Testing of Memcached on Debian 12/11
We are going to create a simple PHP script to carry a test to see how Memcached is used in caching data and pages in Debian. Create a PHP file in apache root, /var/www/html/.
sudo vim /var/www/html/test.phpCopy and paste the lines below in the file. Remember to replace 127.0.0.1 with your actual server IP.
<?php
$mc = new Memcached();
$mc->addServer("127.0.0.1", 11211);

$result = $mc->get("test_key");

if($result) {
        echo $result;
} else {
        echo "No cached data was found. Please refresh page to reload";
        $mc->set("test_key", "Memcached has successfully cached data!!") or die ("Failed to save data at Memcached server");
}
?>
After editing the file, save and exit.
Restart Apache and Memcached to allow changes to take effect.
sudo systemctl restart memcached
sudo systemctl restart apache2
To test via web browser, enter your server_IP or domain in browser with port 11211 in which Memcached is running. Replace 127.0.0.1 with your actual server_IP if you are running from a cloud server
The screen below will appear. Since it is the first time you are loading the script, has not been cached hence message below will display on your screen.
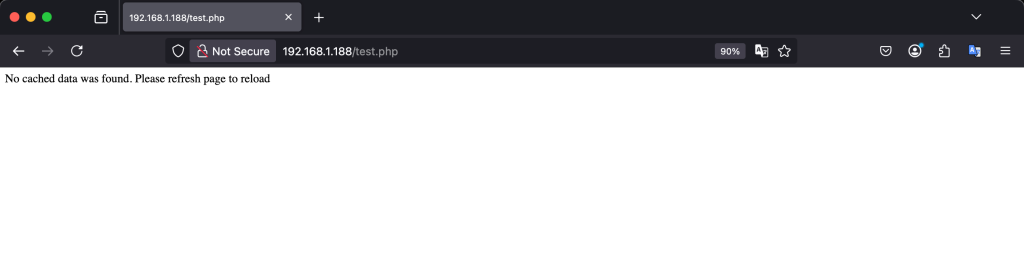
When you refresh the page, Memcached will have cached the page and will be loaded from the Memcached server instead. You should be able to see a page similar to the one below.
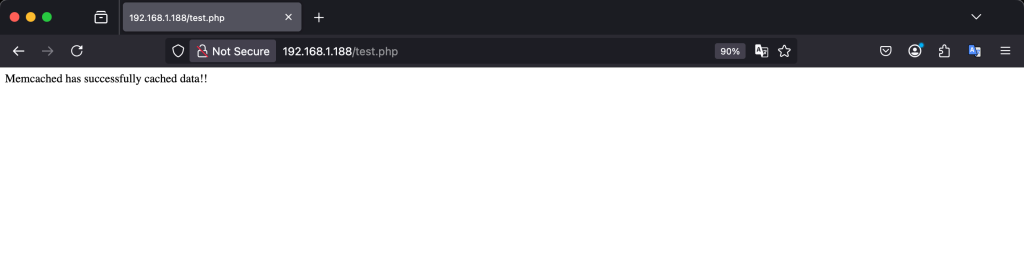
The above two illustrations show how Memcached can be used in real-world production. Memcached has logs statistics running in the background which can be viewed by running commands below in the terminal. First run telnet command to port 1121, in which Memcached is listening.
$ telnet <localhost/server_IP>

Trying 62.12.115.67...
Connected to 62.12.115.67.
Escape character is '^]'.
In the screen output run the stats command to list the history of Memcached. You should be able to see output similar to one down here.
$ stats

#Output

STAT pid 128695
STAT uptime 622738
STAT time 1625602056
STAT version 1.5.6
STAT libevent 2.1.8-stable
STAT pointer_size 64
STAT rusage_user 82.657987
STAT rusage_system 74.395967
STAT max_connections 1024
STAT curr_connections 2
STAT total_connections 278
STAT rejected_connections 0
STAT connection_structures 3
STAT reserved_fds 20
STAT cmd_get 273
STAT cmd_set 2
STAT cmd_flush 2
STAT cmd_touch 0
STAT get_hits 271
STAT get_misses 2
STAT get_expired 0
STAT get_flushed 0
STAT delete_misses 0
STAT delete_hits 0
STAT incr_misses 0
STAT incr_hits 0
STAT decr_misses 0
STAT decr_hits 0
STAT cas_misses 0
STAT cas_hits 0
STAT cas_badval 0
STAT touch_hits 0
STAT touch_misses 0
STAT auth_cmds 0
STAT auth_errors 0
STAT bytes_read 6857
STAT bytes_written 20005
STAT limit_maxbytes 67108864
STAT accepting_conns 1
STAT listen_disabled_num 0
STAT time_in_listen_disabled_us 0
STAT threads 4
STAT conn_yields 0
STAT hash_power_level 16
STAT hash_bytes 524288
STAT hash_is_expanding 0
STAT slab_reassign_rescues 0
STAT slab_reassign_chunk_rescues 0
STAT slab_reassign_evictions_nomem 0
STAT slab_reassign_inline_reclaim 0
STAT slab_reassign_busy_items 0
STAT slab_reassign_busy_deletes 0
STAT slab_reassign_running 0
STAT slabs_moved 0
STAT lru_crawler_running 0
STAT lru_crawler_starts 51765
STAT lru_maintainer_juggles 1865386
STAT malloc_fails 0
STAT log_worker_dropped 0
STAT log_worker_written 0
STAT log_watcher_skipped 0
STAT log_watcher_sent 0
STAT bytes 0
STAT curr_items 0
STAT total_items 2
STAT slab_global_page_pool 0
STAT expired_unfetched 0
STAT evicted_unfetched 0
STAT evicted_active 0
STAT evictions 0
STAT reclaimed 2
STAT crawler_reclaimed 0
STAT crawler_items_checked 0
STAT lrutail_reflocked 408
STAT moves_to_cold 259
STAT moves_to_warm 257
STAT moves_within_lru 4
STAT direct_reclaims 0
STAT lru_bumps_dropped 0
You clear Memcached to empty storage with the below command.
sudo flush_allUse quit command to exit telnet.
$ quitConclusion
Just like any other caching mechanism, Memcached can store data and load it next time the client requests the same page. This helps in reducing server workloads, loading one page simultaneously. Throughout the guide, we were able to install Memcached and configure. We have also looked into how Memcached can be used in the real world by running a sample PHP script. I believe the guide was helpful and should you have queries leave a comment.
Other people also read on:


