Microsoft SQL Server, one of the most powerful relational database management systems (RDBMS) in use today, is no longer tied to a Windows environment only. Thanks to the recent inclusion of support for running SQL Server on Linux, one can easily use SQL Server in popular versions of the Linux operating system like Ubuntu.
This guide will help you install and set up Microsoft SQL Server on a machine running Ubuntu 24.04 Long Term Support. Ubuntu 24.04 is supported in preview for SQL Server 2025 (17.x) Preview. Currently, only the 180-day Enterprise Evaluation edition is available. This is the latest version of Microsoft SQL with a long-term support cycle. Here, we will cover how to install the SQL Server engine as well as set it up on a machine running Ubuntu.
Best Selling Ultimate Ubuntu Desktop Handbook
Master Ubuntu like a pro - from beautiful desktop customization to powerful terminal automation. This eBook is perfect for developers, system admins, and power users who want total control of their Ubuntu Linux workspace.
Install Microsoft SQL Server 2025 on Ubuntu 24.04
The following steps discuss and describe how you can install MS SQL Server 2025 on your Ubuntu 24.04 server or desktop environment:
Step 1: Update Ubuntu System Packages
It’s always a good practice to ensure that your system is up to date with the upstream packages before installing any new software on your system. RUn the commands below to update and upgrade your system packages and applications:
sudo apt-get update && sudo apt-get upgradeRun the following command to reboot your system if a restart is requires after an upgrade:
[ -f /var/run/reboot-required ] && sudo reboot -fStep 2: Add Microsoft Package Repository
To install any Microsoft packages, you need to add Microsoft’s package repository, and to do that, you first need to install basic repository configuration packages as follows:
sudo apt install wget curl libssl-dev gpg gnupg2 software-properties-common apt-transport-https lsb-release ca-certificatesThen import the Public GPG Key:
curl -fsSL https://packages.microsoft.com/keys/microsoft.asc | sudo gpg --dearmor -o /usr/share/keyrings/microsoft-prod.gpgNext, manually download and register the SQL Server Ubuntu repository:
curl -fsSL https://packages.microsoft.com/config/ubuntu/24.04/mssql-server-preview.list | sudo tee /etc/apt/sources.list.d/mssql-server-preview.listStep 3: Install Microsoft SQL Server 2025
Now install Microsoft SQL Server 2025 with the following commands:
sudo apt-get update
sudo apt-get install -y mssql-server
Expected Output:
...
Unpacking mssql-server (17.0.925.4-1-preview) ...
Setting up libdebuginfod-common (0.190-1.1ubuntu0.1) ...
Setting up libunwind-18:amd64 (1:18.1.3-1ubuntu1) ...
Setting up libc++abi1-18:amd64 (1:18.1.3-1ubuntu1) ...
Setting up libsource-highlight-common (3.1.9-4.3build1) ...
Setting up libc6-dbg:amd64 (2.39-0ubuntu8.6) ...
Setting up libc++1-18:amd64 (1:18.1.3-1ubuntu1) ...
Setting up libatomic1:amd64 (14.2.0-4ubuntu2~24.04) ...
Setting up libipt2 (2.0.6-1build1) ...
Setting up libbabeltrace1:amd64 (1.5.11-3build3) ...
Setting up libsss-nss-idmap0 (2.9.4-1.1ubuntu6.3) ...
Setting up libsasl2-modules-gssapi-mit:amd64 (2.1.28+dfsg1-5ubuntu3.1) ...
Setting up libdebuginfod1t64:amd64 (0.190-1.1ubuntu0.1) ...
Setting up libc++1:amd64 (1:18.0-59~exp2) ...
Setting up libsource-highlight4t64:amd64 (3.1.9-4.3build1) ...
Setting up gdb (15.0.50.20240403-0ubuntu1) ...
Setting up mssql-server (17.0.925.4-1-preview) ...
/opt/mssql/lib/mssql-conf/mssqlsettings.py:553: SyntaxWarning: invalid escape sequence '\.'
  if re.search("^[a-zA-Z0-9\.;-]+$", setting_value):

+--------------------------------------------------------------+
Please run 'sudo /opt/mssql/bin/mssql-conf setup'
to complete the setup of Microsoft SQL Server
+--------------------------------------------------------------+
Step 4: Configure Microsoft SQL Server 2025
Before you can proceed to use Microsoft SQL Server 2025, you need to issue the command below, which will initialize the database and complete the SQL Server setup:
sudo /opt/mssql/bin/mssql-conf setupCurrently, only the 180-day Enterprise Evaluation edition is available:
This is a preview version (free, no production use rights, 180-day limit starting now), continue? [Yes/No]:Yes

The license terms for this product can be found in
/usr/share/doc/mssql-server or downloaded from: https://aka.ms/useterms

The privacy statement can be viewed at:
https://go.microsoft.com/fwlink/?LinkId=853010
The Accept the License Terms and Conditions when prompted:
Do you accept the license terms? [Yes/No]:Yes

Enter the SQL Server system administrator password:
Confirm the SQL Server system administrator password:
Configuring SQL Server...

The licensing PID was successfully processed. The new edition is [Enterprise Evaluation Edition].
[EnableRbpexForGP] : Rbpex non HS FS Toggled, isGeneralPurpose:[0]
[EnableRbpexForLogicalMaster] : Rbpex for LM Toggled
[RbpexEnableGrowWithoutShrink] : Rbpex Thin Provisioning FS Toggled
[INFO] [InitXdbSrvGlobals]: In InitXdbSrvGlobals, FAlternateIoFactorEnabled() = [1]. IsRBPEXEnabledNonHyperscaleEdition() = [0].
[RSC Capacity config] MaximumNumberOfCachePerDb: 0, MaximumSpaceForCachePerDbInMB: -1, MaximumNumberOfCacheGlobal: -1
[INFO] [InitServerComponents]: IsRBPEXEnabledNonHyperscaleEdition() = [0], IsSubCoreCPUAllocation = [0], GetSchedulersNumber*100 = [700], GetCPUCorePercentCap = [700.000000], EnableResilientBufferPoolExtension = [0], , RbpexEnableShrink (thin provisioning)  = [0], RbpexEnableGrowWithoutShrink = [0].
SqlInstanceNetworkManager: Finished setting callback functions for network IO tracking in UCS broker.
ForceFlush is enabled for this instance.
Failed to open password policy registry path. Using default password policy values.
ForceFlush feature is enabled for log durability.
[INFO] [StartUp::OpenDBsAndRecover]: In Startup, FEnableResilientBufferPoolExtensionEnabled() = [0]. IsRBPEXSupportedNonHyperscaleEdition() = [0]. IsSubCore = [0].
[INFO][DBDDLAgent::AttachDatabase] Starting Database Attach.
[INFO][DBDDLAgent::AttachDatabase] Starting Database Attach.
[Auditing][SecAuditPkg::AutoStartAuditSessions] Entered function.
TDS initialization result: 0.
SQLSERVR_SSL_CERTIFICATE_DNS_OR_SUBJECT_NAME environment variable was not set as SSL cert is self signed or untrusted.
Created symlink /etc/systemd/system/multi-user.target.wants/mssql-server.service → /usr/lib/systemd/system/mssql-server.service.
Setup has completed successfully. SQL Server is now starting.
The configuration should not take more than a few seconds. You can check the status of the mssql-server service, which should be up and running by now:
$ sudo systemctl status mssql-server.service
● mssql-server.service - Microsoft SQL Server Database Engine
     Loaded: loaded (/usr/lib/systemd/system/mssql-server.service; enabled; preset: enabled)
     Active: active (running) since Mon 2025-11-03 16:32:58 UTC; 11min ago
       Docs: https://docs.microsoft.com/en-us/sql/linux
   Main PID: 11310 (sqlservr)
      Tasks: 93
     Memory: 664.3M (peak: 698.9M)
        CPU: 20.734s
     CGroup: /system.slice/mssql-server.service
             ├─11310 /opt/mssql/bin/sqlservr
             └─11356 /opt/mssql/bin/sqlservr

Nov 03 16:33:04 ubuntu-noble sqlservr[11356]: [119B blob data]
Nov 03 16:33:04 ubuntu-noble sqlservr[11356]: [145B blob data]
Nov 03 16:33:04 ubuntu-noble sqlservr[11356]: [75B blob data]
Nov 03 16:33:04 ubuntu-noble sqlservr[11356]: [96B blob data]
Nov 03 16:33:04 ubuntu-noble sqlservr[11356]: [100B blob data]
Nov 03 16:33:04 ubuntu-noble sqlservr[11356]: [124B blob data]
Nov 03 16:33:04 ubuntu-noble sqlservr[11356]: [71B blob data]
Nov 03 16:40:35 ubuntu-noble sqlservr[11356]: [156B blob data]
Nov 03 16:40:35 ubuntu-noble sqlservr[11356]: [194B blob data]
Nov 03 16:43:26 ubuntu-noble sqlservr[11356]: [71B blob data]
Step 5: Install SQL Server CLI Tools
The SQL Server CLI(Command Line Interface) tools are required to be able to connect to the DB Server and execute SQL statements on the SQL Server. Run the commands below to install mssql-tools18:
First add the Microsoft package repository to your Ubuntu server:
curl -sSL -O https://packages.microsoft.com/config/ubuntu/24.04/packages-microsoft-prod.debThen install the repository:
sudo dpkg -i packages-microsoft-prod.debNow update the package list and install the tools:
sudo apt-get update
sudo apt-get install mssql-tools18 unixodbc-dev
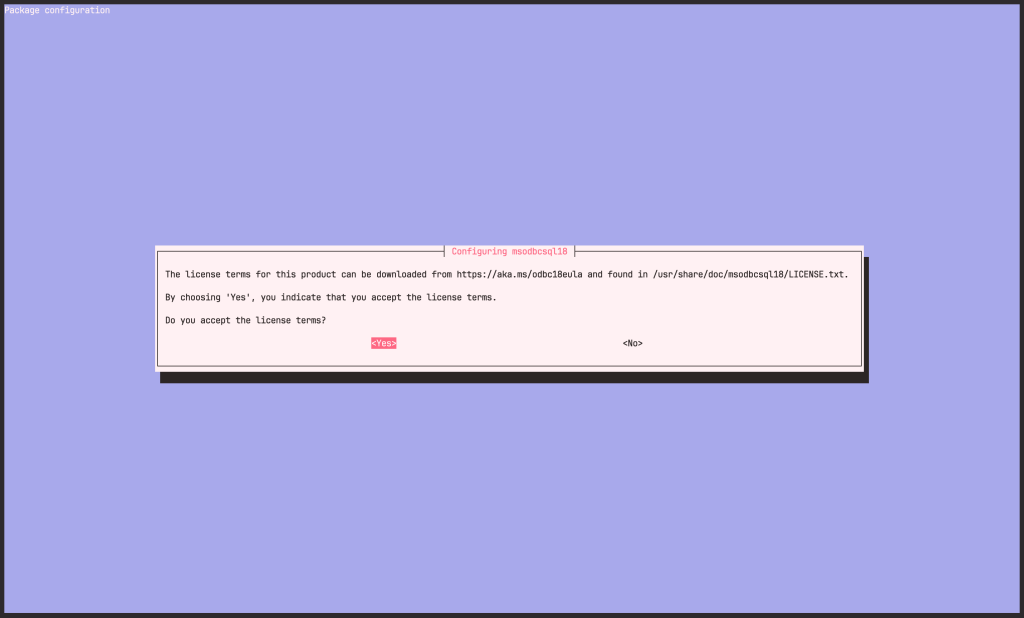
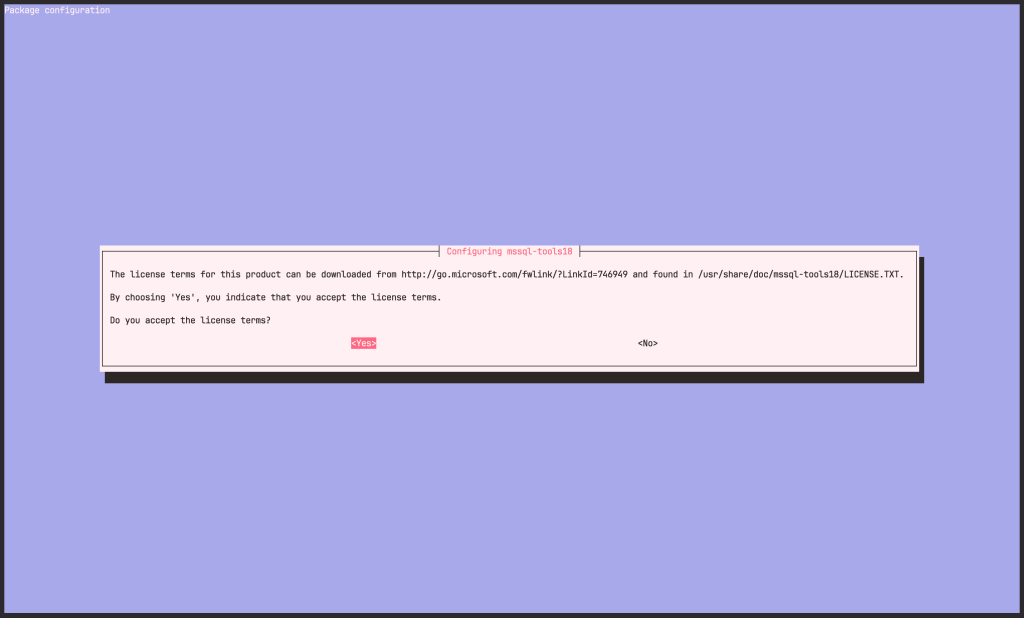
Accept the License Terms for both:
msodbcsql18:

mssql-tools18:

To update to the latest versions:
sudo apt-get update
sudo apt-get install mssql-tools18
To make sqlcmd and bcp accessible from the bash shell for interactive/non-login sessions, modify the PATH in the ~/.bashrc to include /opt/mssql-tools/bin to your $PATH:
echo 'export PATH="$PATH:/opt/mssql-tools18/bin"' >> ~/.bashrc
source ~/.bashrc
Step 6: Connect to the MS SQL DB server
To connect to the DB Server, use the sqlcmd command together with the following options:
- -S : SQL Server name
- -U : The username
- -P : The user password
The following command is for connecting to the local DB, hence the server name localhost. To connect to a server remotely, change localhost to the remote server’s IP address. The password is the one set during SQL Server setup:
sqlcmd -S localhost -U sa -P '<YourPassword>'If you get certficate verification issues, add the -C flag to trust the self-signed certificate:
sqlcmd -S localhost -U sa -P '<YourPassword>' -CTo be prompted for a password, remove the Password parameter from the command. A successful connection will change the prompt to the sqlcmd command prompt.
1> CREATE DATABASE TestDB;
2> SELECT Name FROM sys.databases;
3> GO
Name
--------------------------------------------------------------------------------------------------------------------------------
master
tempdb
model
msdb
TestDB

(5 rows affected)
If you plan to connect remotely, you might also need to open the SQL Server TCP port (default 1433) on your firewall.


1 thought on “How To Install MS SQL Server on Ubuntu 24.04”
What about EDIT_DISTANCE?