
SQL stands for “structured query language” and it makes up the name MySQL, which is the combination of My and SQL. My is the name of MySQL’s co-founder, Monty Widenius daughter. MySQL is an open source database management system created primarily for the management of relational databases. For commercial use cases you can buy a license from Oracle for premium support.
In this article I’ll walk you through the installation of MySQL 8.4 on Amazon Linux 2023 Server running on AWS Cloud or as a Virtual Machine somewhere in your data center. If you need a detailed article on the new features of MySQL 8.4, checkout the official release notes page.
Install MySQL 8.4 on Amazon Linux 2023
Amazon Linux is a derivative of Fedora/RHEL 9 server with a few extra repositories and packages for improved performance and integrations with other AWS cloud services. You can check the release of your server by running the following command in the terminal.
$ cat /etc/os-release
NAME="Amazon Linux"
VERSION="2023"
ID="amzn"
ID_LIKE="fedora"
VERSION_ID="2023"
PLATFORM_ID="platform:al2023"
PRETTY_NAME="Amazon Linux 2023.7.20250609"
ANSI_COLOR="0;33"
CPE_NAME="cpe:2.3:o:amazon:amazon_linux:2023"
HOME_URL="https://aws.amazon.com/linux/amazon-linux-2023/"
DOCUMENTATION_URL="https://docs.aws.amazon.com/linux/"
SUPPORT_URL="https://aws.amazon.com/premiumsupport/"
BUG_REPORT_URL="https://github.com/amazonlinux/amazon-linux-2023"
VENDOR_NAME="AWS"
VENDOR_URL="https://aws.amazon.com/"
SUPPORT_END="2029-06-30"
Step 1: Add MySQL Yum Repository
First, we need to add the MySQL Yum repository to our Amazon Linux 2023 server’s repository list. This operation is only done once and provides all MySQL package version repositories.
Start by updating the system.
sudo yum -y updateInstall an RPM repository package by running the command below:
sudo yum install https://dev.mysql.com/get/mysql84-community-release-el9-1.noarch.rpmHit the y key in your keyboard when prompted to start the installation.
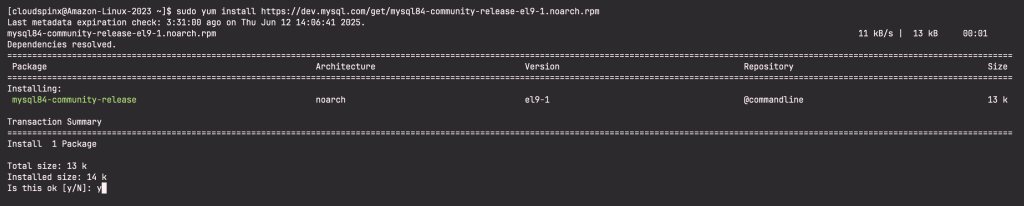
Verify that the package was installed successfully. A new repository file has been created inside the /etc/yum.repos.d directory.
$ ls /etc/yum.repos.d
amazonlinux.repo  kernel-livepatch.repo  mysql-community-debuginfo.repo  mysql-community-source.repo  mysql-community.repo
You can also view list of configured repositories with yum command.
$ sudo yum repolist
repo id                                                                                      repo name
amazonlinux                                                                                  Amazon Linux 2023 repository
kernel-livepatch                                                                             Amazon Linux 2023 Kernel Livepatch repository
mysql-8.4-lts-community                                                                      MySQL 8.4 LTS Community Server
mysql-connectors-community                                                                   MySQL Connectors Community
mysql-tools-8.4-lts-community                                                                MySQL Tools 8.4 LTS Community
Step 2: Install MySQL 8.4 on Amazon Linux 2023
Once the repository has been added, install MySQL 8.4 server packages on Amazon Linux 2023.
Before we can do that, we need the public key of MySQL to be able to install the software:
sudo rpm --import https://repo.mysql.com/RPM-GPG-KEY-mysqlThen install MySQL server or client:
# MySQL Server
sudo yum install mysql-community-server
# MySQL Client
sudo yum install mysql-community-client
Sample Output:
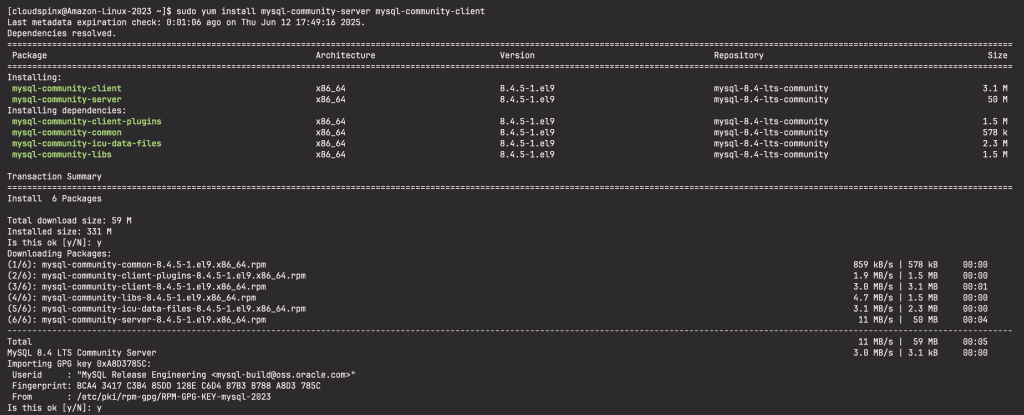
Core packages installed are:
- MySQL server: mysql-community-server
- MySQL client: mysql-community-client
- Common error messages and character sets for client and server: mysql-community-common
- Shared client libraries: mysql-community-libs
Step 3: Start and Configure MySQL 8.4
The next step is to start MySQL server services.
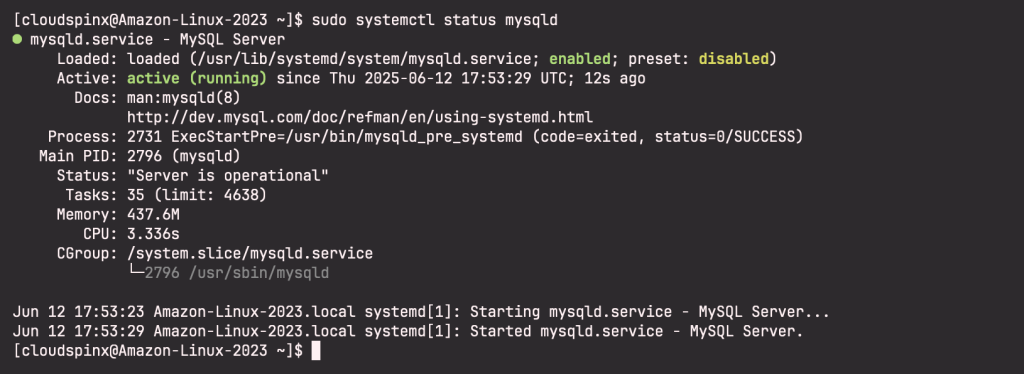
sudo systemctl enable --now mysqldConfirm if MySQL server service is started and running.
A superuser account ‘root’@’localhost’ is created with initial password set and stored in the error log file. To reveal it, use the following command:
$ sudo grep 'temporary password' /var/log/mysqld.log
2025-06-12T17:53:25.526658Z 6 [Note] [MY-010454] [Server] A temporary password is generated for root@localhost: SS2dOZntY8)V
Use this initial password to harden the server:
$ sudo mysql_secure_installation -p'SS2dOZntY8)V'Set new password and set other settings to better secure access to MySQL server.
mysql_secure_installation: [Warning] Using a password on the command line interface can be insecure.

Securing the MySQL server deployment.


The existing password for the user account root has expired. Please set a new password.

New password: <ENTER_NEW_PASSWORD>

Re-enter new password: <CONFIRM_NEW_PASSWORD>
The 'validate_password' component is installed on the server.
The subsequent steps will run with the existing configuration
of the component.
Using existing password for root.

Estimated strength of the password: 100
Change the password for root ? ((Press y|Y for Yes, any other key for No) : n

 ... skipping.
By default, a MySQL installation has an anonymous user,
allowing anyone to log into MySQL without having to have
a user account created for them. This is intended only for
testing, and to make the installation go a bit smoother.
You should remove them before moving into a production
environment.

Remove anonymous users? (Press y|Y for Yes, any other key for No) : Y
Success.


Normally, root should only be allowed to connect from
'localhost'. This ensures that someone cannot guess at
the root password from the network.

Disallow root login remotely? (Press y|Y for Yes, any other key for No) : Y
Success.

By default, MySQL comes with a database named 'test' that
anyone can access. This is also intended only for testing,
and should be removed before moving into a production
environment.


Remove test database and access to it? (Press y|Y for Yes, any other key for No) : Y
 - Dropping test database...
Success.

 - Removing privileges on test database...
Success.

Reloading the privilege tables will ensure that all changes
made so far will take effect immediately.

Reload privilege tables now? (Press y|Y for Yes, any other key for No) : Y
Success.

All done!
You can update root password anytime from MySQL shell.
$ mysql -uroot -p
mysql> ALTER USER 'root'@'localhost' IDENTIFIED BY 'MyNewStrongP@ssw0d!';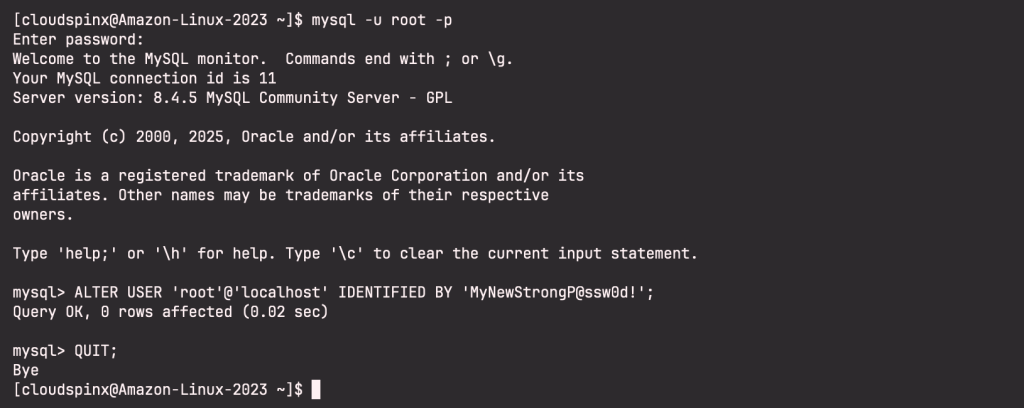
The Password Policy is requires:
- At least one uppercase letter
- At least one lowercase letter
- At least one digit
- At least one special character
- Total password length is at least 8 characters.
You have installed MySQL 8.4 server successfully on Amazon Linux 2023 and ready to roll.
Below are other guides on Amazon Linux available in our website.


