

In this guide, we will systematically go through how to install OpenBSD 7 on a Hypervisor i.e Proxmox VE. But before we plunge in, let us first get to know what OpenBSD is.
OpenBSD is a free and open-source Unix-like operating system based on Berkeley Software Distribution (BSD) whose main focus is security. This operating system was created by Theo de Raadt in 1995 as a fork of NetBSD.
The latest release, OpenBSD 7.8 released on Oct 22, 2025, has the following amazing features:
- Platforms specific improvements:
- arm64:
- Added support for Raspberry Pi 5 (with console on serial port).
- Implement acpicpu(4) for arm64.
- On Apple variants, enter DDB when exuart detects a BREAK.
- On arm64 and riscv64, avoid multiple threads of a process continuously faulting on a single page when pmap_enter(9) is asked to enter a mapping that already exists.
- Make apm and
hw.cpuspeedwork on Snapdragon X Elite machines.
- amd64:
- Fix processing of GPIO events for pin numbers less than 256 with an _EVT method. Fixes power button on various ThinkPads with AMD CPUs.
- arm64:
- Various kernel improvements including:
- Set an upper limit on the value of sysctl(2) kern.seminfo.semopm to avoid a possible kernel panic.
- On arm64, avoid decoding instructions when ELR isn’t pointing into the kernel part of the virtual address space and use fault() instead of panic() to provide better error reports.
- Inherit
PS_NOBTCFIat fork(2) so forked children do not get killed by BTCFI safeguards. - Inherit
PS_PROFILEat fork(2). This lets child processes disable/reenable profiling when they deemed appropriate. - Implement the POSIX-2024 close-on-fork flag, but modified to be reset on exec as preserving it across exec is not necessary for its original purpose and has security and usability concerns.
- Suspend/Hibernate Support:
- Preallocate hibernate work area during boot to fix failures where the needed region can’t be late-allocated.
- Implement lid suspend/resume for lids that use a GPIO.
- Implement support for wakeup interrupts in amdgpio(4), making it possible to resume laptops with AMD CPUs from S0ix suspend.
- Introduce a generic powerbutton_event() function that does everything we expect from a power button event in a consistent manner, ensuring all drivers now prevent shutdown within the first 10 seconds after resume.
- Implement a
ddb.suspendsysctl that will force “S0ix” suspend and skip suspend of inteldrm(4) and amdgpu(4) such that the display remains on during suspend. - Fix dead USB ports after suspend/resume on the ThinkPad Z13.
- Various kernel improvements that includes:
- Added kprobes provider for dt(4).
- Changed the printing of the hibernate image size from bytes to megabytes
- Unlocked the top part of the VM fault handler on i386.
- Added btrace(8) display of time spent in userland when analyzing the kernel stack in the flame graph tool and fixed a parsing bug.
- Increased hibernate writeout speed.
- Identify TPM 2.0 devices and perform the 2.0-specific suspend command, allowing the ThinkPad X1 Carbon Gen 9 and ThinkPad X1 Nano with the latest BIOS (which added S3) to resume.
- ncreased the default buffer space on PF_UNIX sockets to 8k and made the values tuneable via sysctl(2).
- SMP Improvements:
- Up to 8 softnet threads are used to handle network input. The number of threads is also limited by the number of CPUs.
- TCP stack is now running in parallel on multiple CPUs. Up to 8 threads are used to process TCP traffic. Note that each connection can only be handled by one CPU. Use multiple streams and a network interface capable of multi queue to distribute packets.
- IPv6 fragment reassembly is now running in parallel.
- IPv6 destination option and routing header parsing is now running in parallel.
- VMM/VMD improvements:
- On AMD processors SEV-ES technology is supported to start confidential virtual machines. SEV-ES works with the vmm/vmd hypervisor and with OpenBSD guests on KVM/qemu.
- Add option for vmd(8) to run guests in AMD SEV-ES mode and keyword “seves” for vm.conf(5) to enable it.
- Allow SEV-ES enabled guests to run on vmm(4)/vmd(8).
Step 1. System requirements to Install OpenBSD 7
To be able to install OpenBSD 7, you have to meet the below system requirements:
- Storage Space – 15 GB+
- RAM – 2 GB+
Step 2. Download OpenBSD 7 Image file.
OpenBSD offers many images, it is not necessarily easy to find them. The idea is not so much to provide an exhaustive description of all the installation images, as to specify a few points on the most suitable images depending on the use cases for an installation.
So let’s start, in the set of images offered by OpenBSD, I would retain the following:
- install78.img The most complete installation image, containing the essential packages to install the system, BIOS/UEFI compatible.
- install78.iso An image more suitable for CD format also contains most of the packages to install the system, however this image is not compatible with an installation in UEFI.
- cd78.iso and miniroot78.img Are the lighter versions of the aforementioned images (by analogy they could be compared to a “Netinstall” image from Debian).
- All of these images support the main architectures (amd64, arm64, i386), except for the arm64[ architecture /b] for ISO images.
Alternatively, you can use wget to download the image file as follows:
For Physical machine installation, use the .img file.
##For .img file
wget https://cdn.openbsd.org/pub/OpenBSD/7.8/amd64/install78.img

##For iso file
wget https://cdn.openbsd.org/pub/OpenBSD/7.8/amd64/install78.iso
Step 2. Create OpenBSD 7 VM on Proxmox VE
We will use install78.iso for BIOS mode installation and install78.img for UEFI mode installation. This is not to say that you can’t use the install78.img file for both, it’s only in the context of this article that we wanted to present the widest range of installation methods.
BIOS Mode Installation
 qm create 148 \
--name OpenBSD-7 \
--agent 1,type=isa \
--memory 2048 \
--bios seabios \
--sockets 1 --cores 2 \
--cpu kvm64 \
--net0 virtio,bridge=vmbr0 \
--scsihw virtio-scsi-single \
--boot order='ide0;scsi0' \
--scsi0 local-lvm:35 \
--ide0 /mnt/nvme/template/iso/install78.iso,media=cdrom
Explanation:
agent 1,type=isa– Special configuration of the QEMU agent, via the ISA serial port.bios seabios (i440fx machine)– The default configuration for QEMU hosts.boot order='ide0;scsi0'– We define a classic boot order (the installation medium first).--scsi0 local-lvm:35– Location and size of the VM disk--ide0 /mnt/nvme/template/iso/install78.iso,media=cdrom– Location of the installation disk.
UEFI Mode Installation
 qm create 149 \
--name OpenBSD-7-UEFI \
--agent 1,type=isa \
--memory 2048 \
--bios ovmf \
--machine q35 \
--sockets 1 --cores 2 \
--cpu kvm64 \
--net0 virtio,bridge=vmbr0 \
--scsihw virtio-scsi-single \
--boot order='scsi0;ide0' \
--efidisk0 local-lvm:0 \
--scsi0 local-lvm:35
Explanation:
bios ovmf and machine q35– The alternative firmware to Seabios will be better suited, especially if you want to use PCIe peripherals.boot order='scsi0;ide0'– For the boot order, we place the installation disk in second position.efidisk0 local-lvm:0– The necessary EFI partition, for any type of UEFI installation.--scsi0 local-lvm:35– Location and size of the VM disk.
For UEFI mode, you will need to import the installation image in RAW format, which you will place in ide0:
qm set 149 --ide0 local-lvm:0,import-from=/mnt/nvme/template/iso/install78.imgStep 3. Begin Installation of OpenBSD
To begin the installation process start the created VM:
qm start 148
qm start 149
Let’s start with the common installation sections for both BIOS and UEFI mode.
BIOS/UEFI Common Settings
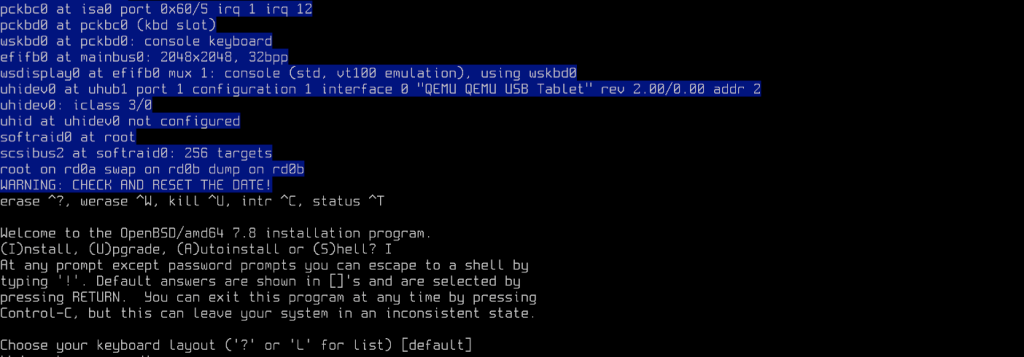
Starting the VM launches the installer, select (I)nstall and then you will be asked to choose your preferred Keyboards Layout:
Then the server hostname:

Network Settings
For the network settings, set them as below:

Root Account Configuration and Basic Services
Enter the password for the root account, and confirm it, then enable the basic services such as xorg, sshd and xenodm as follows:

Create a User
Set up a normal user for the server as follows:

SSH Security and Timezone
You can choose to enable root SSH login. Also, set your correct Timezone:

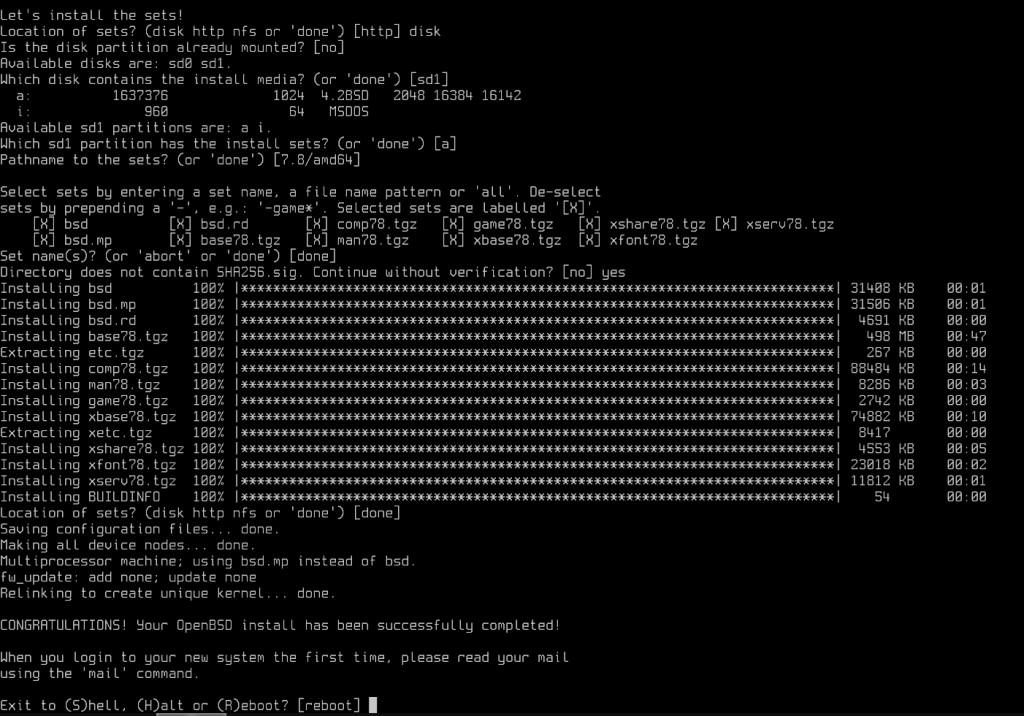
Partitioning and installing the base system
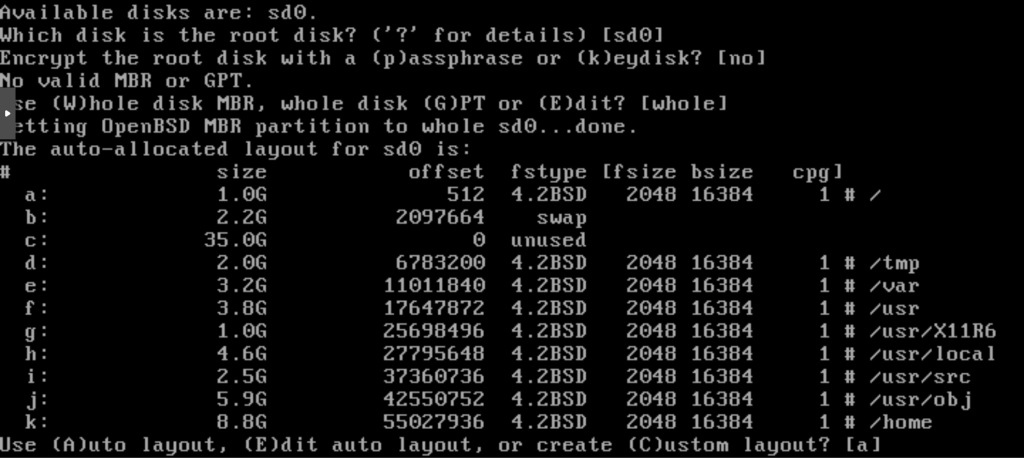
Let’s start with Partitioning disk in BIOS mode:
BIOS Mode Partitioning
We start by defining the destination disk for the installation sd0, if you’re not sure which disk to select you can list them with ‘?’, then the disk partitioning method (MBR). Finally, select the automatic partitioning proposal [a].
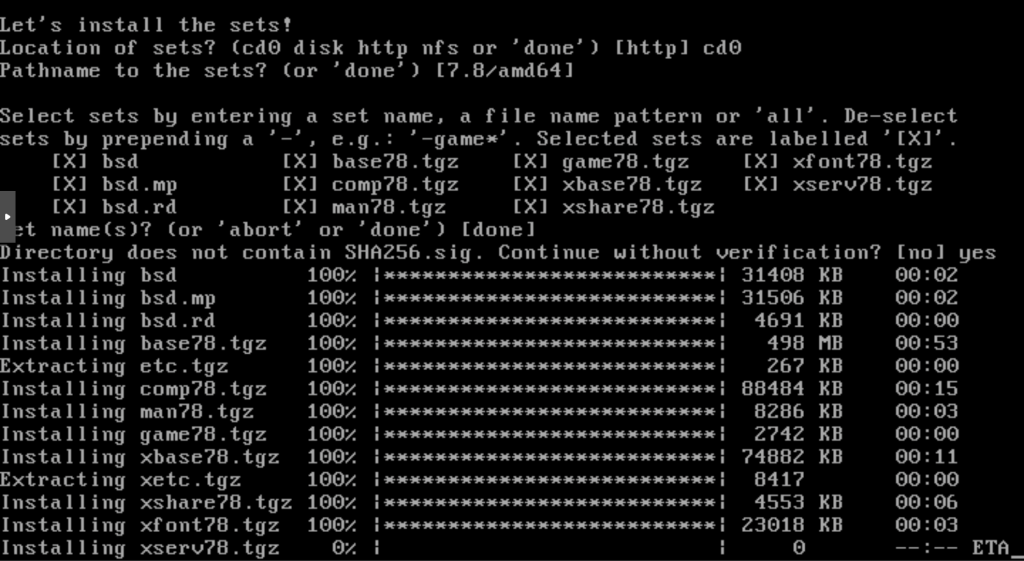
To install the system, we will have to indicate where the basic packages are stored, in cd0 in this case, which corresponds to our ide0 /mnt/nvme/template/iso/install78.iso.
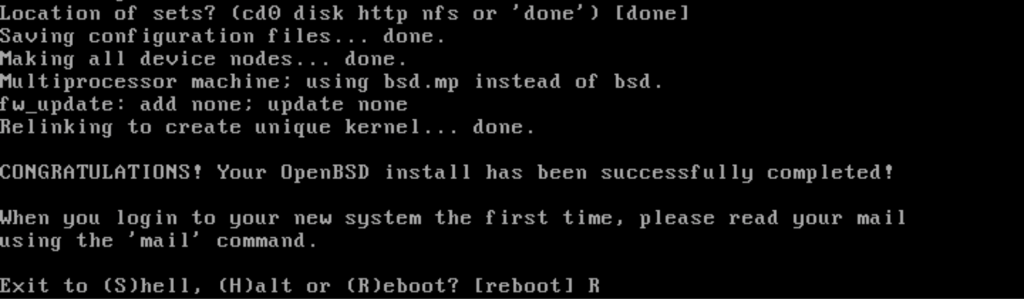
Installation is now complete.
For BOS mode installation, shutdown the VM and disconnect the installation disk.
qm stop 148 && qm set 148 --delete ide0
qm start 148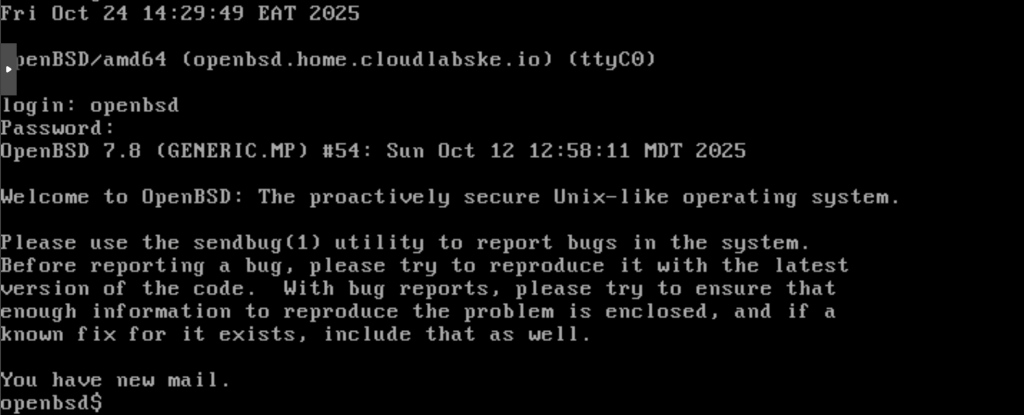
UEFI Mode Partitioning
For UEFI Mode, we start by defining the destination disk for the installation sd0, if you’re not sure which disk to select you can list them with ‘?’, then we select the partitioning method (GPT). Finally, select the automatic partitioning proposal [a].

Hit enter to proceed with the installation:
For UEFI installation we recommend simply restarting it from the console but do not remove the installation disk (openbsd seems to need it at boot time).
Step 4. Post installation OpenBSD 7 Basic Configurations
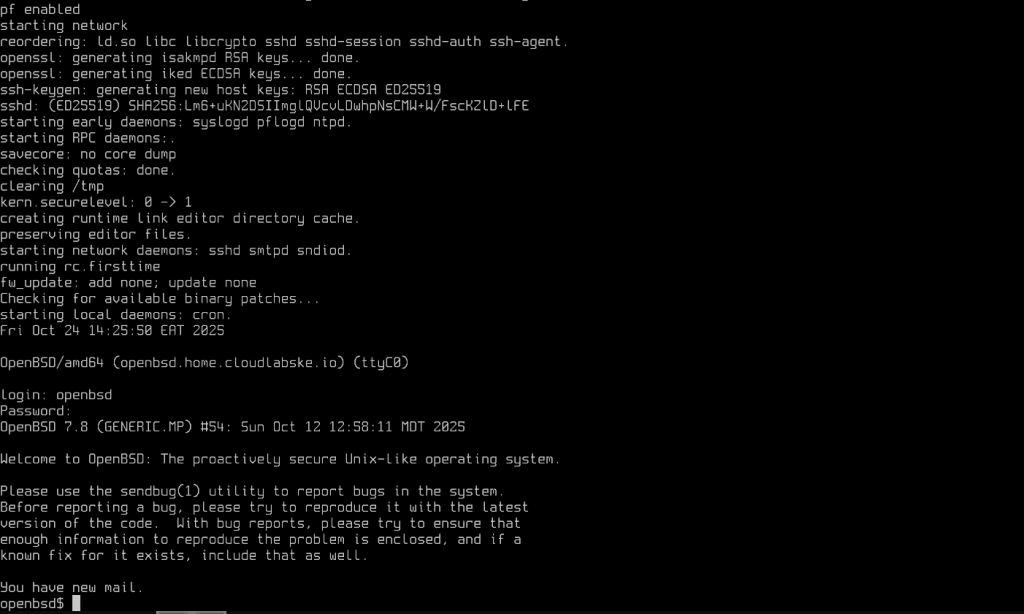
Once our VMs are started, we will still need to go through some configurations for the QEMU agent. First things first, check the ip address of the instance so that you can connect via ssh.
$ ifconfig
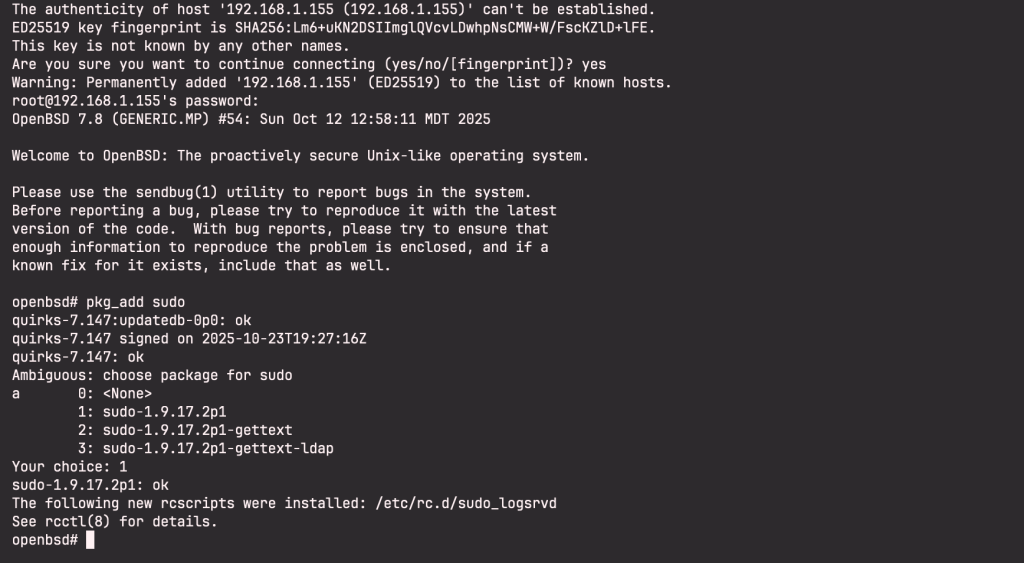
Then continue to connect to the instance via SSH. Since we had enabled root ssh login, we can login ass root over ssh:
ssh [email protected]In OpenBSD, you will be required to add your user to the sudoers file before you can proceed.
Add the user to the wheel group.
# user mod -G wheel openbsdYou will also need to uncomment the line below.
$ visudo
# Uncomment to allow people in group wheel to run all commands
# and set environment variables.
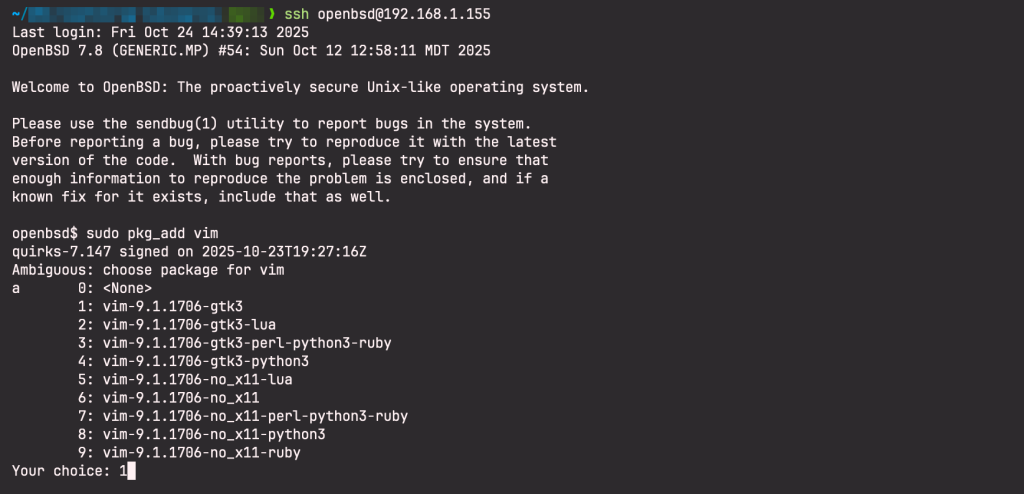
%wheel ALL=(ALL) SETENV: ALLThen log out and back in as the normal user and try running a command with sudo:
QEMU Guest Agent
You can also install and configure the QEMU Agent as follows as root:
Switch to root user:
sudo suThen install the QEMU Agent package:
pkg_add qemu-gaConfigure ISA QEMU Guest agent:
cat <<'EOF' >> /etc/rc.conf.local
pkg_scripts=qemu_ga
qemu_ga_flags="-t /var/run/qemu-ga -m isa-serial -p /dev/cua00 -f /var/run/qemu-ga/qemu-ga.pid"
EOF
Activate the QEMU Guest agent service
/etc/rc.d/qemu_ga stop && /etc/rc.d/qemu_ga startTo update your OpenBSD 7 system.
sudo syspatch -cUpgrade your system.
sudo sysupgradeConclusion
That’s it for this awesome guide, I hope it was helpful. Our next article will be on installing OpenBSD with cloud-init, so watchout.


2 thoughts on “How to Install OpenBSD 7 on Proxmox VE”
Pingback: How to Install LAMP Stack on OpenBSD 7 - CloudSpinx
Pingback: Install and Configure MariaDB Database on OpenBSD 7 - CloudSpinx