Scala programming language is a high-level programming language that is statically typed and supports a fusion of object-oriented programming (OOP) and functional programming language (FP) paradigms.
Scala was designed by Martin Odersky a German Computer Scientist on 20th Jan 2004. Scala’s current latest release is scala 3.6.4 but the LTS is 3.3.5 . The word Scala comes from scalable. Scala is used for powering busy websites and analyze huge data sets.
Scala 3 features
Scala 3 has many terrific programming language features which include the following:
- It is a high level programming language
- It has concise readable syntax.
- It is statically typed.
- It is a functional programming language.
- It is an Object Oriented Programming language.
- It runs on JVM and in browsers.
- It interacts seamlessly with java code.
- It is used for server side applications, big data applications and browser with scala,js
- It has ability to create Algebraic Data Types (ADTs) concisely.
- It has a clear grammar making it easy to understand.
Why Scala 3
Scala 3 has many benefits and reasons why it is embraced by developers. We will list a few benefits.
- It embraces both Object Oriented Programming and Functional Programming Language.
- It is statically typed but feels dynamic.
- Its syntax is concise, readable and expressive.
- Has improved and simplified implicits.
- Integrates seamlessly with java making it easy to create projects with a mixture of the two languages.
- Scala can be used on the server, and also in the browser with scala.js
- Scala library has dozens of pre-built functional methods which saves time and reduce time for writing custom codes.
- Scala is a strong type system.
With the brief introduction of Scala 3, we now turn our focus on Scala3 installation in CentOS Stream 10.
There are 4 common ways of installing Scala 3 in CentOS 10.
- Using Scala installer tool “Coursier”.
- Using sbt which is the defacto build tool for Scala.
- Using SDKMAN (Software Development Kit Manager).
- Manual Installation.
In this article, we will briefly look at each installation method.
Method 1: Installation of Scala 3 in CentOS Stream 10 with Coursier
This is the recommended method of Scala installation. This method automatically installs all the Scala 3 dependencies.
Step 1 : Update CentOS Stream 10 system
Update the YUM packages:
sudo yum update -yStep 2 : Install coursier native launcher.
After system update, install coursier launcher:
sudo yum install curl
curl -fL "https://github.com/coursier/launchers/raw/master/cs-x86_64-pc-linux.gz" | gzip -d > cs
Make cs executable with chmod command:
chmod +x cs Then add cs to your PATH:
./cs install cs
echo 'export PATH="$PATH:~/.local/share/coursier/bin"' | tee -a ~/.bashrc
source ~/.bashrc
Complete cs installation & update cs.
rm cs
cs update cs
Step 3 : Install JVM and standard Scala CLI tools
To install Java 11, download the binary release:
wget https://download.java.net/java/ga/jdk11/openjdk-11_linux-x64_bin.tar.gzThen extract it:
sudo mkdir -p /opt/java
sudo tar -xvzf openjdk-11_linux-x64_bin.tar.gz -C /opt/java
Set JAVA_HOME variable:
cat << 'EOF' >> ~/.bashrc
export JAVA_HOME=/opt/java/jdk-11
export PATH=$JAVA_HOME/bin:$PATH
EOF
To install JVM and standard Scala CLI tools, run the setup command:
cs setup --yesThe command output:

The cs setup command automatically installs JVM and other useful command-line tools.
Step 4 : Install Scala3 and scala3-compiler
To install Scala3 compiler and runner as command-line tools, run the commands:
cs install scala3-compiler
cs install scala3
exit
Confirm version installed:
$ scala -version
Scala code runner version: 1.5.4
Scala version (default): 3.6.4
You have successfully installed Scala using coursier.
Method 2: Installation of Scala 3 on CentOS Stream 10 using sbt
sbt is a build tool for Scala, Java, and many more. It requires Java 1.8 or later for a successful installation.
Step 1 : Install java 1.8 or later
To install Java 11 run the command, download it:
wget https://download.java.net/java/ga/jdk11/openjdk-11_linux-x64_bin.tar.gzThen extract it:
sudo mkdir -p /opt/java
sudo tar -xvzf openjdk-11_linux-x64_bin.tar.gz -C /opt/java
Set the “JAVA_HOME” environment variable:
cat << 'EOF' >> ~/.bashrc
export JAVA_HOME=/opt/java/jdk-11
export PATH=$JAVA_HOME/bin:$PATH
EOF
Verify java version installed:
$ java -version
openjdk 11 2018-09-25
OpenJDK Runtime Environment 18.9 (build 11+28)
OpenJDK 64-Bit Server VM 18.9 (build 11+28, mixed mode)
Step 2 : Install sbt
To install sbt execute the following commands:
Remove the old Bintray repo file:
sudo rm -f /etc/yum.repos.d/bintray-rpm.repoThen add the sbt-rpm repository:
curl -L https://www.scala-sbt.org/sbt-rpm.repo > sbt-rpm.repoMove the sbt-rpm repo to yum.repos.d:
sudo mv sbt-rpm.repo /etc/yum.repos.d/Finally, install sbt:
sudo yum update
sudo yum install sbt
Verify sbt installation:
$ sbt --version
downloading sbt launcher 1.10.11
copying runtime jar...
sbt runner version: 1.10.11

[info] sbt runner (sbt-the-shell-script) is a runner to run any declared version of sbt.
[info] Actual version of the sbt is declared using project/build.properties for each build.
Then update & refresh the YUM packages.
sudo yum update -yStep 3 : Helloworld example using sbt
Create a simple HelloWorld application with the command below:
$ sbt new sbt/scala-seed.g8Sample Output:

Run the HelloWorld application:
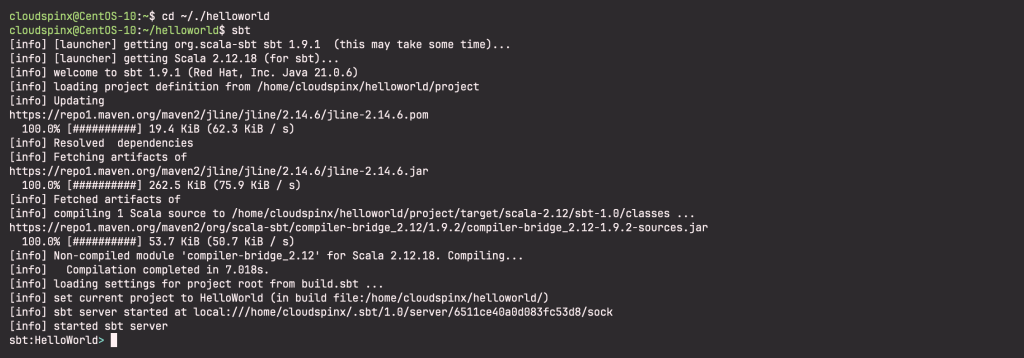
Change to ~/./helloworld and issue sbt command:
$ cd ~/./helloworld
$ sbt
Sample Output:

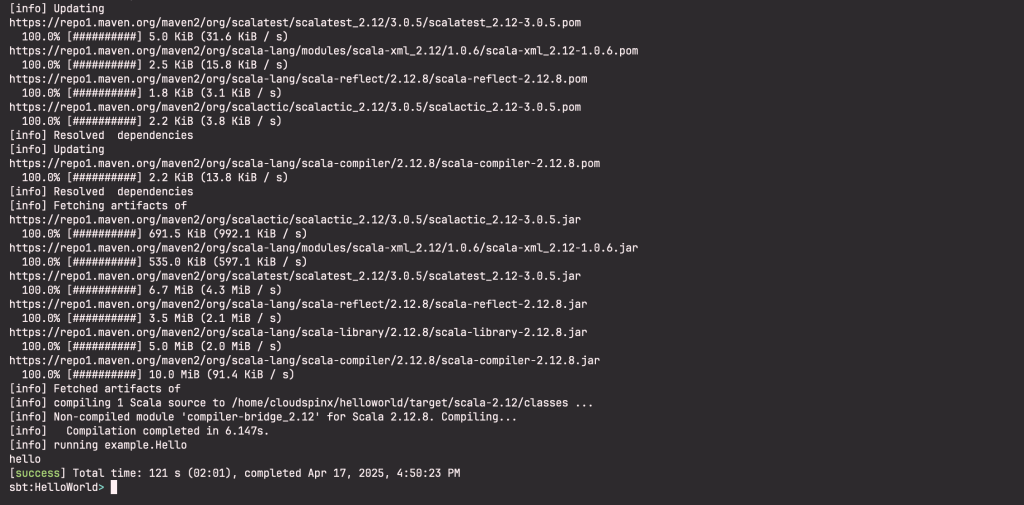
Then issue the command run:
sbt:HelloWorld> run Sample Output:

To exit the sbt shell, type exit or use Ctrl+D.
Method 3: Installing Scala3 on CentOS Stream 10 from SDKMAN
Install Java 11
To install Java 11 run the command, download it:
wget https://download.java.net/java/ga/jdk11/openjdk-11_linux-x64_bin.tar.gzThen extract it:
sudo mkdir -p /opt/java
sudo tar -xvzf openjdk-11_linux-x64_bin.tar.gz -C /opt/java
Set the “JAVA_HOME” environment variable:
cat << 'EOF' >> ~/.bashrc
export JAVA_HOME=/opt/java/jdk-11
export PATH=$JAVA_HOME/bin:$PATH
EOF
Verify java version installed:
$ java -version
openjdk 11 2018-09-25
OpenJDK Runtime Environment 18.9 (build 11+28)
OpenJDK 64-Bit Server VM 18.9 (build 11+28, mixed mode)
Install Sdkman
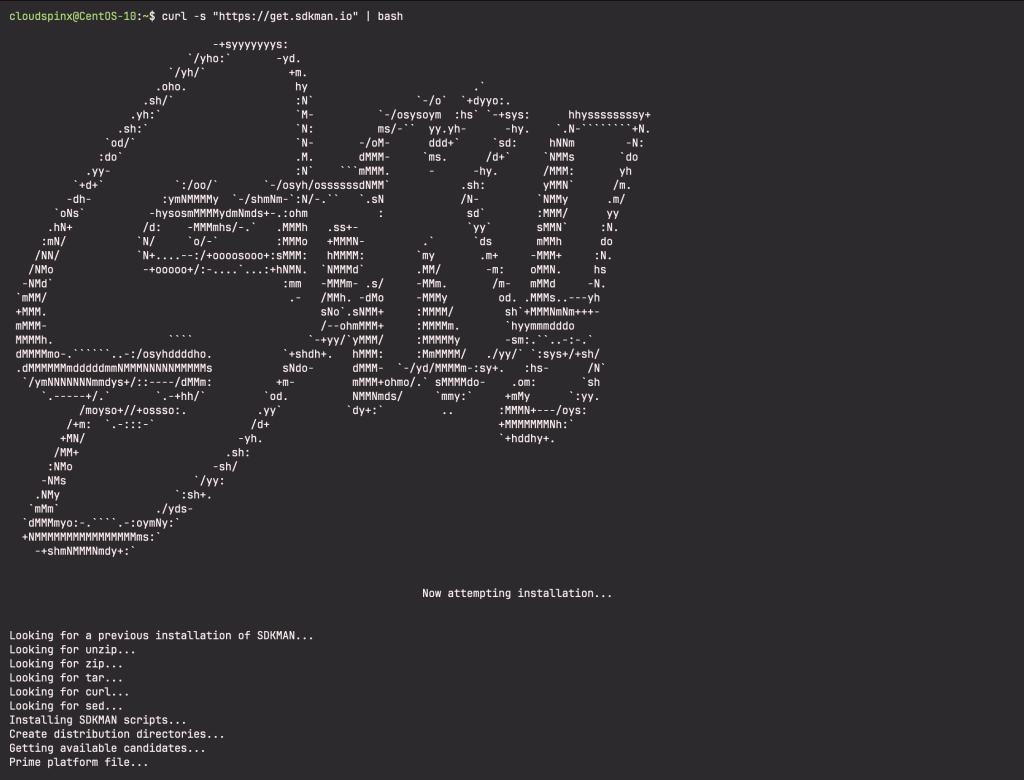
To install sdkman, paste the following command on the terminal:
curl -s "https://get.sdkman.io" | bashSample output:

Source the file:
source "/home/cloudspinx/.sdkman/bin/sdkman-init.sh"To verify your installation:
sdk versionThe output :

Install Scala3 using SDK
To install Scala3 using SDK execute the command:
sdk install scalaOutput :

From the output, Scala version 3.1.0 has been installed.
Verify SDK installation:
scala -versionSample output:
Scala code runner version: 1.5.4
Scala version (default): 3.6.4
Method 4: Manual installation of Scala 3 on CentOS Stream 10
Download and install the latest Scala 3 RPM file from the official Github Release page.
Scala binaries for s are available as of this article.
sudo yum update -y
sudo yum install curl -y
VER=$(curl -s https://api.github.com/repos/scala/scala3/releases/latest|grep tag_name|cut -d '"' -f 4|sed 's/v//')
sudo wget https://github.com/scala/scala3/releases/download/${VER}/scala3-${VER}.tar.gz
After download, extract the file.
tar -xf scala3-${VERSION}.tar.gzThen move the directory created to /usr/local/share/scala:
sudo mv scala3-${VERSION}/ /usr/local/share/scalaNext Install Java. To install Java 11 run the command, download it:
wget https://download.java.net/java/ga/jdk11/openjdk-11_linux-x64_bin.tar.gzThen extract it:
sudo mkdir -p /opt/java
sudo tar -xvzf openjdk-11_linux-x64_bin.tar.gz -C /opt/java
Set the “JAVA_HOME” environment variable:
cat << 'EOF' >> ~/.bashrc
export JAVA_HOME=/opt/java/jdk-11
export PATH=$JAVA_HOME/bin:$PATH
EOF
Verify java version installed:
$ java -version
openjdk 11 2018-09-25
OpenJDK Runtime Environment 18.9 (build 11+28)
OpenJDK 64-Bit Server VM 18.9 (build 11+28, mixed mode)
Verify Scala version installed:
$ scala -version
Scala code runner version: 1.5.4
Scala version (default): 3.6.4
That marks the end of manual Scala 3 installation in CentOS Stream 10.
Creating a Scala 3 project in CentOS Stream 10
With Scala 3 installation now complete, let’s run a simple project for demonstration purposes.
In this example, I will add two integers and run the HelloWorld application using Scala.
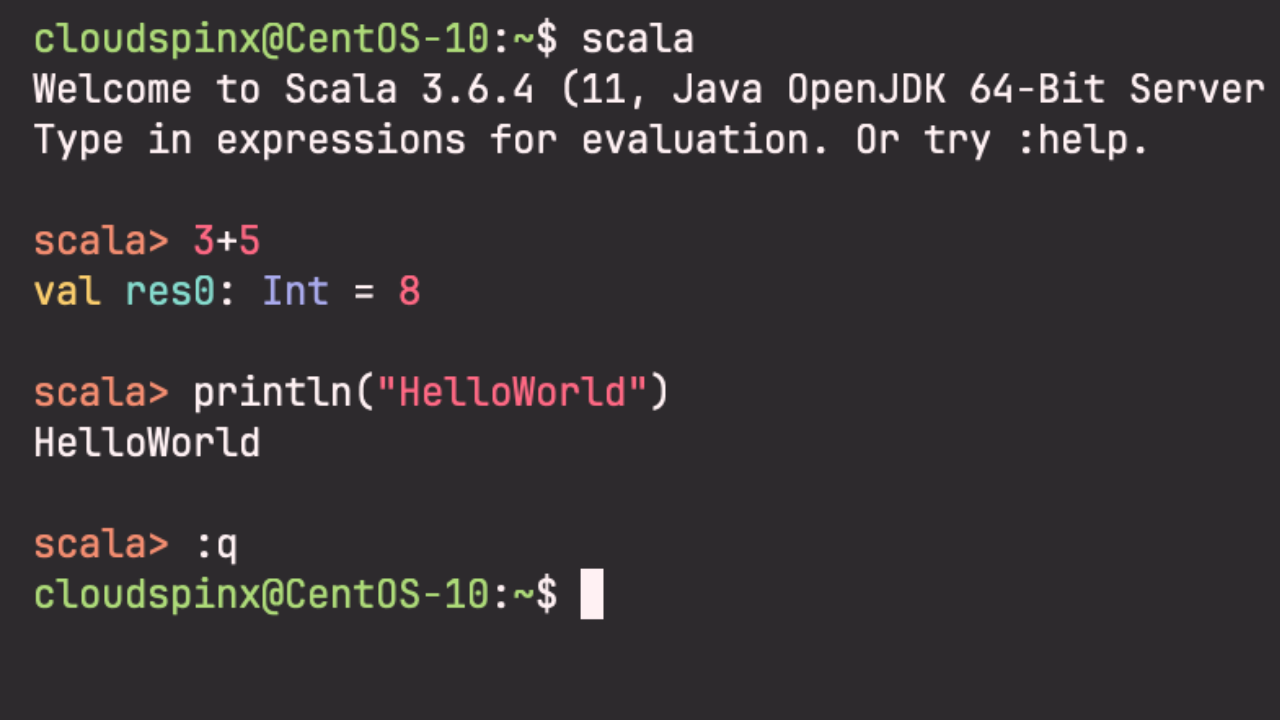
Step 1 : Get into Scala Shell.
To get into scala shell, run the scala command:
scalaStep 2 : Calculate the result of a formula.
Add two integers to get the sum.
scala> 3+5The output:
scala> 3+5
val res1: Int = 8
You can as well execute a function. Let’s demonstrate a HelloWorld application.
scala> println("HelloWorld")This command prints HelloWorld
scala> println ("Hello World!!")
Hello World!!
To quit the scala shell:
:q
You can also use scalac compiler to compile a .scala source code.
1. Create a .scala source code.
Use a text editor to create a .scala source code.
vim hello.scalaPaste the code below:
object HelloWorld {
  def main(args: Array[String]): Unit = {
    println("Hello, world!")
  }
}
Save and exit your terminal.
:wq2. Compile your .scala source code.
To compile the source code, use scalac
scalac run hello.scalaThe output :

Congratulations you have compiled your first hello world application with scala.
To uninstall the Scala package:
sudo dnf remove scalaConclusion:
That marks the end of the article on How To Install Scala 3 on CentOS Stream 10. Many developers would appreciate Scala because of its unique features and its seamless interaction with java code. I hope the article was relevant to you and thank you for following.
See more resources:


