

In this blog post we’ll take you through a step-by-step installation of Apache Tomcat 10 on Amazon Linux 2023. Apache Tomcat is a free to use JAVA HTTP web server developed by the Apache Software Foundation. Tomcat is an implementation of the Java Servlet, JavaServer Pages, Java Expression Language and WebSocket technologies.
In a nutshell Apache Tomcat runs a HTTP web server environment in which special Java programs known as “Java Servlet” and “Java Server Pages (JSP)” can be executed. Due to its open-source nature Tomcat has been widely adopted by Enterprise customers. It Powers Payment platforms, E-Commerce platforms, Cloud environments among many other use cases.
Install Apache Tomcat 10 on Amazon Linux 2023
The type of installation of Tomcat that we’ll do is manual. Which means we’ll start from source download, extract and copying files to relevant directories to performing user creation and permissions.
Below steps have been organized for easy following to help new users install Apache Tomcat 10 on Amazon Linux 2023. Just follow the steps and change the values as instructed where required to have a working Tomcat 10 installation on Amazon Linux 2023 instance.
The installation can be done in an on-prem virtualization environment or instance running in AWS EC2 environment.
Step 1: Install Java on Amazon Linux
Apache Tomcat 10 requires Java 11 or later, so we need to ensure Java is installed and working perfectly in the server.
Follow our guide below to install Java 21 on your Amazon Linux server:
Confirm installation:
$ java -version
java version "21.0.10" 2026-01-20 LTS
Java(TM) SE Runtime Environment (build 21.0.10+8-LTS-217)
Java HotSpot(TM) 64-Bit Server VM (build 21.0.10+8-LTS-217, mixed mode, sharing)
Step 2: Create Tomcat User and Group
We’ll be creating a dedicated system tomcat user and group.
sudo groupadd --system tomcat
sudo useradd -d /usr/share/tomcat -r -s /bin/false -g tomcat tomcat
Confirm creation:
$ getent passwd tomcat
tomcat:x:996:994::/usr/share/tomcat:/bin/false

$ getent group tomcat
tomcat:x:994:
Step 3: Install Tomcat 10 on Amazon Linux 2023
Latest releases of Apache Tomcat software can be checked from the Software releases page.
Run the following commands to download the latest version of Apache Tomcat 10 as of this article update.
sudo yum -y install wget
export VER="10.1.52"
wget https://archive.apache.org/dist/tomcat/tomcat-10/v${VER}/bin/apache-tomcat-${VER}.tar.gz
Use tar command line tool to extract downloaded archive.
sudo tar xvf apache-tomcat-${VER}.tar.gz -C /usr/share/Create Symlink to the folder /usr/share/tomcat. This is for easy updates.
sudo ln -s /usr/share/apache-tomcat-$VER/ /usr/share/tomcatUpdate folder permissions:
sudo chown -R tomcat:tomcat /usr/share/tomcat
sudo chown -R tomcat:tomcat /usr/share/apache-tomcat-$VER/
The /usr/share/tomcat directory has the following sub-directories:
- bin: contains the binaries and scripts (e.g
startup.shandshutdown.shfor Unixes and Mac OS X). - conf: contains the system-wide configuration files, such as
server.xml,web.xml, andcontext.xml. - webapps: contains the webapps to be deployed. You can also place the WAR (Webapp Archive) file for deployment here.
- lib: contains the Tomcat’s system-wide library JAR files, accessible by all webapps. You could also place external JAR file (such as MySQL JDBC Driver) here.
- logs: contains Tomcat’s log files. You may need to check for error messages here.
- work: Tomcat’s working directory used by JSP, for JSP-to-Servlet conversion.
Create Tomcat Systemd service:
sudo tee /etc/systemd/system/tomcat.service > /dev/null <<'EOF'
[Unit]
Description=Tomcat Server
After=syslog.target network.target

[Service]
Type=forking
User=tomcat
Group=tomcat

Environment=JAVA_HOME=/usr/lib/jvm/jdk-21.0.10-oracle-x64
Environment='JAVA_OPTS=-Djava.awt.headless=true'
Environment=CATALINA_HOME=/usr/share/tomcat
Environment=CATALINA_BASE=/usr/share/tomcat
Environment=CATALINA_PID=/usr/share/tomcat/temp/tomcat.pid
Environment='CATALINA_OPTS=-Xms512M -Xmx1024M'
ExecStart=/usr/share/tomcat/bin/catalina.sh start
ExecStop=/usr/share/tomcat/bin/catalina.sh stop

[Install]
WantedBy=multi-user.target
EOF
You can update CATALINA_OPTS values with your memory limits for Tomcat service.
If you installed Java manually and need to get the JAVA_HOME path, use the following command:
readlink -f $(which java)The JAVA_HOME is the parent directory of bin/ in the output of the above command:
/usr/lib/jvm/jdk-21.0.10-oracle-x64/bin/javaEnable and start tomcat service:
sudo systemctl daemon-reload
sudo systemctl start tomcat
sudo systemctl enable tomcat
Service should be in the running state:
Check the status:
systemctl status tomcat
Allow Tomcat TCP port 8080 if you have firewalld service enabled.
sudo firewall-cmd --permanent --add-port=8080/tcp
sudo firewall-cmd --reload
Step 4: Configure Tomcat Authentication
We have to edit Tomcat configuration file to enable Admin and Manager UI roles.
sudo vim /usr/share/tomcat/conf/tomcat-users.xmlAdd below lines before closing with </tomcat-users>
<role rolename="admin-gui"/>
<role rolename="manager-gui"/>
<user username="admin" password="TomcatAdminPassw0rd" fullName="Administrator" roles="admin-gui,manager-gui"/>
Where:
- admin is access username
- TomcatAdminPassw0rd is the password for admin user.
Configure Apache web server as a proxy for Tomcat server. First install httpd package.
sudo yum -y install httpd Create VirtualHost file for Tomcat Admin web interface:
sudo tee /etc/httpd/conf.d/tomcat_manager.conf > /dev/null <<'EOF'
<VirtualHost *:80>
    ServerName tomcat.example.com
    ServerAdmin root@localhost

    ProxyPreserveHost On
    ProxyRequests Off

    <Proxy *>
        Require all granted
    </Proxy>

    ProxyPass        / http://127.0.0.1:8080/
    ProxyPassReverse / http://127.0.0.1:8080/

    ErrorLog  /var/log/httpd/tomcat_error.log
    CustomLog /var/log/httpd/tomcat_access.log combined
</VirtualHost>
EOF
For AJP connector, it will be configuration like this:
<VirtualHost *:80>
  ServerName ajp.example.com

  ProxyRequests Off
  ProxyPass / ajp://127.0.0.1:8009/
  ProxyPassReverse / ajp://127.0.0.1:8009/
</VirtualHost>
If SELinux is enabled run the following commands:
sudo setsebool -P httpd_can_network_connect 1
sudo setsebool -P httpd_can_network_relay 1
sudo setsebool -P httpd_graceful_shutdown 1
sudo setsebool -P nis_enabled 1
Restart httpd service:
sudo systemctl restart httpd
sudo systemctl enable httpd
If access is required from a network external to AWS, you may need to allow port 80 on Security group for you EC2 instance after allowing port 80 on your firewall:
sudo firewall-cmd --permanent --add-port=80/tcp
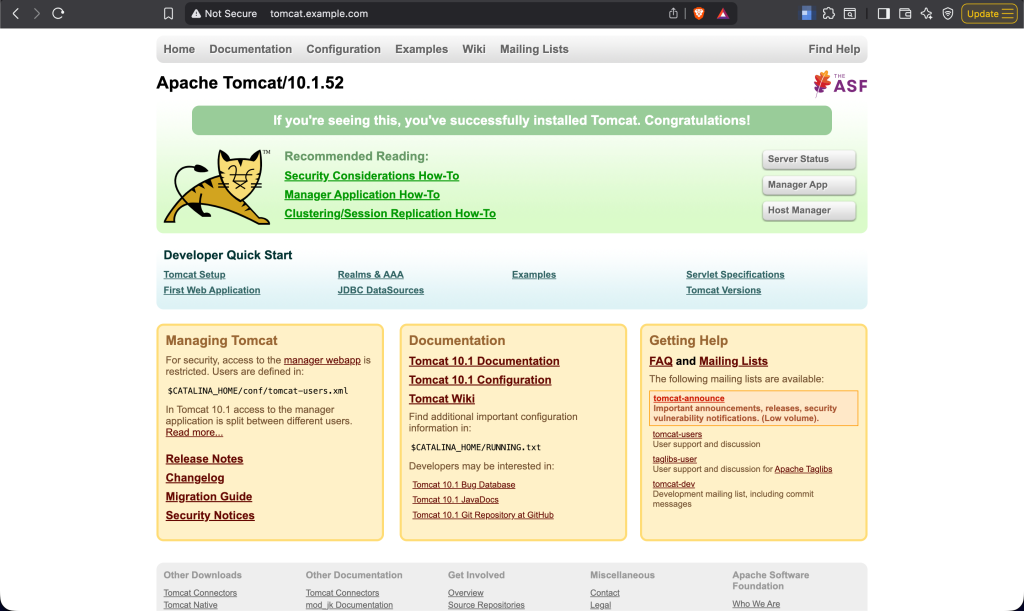
sudo firewall-cmd --reloadStep 5: Access Tomcat Web interface
Open your web browser and type the DNS name configured in Apache for Apache Tomcat.
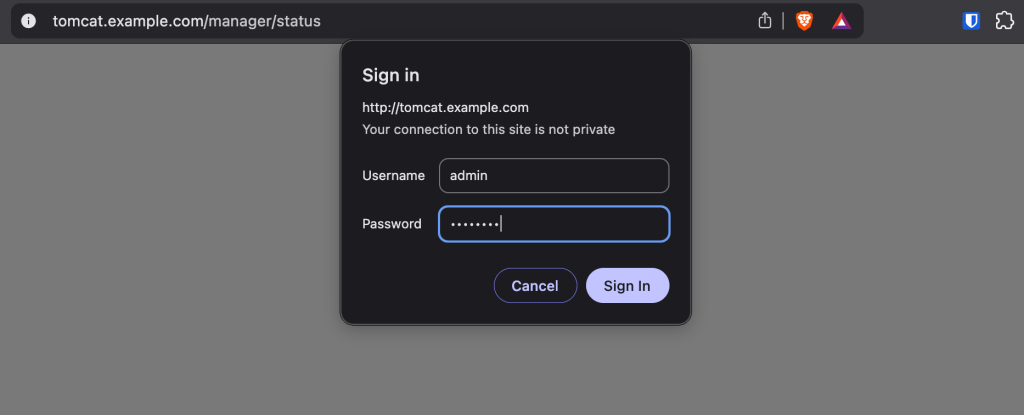
You need to authenticate to view server status and manage Tomcat Applications.
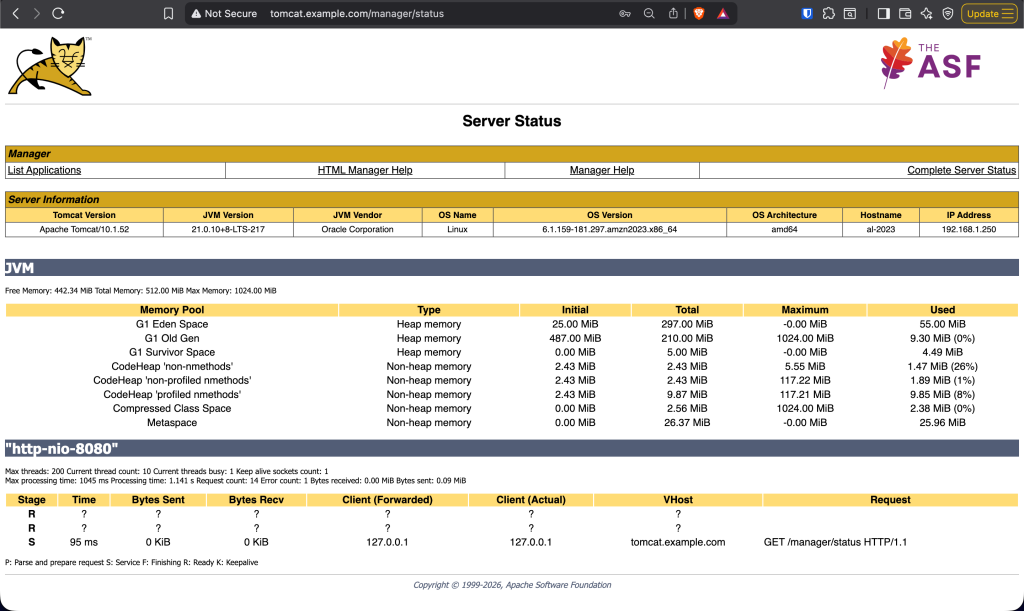
Only then, will you be able to check server status.
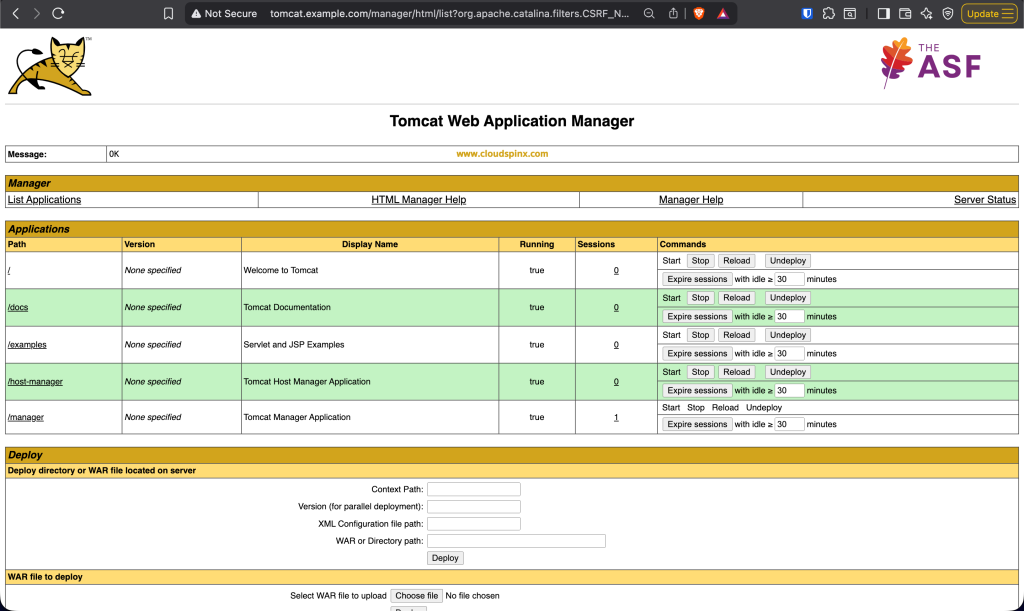
Deploy and manage Web applications.
This is the end of our guide on installation of Tomcat 10 on Amazon Linux 2023 server. The next article will capture securing Tomcat Server with an SSL Certificate.
Other articles on Amazon Linux:


