

VirtualBox is a free open-source hypervisor that can be installed on Linux, macOS, Windows and Solaris systems. A hypervisor is a software used to abstract the resources of a host computer in order to create virtual machines that run different operating systems. In this guide, we are going to see how to install VirtualBox on Linux Mint Linux system.
Before you begin this installation, we recommend you perform an upgrade on your entire system.
sudo apt update && sudo apt full-upgrade -y
[ -f /var/run/reboot-required ] && sudo reboot -f
Install VirtualBox 7.x on Linux Mint 22
Follow the steps in this section to install and use VirtualBox on Linux Mint.
Step 1: Add VirtualBox repository
First, import VirtualBox repository public key to your Linux Mint by running the below command.
wget -O- https://www.virtualbox.org/download/oracle_vbox_2016.asc | sudo gpg --dearmor --yes --output /usr/share/keyrings/oracle-virtualbox-2016.gpgThen add VirtualBox’s repository to your system using the below command:
echo "deb [arch=amd64 signed-by=/usr/share/keyrings/oracle-virtualbox-2016.gpg] http://download.virtualbox.org/virtualbox/debian noble contrib" | sudo tee /etc/apt/sources.list.d/virtualbox.listStep 2: Installing VirtualBox on Linux Mint
Having added VirtualBox repository and public key, update apt repository and install VirtualBox.
sudo apt update
sudo apt install virtualbox-7.1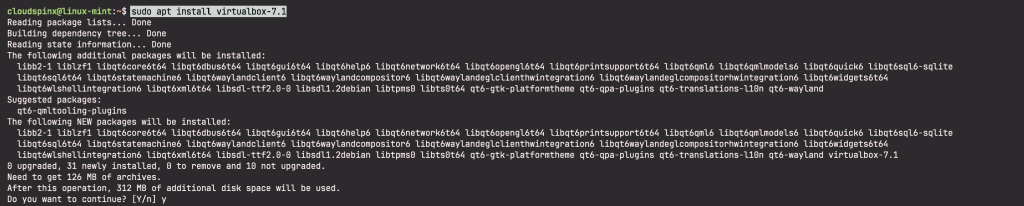
To confirm VirtualBox successful installation, check VirtualBox kernel module service status using the below command.
sudo systemctl status vboxdrv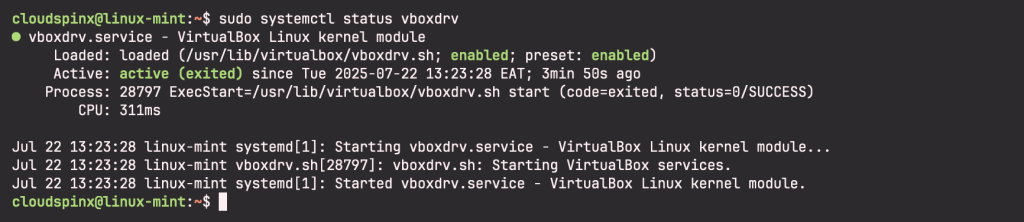
Now, add your user to the vboxusers group:
sudo usermod -aG vboxusers $USER
newgrp vboxusers
Step 3: Accessing VirtualBox on Linux Mint
You can launch VirtualBox either from the GUI or from the terminal. When launching from graphical mode, go to your applications then search for virtuabox from the search bar.
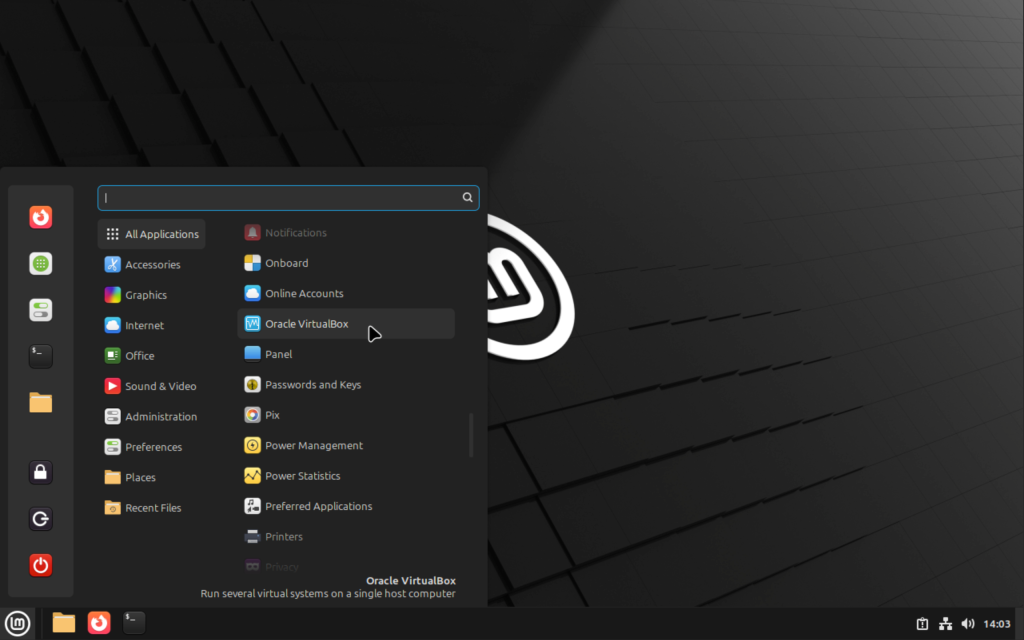
Click to launch.
Step 4: Installing VirtualBox Extension Pack
What is virtualbox extension pack? It is a binary package intended to add functionality to VirtualBox. It provides support for USB 2.0 devices and USB 3.0 enabling the use of a physical USB on a guest operating system. Other features include the ability to connect your host webcam to a guest machine, the ability to control virtual machines remotely through VirtualBox interface even if a VM network is down and the ability to encrypt data stored in virtual disk.
Visit VirtualBox official download page and grab VirtualBox Extension Pack for all supported platforms. Or download from command line interface.
VER=$(curl -s https://download.virtualbox.org/virtualbox/LATEST.TXT)
wget https://download.virtualbox.org/virtualbox/${VER}/Oracle_VirtualBox_Extension_Pack-${VER}.vbox-extpack
Once you download to your Linux Mint, run the vboxmanage command below to install the extensions pack:
sudo vboxmanage extpack install Oracle_VirtualBox_Extension_Pack-${VER}.vbox-extpack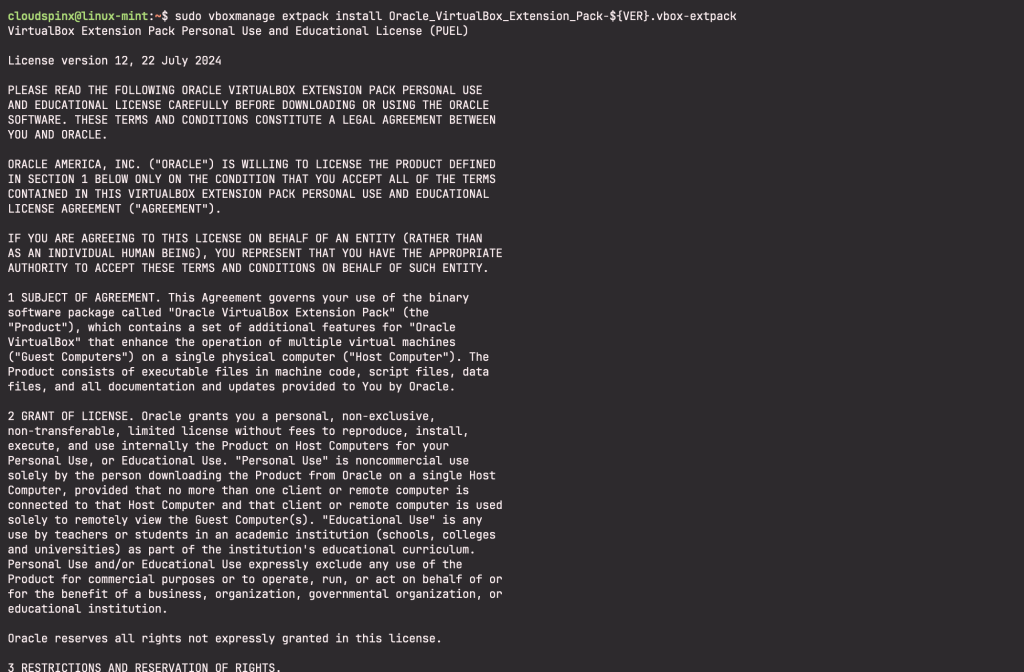
Enter Y when prompted to agree to the License terms:
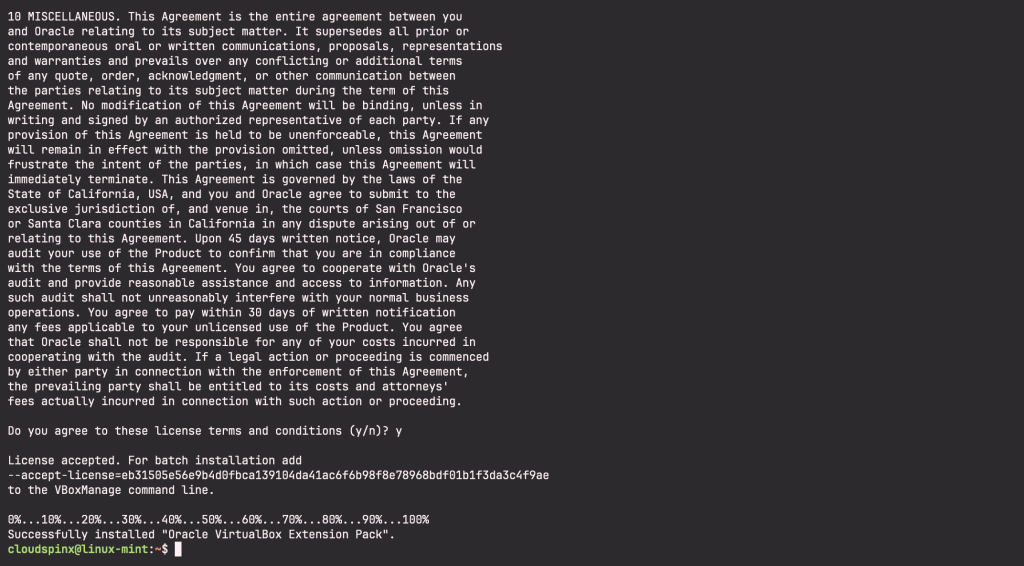
You can verify installed VirtualBox’s extension pack version by restarting VirtualBox and running the following:
vboxmanage list extpacks
Step 5: Blacklist KVM Hypervisor
If there are any additional hypervisors, you need to add them to the deny list in order for VirtualBox to function correctly an avoid running into any errors when creating your Virtual Machines.
Run the following command to find out the name of the hypervisor:
lsmod | grep kvmIf you have an output similar to mine below:

Then you must add the additional hypervisors to the deny list. Use the blacklist command to add the hypervisor to your denylist. (You must run the commmand as root user):
echo 'blacklist kvm-intel' >> /etc/modprobe.d/blacklist.confThen reboot your system:
sudo rebootHow to Install a Virtual Machine on VirtualBox
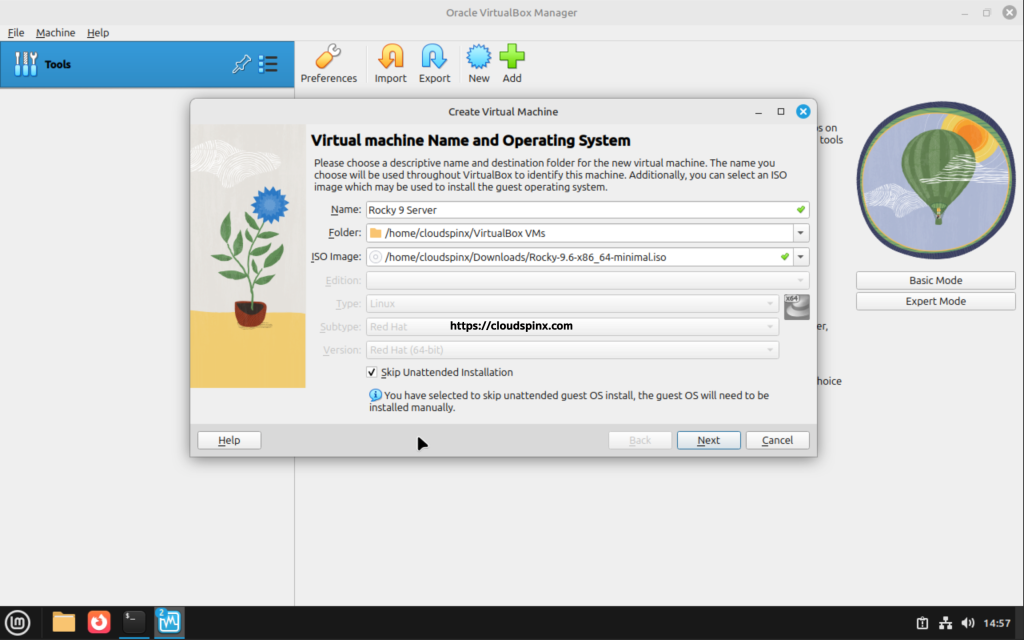
To install a VM on VirtualBox, you need to have downloaded the operating system that you need. For my demonstration, I have downloaded Rocky Linux 9 OS which I am going to use to create a virtual machine.
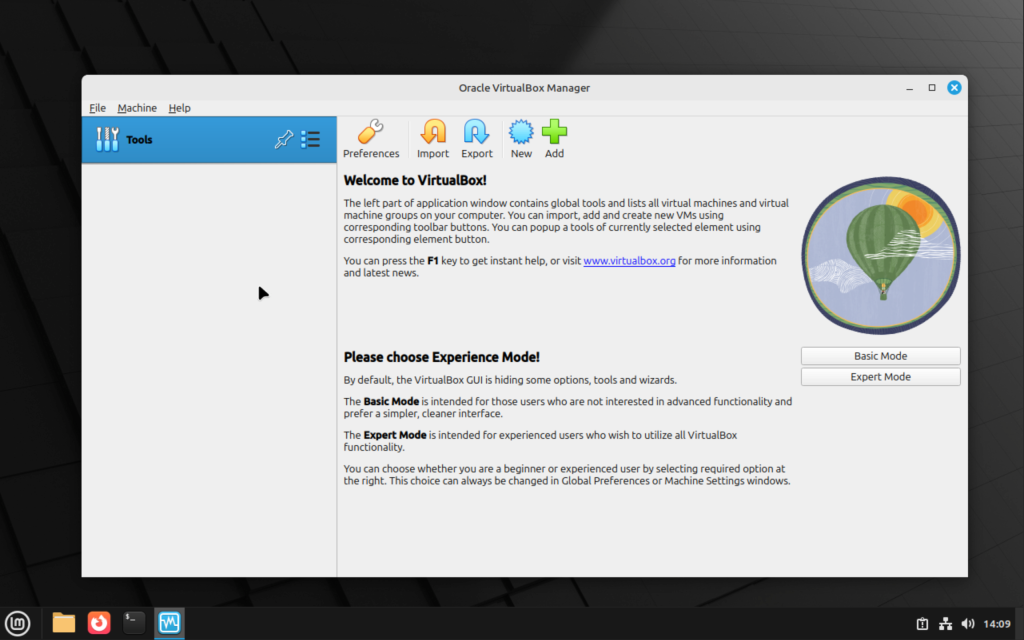
Installing a VM on VirtualBox
Launch VirtualBox, click New. In the dialogue box, specify name, machine folder, type and version, and the ISO image.
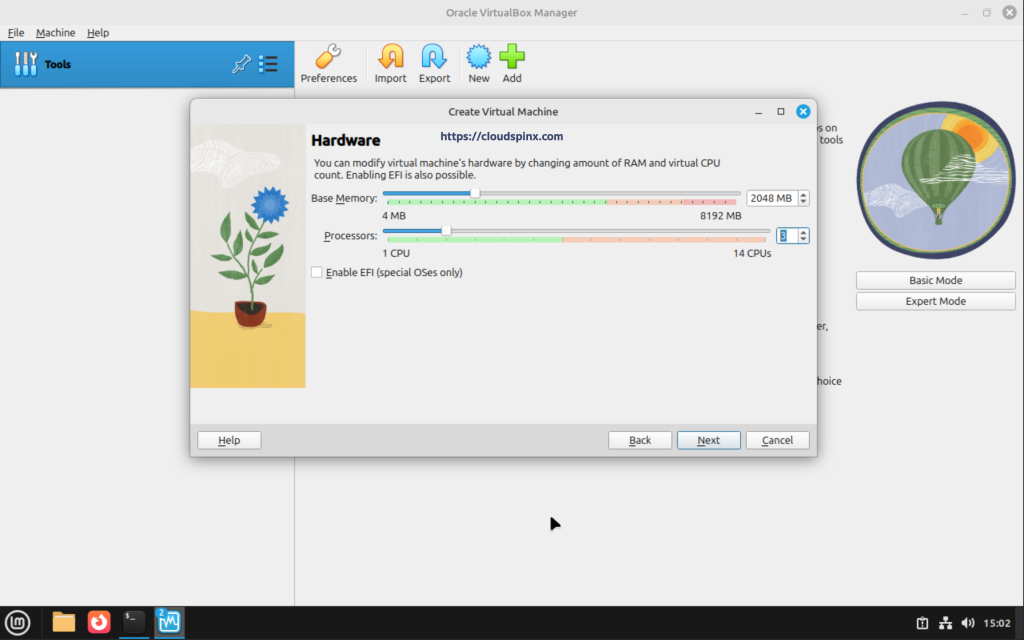
Click Next to configure the hardware components of your VM. Specify the amount of memory you want to allocate to the virtual machine and the number of vCPUs also:
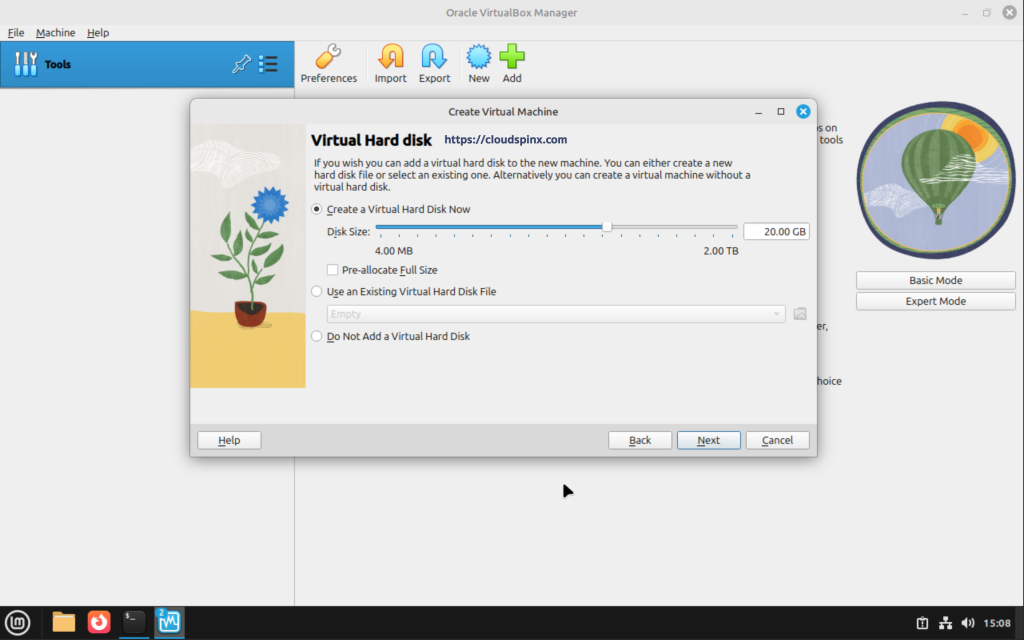
In the next page, choose Create a Virtual Hard Disk Now and specify the size of the Hard Disk, then click Next.
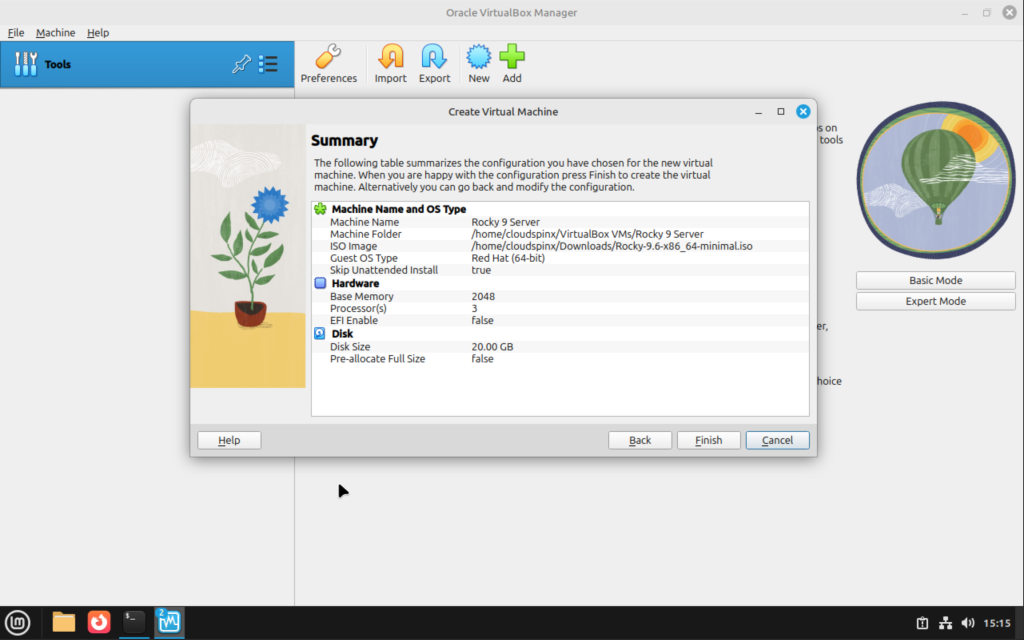
Look at the Summary of your VM and click after confirming that everything is in order:
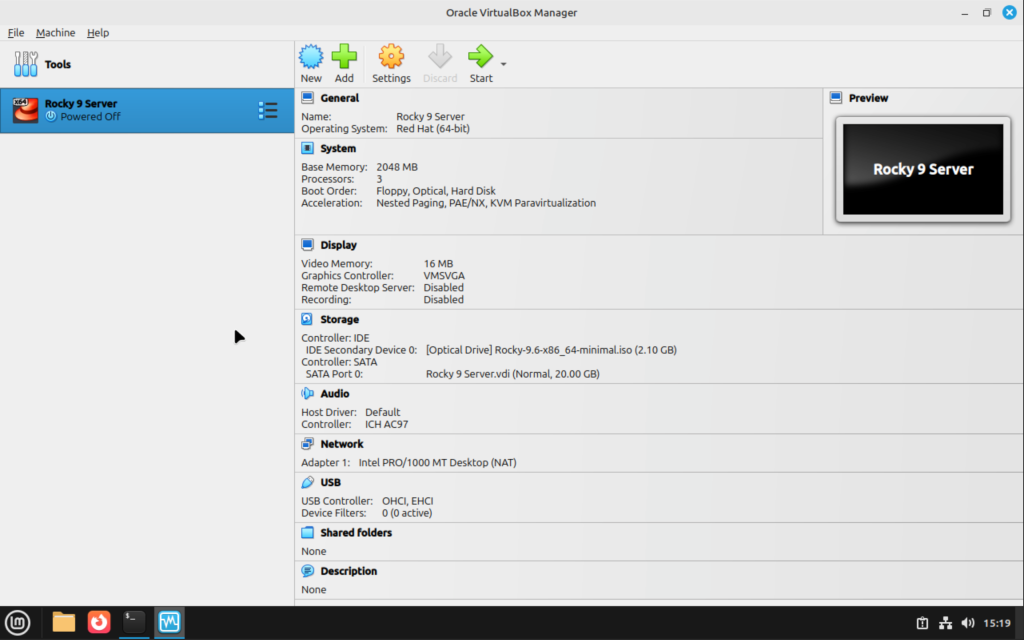
Once done, you will see your added guest OS on the left pane of virtual box. Click on the Start button:
Your VM shoud boot into the GRUB menu entry as shown below:
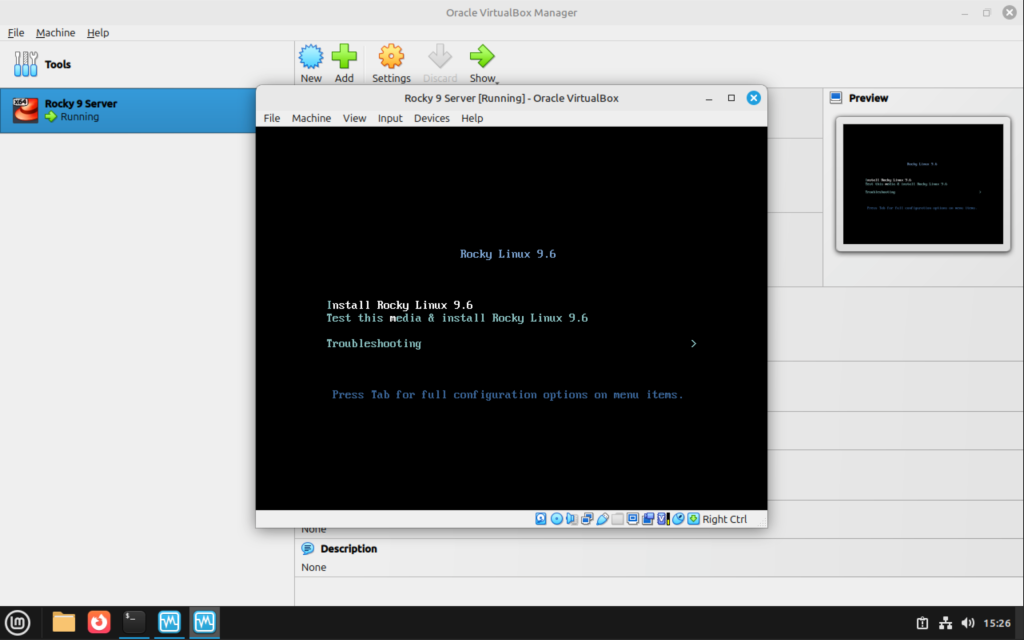
From there, select the Installer and proceed to install the OS.
Enjoy! Below are more of your day-to-day Linux guides.


1 thought on “How To Install VirtualBox 7.x on Linux Mint 22”
Pingback: Install ADB and Fastboot Drivers on Linux Mint - CloudSpinx