In this guide, we are going to look at how to use Terraform to provision virtual machines on AWS. The guide is for the new-bies who are getting started with both Terraform and AWS. I am going to explain all the basic steps needed to get you have your first virtual machine running in AWS provisioned using Terraform. Below are the steps we are going to focus on:
- Explain what terraform is
- Install Terraform on Linux
- Set up AWS account
- Initialize Terraform for AWS
- Deploy AWS instance with Terraform
What is Terraform?
Terraform is a tool used to easily and efficiently built and manage infrastructure. It uses code to manage existing service providers as well as custom infrastructure. Terraform works with the existing public cloud providers including AWS, Google Cloud, Azure, DigitalOcean, among others. It uses a language written in HCL and files have a .tf extension. Terraform language is declarative, meaning that you specify your desired state and Terraform will figure out how to achieve it.
Installing Terrafom in Linux
To install Terraform on Linux, we need to download Terraform binary and add to a directory included in our system PATH for it to be executable. Run the commands below:
Ubuntu/Debian:
#Update and install dependency packages
sudo apt-get update && sudo apt-get install -y gnupg software-properties-common

#Install the HashiCorp GPG key.
wget -O- https://apt.releases.hashicorp.com/gpg | \
gpg --dearmor | \
sudo tee /usr/share/keyrings/hashicorp-archive-keyring.gpg > /dev/null

#Verify the key's fingerprint.
gpg --no-default-keyring \
--keyring /usr/share/keyrings/hashicorp-archive-keyring.gpg \
--fingerprint

#Add the official HashiCorp repository to your system
echo "deb [signed-by=/usr/share/keyrings/hashicorp-archive-keyring.gpg] \
https://apt.releases.hashicorp.com $(lsb_release -cs) main" | \
sudo tee /etc/apt/sources.list.d/hashicorp.list

#Install terraform
sudo apt-get install terraform
CentOS/RHEL:
#Install yum-config-manager to manage your repositories.
sudo yum install -y yum-utils

#Use yum-config-manager to add the official HashiCorp Linux repository.
sudo yum-config-manager --add-repo https://rpm.releases.hashicorp.com/RHEL/hashicorp.repo

#Install Terraform from the new repository.
sudo yum -y install terraform
Fedora:
#Install dnf config-manager to manage your repositories.
sudo dnf install -y dnf-plugins-core

#Use dnf config-manager to add the official HashiCorp Linux repository.
sudo dnf config-manager --add-repo https://rpm.releases.hashicorp.com/fedora/hashicorp.repo

#Install Terraform from the new repository.
sudo dnf -y install terraform
Amazon Linux:
#Install yum-config-manager to manage your repositories.
sudo yum install -y yum-utils

#Use yum-config-manager to add the official HashiCorp Linux repository.
sudo yum-config-manager --add-repo https://rpm.releases.hashicorp.com/AmazonLinux/hashicorp.repo

#Install Terraform from the new repository.
sudo yum -y install terraform
Set Up AWS account
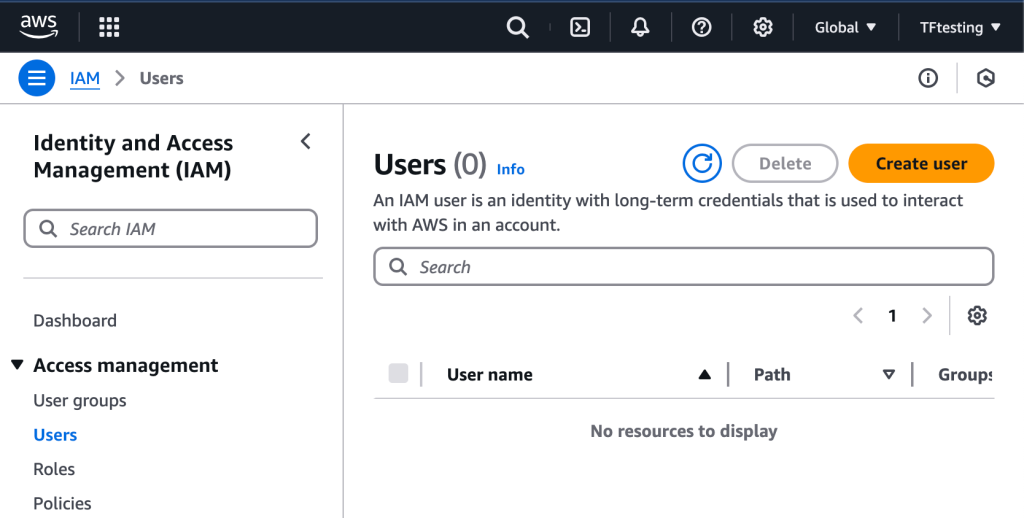
Once you sign up for AWS, you are normally provided with a root user account that has all the permissions on your account. For security purposes, it is recommended to create non-root user and assign specific permissions. Navigate to IAM section and click on ‘users’ then click ‘Add user’.
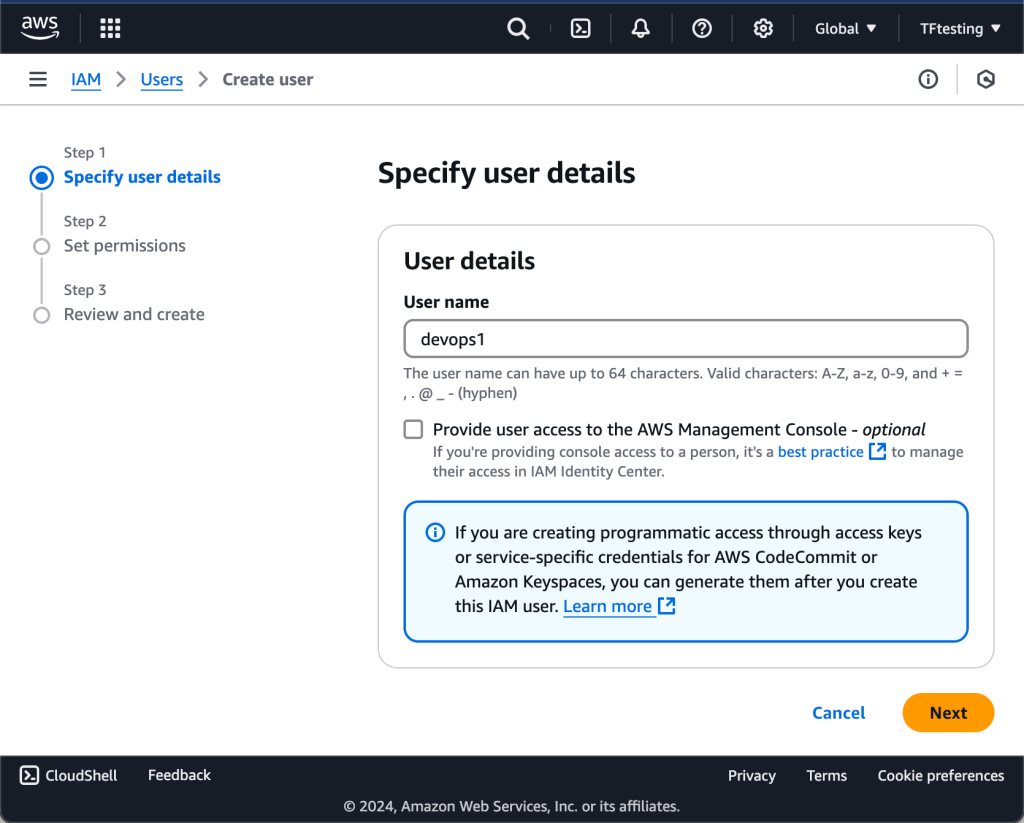
Give the user a name and choose the type of access you want for the user. For this case, I am choosing programmatic access because I want to use the CLI. You can choose both options if you also require the user to have console access.
Click on Next:permissions to allow the user to perform some tasks. For the user to use terraform, I am going to grant the following permissions:
- AmazonEC2FullAccess
- AmazonS3FullAcc
ess - AmazonDynamoDBFullAccess
- AmazonRDSFullAccess
- CloudWatchFullAccess
- IAMFullAccess
I am going to create a group called Terraform, allow the above permissions for the group and add my new user to the group. You can also go ahead to attach existing policies directly without necessarily adding the user to a group.
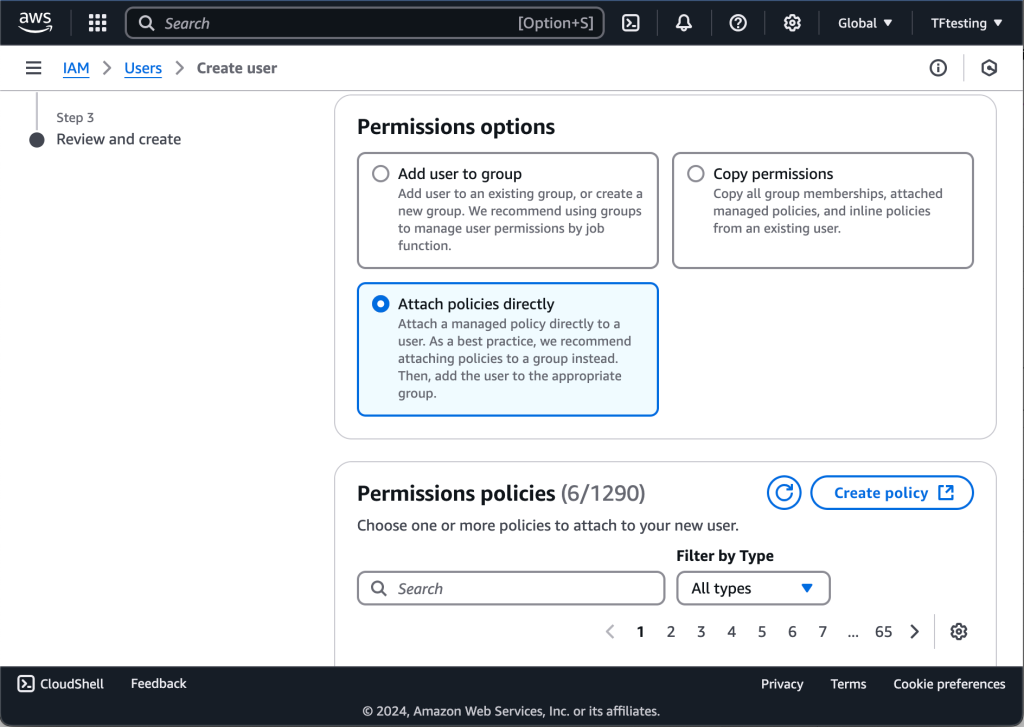
Review and create the user.
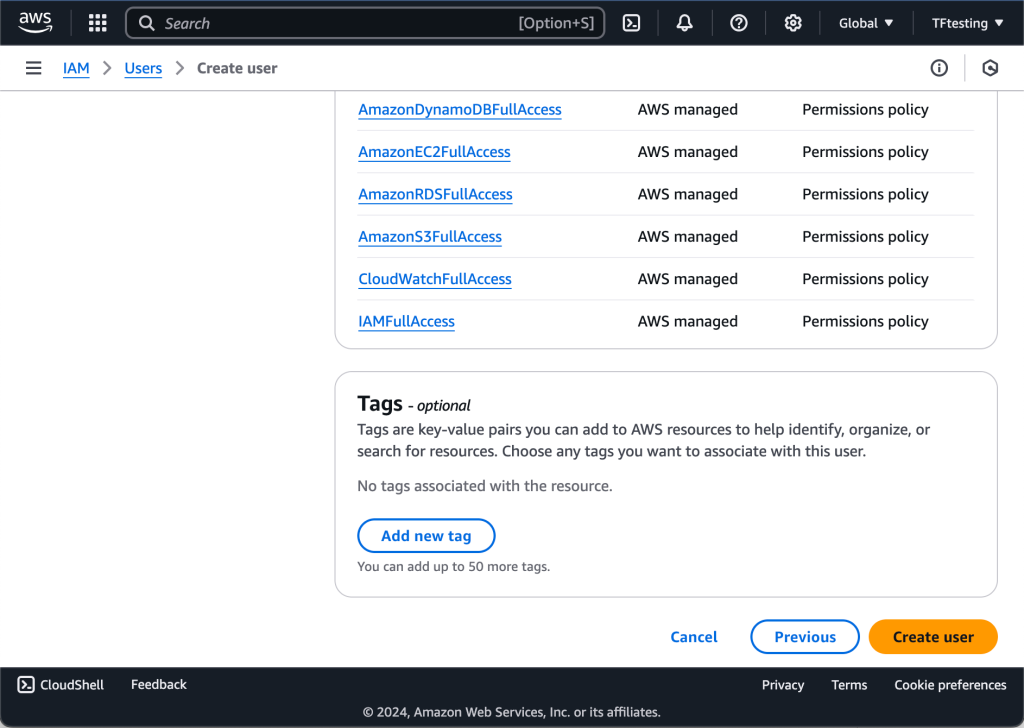
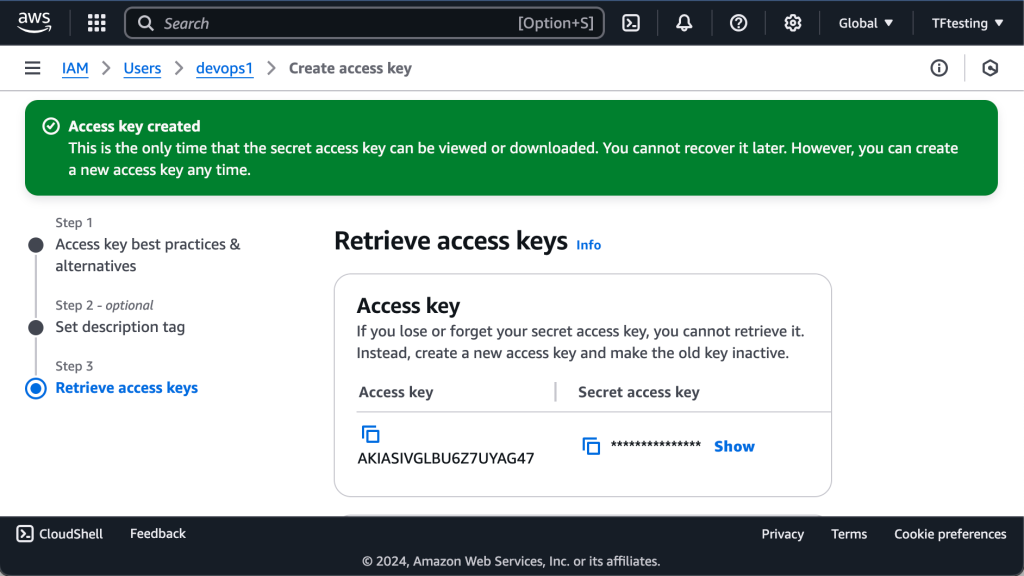
You can proceed to add tags (optional). Finally, click on create user. You should see that the user is successfully created, and you are provided with access key and access secret. Save them properly as you will always need them whenever you need to access your AWS account from the CLI.
Configure Terraform for AWS
First we need to configure the AWS credentials for the created user. You can choose to include the credentials as part of terafform .tf files (not recommended) but for security purposes I would recommend you pass the credentials as variables with the below commands.
Ensure you have AWS shell installed on your local machine, you can follow the instructions on the official AWS page.
$ aws configureProvide:
- AWS Access Key ID
- AWS Secret Access Key
- Default region
Sample output is shown below:
$ aws configure
AWS Access Key ID [None]: ****************AG47
AWS Secret Access Key [None]: wJalrXUtnFEMI/K7MDENG/bPxRfiCYzQP7J1HtfLf
Default region name [None]: us-east-1
Default output format [None]: json
Next, we need to configure provider, AWS in this case, for terraform. Create a file called main.tf. I have created a working directory called AWS-Terraform to have all work here. Inside this directory I am going to create all the needed files.
$ mkdir aws-terraform
$ cd aws-terraform
$ vim main.tf
Add the below content, you can change the region if you like. AWS has various regions around the world and each region has a number of availability zones (data centers). You can read more on this on the AWS website.
provider "aws" {
region = "us-east-1"
shared_credentials_files = ["~/.aws/credentials"]
}
Deploying single instance
To deploy an instance, we need to specify the provider, resource and the name that we want to give to our deployment. In case of a virtual machine in AWS (EC2), the resource will be ‘instance’. There are other resources which we can deploy including elastic load balancers, RDS and so on. Add the below content to the main.tf file:
resource "aws_instance" "example" {
  ami           = "ami-00446b95dfa0c0794"
  instance_type = "t2.micro"
}- aws_instance – AWS is our provider and we are deploying an EC2 instance
- ami – Amazon Machine Image – Here we are using already available image to deploy our instance. AWS marketplace has various AMIs, some free to use.
- instance_type – instances resources are grouped in instance types. In this case t2.micro has one vCPU and 1GB RAM It is also part of the free tier
Initialize Terraform for AWS
terraform init
When Terraform is installed, it only supports the basic functionality for Terraform but no configurations for any provider. Running terraform init command tells terraform to figure out the provider you are using and accordingly download the necessary code. Inside AWS-Terraform working directory, run the init command as below:
$ terraform init
Initializing the backend...

Initializing provider plugins...
- Finding latest version of hashicorp/aws...
- Installing hashicorp/aws v5.78.0...
- Installed hashicorp/aws v5.78.0 (signed by HashiCorp)

Terraform has created a lock file .terraform.lock.hcl to record the provider
selections it made above. Include this file in your version control repository
so that Terraform can guarantee to make the same selections by default when
you run "terraform init" in the future.

Terraform has been successfully initialized!

You may now begin working with Terraform. Try running "terraform plan" to see
any changes that are required for your infrastructure. All Terraform commands
should now work.

If you ever set or change modules or backend configuration for Terraform,
rerun this command to reinitialize your working directory. If you forget, other
commands will detect it and remind you to do so if necessary.
terraform plan
The plan command shows you what your terraform code will execute before the actual execution.
$ terraform plan
Terraform used the selected providers to generate the following execution plan. Resource actions are indicated with the following symbols:
  + create

Terraform will perform the following actions:

  # aws_instance.example will be created
  + resource "aws_instance" "example" {
      + ami                                  = "ami-00446b95dfa0c0794"
      + arn                                  = (known after apply)
      + associate_public_ip_address          = (known after apply)
      + availability_zone                    = (known after apply)
      + cpu_core_count                       = (known after apply)
      + cpu_threads_per_core                 = (known after apply)
      + disable_api_stop                     = (known after apply)
      + disable_api_termination              = (known after apply)
      + ebs_optimized                        = (known after apply)
      + get_password_data                    = false
      + host_id                              = (known after apply)
      + host_resource_group_arn              = (known after apply)
      + iam_instance_profile                 = (known after apply)
      + id                                   = (known after apply)
      + instance_initiated_shutdown_behavior = (known after apply)
      + instance_lifecycle                   = (known after apply)
      + instance_state                       = (known after apply)
      + instance_type                        = "t2.micro"
      + ipv6_address_count                   = (known after apply)
      + ipv6_addresses                       = (known after apply)
      + key_name                             = (known after apply)
      + monitoring                           = (known after apply)
      + outpost_arn                          = (known after apply)
      + password_data                        = (known after apply)
      + placement_group                      = (known after apply)
      + placement_partition_number           = (known after apply)
      + primary_network_interface_id         = (known after apply)
      + private_dns                          = (known after apply)
      + private_ip                           = (known after apply)
      + public_dns                           = (known after apply)
      + public_ip                            = (known after apply)
      + secondary_private_ips                = (known after apply)
      + security_groups                      = (known after apply)
      + source_dest_check                    = true
      + spot_instance_request_id             = (known after apply)
      + subnet_id                            = (known after apply)
      + tags                                 = {
          + "Name" = "tf-demo"
        }
      + tags_all                             = {
          + "Name" = "tf-demo"
        }
      + tenancy                              = (known after apply)
      + user_data                            = (known after apply)
      + user_data_base64                     = (known after apply)
      + user_data_replace_on_change          = false
      + vpc_security_group_ids               = (known after apply)
    }

Plan: 1 to add, 0 to change, 0 to destroy.

─────────────────────────────────────────────────────────────────────────────────────────────────────────────────────────────────────────────────────────────────────────────────────────────────────────

Note: You didn't use the -out option to save this plan, so Terraform can't guarantee to take exactly these actions if you run "terraform apply" now.
terraform apply
The apply command actually creates resource in AWS.
$ terraform apply
Terraform used the selected providers to generate the following execution plan. Resource actions are indicated with the following symbols:
  + create

Terraform will perform the following actions:

  # aws_instance.example will be created
  + resource "aws_instance" "example" {
      + ami                                  = "ami-0166fe664262f664c"
      + arn                                  = (known after apply)
      + associate_public_ip_address          = (known after apply)
      + availability_zone                    = (known after apply)
      + cpu_core_count                       = (known after apply)
      + cpu_threads_per_core                 = (known after apply)
      + disable_api_stop                     = (known after apply)
      + disable_api_termination              = (known after apply)
      + ebs_optimized                        = (known after apply)
      + get_password_data                    = false
      + host_id                              = (known after apply)
      + host_resource_group_arn              = (known after apply)
      + iam_instance_profile                 = (known after apply)
      + id                                   = (known after apply)
      + instance_initiated_shutdown_behavior = (known after apply)
      + instance_lifecycle                   = (known after apply)
      + instance_state                       = (known after apply)
      + instance_type                        = "t2.micro"
      + ipv6_address_count                   = (known after apply)
      + ipv6_addresses                       = (known after apply)
      + key_name                             = (known after apply)
      + monitoring                           = (known after apply)
      + outpost_arn                          = (known after apply)
      + password_data                        = (known after apply)
      + placement_group                      = (known after apply)
      + placement_partition_number           = (known after apply)
      + primary_network_interface_id         = (known after apply)
      + private_dns                          = (known after apply)
      + private_ip                           = (known after apply)
      + public_dns                           = (known after apply)
      + public_ip                            = (known after apply)
      + secondary_private_ips                = (known after apply)
      + security_groups                      = (known after apply)
      + source_dest_check                    = true
      + spot_instance_request_id             = (known after apply)
      + subnet_id                            = (known after apply)
      + tags                                 = {
          + "Name" = "tf-demo"
        }
      + tags_all                             = {
          + "Name" = "tf-demo"
        }
      + tenancy                              = (known after apply)
      + user_data                            = (known after apply)
      + user_data_base64                     = (known after apply)
      + user_data_replace_on_change          = false
      + vpc_security_group_ids               = (known after apply)
    }

Plan: 1 to add, 0 to change, 0 to destroy.

Do you want to perform these actions?
  Terraform will perform the actions described above.
  Only 'yes' will be accepted to approve.

  Enter a value: yes

aws_instance.example: Creating...
aws_instance.example: Still creating... [10s elapsed]
aws_instance.example: Creation complete after 16s [id=i-0fcb79eb0a6fd6880]

Apply complete! Resources: 1 added, 0 changed, 0 destroyed.
When you refresh your AWS console, US-East region, you should see your instance running.

Run the command below to destroy the resources created:
$ terraform destroyThis was just to get you started with AWS and Terraform. In our coming guides, we will see how to deploy other resources like load balancers and even to scale our deployments to enable us create more than one resource at a time.
Check out our other articles on Terraform:


