GNS3 is an open source Network Simulator that is used to emulate, configure, test and troubleshoot virtual and real networks. GNS3 can run on Windows, Linux and MacOS. It can also run on a virtualized environment such as VMware, Docker, Virtualbox and KVM.
Below are some of the features of GNS3:
- Fully free and Open Source – No monthly or yearly license fees
- There is no limit on the number of devices supported – CPU and RAM hardware is your only limitation
- GNS3 supports all VIRL images (IOSv, IOSvL2, IOS-XRv, CSR1000v, NX-OSv, ASAv)
- GNS3 can run with or without hypervisors in multi-vendor environments
- It has support for multiple switching options (ESW16 Etherswitch, IOU/IOL Layer 2 images, VIRL IOSvL2)
- GNS3 supports both free and paid hypervisors – Virtualbox, VMware Workstation, VMware Player, ESXi, Fusion
- GNS3 has native support for Linux without the need for need for additional virtualization software
We shall cover how to run GNS3 VM on KVM in this article. In this setup, you have your GNS3 application running on your host but the GNS3 server runs on KVM instance and there is a remote connection between the application and the VM using the KVM network bridge.
🔥 Check out the #1 best-selling eBook on KVM Virtualization – your ultimate guide to mastering it!
Install GNS3 VM on KVM
The steps below will guide us on how to successfully deploy a GNS3 instance on KVM.
Download the latest version of GNS3 VM image for KVM on this page.
curl -s https://api.github.com/repos/GNS3/gns3-gui/releases/latest |grep browser_download_url | grep GNS3.VM.KVM | cut -d '"' -f 4 | grep '\.zip' | wget -i -Extract the downloaded zip file to a directory in your local machine.
unzip -d gns3-vm GNS3.VM.KVM*.zipIn the command above, we have extracted the GNS3 components to a folder called gns3-vm.
The components of the extracted files are:
- The KVM disk images
- Script for importing the VM and starting it using QEMU.
Run GNS3 VM on KVM
The next phase will be firing up the VM. Before we can do that, we need to make sure that we have KVM installed on our host computer. Use the link below to check out how to install KVM on Ubuntu.
Install KVM Hypervisor on Ubuntu 24.04|22.04|20.04
- Navigate to the folder in which we extracted the files. You should see the disk images and the script named
start-gns3vm.sh. - Run the script to spin up your GNS3 VM.
cd gns3-vm
./start-gns3vm.sh
The script brings up a KVM instance and boots it up with the disk image for GNS3.
If you are accessing your KVM host over SSH, you won’t be able to use the startup script because you will run into errors. This happens because the scripts expects a GUI display available for the VM, which is not the case if you are on SSH.
The alternative is to you spin the VM directly using virt-install then access the console remotely via virt-manager or cockpit web UI. Copy the VM qcow2 disks to /var/lib/libvirt/images/:
cd gns3-vm
sudo cp GNS3\ VM-disk001.qcow2 GNS3\ VM-disk002.qcow2 /var/lib/libvirt/images
Then spin the VM using virt-install:
sudo virt-install \
  --name GNS3-VM \
  --memory 4096 \
  --vcpus 2 \
  --os-variant ubuntu24.04 \
  --import \
  --disk path=/var/lib/libvirt/images/'GNS3 VM-disk001.qcow2',format=qcow2,bus=virtio
  --disk path=/var/lib/libvirt/images/'GNS3 VM-disk002.qcow2',format=qcow2,bus=virtio
  --network network=default,model=virtio \
  --graphics vnc,listen=0.0.0.0 \
  --video virtio \
  --noautoconsole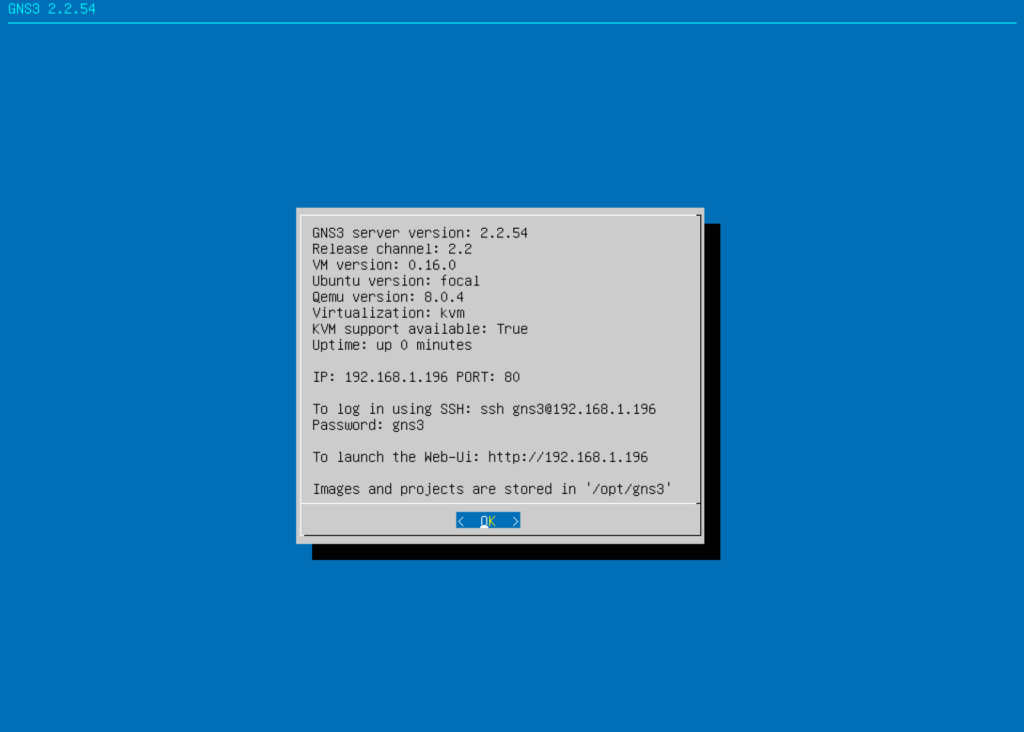
At this point, we can reach the GNS3 VM running on KVM using the KVM network bridge.
Configure GNS3-GUI with KVM instance
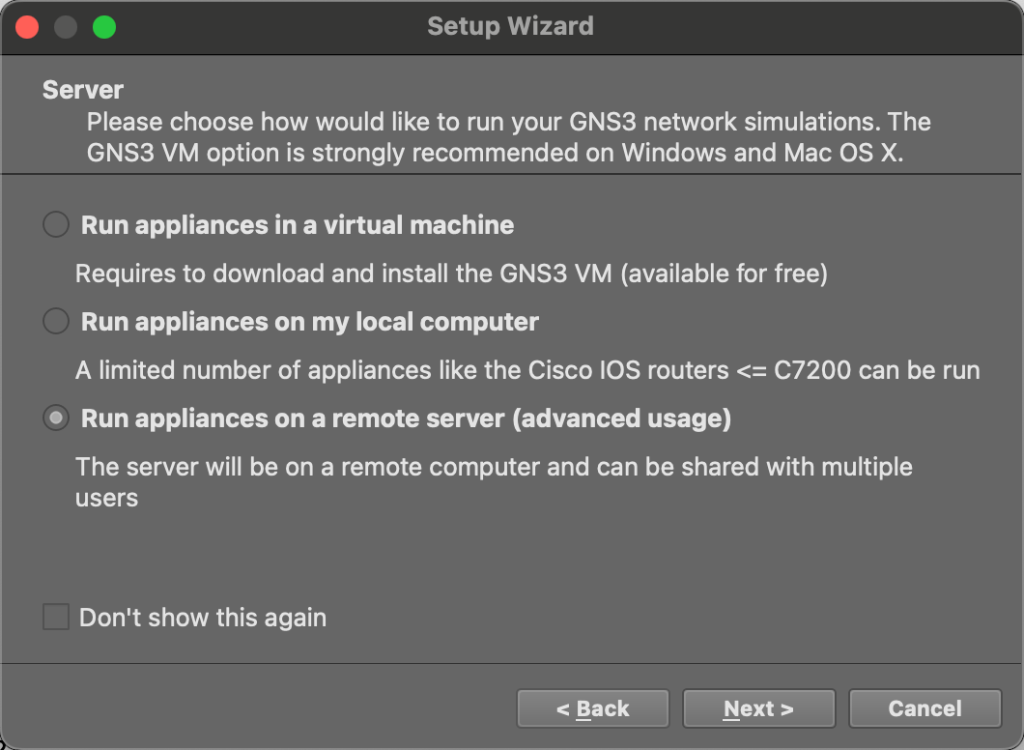
The next step is to configure GNS3-GUI application to use the newly setup GNS3-VM as the server. On the Setup Wizard, choose ‘Run appliances on a remote server‘ option.
In the remote server settings, input the IP of the VM running on KVM and port 80/TCP as shown below:
- User: gns3
- Password: gns3
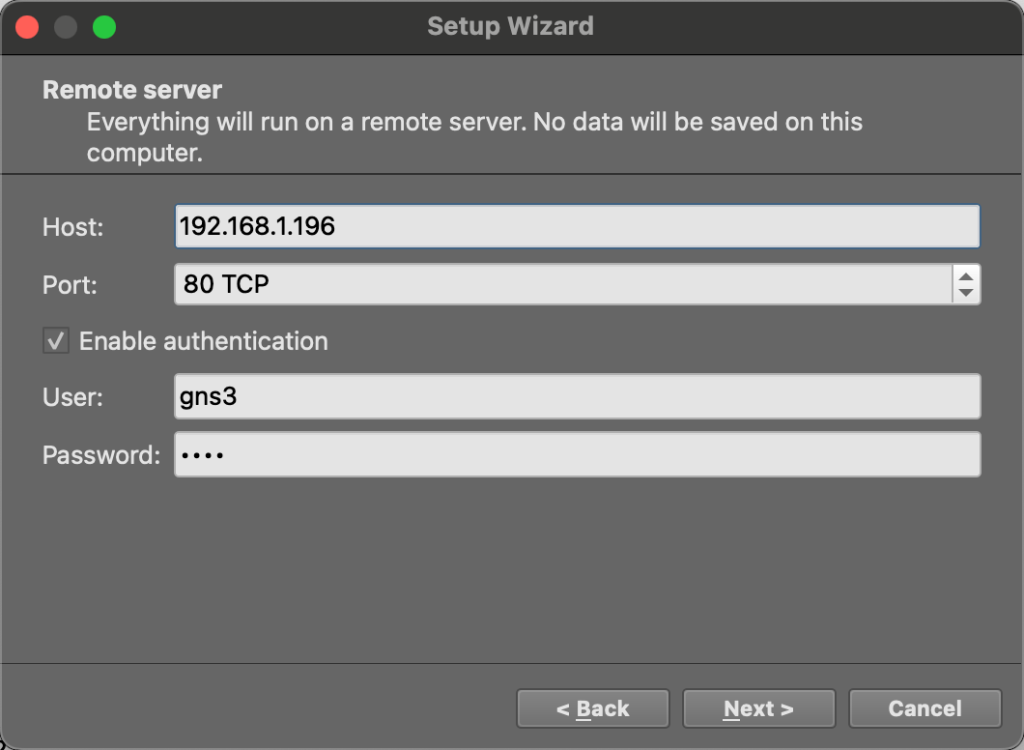
Click Next then Finish.
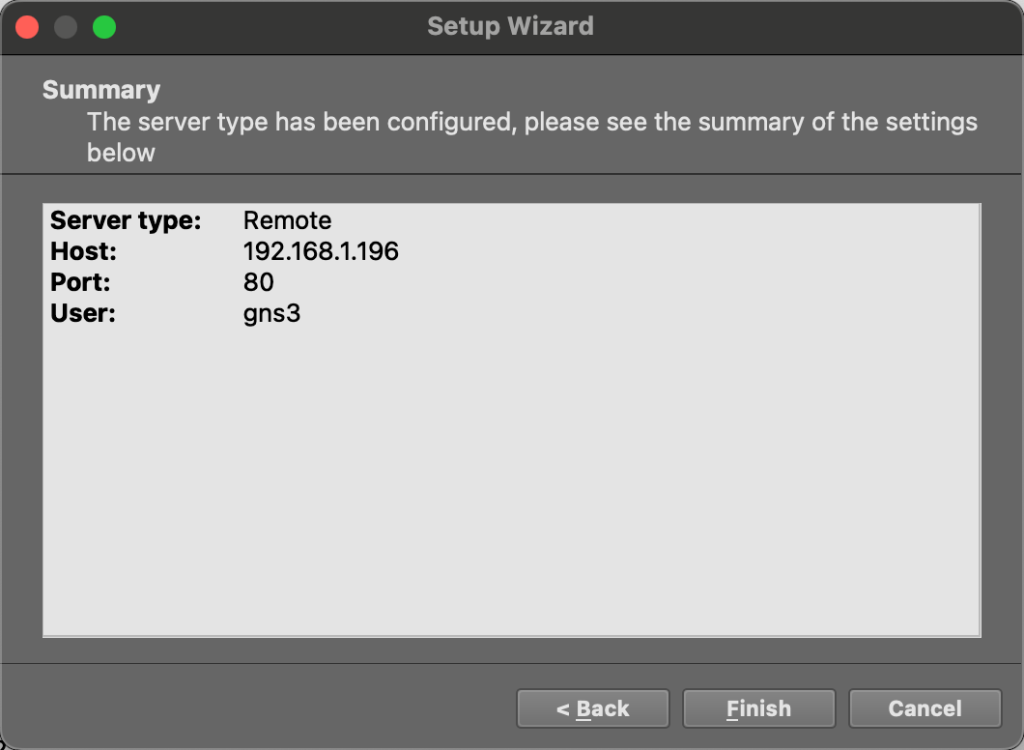
At this point, you have successfully connected the GNS3-GUI to GNS-VM/server running on KVM.
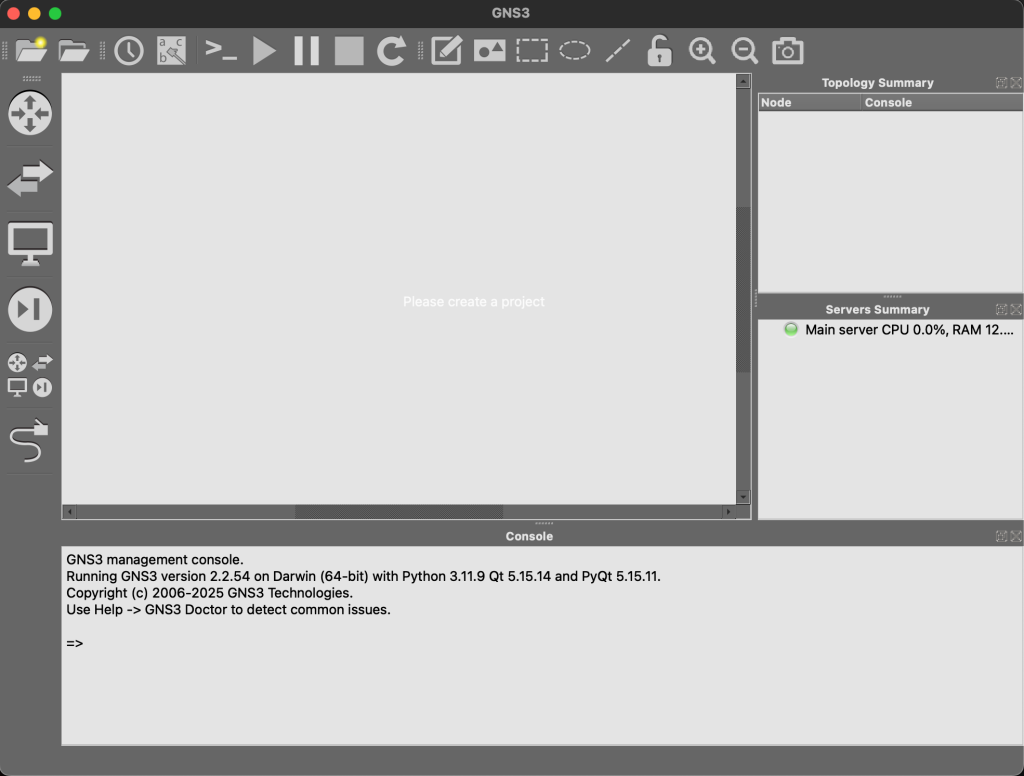
You can now be able to deploy your test labs and start building your simulations.
Cheers! Enjoy your simulations. Check out these other interesting guides:

