Greetings and salutations. In our guide today we will examine what Passbolt is. Imagine the number of passwords you have, from your email passwords, your desktop and server passwords, your router and switch devices passwords, your applications passwords, your cloud passwords, and your social account passwords, and the list is endless. It is next to impossible to remember all these passwords unless you maintain a similar password for all your accounts which is a huge security issue. Now think of a versatile, secure, and flexible password manager that is open-source and allows collaboration, and is automation ready.
Passbolt is a trusted password manager employed by thousands of organizations, companies, government organizations, newspapers, etc. Passbolt can be installed both on-premise and on cloud infrastructure. Passbolt is easy to deploy on multiple platforms allowing synchronization of passwords between the web browsers and your devices. Developers prefer Passbolt because they can share their passwords in real-time.
Passbolt is distributed under AGPL V3 which means you have access to the entire source code and are free to modify and distribute the source code. Passbolt is available in three plans i.e Community, Business, and Enterprise. For Business and Enterprise plans, you must subscribe to use but the Community requires no subscription. If your subscriptions for Business and Enterprise expire, you will still be able to use passbolt but won’t enjoy the fixes and updates, making your password manager vulnerable to attacks. Passbolt is written in PHP and relies on MySQL/MariaDB database server.
Why Passbolt Password Manager?
Developers prefer Passbolt due to the following features.
- Passbolt allows easier collaboration between IT teams, DevOps teams, managers, etc.
- Passbolt is very versatile and very flexible
- Passbolt is secure.
- It can be installed both on-prem and on cloud infrastructure.
- Passwords are encrypted based on OpenPGP a proven cryptographic standard.
- Passbolt manager organizes passwords in folders and tags.
- With Passbolt, you can easily generate secure passwords.
- With Passbolt you can access passwords everywhere.
- Passbolt allows DevOps to automate their infrastructure
- Passbolt has no tracker which gives you a sense of security.
- Passbolt is completely open source.
- Passbolt is privacy-focused
- It comes with many themes to choose from.
For more features, please visit the official Passbolt web page
We will now learn how to install Passbolt Password Manager on Docker using Docker Compose. I will not cover docker installation for this guide. Please refer to our guides on Install and Use Docker On Ubuntu and Install and Use Docker Compose . Once you are done installing the Docker engine and compose then proceed with the installation below.
I will begin by checking the versions of Docker and Docker-Compose running on my Ubuntu server.
$ docker version
Client: Docker Engine - Community
 Version:           27.3.1
 API version:       1.47
 Go version:        go1.22.7
 Git commit:        ce12230
 Built:             Fri Sep 20 11:40:59 2024
 OS/Arch:           linux/amd64
 Context:           default

Server: Docker Engine - Community
 Engine:
  Version:          27.3.1
  API version:      1.47 (minimum version 1.24)
  Go version:       go1.22.7
  Git commit:       41ca978
  Built:            Fri Sep 20 11:40:59 2024
  OS/Arch:          linux/amd64
  Experimental:     false
 containerd:
  Version:          1.7.23
  GitCommit:        57f17b0a6295a39009d861b89e3b3b87b005ca27
 runc:
  Version:          1.1.14
  GitCommit:        v1.1.14-0-g2c9f560
 docker-init:
  Version:          0.19.0
  GitCommit:        de40ad0
root@gidilab:~# docker --version
Docker version 27.3.1, build ce12230

$ docker-compose version
Docker Compose version v2.29.7
Once you have docker and docker-compose installed, you are ready to proceed. Ensure your Linux server meets the following minimum requirements.
- 2 CPU cores
- minimum of 2GB of RAM.
- 20GB of hard disk storage.
- stable internet access.
- Docker container
- Docker Compose
- Working NTP service to avoid GPG authentication issues
- sudo account.
Begin by updating your Linux system.
sudo apt update && sudo apt -y full-upgrade
[ -f /var/run/reboot-required ] && sudo reboot -f
Once done proceed with the steps below.
Step 1: Install with docker-compose
Begin by downloading the passbolts official docker-compose file. Navigate to the passbolt_docker release Github page and download the latest release. Run the command below on your terminal.
sudo apt install wget
wget https://download.passbolt.com/ce/docker/docker-compose-ce.yaml
Calculate SHA512 cryptographic checksums
wget "https://github.com/passbolt/passbolt_docker/releases/latest/download/docker-compose-ce-SHA512SUM.txt"Verify that the downloaded file is not corrupted. Run the command below.
sha512sum -c docker-compose-ce-SHA512SUM.txt && echo "Checksum OK" || (echo "Bad checksum. Aborting" && rm -f docker-compose-ce.yaml)The command output looks like this:
docker-compose-ce.yaml: OK
Checksum OK
If the output of the command above is not correct, it means your file is corrupted. Download another file.
To run Docker in the background, run the following command:
docker-compose -f docker-compose-ce.yaml up -dStep 2: Configure and create the first user
Once you have the docker-compose file in place, it’s time to do some housekeeping by doing some basic configurations to the docker-compose yaml file. In this step, we will configure our server and create an admin user to manage the passbolt application. Configure environment variables in docker-compose-ce.yaml file to customize your instance.
The configuration file we need to edit is docker-compose-ce.yaml. It’s in your home directory. Using the text editor of your choice, make the following changes to the file. Set the APP_FULL_BASE_URL parameter to your server name. By default, this parameter is set to https://passbolt.local.
To get your server name, run the command:
$ echo $HOSTNAME
ubuntu-22-lab
Make the changes to the environment variable as below.
$  vim docker-compose-ce.yaml
# The parameters look like this.
services:
  db:
    image: mariadb:10.3
    restart: unless-stopped
    environment:
      MYSQL_RANDOM_ROOT_PASSWORD: "true"
      MYSQL_DATABASE: "passbolt"
      MYSQL_USER: "passbolt"
      MYSQL_PASSWORD: "P4ssb0lt"
    volumes:
      - database_volume:/var/lib/mysql

  passbolt:
    image: passbolt/passbolt:latest-ce
    #Alternatively you can use rootless:
    #image: passbolt/passbolt:latest-ce-non-root
    restart: unless-stopped
    depends_on:
      - db
    environment:
      APP_FULL_BASE_URL: "http://188.40.183.234"
      DATASOURCES_DEFAULT_HOST: "db"
      DATASOURCES_DEFAULT_USERNAME: "passbolt"
      DATASOURCES_DEFAULT_PASSWORD: "P4ssb0lt"
      DATASOURCES_DEFAULT_DATABASE: "passbolt"
    volumes:
      - gpg_volume:/etc/passbolt/gpg
      - jwt_volume:/etc/passbolt/jwt
    command: ["/usr/bin/wait-for.sh", "-t", "0", "db:3306", "--", "/docker-entrypoint.sh"]
    ports:
      - 80:80
      - 443:443
    #Alternatively for non-root images:
    # - 8080:80
    # - 4433:433

volumes:
  database_volume:
  gpg_volume:
  jwt_volume:
Edit your server name accordingly. Alternatively, you can use your server IP Address. Save your changes and exit from your editor.
In order to receive notifications and recovery emails, you must configure SMTP settings. The most common settings are as below.

For more information on how to set up environment settings, visit the link on the passbolt environment variable reference.
Step 3: Start the passbolt container
Once you have set up your environment variables, start the passbolt container with the following command.
docker-compose -f docker-compose-ce.yaml up -dThe output of the command.
[+] Running 11/11
 ⠿ db Pulled                                                               7.9s
   ⠿ 846c0b181fff Pull complete                                            2.9s
   ⠿ 2279a7485340 Pull complete                                            3.0s
   ⠿ 30c7fe7ba3fd Pull complete                                            3.4s
   ⠿ 6b43169afb5c Pull complete                                            3.4s
   ⠿ 350596f36f48 Pull complete                                            3.5s
   ⠿ b8780e9098a9 Pull complete                                            6.1s
   ⠿ 09915c7e7390 Pull complete                                            6.1s
   ⠿ 2b638ef4dd68 Pull complete                                            6.2s
   ⠿ f249ad958eaa Pull complete                                            6.2s
 ⠿ passbolt Pulled                                                         0.9s
[+] Running 6/6
 ⠿ Network jil_default           Created                                   0.1s
 ⠿ Volume "jil_gpg_volume"       Created                                   0.0s
 ⠿ Volume "jil_jwt_volume"       Created                                   0.0s
 ⠿ Volume "jil_database_volume"  Created                                   0.0s
 ⠿ Container jil-db-1            Started                                   1.5s
 ⠿ Container jil-passbolt-1      Started                                   0.9s
To run the container in a detached mode, use –d option with the command above.
docker-compose up -dThe container is up and running.
To list your running containers:
$ docker ps
CONTAINER ID   IMAGE                         COMMAND                  CREATED         STATUS         PORTS                                                                      NAMES
784a787fe251   passbolt/passbolt:latest-ce   "/usr/bin/wait-for.s…"   4 minutes ago   Up 4 minutes   0.0.0.0:80->80/tcp, :::80->80/tcp, 0.0.0.0:443->443/tcp, :::443->443/tcp   jil-passbolt-1
e19f98203cb9   mariadb:10.3                  "docker-entrypoint.s…"   4 minutes ago   Up 4 minutes   3306/tcp                                                                   jil-db-1
Step 4: Create an admin user
For this step, we will set up an admin user who will administer our passbolt. run the command below.
docker-compose -f docker-compose-ce.yaml exec passbolt su -m -c "/usr/share/php/passbolt/bin/cake \
                                passbolt register_user \
                                -u [email protected] \
                                -f passbolt \
                                -l passbolt \
                                -r admin" -s /bin/sh www-data
The output of the command:

To start the registration follow the link provided in your mailbox or the one provided on your terminal.
Step 5: Firewall rules
We must now allow ports 80 and 443 i.e HTTP & HTTPS respectively through the firewall. This is to allow communication with the outside world.
sudo ufw allow 80
sudo ufw allow 443
Step 6: Installation process
When you run the link above, you might be required to add the Passbolt Extension on your browser. Please add the extension and you will be brought to this page.
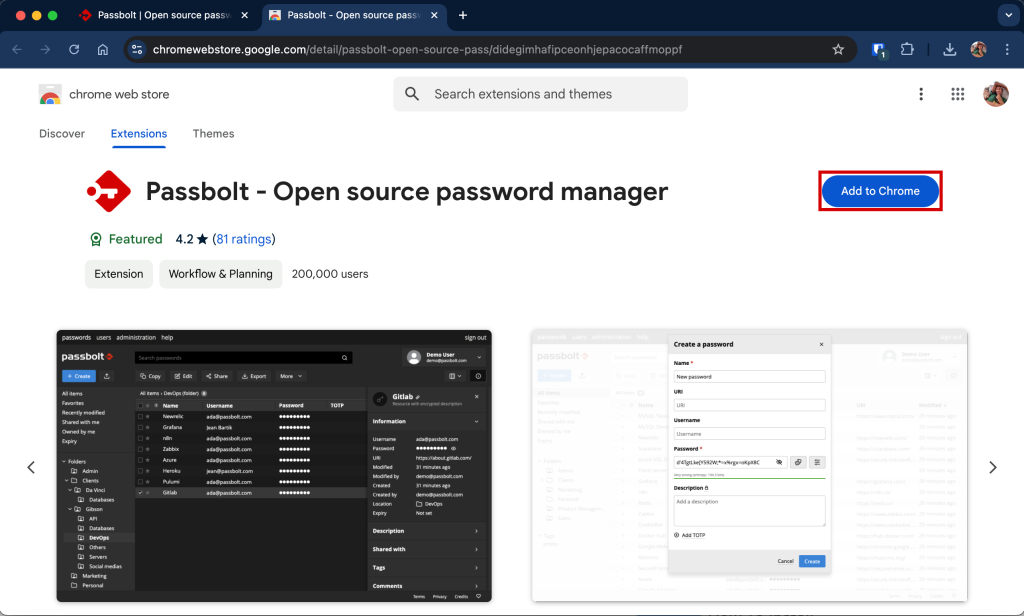
Add the passbolt extension to your browser by clicking Add to Chrome if you are using Chrome web browser. When the extension has been added successfully you should see the following message.
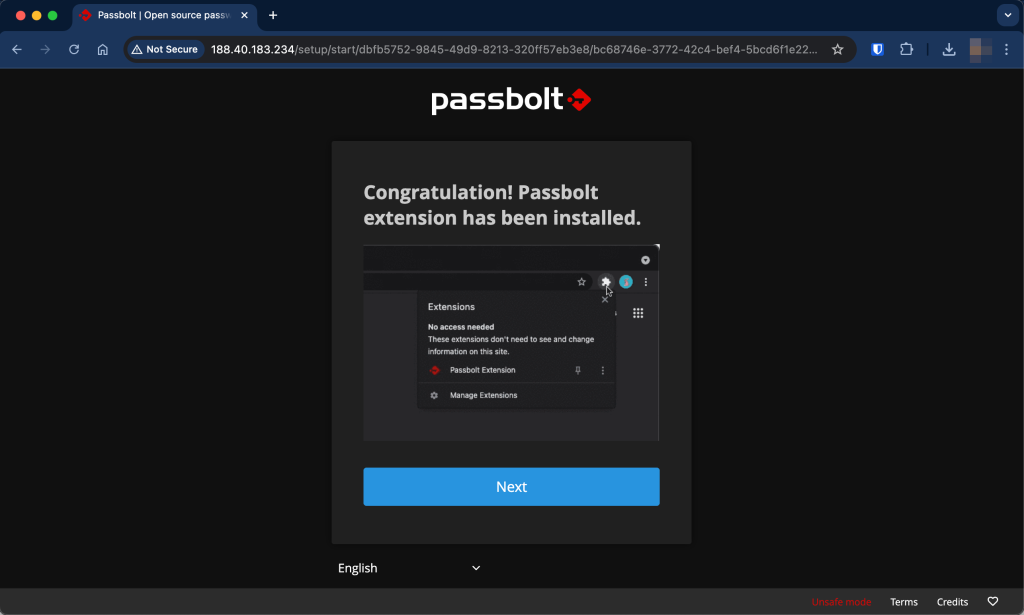
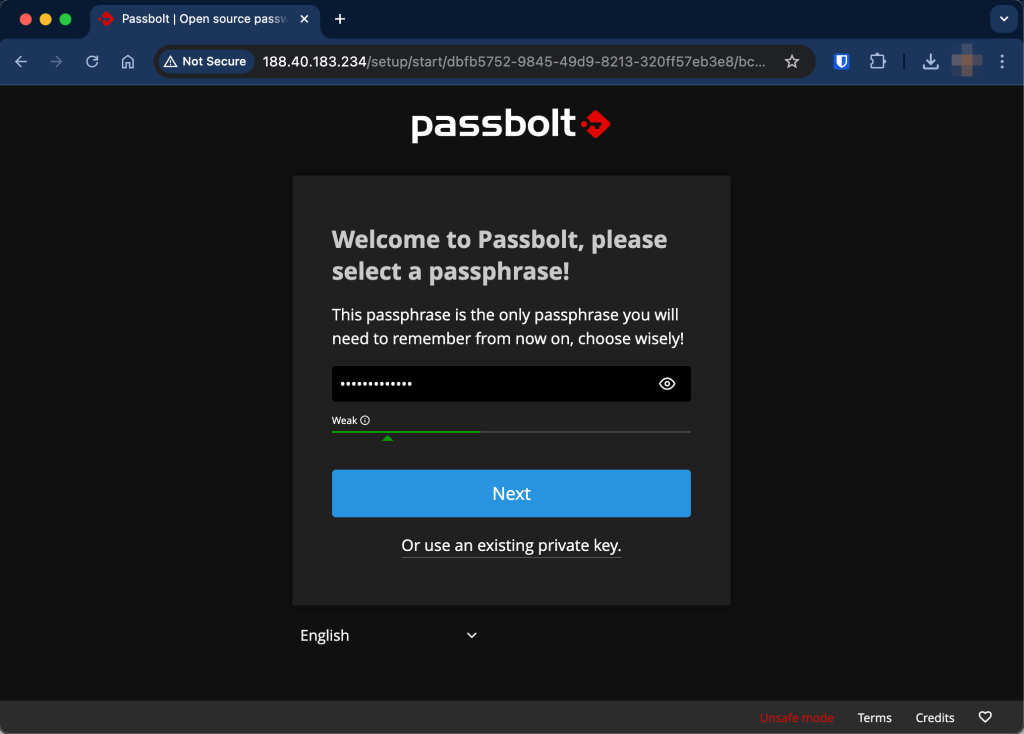
Then click Next to continue. Choose a passphrase or alternatively use an existing private key and press Enter. Ensure that you observe the password rules.
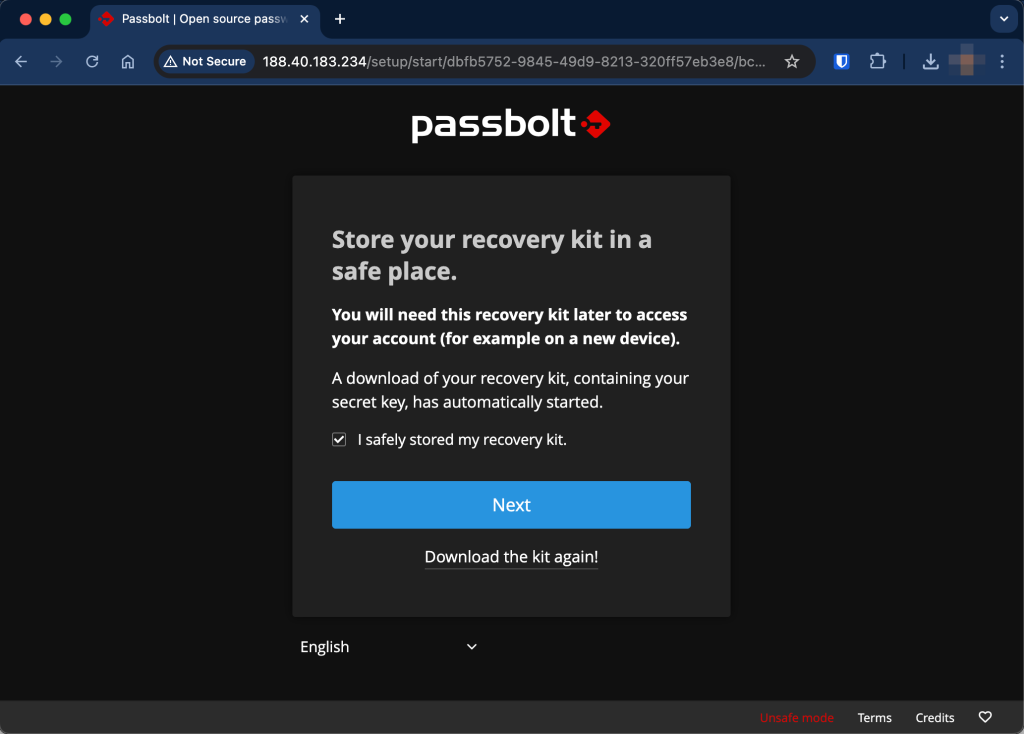
After setting your paraphrase, your recovery kit will be automatically downloaded and you will directed to the next page where you’ll confirm it. Click Next to proceed.
You will be required to pick a theme color of your choice and set a security token which will be displayed whenever passbolt requests your passphrase. You can leave it as it is and click Next to finish the setup process.
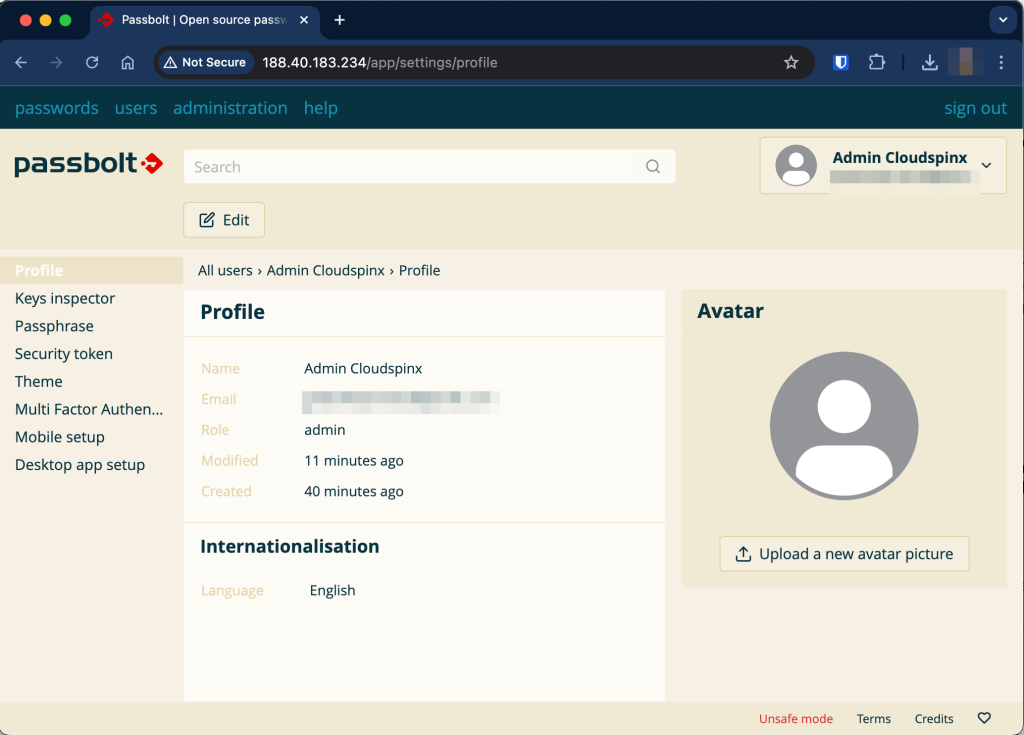
For demonstration, I will save the password of my personal email address. Navigate to the left top corner and click on Passwords >> Create. Supply the details as shown below.
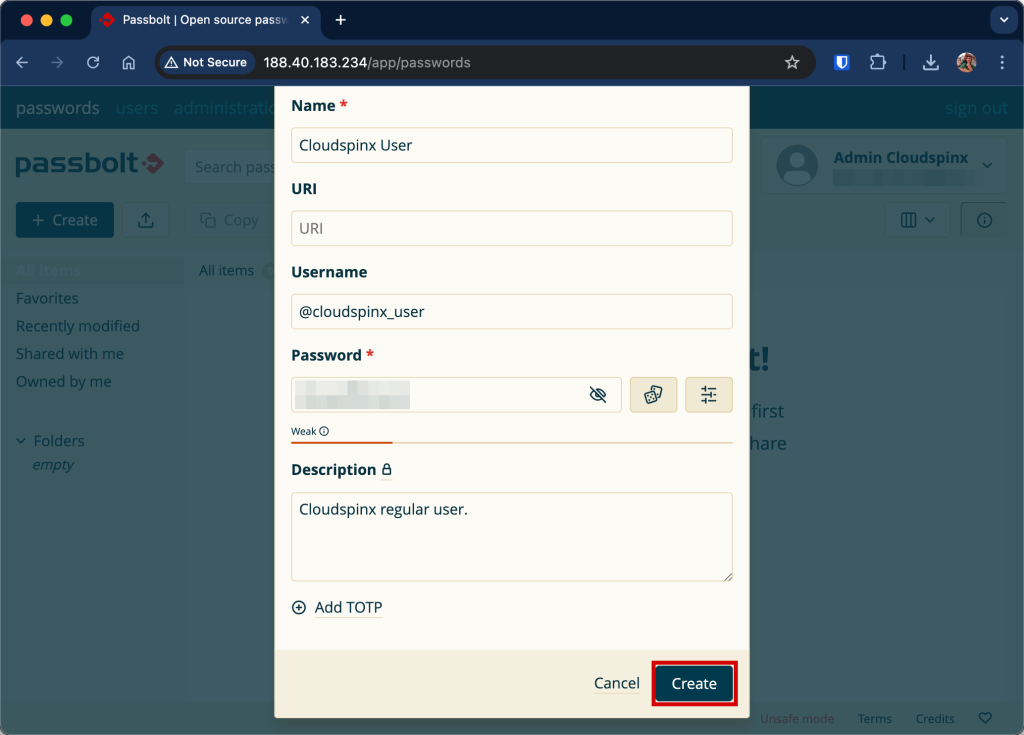
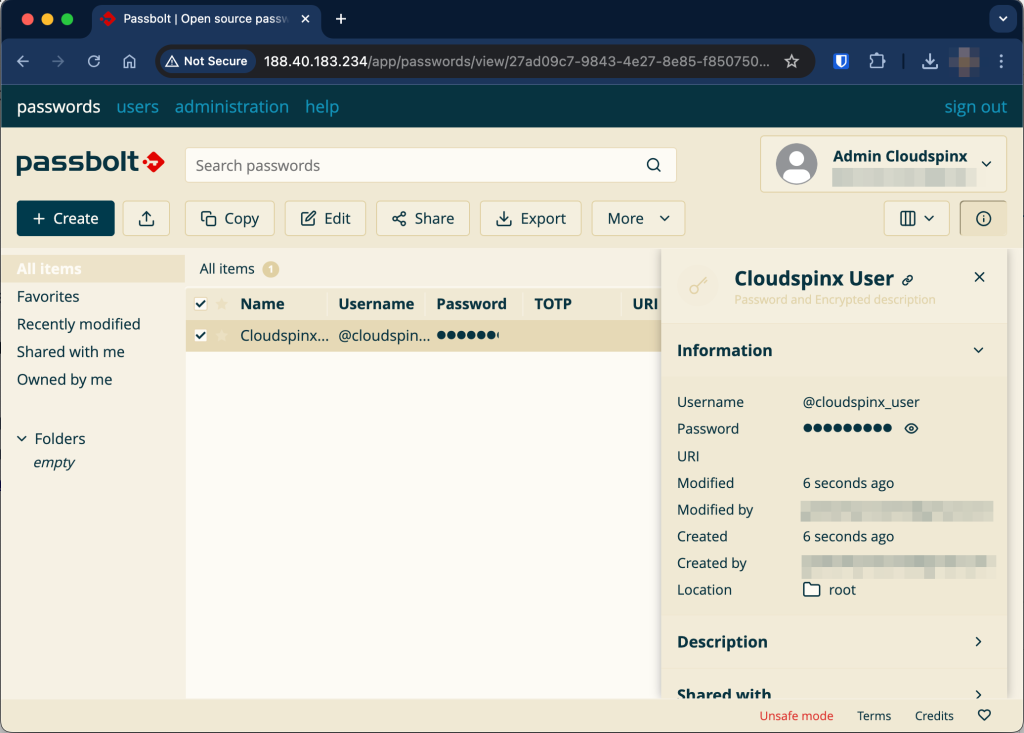
Once you click Create, you will be required to provide your passphrase. You should see the following.
Conclusion
That marks the end of our guide. I hope your installation was a success. We have looked at what passbolt is, analyzed a few features, and taken you through the installation process via docker. Please explore more on passbolt docker installation for more information on how to configure SMTP, encryption methods, configuring certificates, and so on. For installation challenges, be sure to register with the passbolt community forum for more.
Check out more articles:


