Most people who used the internet before the streaming sites era are probably aware of torrents. This is because many people used torrents to download ripped movies, video games, music albums e.t.c.
A torrent is a file distributed over the internet through a decentralized, BitTorrent protocol known as a peer-to-peer (P2P) sharing network. Torrenting is the process of downloading or uploading the component torrent files from several peer computers. This shared nature makes the torrenting process faster than downloading or uploading large files to a central server. The files are split into smaller manageable bits that are transmitted to and from multiple computers.
There are many benefits associated with Torrents. The main advantage is that files can be uploaded by multiple other users simultaneously and downloads made from several users at once. However, torrenting is risky at times. By itself, it is not danger-ingrained, but unless the source of the files is trusted, you can end up downloading files with malware or those uploaded without proper legal permission.
Torrenting only requires torrent software to connect to the BitTorrent network. Those downloading/uploading the files are collectively referred to as a swarm. There are several torrent software in the market, the most popular ones are uTorrent, qBittorrent, Vuze, BitTorrent exatorrent e.t.c
In this guide, we will go through how to run the Transmission Torrent Web Client in Docker. Transmission is an easy-to-use and powerful BitTorrent client that offers tracker editing, a web interface, encryption, peer exchange, magnet links, DHT, µTP, UPnP and NAT-PMP port forwarding, web seed support, watch directories, global and per-torrent speed limits e.t.c
The features provided by Transmission Torrent Web Client are:
- Sleek & Feature Rich: It provides an easy-to-use interface yet is feature-rich. The nifty features include full peer communications, tracker editing, speed limits e.t.c
- Open Source & Privacy Focused: This is an open-source, volunteer-based project that doesn’t’ bundle toolbars, pop-up ads, flash ads, twitter tools, or anything else
- Lightweight & Lightning Fast: It has the lowest memory and resource footprints of any major BitTorrent client. It is also compatible with almost any hardware.
- News & Updates: There are continued updates with features included from the community contributors and the dedicated lead developers of the project.
Setup Pre-requisites
For this guide, you need to have Docker installed on your system. The guides below can be used to achieve this:
After installing Docker, ensure that your system user is added to the docker group:
sudo usermod -aG docker $USER
newgrp docker
Start and enable the service:
sudo systemctl enable --now dockerYou might also need to install Docker Compose on your system.
curl -s https://api.github.com/repos/docker/compose/releases/latest | grep browser_download_url  | grep docker-compose-linux-x86_64 | cut -d '"' -f 4 | wget -qi -
chmod +x docker-compose-linux-x86_64
sudo mv docker-compose-linux-x86_64 /usr/local/bin/docker-compose
Verify the installation:
$ docker-compose version
Docker Compose version vx.y.z
1 – Create Persistent Volumes For Transmission Torrent
For Transmission Torrent data to persist, we need to configure persistent volumes. For this case, we need 3 volumes i.e config, downloads, and watch.
The directories can be created on your system with the command:
sudo mkdir -p /transmission/downloads /transmission/config /transmission/watchSet the required permissions:
sudo chmod 775 -R /transmissionOn RHEL-based systems, set SELinux in permissive mode for the paths to be accessible:
sudo setenforce 0
sudo sed -i 's/^SELINUX=.*/SELINUX=permissive/g' /etc/selinux/config
2 – Run Transmission Torrent Web Client in Docker
Transmission Torrent Web Client requires several ports on your system. These are:
- 9091: WebUI
- 51413: Torrent Port TCP
- 51413/udp: Torrent Port UDP
There are also other environment variables defined using the -e. These include:
- PUID and PGID define the user and group permissions to avoid errors that arise between the host OS and the container due to persistent volumes/path
- -e PUID=1000
- -e PGID=1000
- -e TZ=Africa/Nairobi for timezone
- -e TRANSMISSION_WEB_HOME=/combustion-release/: you can specify an alternative UI. The options available are /combustion-release/, /transmission-web-control/, /kettu/, /flood-for-transmission/, and /transmissionic/
- -e USER=admin: optional username for the interface
- -e PASS=Password!: optional password for the interface
- -e WHITELIST=iplist: Specify an optional list of comma-separated IP whitelists. Fills RPC-whitelist setting.
- -e PEERPORT=peerport: Specify an optional port for torrent TCP/UDP connections. Fills peer-port setting.
- -e HOST_WHITELIST=dnsname list: Specify an optional list of comma-separated DNS name whitelist. Fills RPC-host-whitelist setting.
For this guide, we will provide two methods of running the Transmission Torrent Web Client container. These are:
- Using Docker CLI
- Using Docker Compose
Choose one of the options that best works for you.
Method 1 – Using Docker CLI
You can start the Transmission Torrent Web Client directly using Docker CLI as shown:
docker run -d \
  --name=transmission \
  -e PUID=1000 \
  -e PGID=1000 \
  -e TZ=Africa/Nairobi \
  -e USER=admin \
  -e PASS=Password \
  -p 9091:9091 \
  -p 51413:51413 \
  -p 51413:51413/udp \
  -v  /transmission/data:/config \
  -v  /transmission/downloads:/downloads \
  -v  /transmission/watch:/watch \
  --restart unless-stopped \
lscr.io/linuxserver/transmission:latest
Replace where required. Once started, the container should be available as shown:
admin@cloudspinx:~$ docker ps
CONTAINER ID   IMAGE                                     COMMAND   CREATED              STATUS              PORTS                                                                                                                                     NAMES
f569c168efd5   lscr.io/linuxserver/transmission:latest   "/init"   About a minute ago   Up About a minute   0.0.0.0:9091->9091/tcp, :::9091->9091/tcp, 0.0.0.0:51413->51413/tcp, :::51413->51413/tcp, 0.0.0.0:51413->51413/udp, :::51413->51413/udp   transmission
admin@cloudspinx:~$
Method 2 – Using Docker Compose
It is also possible to spin the container using Docker Compose. First, create the YAML file:
vim docker-compose.ymlIn the opened file, add the below content and replace values where required.
---
services:
  transmission:
    image: lscr.io/linuxserver/transmission:latest
    container_name: transmission
    environment:
      - PUID=1000
      - PGID=1000
      - TZ=Africa/Nairobi
      #  - TRANSMISSION_WEB_HOME=/combustion-release/ #optional
      - USER=admin #optional
      - PASS=Password #optional
        # - WHITELIST=iplist #optional
        # - PEERPORT=peerport #optional
        # - HOST_WHITELIST=dnsname_list #optional
    volumes:
      - /transmission/data:/config
      - /transmission/downloads:/downloads
      - /transmission/watch:/watch
    ports:
      - 9091:9091
      - 51413:51413
      - 51413:51413/udp
    restart: unless-stopped
Now start the container with the command:
$ docker-compose up -d

admin@cloudspinx:~$ docker-compose up -d
Creating network "root_default" with the default driver
Pulling transmission (lscr.io/linuxserver/transmission:latest)...
latest: Pulling from linuxserver/transmission
8fc9c306fc5e: Pull complete
df25a931801a: Pull complete
feae5bd8b9ac: Pull complete
9686e6c90895: Pull complete
93a4a780530c: Pull complete
36e142dfda7b: Pull complete
a207e64b0db1: Pull complete
fa19a56aa224: Pull complete
d92bae1ceeaf: Pull complete
Digest: sha256:31b283ac9f8031135db93fda4e452b32e2656f0a92a5a75f7f5a76ca98433bbb
Status: Downloaded newer image for lscr.io/linuxserver/transmission:latest
Creating transmission ... done
admin@cloudspinx:~$
Check if the container is running:
admin@cloudspinx:~$ docker ps
CONTAINER ID   IMAGE                                     COMMAND   CREATED              STATUS              PORTS                                                                                                                                     NAMES
f569c168efd5   lscr.io/linuxserver/transmission:latest   "/init"   About a minute ago   Up About a minute   0.0.0.0:9091->9091/tcp, :::9091->9091/tcp, 0.0.0.0:51413->51413/tcp, :::51413->51413/tcp, 0.0.0.0:51413->51413/udp, :::51413->51413/udp   transmission
admin@cloudspinx:~$
3 – Access Transmission Torrent Web Interface
To be able to access the transmission Torrent Web Interface, we need to allow the ports through the firewall.
##For UFW
sudo ufw allow 9091
sudo ufw allow 51413

##Firewalld
sudo firewall-cmd --add-port={9091/tcp,51413/tcp,51413/udp} --permanent
sudo firewall-cmd --reload
Now access the web interface using the URL http://your_server_ip:9091. Once authenticated, you will see the below dashboard.
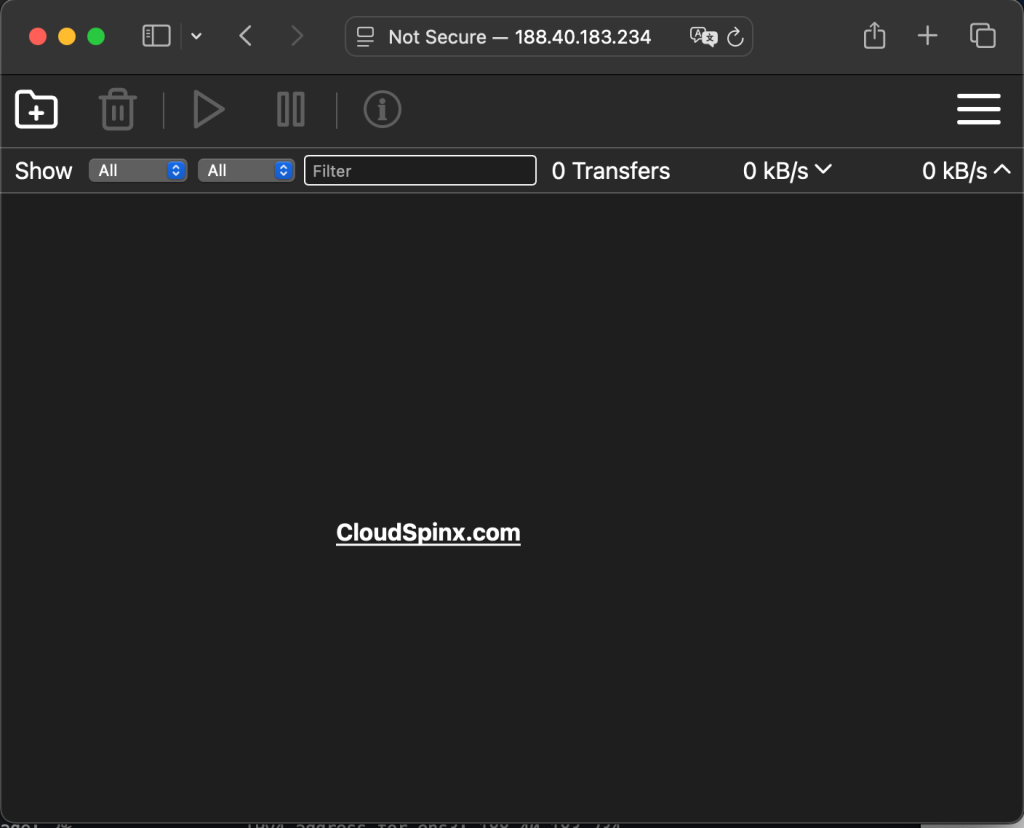
You are now set to download and upload the Torrents. I will demonstrate how to download a Torrent using Transmission Torrent. To add a torrent, click on the folder icon on the far left.
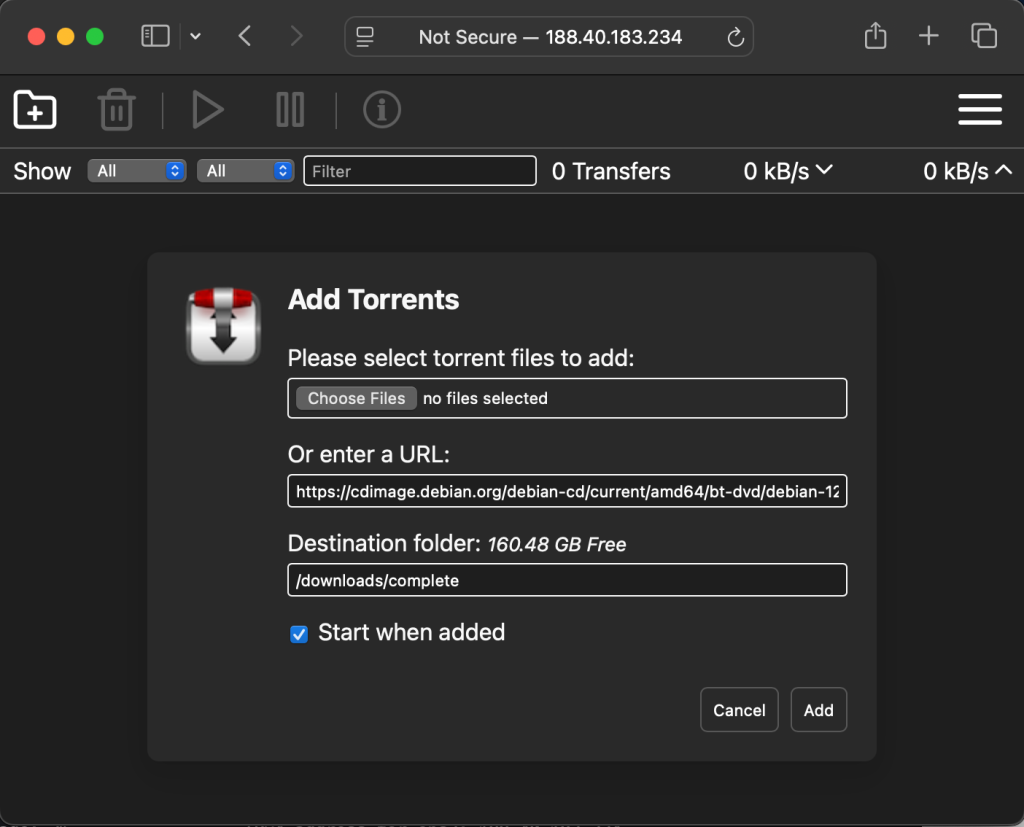
Provide the URL and select the folder to proceed. The download can be paused and resumed if need to.
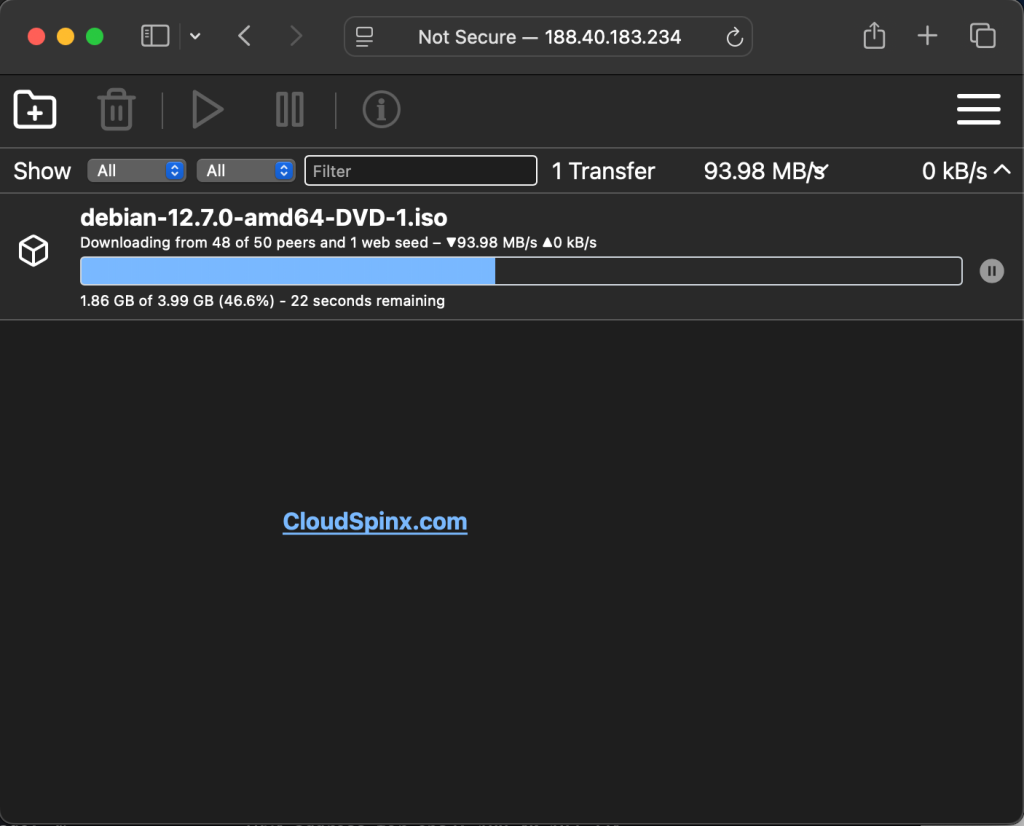
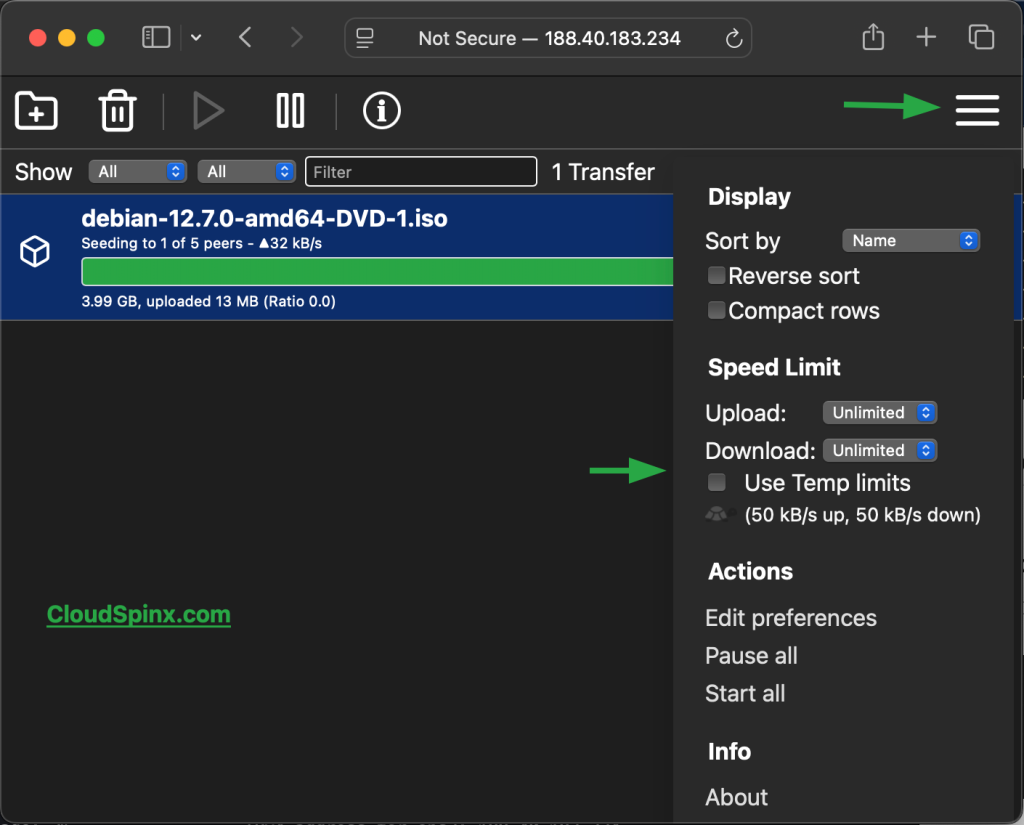
You can also make adjustments using the icons on the lower part of the page. This includes limiting the download/upload speed e.t.c
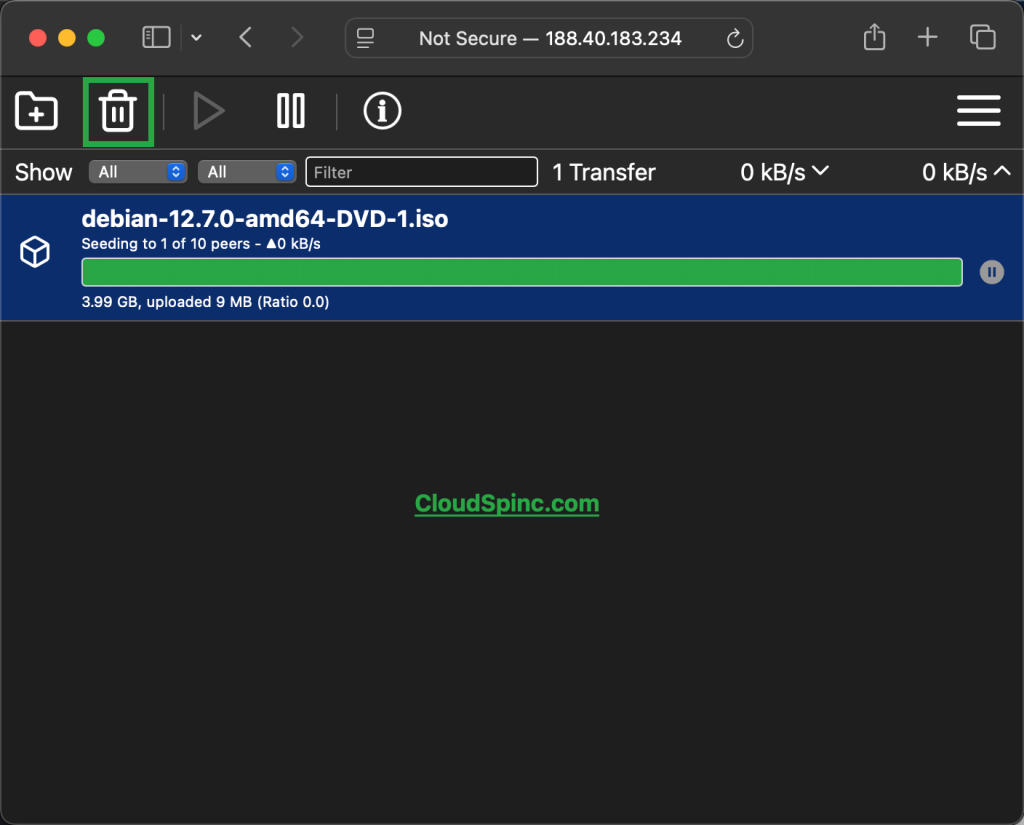
To delete a torrent, use the icon shown below:
Once downloaded successfully, the files will be available in the set folder and can be viewed as shown.
admin@cloudspinx:~$ ls -al /transmission/downloads/complete/
total 3900524
drwxr-xr-x 2 ubuntu ubuntu       4096 Oct 18 23:17 .
drwxrwxr-x 4 ubuntu ubuntu       4096 Oct 18 22:32 ..
-rw-rw-r-- 1 ubuntu ubuntu 3994091520 Oct 18 23:17 debian-12.7.0-amd64-DVD-1.iso
admin@cloudspinx:~$
That marks the end of this guide on how to run the Transmission Torrent Web Client in Docker. This can now be used to download and upload torrents with ease.
Explore More with CloudSpinx
Looking to streamline your tech stack? At CloudSpinx, we deliver robust solutions tailored to your needs:
- Hosting Services: Web Hosting, VPS, and Email Hosting
- Development Services: Custom Web & Mobile Apps, UI/UX Design
- Consultancy Services: Cloud, DevOps, Cybersecurity, and Kubernetes Experts
- Managed Services: End-to-end infrastructure support
- Dedicated Servers: Power and control, fully managed
Learn more about how we can support your journey with CloudSpinx.

