
Visual studio code is a code editor which most developers use in writing, editing, debugging applications. It is a lightweight software and powerful code editor application. Some have even termed it as half IDE. It has sweet features that make it more preferable whenever you are choosing a platform to edit your code. These features include; cross-platform support, intelli-sense capability, supports diverse programming languages, git-support, terminal support, etc. VSCode can be a form of a desktop application or web application. Having it on the web simply means you can access it anytime regardless of location. In this case, you will need a central server to provide remote access.
In this article, we are going to discuss how to run VS Code in browser secured with Let’s Encrypt on Ubuntu/Debian, CentOS, macOS, Arch. Code-server is a visual studio code instance running on a remote server and is accessible through a web browser. Since code-server is an open-source product, simply means the user has the freedom to service at no cost.
Visual Studio Code was released as an open-source but what we normally download from Microsoft is not open source. Microsoft only allows the use of extension on the application from their marketplace This makes it difficult to share extension which is currently unavailable such as Live Share. With code-server, developers have the freedom to share extensions via its marketplace on Github. Extensions can be installed via the extension tab on the left bar or command line with the code-server –install-extension command.
Setup Requirements
- At least 2GB RAM
- Nginx installed and running
- Fully Qualified Domain Name to host code-server.
- User with root access to the server.
Step 1: Download code-server in on Ubuntu/Debian, CentOS, macOS, Arch
We are going to install code-server and also configure systemd file that will automate code-server daemon services. Majorly our guide is basing on Ubuntu/Debian then partial directives on how to go about it on other distros. There different methods of installation but for this guide, I chose to use stand-alone which is universal.
Ensure your packages are upto date:
sudo apt update && sudo apt upgrade -yCreate a directory in home directory where we will download our file to.
sudo mkdir ~/code-serverNavigate to the directory as below.
cd ~/code-serverHead to git-hub and confirm the latest version in the release of code-server. As for this article, the current version was 4.97.2.
#Fetch the latest version form github
VERSION=$(curl -s https://api.github.com/repos/coder/code-server/releases/latest | grep -oP '"tag_name": "v\K[^"]*')

#Confirm that the version has indeed been fetched
echo "$VERSION"

#Download the latest version of code-server
wget "https://github.com/coder/code-server/releases/download/v$VERSION/code-server-$VERSION-linux-amd64.tar.gz"
Unpack the file by running below command.
sudo tar -xzvf code-server-*-linux-amd64.tar.gzCopy all files in the folder to /usr/lib/code-server.
sudo cp -r code-server-*-linux-amd64 /usr/lib/code-serverStep 2: Configure code-server and create Systemd service
Create a symbolic link pointing to executable code-server in /usr/lib/code-server.
sudo ln -s /usr/lib/code-server/bin/code-server /usr/bin/code-serverNext, we have to create a directory where code-server will store user data.
sudo mkdir /var/lib/code-serverAt this point, you can start code-server with code-server command but this is too manual. We, therefore, have to configure a systemd.service file that will manage code-server status automatically. The script will allow us to have daemon run in the background always without any human intervention.
sudo vim /etc/systemd/system/code-server.serviceCopy and paste configurations below in your file. Edit to match your preferences.
[Unit]
Description=code-server

[Service]
Type=simple
Environment=PASSWORD=StrongPassword
Environment=HOME=/home/cloudspinx
ExecStart=/usr/lib/code-server/bin/code-server --bind-addr 0.0.0.0:8080 --user-data-dir /var/lib/code-server --auth password
Restart=always

[Install]
WantedBy=multi-user.target
You have to tell the service to start after Nginx has started. Also, specify the location where the executable file is located arguments where it will start.
As for the above service unit, is only from inside the server. For one to access will need to enter the password declared for authentication. Replace StrongPassword set with your preferred password. When done with editing the file, save and exit.
Start and enable code-server.
sudo systemctl daemon-reload
sudo systemctl start code-server
sudo systemctl enable code-server
Screen output below shows that codes has started successfully.
$ sudo systemctl status code-server
● code-server.service - code-server
Loaded: loaded (/etc/systemd/system/code-server.service; enabled; preset: enabled)
Active: active (running) since Thu 2025-03-06 20:33:16 EAT; 3s ago
Main PID: 17345 (node)
Tasks: 22 (limit: 7025)
Memory: 60.2M (peak: 60.9M)
CPU: 632ms
CGroup: /system.slice/code-server.service
├─17345 /usr/lib/code-server/lib/node /usr/lib/code-server --bind-addr 0.0.0.0:8080 --user-data-dir /var/lib/code-server --auth pass>
└─17364 /usr/lib/code-server/lib/node /usr/lib/code-server/out/node/entry
Mar 06 20:33:16 code-server.africanfine.com systemd[1]: Started code-server.service - code-server.
Mar 06 20:33:16 code-server.africanfine.com code-server[17345]: [2025-03-06T17:33:16.968Z] info code-server 4.97.2 34b8d2ed69811c3315a465f01492e>
Mar 06 20:33:16 code-server.africanfine.com code-server[17345]: [2025-03-06T17:33:16.971Z] info Using user-data-dir /var/lib/code-server
Mar 06 20:33:16 code-server.africanfine.com code-server[17345]: [2025-03-06T17:33:16.983Z] info Using config file /root/.config/code-server/conf>
Mar 06 20:33:16 code-server.africanfine.com code-server[17345]: [2025-03-06T17:33:16.984Z] info HTTP server listening on http://0.0.0.0:8080/
Mar 06 20:33:16 code-server.africanfine.com code-server[17345]: [2025-03-06T17:33:16.984Z] info - Authentication is enabled
Mar 06 20:33:16 code-server.africanfine.com code-server[17345]: [2025-03-06T17:33:16.984Z] info - Using password from $PASSWORD
Mar 06 20:33:16 code-server.africanfine.com code-server[17345]: [2025-03-06T17:33:16.984Z] info - Not serving HTTPS
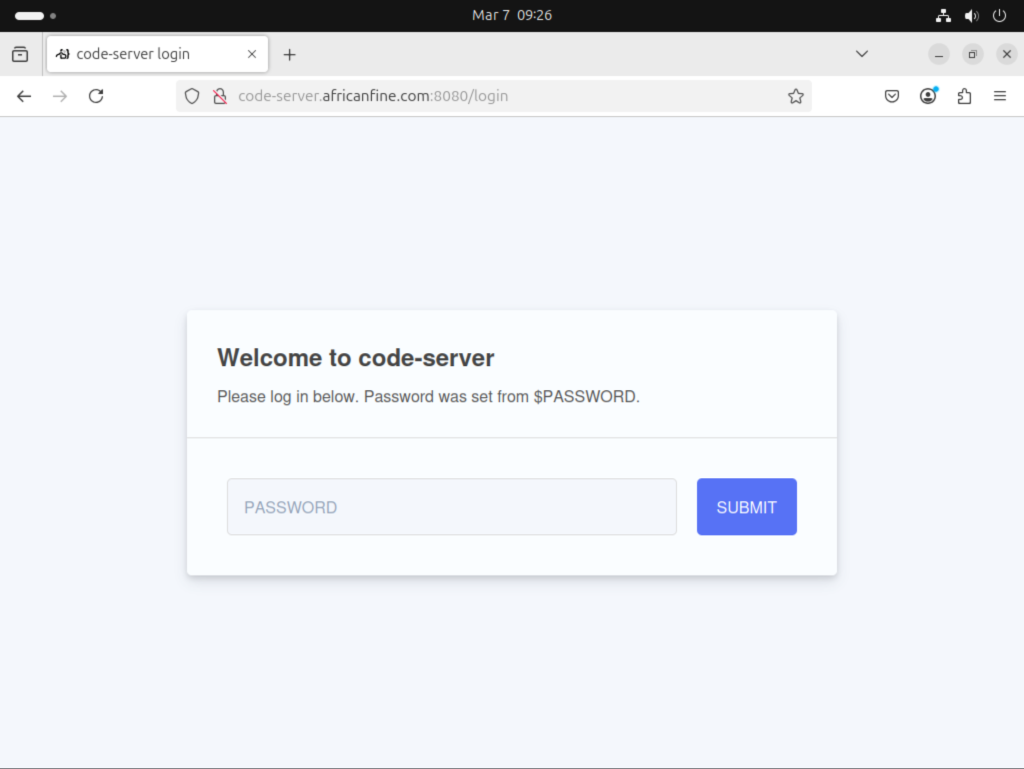
Mar 06 20:33:16 code-server.africanfine.com code-server[17345]: [2025-03-06T17:33:16.984Z] info Session server listening on /var/lib/code-serverAccess Code Server web interface on http://ServerIP:8080
Login with password set in service unit with environment PASSWORD. For us this was StrongPassword.
Step 3: Install and Configure Nginx proxy (Recommended)
Since code-server is only reachable internally and for instance, you have a server in the cloud, we will therefore have to expose it to access remotely. Nginx will serve as a reverse proxy to code-server running on port 8080. You can install Nginx with the below command.
Install Nginx on Ubuntu/Debian Linux:
sudo apt update
sudo apt install nginx
Install Nginx on CentOS / Fedora Linux:
sudo yum install nginxInstall Nginx Web server on macOS:
sudo brew install nginxInstall Nginx Web server on Arch Linux:
sudo pacman -S nginxIn Ubuntu, open/create /etc/nginx/sites-available/code-server.conf:
sudo vim /etc/nginx/sites-available/code-server.confPaste lines below in the file. Remember to replace code.mydomain.com with your actual domain for the server.
server {
    listen 80;
    listen [::]:80;

    server_name code.mydomain.com;

    location / {
      proxy_pass http://localhost:8080/;
      proxy_set_header Upgrade $http_upgrade;
      proxy_set_header Connection upgrade;
      proxy_set_header Accept-Encoding gzip;
    }
}
For Ubuntu / Debian unlink default configuration and link the new code-server site:
sudo unlink /etc/nginx/sites-enabled/default
sudo ln -s /etc/nginx/sites-available/code-server.conf /etc/nginx/sites-enabled/code-server.conf
Restart nginx to allow changes to take effect.
sudo systemctl restart nginxTest whether nginx can reach code-server successfully:
$ curl -I http://127.0.0.1:8080
HTTP/1.1 302 Found
Location: ./login
Vary: Accept, Accept-Encoding
Content-Type: text/plain; charset=utf-8
Content-Length: 29
Date: Fri, 07 Mar 2025 09:51:02 GMT
Connection: keep-alive
Keep-Alive: timeout=5
Check nginx to ensure it’s running with zero errors:
$ sudo systemctl status nginx
● nginx.service - A high performance web server and a reverse proxy server
     Loaded: loaded (/usr/lib/systemd/system/nginx.service; enabled; preset: enabled)
     Active: active (running) since Thu 2025-03-06 20:40:52 EAT; 9s ago
       Docs: man:nginx(8)
    Process: 17988 ExecStartPre=/usr/sbin/nginx -t -q -g daemon on; master_process on; (code=exited, status=0/SUCCESS)
    Process: 17990 ExecStart=/usr/sbin/nginx -g daemon on; master_process on; (code=exited, status=0/SUCCESS)
   Main PID: 17992 (nginx)
      Tasks: 4 (limit: 7025)
     Memory: 3.0M (peak: 3.1M)
        CPU: 26ms
     CGroup: /system.slice/nginx.service
             ├─17992 "nginx: master process /usr/sbin/nginx -g daemon on; master_process on;"
             ├─17993 "nginx: worker process"
             ├─17994 "nginx: worker process"
             └─17995 "nginx: worker process"

Mar 06 20:40:52 code-server.africanfine.com systemd[1]: Starting nginx.service - A high performance web server and a reverse proxy server...
Mar 06 20:40:52 code-server.africanfine.com systemd[1]: Started nginx.service - A high performance web server and a reverse proxy server...
Step 4: Install Let’s Encrypt TLS certificate (Optional)
Now that we have Nginx and code-server running, we are now going to secure our connection to the server with TLS Certificate for Let’s Encrypt. This section is especially for Ubuntu and Debian.
Add repository below to the server to enable you install latest version of Certbot.
# Ubuntu / Debian
sudo apt update
sudo apt install certbot python3-certbot-nginx

# Fedora
sudo dnf install certbot python2-certbot-nginx
#For Python 3: sudo dnf install certbot python3-certbot-nginx

# CentOS / RHEL 8
sudo dnf -y install epel-release
sudo yum -y install certbot python3-certbot-nginx

# CentOS 7
sudo yum -y install epel-release
sudo yum -y install certbot python2-certbot-nginx
Incase you have your firewall running, allow HTTPS traffics through the firewall.
# Ubuntu / Debian
sudo ufw allow https
sudo ufw reload

# CentOS / Fedora
sudo firewall-cmd --add-service={http,https} --permanent
sudo firewall-cmd --reload
Run command below to request for Let’s Encrypt certificate for your domain.
sudo certbot --nginx -d code.mydomain.comEnter email address that will be used to notify you for certificate renewal.
Saving debug log to /var/log/letsencrypt/letsencrypt.log
Plugins selected: Authenticator nginx, Installer nginx
Enter email address (used for urgent renewal and security notices) (Enter 'c' to
cancel): your-email.address

- - - - - - - - - - - - - - - - - - - - - - - - - - - - - - - - - - - - - - - -
Agree terms and conditions to continue.
Please read the Terms of Service at
https://letsencrypt.org/documents/LE-SA-v1.5-February-24-2025.pdf. You must
agree in order to register with the ACME server. Do you agree?
- - - - - - - - - - - - - - - - - - - - - - - - - - - - - - - - - - - - - - - -
(Y)es/(N)o: Y

- - - - - - - - - - - - - - - - - - - - - - - - - - - - - - - - - - - - - - - -
Say no to the screen below or yes if you would like to be receiving notifcations.
Would you be willing to share your email address with the Electronic Frontier
Foundation, a founding partner of the Let's Encrypt project and the non-profit
organization that develops Certbot? We'd like to send you email about our work
encrypting the web, EFF news, campaigns, and ways to support digital freedom.
- - - - - - - - - - - - - - - - - - - - - - - - - - - - - - - - - - - - - - - -
(Y)es/(N)o: N
Obtaining a new certificate
Performing the following challenges:
http-01 challenge for code-server.domain.com
Waiting for verification...
Cleaning up challenges
Deploying Certificate to VirtualHost /etc/nginx/sites-enabled/code-server.conf
At this point, we want to allow redirecting of all traffics to secure tunnel.
Please choose whether or not to redirect HTTP traffic to HTTPS, removing HTTP access.
- - - - - - - - - - - - - - - - - - - - - - - - - - - - - - - - - - - - - - - -
1: No redirect - Make no further changes to the webserver configuration.
2: Redirect - Make all requests redirect to secure HTTPS access. Choose this for
new sites, or if you're confident your site works on HTTPS. You can undo this
change by editing your web server's configuration.
- - - - - - - - - - - - - - - - - - - - - - - - - - - - - - - - - - - - - - - -
Select the appropriate number [1-2] then [enter] (press 'c' to cancel): 2
Redirecting all traffic on port 80 to ssl in /etc/nginx/sites-enabled/code-server.conf

- - - - - - - - - - - - - - - - - - - - - - - - - - - - - - - - - - - - - - - -
Upon successful completion, message below will show up confirming that certificate has been successfully installed and integrated with the script.
IMPORTANT NOTES:
 - Congratulations! Your certificate and chain have been saved at:
   /etc/letsencrypt/live/code-server.domain.com/fullchain.pem
   Your key file has been saved at:
   /etc/letsencrypt/live/code-server.domain.com/privkey.pem
   Your cert will expire on 2026-09-25. To obtain a new or tweaked
   version of this certificate in the future, simply run certbot again
   with the "certonly" option. To non-interactively renew *all* of
   your certificates, run "certbot renew"
 - Your account credentials have been saved in your Certbot
   configuration directory at /etc/letsencrypt. You should make a
   secure backup of this folder now. This configuration directory will
   also contain certificates and private keys obtained by Certbot so
   making regular backups of this folder is ideal.
 - If you like Certbot, please consider supporting our work by:

   Donating to ISRG / Let's Encrypt:   https://letsencrypt.org/donate
   Donating to EFF:                    https://eff.org/donate-le
Step 5: Accessing Code-server Interface.
Up to this point, we have all our environments running and we want to access the code server on a cloud server. Open the browser then enter your server domain to start the application interface. Replace below with your actual server domain.
Access without HTTPS:
http://code.mydomain.comWith HTTPS:
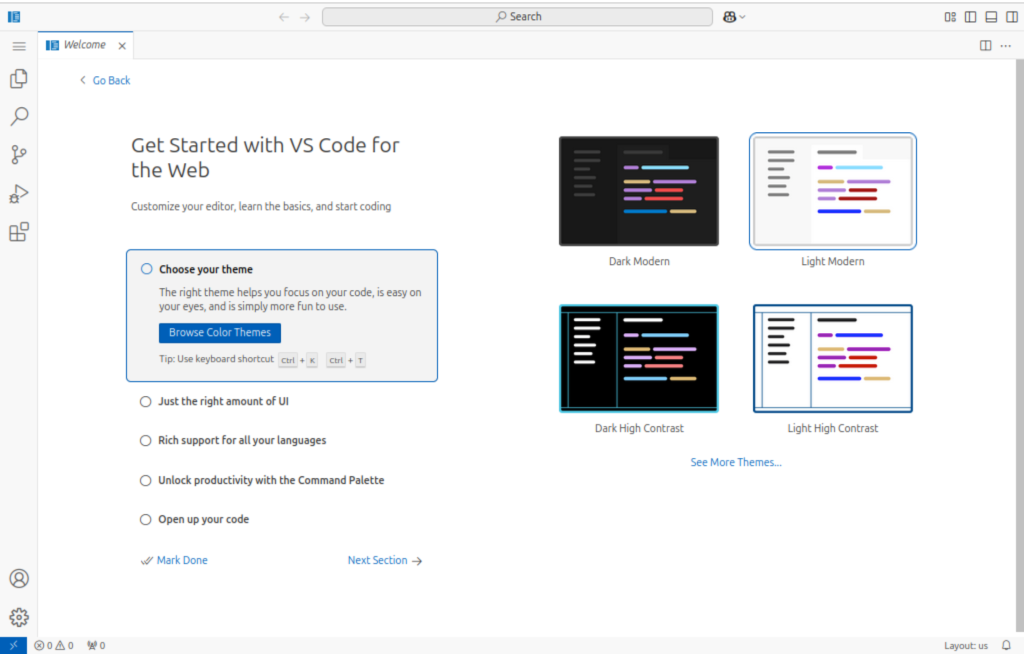
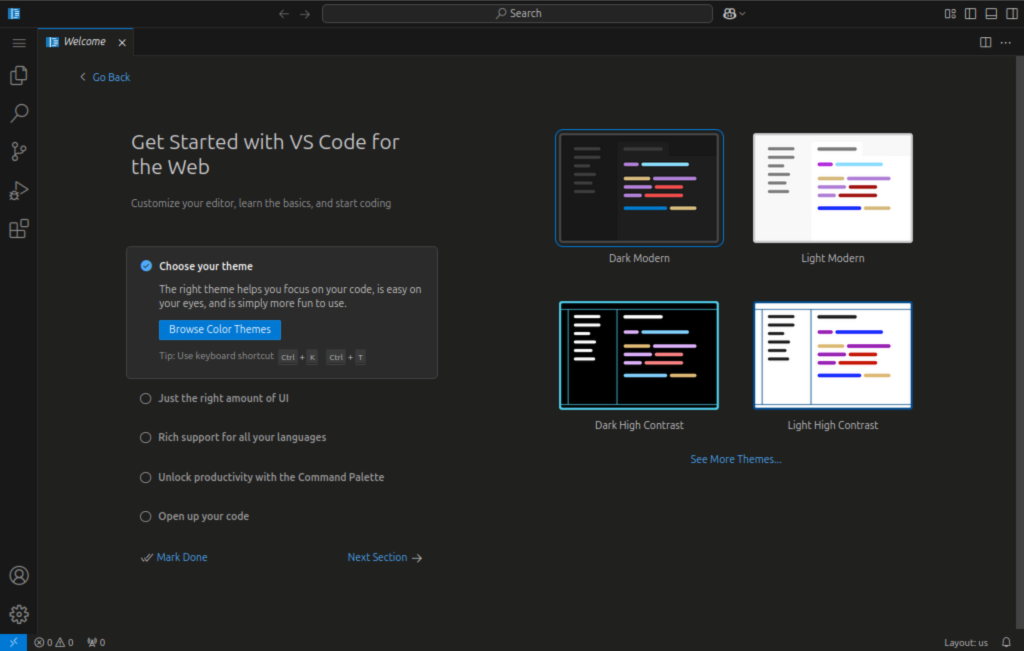
https://code.mydomain.comBelow is a screen showing the interface of the code-server. You will realize it resembles visual studio code. Just like VSCode, code-server also has different themes.
Light theme.
Dark theme.
Conclusion
In this guide, we have learned how to run code-server in web browser on Linux, and a partial guide for Ubuntu, Debian, CentOS, macOS, and Arch Linux. Since code-server is only accessible internally, we have also configured Nginx as a proxy server to code-server. Thank you for your continual support and always feel free to channel your queries. Feel free to share and leave a comment too.
Also read on:


