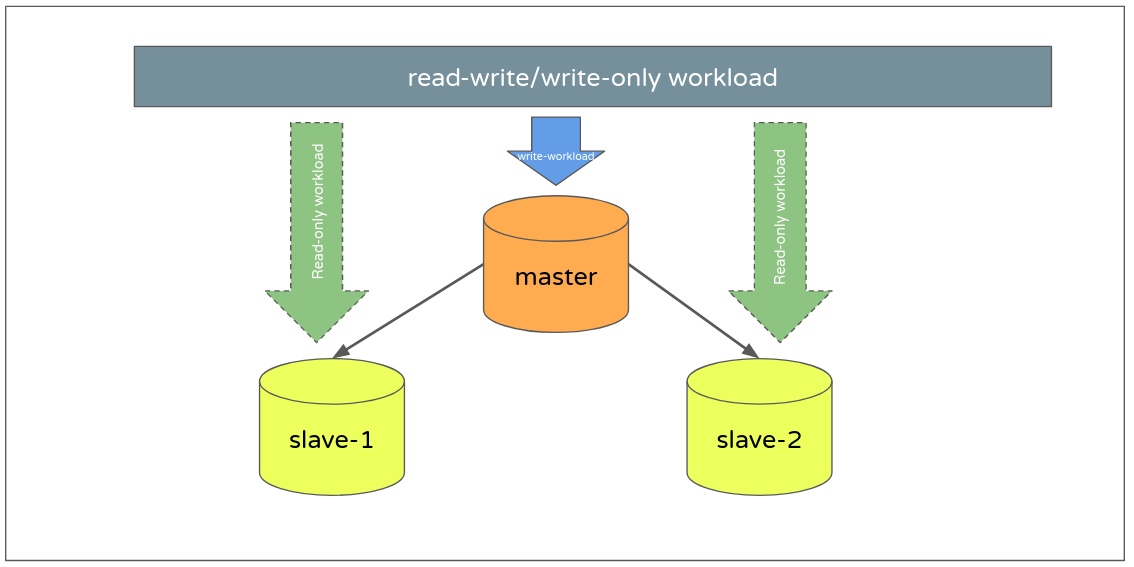
A MariaDB master-slave replication enables you to create a copy of a database (slave) that tracks and copies changes from master database in real-time. It is useful setup in backup strategies, data recovery, and load balancing by distributing database reads to reduce load on the primary server . In this tutorial, we will walk you through the complete steps of configuring MariaDB master-slave replication on Linux servers.
Setup Requirements
Before we get started, make sure you meet the following requirements:
- Two Linux servers that has MariaDB installed – One will be Master, and the other Slave.
- SSH access to the servers with root privileges.
- Both servers should have static IPs configured – Don’t use DHCP.
- Configured Firewall to allow MySQL service port – 3306
In our example, there will be two servers with the following IP addresses, and hostnames:
| Server IP | Server Hostname | Server Role |
| 192.168.1.50 | dbmaster.cloudspinx.com | Master DB Server |
| 192.168.1.51 | dbslave.cloudspinx.com | Slave DB Server |
Install Master DB Server
If DB server doesn’t exist already, install MariaDB database server:
- Debian / Ubuntu:
sudo apt update
sudo apt -y install mariadb-server- Rocky / AlmaLinux:
sudo dnf install @mariadb
sudo systemctl enable --now mariadb
Secure database server installation:
- Newer MariaDB releases:
sudo mariadb-secure-installation- Older MariaDB releases:
sudo mysql_secure_installationChoose your preferred hardening configurations.
Switch to unix_socket authentication [Y/n] n
Change the root password? [Y/n] y
Remove anonymous users? [Y/n] y
Disallow root login remotely? [Y/n] y
Remove test database and access to it? [Y/n] y
Reload privilege tables now? [Y/n] y
Configure MariaDB master server
A replication user is needed, which is responsible for syncing data from the primary(master) database to the replica(slave). Login to MySQL shell:
sudo mysql -u root -pWe are going to create replication user with the following details:
- User: replicausr
- Password: Str0ngPassw0rD
- Connection from address: % or IP
CREATE USER 'replicausr'@'%' IDENTIFIED BY 'Str0ngPassw0rD';
GRANT REPLICATION SLAVE ON *.* TO 'replicator'@'%';
FLUSH PRIVILEGES;
EXIT;
Edit database server configuration and set:
[mysqld]
server-id = 1
log_bin = mariadb-bin
Restart mariadb service after the changes:
sudo systemctl restart mariadbRun the following commands in MariaDB shell and ensure that File and Position values are shown.
MariaDB [(none)]> show master status\G
*************************** 1. row ***************************
            File: mariadb-bin.000001
        Position: 245
    Binlog_Do_DB:
Binlog_Ignore_DB:
1 row in set (0.00 sec)
Allow remote connections on master server
On the primary database server, set listed address to the actual server IP address. Check listening address:
sudo ss -tunelp | grep 3306If you see *:3306, there’s no need to change it – this means it’s listening on all interfaces.
tcp LISTEN 0 50 *:3306 *:* users:(("mysqld",pid=18511,fd=15)) uid:27 ino:59667213 sk:ffff8f9df0b33e00 <->Depending on your distro, locate MariaDB server configuration file and set bind-address inside [mysqld] block.
[mysqld]
#bind-address = 192.168.1.50
If you have Firewalld or UFW, and would like to only allow database remote connections from Slave IP configured as below.
- Firewalld rich-rules:
sudo firewall-cmd --permanent --add-rich-rule='rule family="ipv4" source address="192.168.1.51/32" service name="mysql" accept'
sudo firewall-cmd --reload- UFW:
sudo ufw allow from 192.168.1.51 to any port 3306 proto tcp
sudo ufw reload
Dump and Copy databases from master to slave
Dump all databases from the Master DB:
mysqldump -u root -p --all-databases --single-transaction --master-data=2 --events > dbs_dump.sqlEnter the database root user’s password to perform the dump. Once done, validate the size:
$ du -sh dbs_dump.sql
29G	dbs_dump.sql
Transfer the dump to the slave server:
scp dbs_dump.sql [email protected]:
scp dbs_dump.sql [email protected]:
Configure MariaDB Slave
Confirm the version of MariaDB installed on the primary database server:
$ mariadb -V
mariadb  Ver 15.1 Distrib 10.5.28-MariaDB, for Linux (x86_64) using readline 5.1
Try as much as possible to install the same version on the replica. After package installation, you need to configure Slave server.
Common database server configuration paths:
/etc/mysql/mariadb.conf.d/50-server.cnf/etc/my.cnf.d/server.cnf
Edit the MariaDB configuration file to configure as slave server.
[mysqld]
read_only=1
server-id = 2
report-host=dbslave
log-bin=mariadb-bin
relay-log=mariadb-relay-bin
slow_query_log_file=/var/log/mysql/mariadb-slow.log
expire_logs_days = 3
Create log directory if doesn’t exist, and set correct permissions.
sudo mkdir /var/log/mysql
sudo chown -R mysql:mysql /var/log/mysql
Stop and start the database service after making the changes:
sudo systemctl stop mariadb
sudo systemctl start mariadb
If you have Firewalld or UFW, you can permit connections from Master DB IP:
- Firewalld rich-rules:
sudo firewall-cmd --permanent --add-rich-rule='rule family="ipv4" source address="192.168.1.50/32" service name="mysql" accept'
sudo firewall-cmd --reload- UFW:
sudo ufw allow from 192.168.1.50 to any port 3306 proto tcp
sudo ufw reload
Import the database file exported from the master.
mysql -u root -p < dbs_dump.sqlStart Replication service on the Slave
Test connection to Master DB from Slave:
mysql -h 192.168.1.51 -u replicausr -p
Str0ngPassw0rD
Login to the MariaDB shell:
sudo mysql -u root -pRetrieve the master binary log file and position:
$ head -n 50  dbs_dump.sql|egrep "CHANGE MASTER TO"
-- CHANGE MASTER TO MASTER_LOG_FILE='mariadb-bin.000001', MASTER_LOG_POS=105;
Then set up the replication:
CHANGE MASTER TO
  MASTER_HOST='192.168.1.50',
  MASTER_USER='replicausr',
  MASTER_PASSWORD='Str0ngPassw0rD',
  MASTER_LOG_FILE='mariadb-bin.000001',
  MASTER_LOG_POS=105;
Replace MASTER_LOG_FILE and MASTER_LOG_POS with the values retrieved earlier from the master server.
Once done, start slave:
START SLAVE;Verify the Replication Status
Check the replication status:
SHOW SLAVE STATUS\GCheck for:
Slave_IO_Running: YesSlave_SQL_Running: Yes
Sample output:
MariaDB [(none)]> SHOW SLAVE STATUS\G
*************************** 1. row ***************************
                Slave_IO_State: Waiting for master to send event
                   Master_Host: 192.168.1.50
                   Master_User: replica_user
                   Master_Port: 3306
                 Connect_Retry: 60
               Master_Log_File: mariadb-bin.000002
           Read_Master_Log_Pos: 110574028
                Relay_Log_File: mariadb-relay-bin.000002
                 Relay_Log_Pos: 90380422
         Relay_Master_Log_File: mariadb-bin.000002
              Slave_IO_Running: Yes
             Slave_SQL_Running: Yes
               Replicate_Do_DB:
           Replicate_Ignore_DB:
            Replicate_Do_Table:
        Replicate_Ignore_Table:
       Replicate_Wild_Do_Table:
   Replicate_Wild_Ignore_Table:
                    Last_Errno: 0
                    Last_Error:
                  Skip_Counter: 0
           Exec_Master_Log_Pos: 245
               Relay_Log_Space: 857
               Until_Condition: None
                Until_Log_File:
                 Until_Log_Pos: 0
            Master_SSL_Allowed: No
            Master_SSL_CA_File:
            Master_SSL_CA_Path:
               Master_SSL_Cert:
             Master_SSL_Cipher:
                Master_SSL_Key:
         Seconds_Behind_Master: 0
 Master_SSL_Verify_Server_Cert: No
                 Last_IO_Errno: 0
                 Last_IO_Error:
                Last_SQL_Errno: 0
                Last_SQL_Error:
   Replicate_Ignore_Server_Ids:
              Master_Server_Id: 1
                Master_SSL_Crl:
            Master_SSL_Crlpath:
                    Using_Gtid: No
                   Gtid_IO_Pos:
       Replicate_Do_Domain_Ids:
   Replicate_Ignore_Domain_Ids:
                 Parallel_Mode: optimistic
                     SQL_Delay: 0
           SQL_Remaining_Delay: NULL
       Slave_SQL_Running_State: closing tables
              Slave_DDL_Groups: 15
Slave_Non_Transactional_Groups: 0
    Slave_Transactional_Groups: 71914680
1 row in set (0.000 sec)
The Seconds_Behind_Master: 0 is a key indicator in MySQL or MariaDB replication. It may take a while for it to turn 0.
Use STOP SLAVE; and RESET SLAVE; if you need to reconfigure.


