

Greetings and salutations. In this tutorial, you will learn how to upgrade your AlmaLinux 8 to the newly released AlmaLinux 9. AlmaLinux is a free and open-source Linux distribution created by Cloud Linux for the community and enterprise and is binary compatible with Red Hat Enterprise Linux. It is a replacement for CentOS. It is maintained by The AlmaLinux OS Foundation and is licensed under GPLv2 and others. It supports Intel /AMD (x86-64), ARM64 (AArch64), IBM PowerPC ( ppc64le ), and IBMZ (s390x) platforms with RPM as its Package Manager.
Not long ago, The AlmaLinux OS Foundation released AlmaLinux 9 and it is generally available. AlmaLinux 9 is based on upstream kernel version 5.14. While installation via ISO images is the approach, The AlmaLinux OS Foundation is working and updating Cloud Images ( Azure, Google Cloud, Oracle Cloud Infrastructure, OPenNebula, and AWS AMIs), Docker Images, Raspberry Pi, Live Media or GNOME, GNOME-mini, KDE, XFCE and more, Vagrant Boxes for Libvirt, VirtualBox, VMware, Hyper-V and Parallels and Windows Subsystem for Linux.
AlmaLinux 9 has more enhancements around cloud and container development, security & compliance, improved SELinux performance, and user authentication logs. The default Python version is Python version 3.9, GCC 11 while LLVM, Rust, and Go compilers have been updated to the latest versions respectively. AlmaLinux 9 packages and repositories are signed with the new RPM-GPG-KEY-AlmaLinux-9 GPG key. Updated dynamic programming languages, and web and database servers ( Perl 5.32, PHP 8.0, Git 2.31, Apache HTTP Server 2.4.51, Varnish Cache 6.6, Squid 5.2, MySQL 8.0, and Redis 6.2).
AlmaLinux comes with 3 installation ISO images:-
- AlmaLinux-9.0-x86_64-boot.iso – a single network installation CD image that downloads packages over the Internet.
- AlmaLinux-9.0-x86_64-minimal.iso – a minimal self-containing DVD image for local/offline installation.
- AlmaLinux-9.0-x86_64-dvd.iso – a full installation DVD image that contains almost all AlmaLinux packages.
Read more on AlmaLinux 9 release notes.
How To Upgrade to AlmaLinux 9 from AlmaLinux 8
For AlmaLinux 8 users who would wish to upgrade to AlmaLinux 9, they can do a clean install ( the recommended method) or employ the Elevate tool. Elevate project is an initiative to help migrate between the major versions of RHEL derivatives. The Leapp Utility that supports migration from CentOS derivatives is used to perform the upgrades. Please note that The ELevate project supports only CentOS repositories. The following upgrades are possible with the Leapp Utility:
- CentOS 7 – AlmaLinux 8
- CentOS 7 – EuroLinux 8
- CentOS 7 – Rocky Linux 8
- CentOS 7 – Oracle Linux 8
- CentOS 7 – CentOS Stream 8
With that brief introduction, we can now begin the process of upgrading AlmaLinux 8 to AlmaLinux 9. AlmaLinux 8 to AlmaLinux 9 is now possible as an Inplace upgrade. This was only initially supporting upgrades from CentOS 7 to AlmaLinux 8, EuroLinux 8, CentOS Stream 8, Oracle 8, and Rocky Linux 8. We will look at how to do this in this guide.
Step 1: Confirm the AlmaLinux Version
AlmaLinux is Binary compatible with Red Hat Enterprise Linux. Check the version by this command.
$ cat /etc/*release*
AlmaLinux release 8.10 (Cerulean Leopard)
Derived from Red Hat Enterprise Linux 8.10 (Source)
AlmaLinux release 8.10 (Cerulean Leopard)
NAME="AlmaLinux"
VERSION="8.10 (Cerulean Leopard)"
ID="almalinux"
ID_LIKE="rhel centos fedora"
VERSION_ID="8.10"
PLATFORM_ID="platform:el8"
PRETTY_NAME="AlmaLinux 8.10 (Cerulean Leopard)"
ANSI_COLOR="0;34"
LOGO="fedora-logo-icon"
CPE_NAME="cpe:/o:almalinux:almalinux:8::baseos"
HOME_URL="https://almalinux.org/"
DOCUMENTATION_URL="https://wiki.almalinux.org/"
BUG_REPORT_URL="https://bugs.almalinux.org/"

ALMALINUX_MANTISBT_PROJECT="AlmaLinux-8"
ALMALINUX_MANTISBT_PROJECT_VERSION="8.10"
REDHAT_SUPPORT_PRODUCT="AlmaLinux"
REDHAT_SUPPORT_PRODUCT_VERSION="8.10"
SUPPORT_END=2029-06-01
AlmaLinux release 8.10 (Cerulean Leopard)
AlmaLinux release 8.10 (Cerulean Leopard)
cpe:/o:almalinux:almalinux:8::baseos
## OR
$ cat /etc/redhat-release
AlmaLinux release 8.10 (Cerulean Leopard)s
Alternatively, you can use the neofetch command.
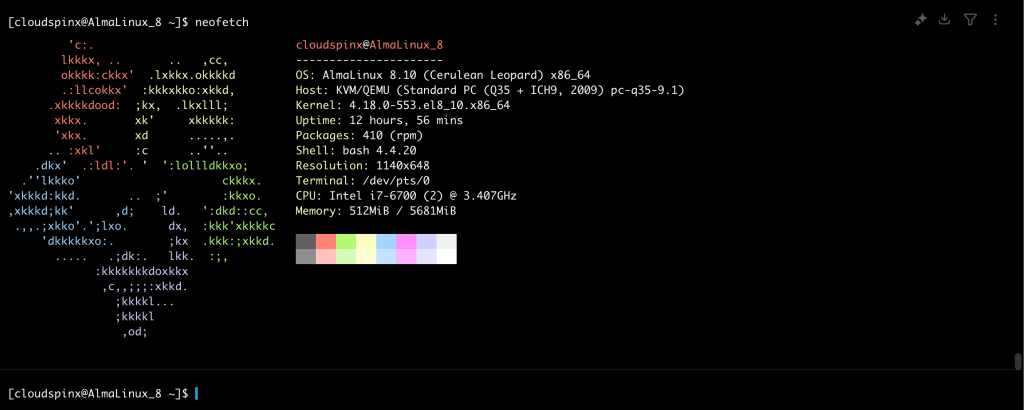
My lab box is running on AlmaLinux 8.10.
Step 2: Update your system
To begin the process of installation, ensure that your system package repository is updated. Issue the command below.
sudo yum update -yOnce the package repository is updated, reboot your system.
sudo reboot Our system is ready for the next couple of steps.
Step 3: Download the elevate-testing repo
The next step is to download the elevate testing repository. Elevate helps in migration in major versions of RHEL-based distributions. To down the repository, run the following command.
sudo curl https://repo.almalinux.org/elevate/testing/elevate-testing.repo -o /etc/yum.repos.d/elevate-testing.repoConfirm if the repository has been added.
$ ls /etc/yum.repos.d/ | grep elevate
elevate-testing.repo
Now import the ELevate GPG key.
sudo rpm --import https://repo.almalinux.org/elevate/RPM-GPG-KEY-ELevateOur system is now ready for the upgrade.
Step 4: Install leapp packages
The Leapp packages are installable through RPM packages prepared for Fedora 26, 27, and 28, CentOS 7, and Red Hat Enterprise Linux 7. Possible options for 7 to 8 migration are leapp-data-almalinux, leapp-data-centos, leapp-data-eurolinux, leapp-data-oraclelinux, and leapp-data-rocky.
Install the Leapp packages for Almalinux 8 to Almalinux 9 with the following code.
$ sudo yum install -y leapp-upgrade leapp-data-almalinux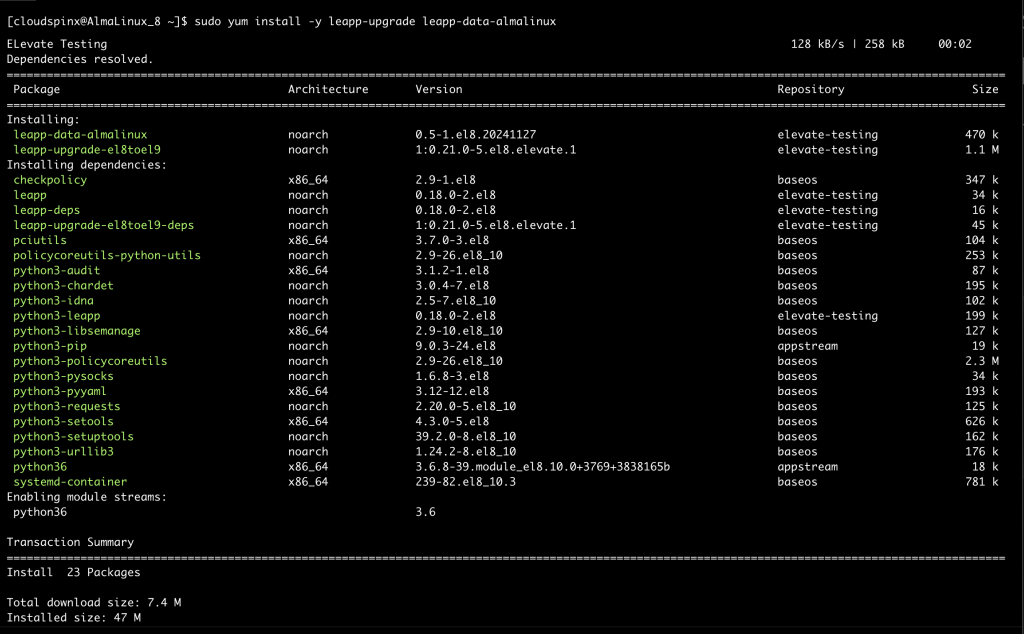
Diable ZoneDrifting in firewalld
Run the following command to disable ZoneDrifting as it is a known inhibitor to the upgrade:
sudo sed -i "s/^AllowZoneDrifting=.*/AllowZoneDrifting=no/" /etc/firewalld/firewalld.conf
sudo leapp answer --section check_vdo.confirm=True
Proceed to the next step.
Step 5: Start a pre-upgrade check
We will now run the pre-upgrade command to check if there are any errors. This command creates /var/log/leapp/leapp-report.txt file. This file logs any errors witnessed during the pre-upgrade process and gives possible solutions on how to solve the errors.
Run the command below.
sudo leapp preupgrade A sample output will look like this.
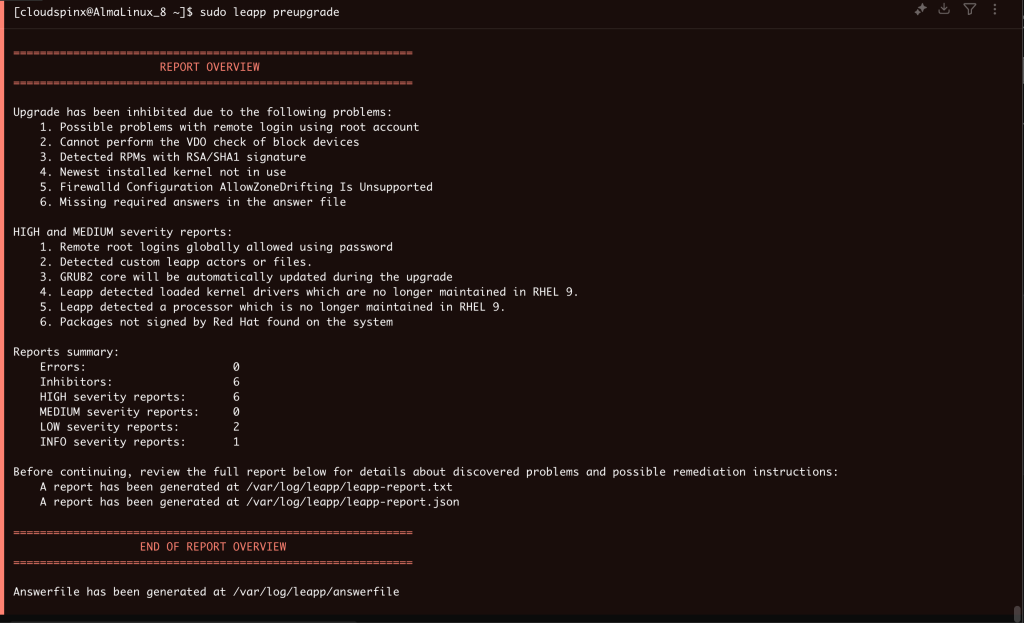
My pre-upgrade reports the errors shown in the attached screenshot. To see the contents of the report and the possible resolution, cat into the /var/log/leapp/leapp-report.txt
I have got inhibitors and here’s how I resolved them. The resolutions are all in the generated text file.
##Disabled SSH root login config
$ sudo vim /etc/ssh/sshd_config
#PermitRootLogin yes

##Installed vdo package
$ sudo yum makecache --refresh
$ sudo yum -y install vdo

##Removed RPMs with RSA/SHA1 signature
$ sudo yum remove tmux
$ sudo yum remove galaxy4-release
sudo leapp preupgrade If you encounter an error resembling the one shown below, then the fix would be to remove the file that is inhiting the upgrade.
 Network configuration for unsupported device types detected
 Summary: RHEL 9 does not support the legacy network-scripts package that was deprecated in RHEL 8 in favor of NetworkManager. Files for device types that are not supported by NetworkManager are present in the system. Files with the problematic configuration:
   - /etc/sysconfig/network-scripts/ifcfg-eth0
If you have any errors, please be sure to check the /var/log/leapp/leapp-report.txt for the suggested solution. My output looks like this.
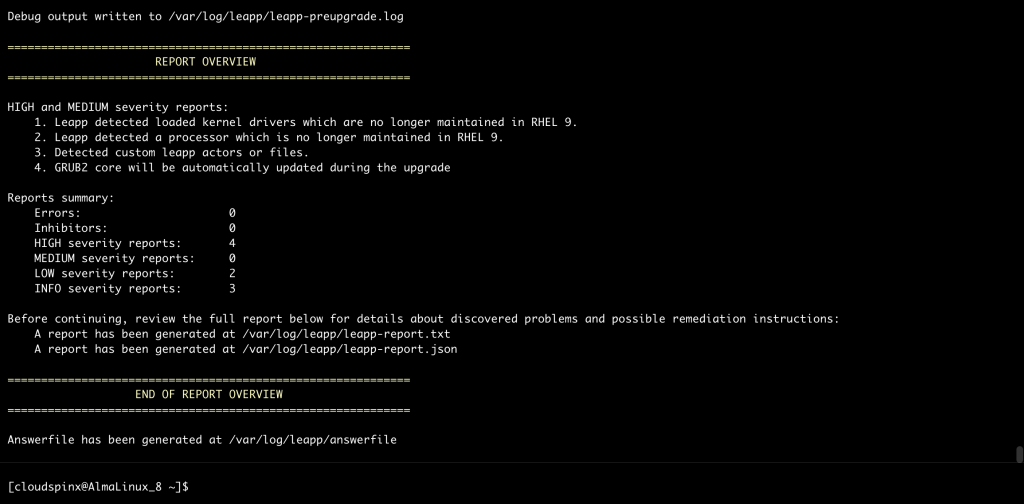
I now have a clean bill of health to start the upgrade process.
Step 6: Upgrade Alma Linux 8 to Alma Linux 9
Once you ascertain that no more errors are generated, it’s time to do the actual upgrade. run the command below.
sudo leapp upgrade The process will begin and numerous files will be copied as the upgrade process begins.
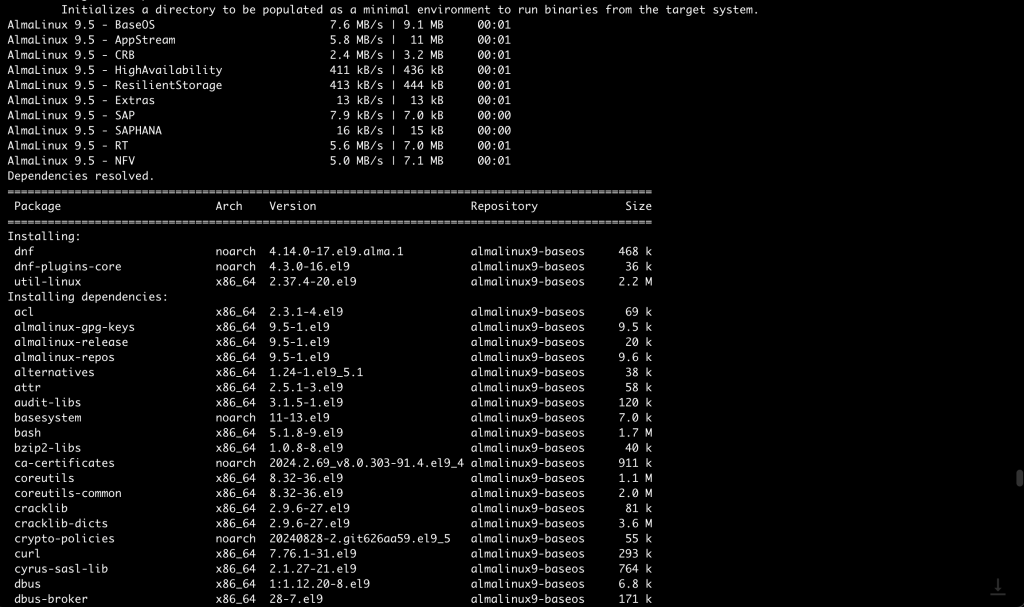
Wait for the upgrade process to complete:
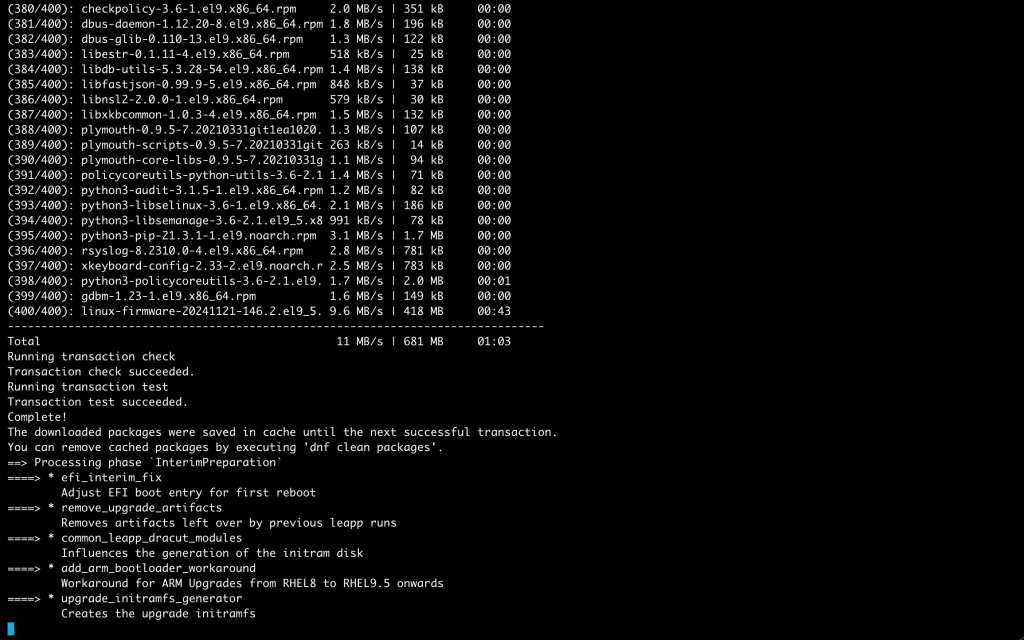
As the process continues, you will be required to reboot your system to add_upgrade_boot_entry. Reboot your system
sudo rebootA new entry in GRUB called ELevate-Upgrade-Initramfs will appear and the system will be automatically booted into it and the process will proceed as shown in the screenshot below.
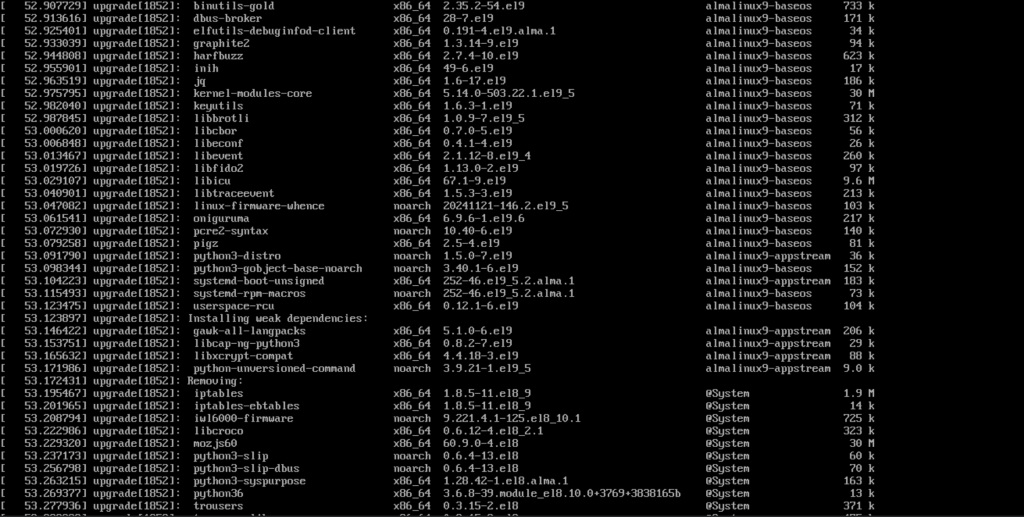
Once the process completes, the following screen should greet you.
Proceed to login when prompted for username and password. This will direct you to the Welcome page as shown in the screenshot below.

Step 7: Post upgrade tweaks.
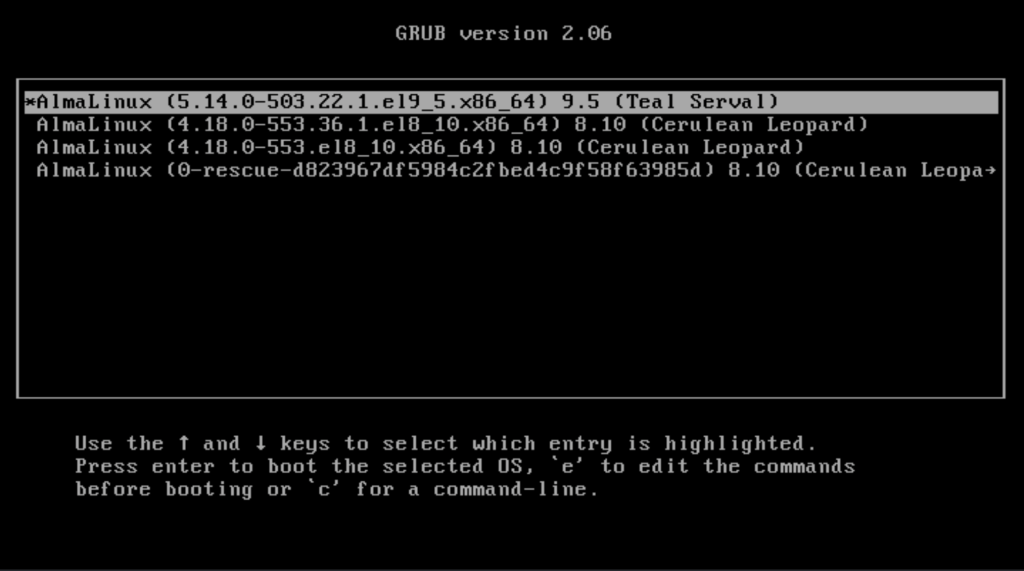
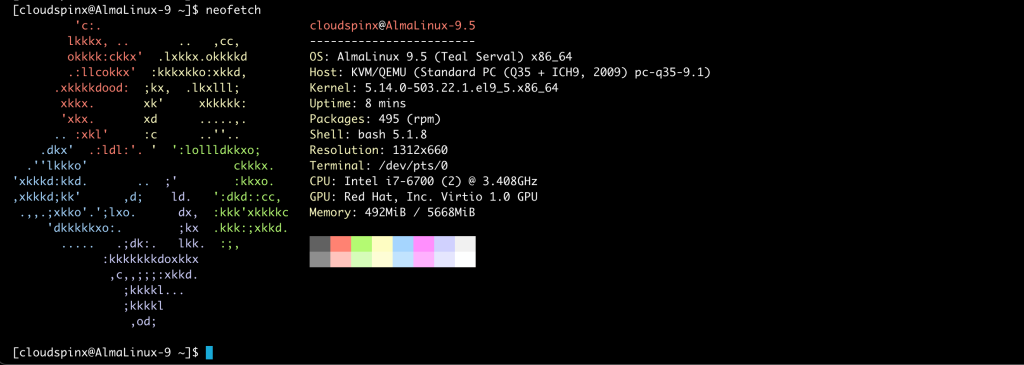
The goal of our upgrade is to move to Alma Linux 9. Begin by confirming that indeed your system is now booted into Alma Linux 9. Run the commands below.
$ cat /etc/redhat-release
AlmaLinux release 9.5 (Teal Serval)

OR
$ cat /etc/os-release
NAME="AlmaLinux"
VERSION="9.5 (Teal Serval)"
ID="almalinux"
ID_LIKE="rhel centos fedora"
VERSION_ID="9.5"
PLATFORM_ID="platform:el9"
PRETTY_NAME="AlmaLinux 9.5 (Teal Serval)"
ANSI_COLOR="0;34"
LOGO="fedora-logo-icon"
CPE_NAME="cpe:/o:almalinux:almalinux:9::baseos"
HOME_URL="https://almalinux.org/"
DOCUMENTATION_URL="https://wiki.almalinux.org/"
BUG_REPORT_URL="https://bugs.almalinux.org/"

ALMALINUX_MANTISBT_PROJECT="AlmaLinux-9"
ALMALINUX_MANTISBT_PROJECT_VERSION="9.5"
REDHAT_SUPPORT_PRODUCT="AlmaLinux"
REDHAT_SUPPORT_PRODUCT_VERSION="9.5"
SUPPORT_END=2032-06-01
The output confirms that I have successfully upgraded to AlmaLinux 9.5 (Teal Serval). Great right 🙂
To see the packages left from the previous OS version, run the command below.
$ rpm -qa | grep el8
compat-exiv2-026-0.26-7.el8.x86_64
python36-3.6.8-38.module_el8.5.0+2569+5c5719bc.x86_64
catimg-2.7.0-3.el8.x86_64
caca-utils-0.99-0.59.beta20.el8.x86_64
libertas-usb8388-firmware-20220726-110.git150864a4.el8.noarch
netcf-libs-0.2.8-12.module_el8.6.0+2880+7d9e3703.x86_64
kernel-modules-4.18.0-372.16.1.el8_6.x86_64
leapp-0.15.0-2.el8.noarch
iwl6000-firmware-9.221.4.1-110.el8.1.noarch
kernel-core-4.18.0-425.3.1.el8.x86_64
imlib2-1.4.9-8.el8.x86_64
leapp-data-almalinux-0.2-2.el8.noarch
libcaca-0.99-0.59.beta20.el8.x86_64
kernel-core-4.18.0-372.16.1.el8_6.x86_64
kernel-4.18.0-372.16.1.el8_6.x86_64
libraqm-0.7.0-4.el8.x86_64
python3-leapp-0.15.0-2.el8.noarch
neofetch-7.1.0-6.el8.noarch
ilmbase-2.2.0-13.el8.x86_64
kernel-4.18.0-425.3.1.el8.x86_64
leapp-upgrade-el8toel9-0.16.0-6.el8_6.elevate.4.noarch
kernel-modules-4.18.0-425.3.1.el8.x86_64
And to see the upgrade logs:
$ sudo cat /var/log/leapp/leapp-upgrade.log >> upgradelog.txtThe command above will output the upgrade logs in a file called upgradelog.txt or whatever name you give your file. You can then analyze the log file.
Change the hostname and any other changes you need to make.
$ sudo hostnamectl set-hostname AlmaLinux-9.5
$ sudo reboot
After the changes, run the neofetch command.
Wrapping up
Our guide has demonstrated how to do an in-place upgrade from AlmaLinux 8 to AlmaLinux 9. It is important to remember that you need to carry out a backup of your system prior to the upgrade. That said, the process should run smoothly with no major challenges. If you encounter challenges in the pre-upgrade phase, please visit wiki.almalinux.org and check on the Elevate Frequent Issues to see how to deal with your error.
Explore our server migration services by visiting cloudspinx.com. I would like to hear from you in the comments section below. If the guide helps you, please consider buying us a coffee.
For more:


1 thought on “How To Upgrade to AlmaLinux 9 from AlmaLinux 8”
Pingback: How To: Upgrade from AlmaLinux 8 to 9 – Starburst Services Knowledge Base