
phpIPAM is a free PHP-based web IP Address management tool whose goal is to provide modern, lightweight, and useful IP address management and administration. It has a MySQL database backend using ajax, jQuery libraries, and soHow To Install and Use aaPanel on Debian 12,11,10me HTML5/CSS3 features.
phpIPAM has the following features:
- Visual subnet display
- Automatic discovery of new subnets
- PowerDNS integration
- IP database search
- Translations
- It has NAT support
- Offers VLAN management
- Automatic status checks of hosts
- E-mail notifications
- Multiple level of nested subnets
- Per-group section/subnet permissions
- REST API
- Domain authentication (AD, LDAP, Radius)
- Device/device types management
- ICMP status updates, automatic display of available subnets by scanning and IP checks
- IPv4/IPv6 IP address management
- XLS / CVS subnets import
In this guide, we will systematically walk through how to install and configure phpIPAM on Debian 11 / Debian 10.
Let’s dive in!
Install and Configure phpIPAM on Debian 12 |Debian 11
There are a couple of dependencies required by phpIPAM:
- A database – MariaDB/MySQL
- A web server – Apache / Nginx
- PHP / PHP-FPM
- PHP extensions such as pdo, pdo_mysql, openssl, ldap, gmp e.t.c
In this guide, we will use Apache as our preferred webserver to install phpIPAM on Debian 12 / Debian 11.
Step 1 – Install Apache, PHP and PHP modules
We need to ensure that all the required software is installed for phpIPAM to run on our system. Install Apache, PHP and its modules as below.
sudo apt update -y
sudo apt install -y vim apache2 php php-cli libapache2-mod-php php-curl php-mysql php-curl php-gd php-intl php-pear php-imap php-apcu php-pspell php-tidy php-xmlrpc php-mbstring php-gmp php-json php-xml php-ldap php-common php-snmp php-fpm
With PHP-FPM installed, check the status of the service.
$ systemctl status php*-fpm.service
● php8.2-fpm.service - The PHP 8.2 FastCGI Process Manager
     Loaded: loaded (/lib/systemd/system/php8.2-fpm.service; enabled; preset: enabled)
     Active: active (running) since Fri 2025-02-07 00:36:58 EAT; 4min 34s ago
       Docs: man:php-fpm8.2(8)
    Process: 19822 ExecStartPost=/usr/lib/php/php-fpm-socket-helper install /run/php/php-fpm.sock /etc/php/8.2/fpm/pool.d/www.conf 82 (code=exited, >
   Main PID: 19819 (php-fpm8.2)
     Status: "Processes active: 0, idle: 2, Requests: 0, slow: 0, Traffic: 0.00req/sec"
      Tasks: 3 (limit: 7034)
     Memory: 14.3M
        CPU: 119ms
     CGroup: /system.slice/php8.2-fpm.service
             ├─19819 "php-fpm: master process (/etc/php/8.2/fpm/php-fpm.conf)"
             ├─19820 "php-fpm: pool www"
             └─19821 "php-fpm: pool www"
Edit the PHP-FPM file as below:
sudo vim /etc/php/*/fpm/php.iniIn the file, edit your timezone as below.
[Date]
date.timezone = Africa/Nairobi
Restart PHP-FPM for the changes to take effect.
sudo systemctl restart php*-fpm.serviceStep 2 – Install and Configure MariaDB Database Server
phpIPAM needs a database backend, in this guide, we will use MariaDB as our database management system.
Install MariaDB using the command:
sudo apt install -y mariadb-server mariadb-clientStart and enable MariaDB.
sudo systemctl enable --now mariadbThen harden the MariaDB instance.
sudo mysql_secure_installationProceed to set a password for the root user as below.
Enter current password for root (enter for none): Press Enter
....
Switch to unix_socket authentication [Y/n] y
.......
Change the root password? [Y/n] y
New password: Enter Password
Re-enter new password: Re-Enter Password
......
Remove anonymous users? [Y/n] y
...
Disallow root login remotely? [Y/n] y
...
...
Remove test database and access to it? [Y/n] y
....
Reload privilege tables now? [Y/n] y
.....
Thanks for using MariaDB!
Now login to the MariaDB instance using the created root password above.
mysql -u root -pNow create a database for phpIPAM as below.
CREATE DATABASE phpipam;
GRANT ALL ON phpipam.* TO phpipam@localhost IDENTIFIED BY 'Passw0rd';
FLUSH PRIVILEGES;
QUIT;
You can replace Passw0rd with your preferred password for the phpIPAM database user created.
Step 3: Install phpIPAM on Debian 12 | Debian 11
Now we have come to the crux of this guide, having met all the required conditions, we are set to install phpIPAM on Debian 12 | Debian 11. First, download phpIPAM using the git command below.
sudo apt install git
sudo git clone --recursive https://github.com/phpipam/phpipam.git /var/www/html/phpipam
Navigate to the phpIPAM directory.
cd /var/www/html/phpipamCopy config.dist.php to config.php as below.
sudo cp config.dist.php config.phpNow edit the created config.php file.
sudo vim config.phpEdit the file as below adding the created database for phpIPAM.
/ **
* database connection details
******************************/
$db['host'] = 'localhost';
$db['user'] = 'phpipam';
$db['pass'] = 'Passw0rd';
$db['name'] = 'phpipam';
$db['port'] = 3306;
Step 4 – Configure Apache for phpIPAM on Debian 12 | Debian 11
For Apache to serve the phpIPAM web page, we are required to create the virtual host file for phpIPAM on our system. First, disable the default apache configuration file.
cd /etc/apache2/sites-enabled/
sudo mv 000-default.conf 000-default.conf.bak
Now create the virtual host for phpIPAM.
sudo vim /etc/apache2/sites-enabled/phpipam.confIn the file, add the below lines.
<VirtualHost *:80>
    ServerAdmin webmaster@techviewleo.com
    DocumentRoot "/var/www/html/phpipam"
    ServerName ipam.techviewleo.com
    ServerAlias www.ipam.techviewleo.com
    <Directory "/var/www/html/phpipam">
        Options Indexes FollowSymLinks
        AllowOverride All
        Require all granted
    </Directory>
    ErrorLog "/var/log/apache2/phpipam-error_log"
    CustomLog "/var/log/apache2/phpipam-access_log" combined
</VirtualHost>
Replace phpipam.techviewleo.com with your FQDN.
Next, change the ownership of the document root to Apache group as below.
sudo chown -R www-data:www-data /var/www/html/Check the syntax of the created file.
$ sudo apachectl -t
Syntax OK
Enable the rewrite module for Apache.
sudo a2enmod rewriteRestart Apache for the changes to apply.
sudo systemctl restart apache2Step 5: Configure phpIPAM using the Web UI
Now everything is set and we can now access the phpIPAM using the URL http://IP-Address or http://domain.com. You will see this page.
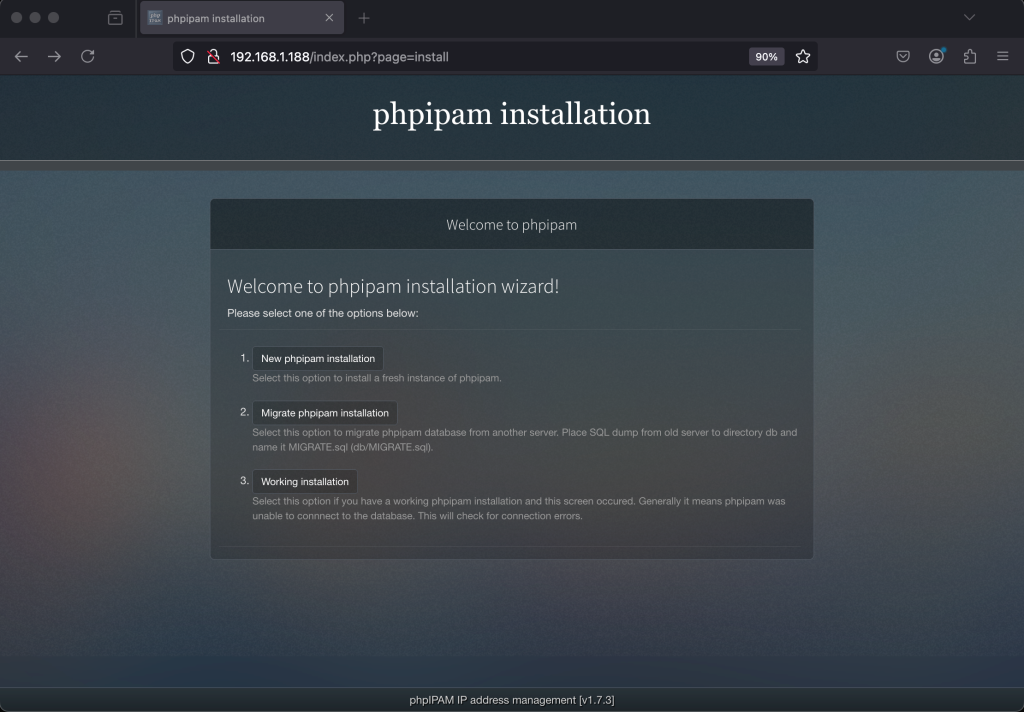
Select “New phpipam installation“ and proceed to database configuration as below.
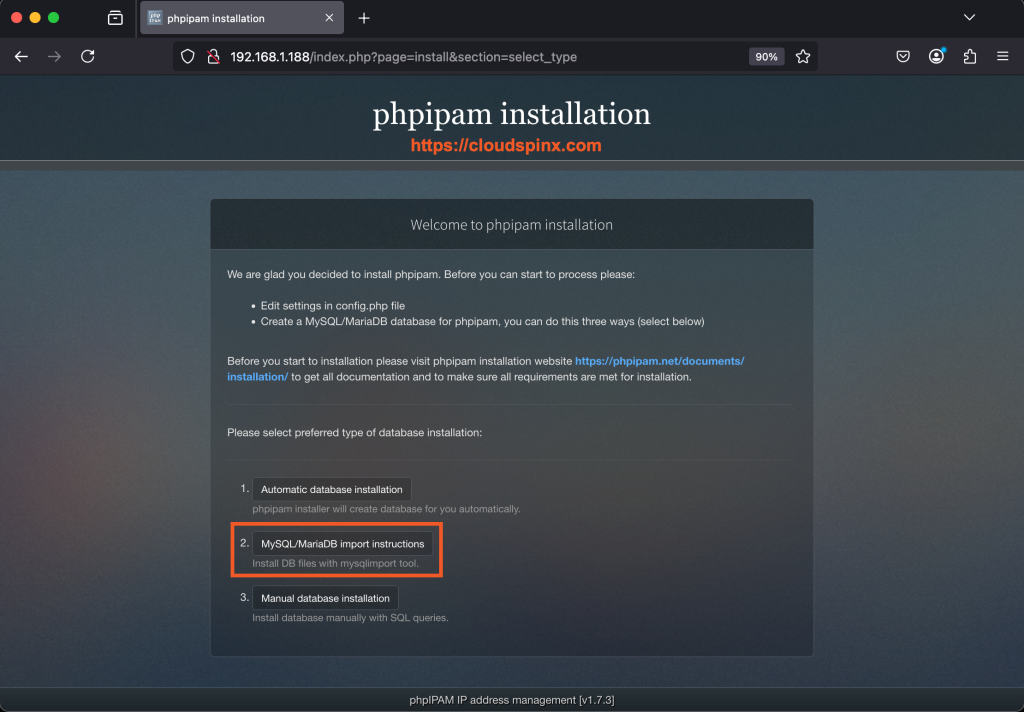
On the above page, select MySQL import instructions. You will see instructions on how to create a database for phpIPAM, since we already did this, proceed as below by running the command on your terminal to import Schemas.
$ sudo mysql -u root -p phpipam < /var/www/html/phpipam/db/SCHEMA.sql
Enter password: Enter your set MariaDB root password
Once done, proceed to login.
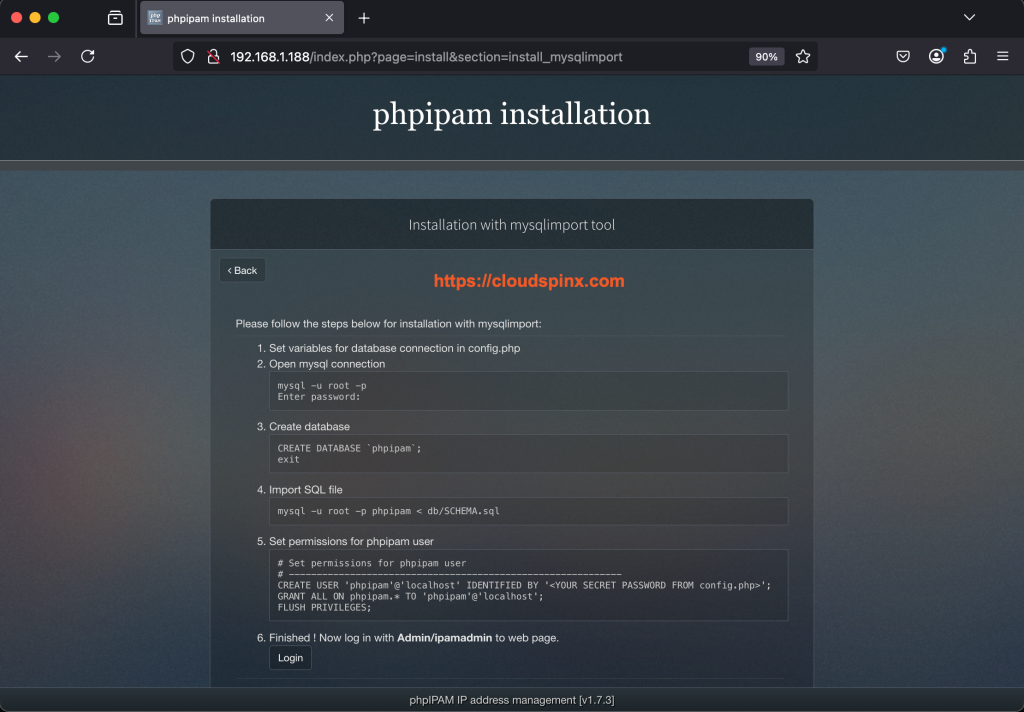
Enter the default credentials Username: admin and Password: ipamadmin
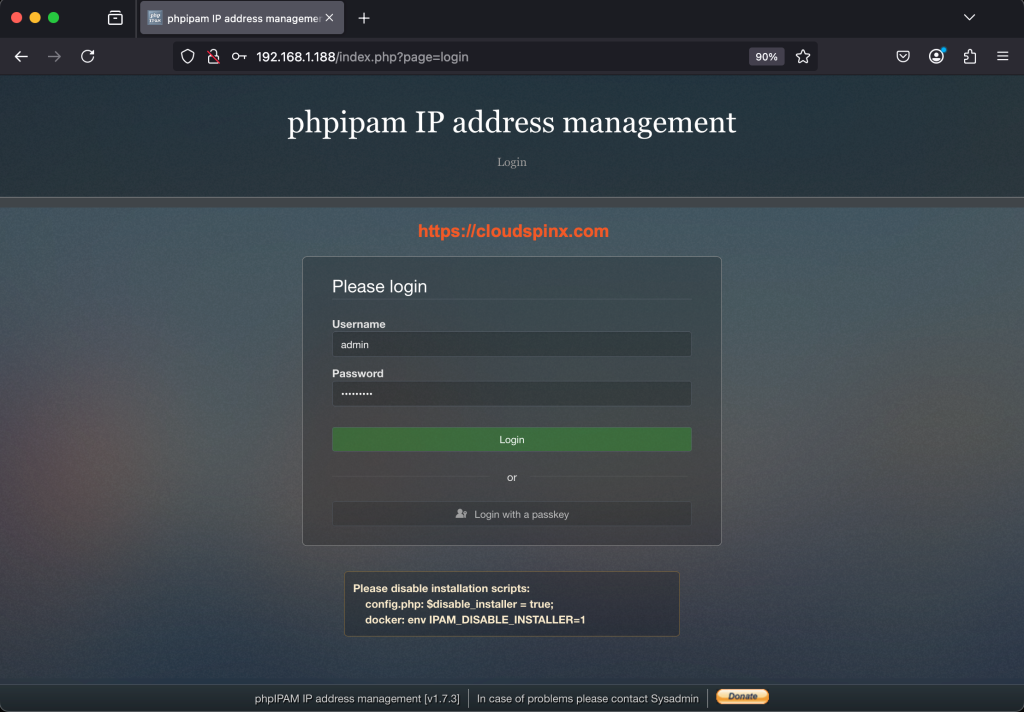
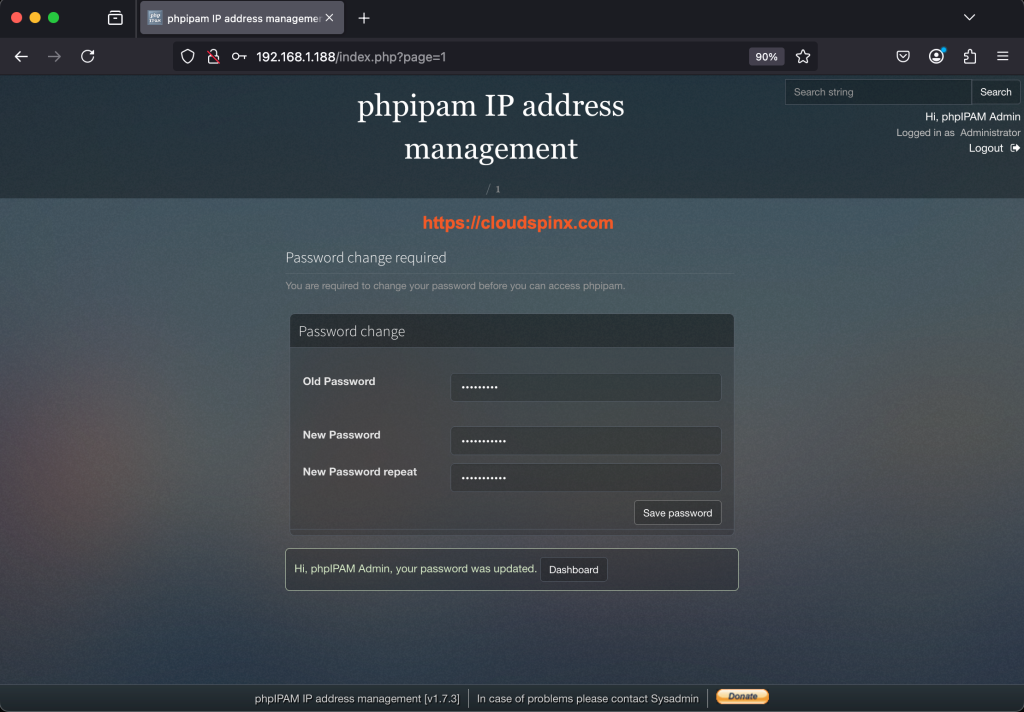
You will be prompted to change the admin password on login as below.
Once complete, you will proceed to this phpIPAM dashboard:
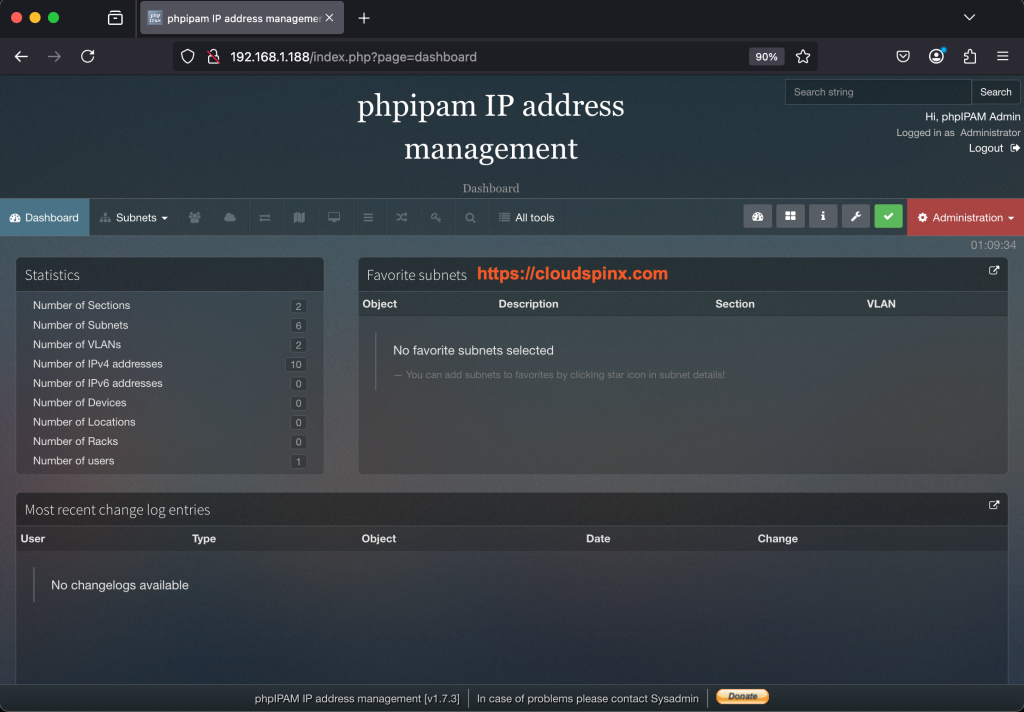
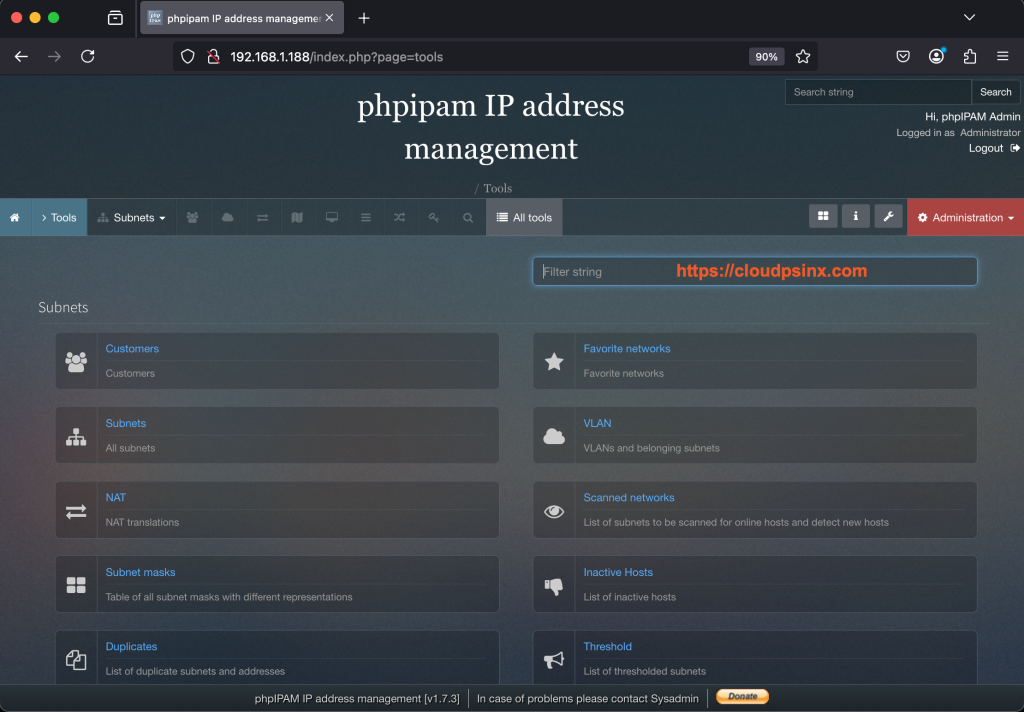
While here, you are now set to manage you IP addresses, add subnets and use the discovery feature to pull available subnets. You can see all the available tools and devices in phpIPAM as below.
That is it! We have successfully chewed over how to install and configure phpIPAM on Debian 12 / Debian 11. I hope you gained something from this guide.
See more related guides:


