

Today we will plunge into how to install and configure Pritunl VPN on Ubuntu 24.04. VPN an acronym for Virtual Private Network is commonly used to mask/protect users from untrusted networks. It encrypts all the traffic, secures a connection to a network, and bypasses all geographical restrictions. By doing so, one is able to surf over public networks while keeping their data private.
🔑 Unlock the complete Ubuntu Desktop learning journey by purchasing our best selling ebook: The Ultimate Ubuntu Desktop Handbook.
There are several VPN servers in the market today. Pritunl VPN is one of the best open-source alternatives to the available commercial products such as Pulse Secure and Aviatrix. Aside from a simple and easy-to-use graphical interface. It offers a lot more amazing features such as:
- Free to Use with no registration or credit card required.
- It is simple to install and configure
- It supports multiple Protocols as it provides clients the option to connect with OpenVPN or Wireguard
- It has a REST API that makes it easy to integrate and configure Pritunl with other services
- Offers improved security with all the traffic between clients and the server encrypted. There is also an optional two-step authentication with the Google authenticator.
- Supports multi-cloud site-to-site links with VPC peering. VPC peering is available for AWS, Google Cloud, Azure, and Oracle Cloud.
- Pritunl is built on MongoDB, a reliable and scalable database that can be quickly deployed
Pritunl VPN Architecture
The Pritunl VPN is built to provide a highly distributed and scalable infrastructure in the cloud with no expensive hardware required. Pritunl works with the client-server architecture where the server has all the required VPN configurations and the client configured to connect to it using client profiles.
Pritunl VPN can be run as a single server or multiple servers for high availability and redundant systems for automatic failover. All the servers in this deployment are equal with no master and can also run independently whenever other instances fail.
The image below represents a simple Pritunl Architecture:

The below steps can be used to install and configure Pritunl VPN on Ubuntu 24.04.
1. Install Depenencies and Update System
First, you need to update the system and all the available packages to their latest versions.
sudo apt update && sudo apt upgrade -yAlso, install the required tools.
sudo apt install wget vim curl gnupg2 software-properties-common apt-transport-https ca-certificates lsb-release2. Install Pritunl VPN Server
This guide provides two methods on how to install the Pritunl VPN Server on Ubuntu 24.04. They include:
- Using Docker
- Using APT
Option 1 – Install Pritunl VPN Server Using APT
These option entails several steps as shown below:
A. Add Pritunl and MongoDB Repositories and GPG keys
Add Pritunl Repository
Now add the Pritunl repository on and import Ubuntu 24.04:
sudo tee /etc/apt/sources.list.d/pritunl.list << EOF
deb [ signed-by=/usr/share/keyrings/pritunl.gpg ] https://repo.pritunl.com/stable/apt noble main
EOF
Import Pritunl GPG key
Add GPG keys for the repository:
sudo apt --assume-yes install gnupg
curl -fsSL https://raw.githubusercontent.com/pritunl/pgp/master/pritunl_repo_pub.asc | sudo gpg -o /usr/share/keyrings/pritunl.gpg --dearmor --yes
sudo apt update
Add MongoDB Repository and Import Public Key
To import the MongoDB public GPG key, run the following command:
curl -fsSL https://www.mongodb.org/static/pgp/server-8.0.asc | \
   sudo gpg -o /usr/share/keyrings/mongodb-server-8.0.gpg \
   --dearmor
Now add the repository:
echo "deb [ arch=amd64,arm64 signed-by=/usr/share/keyrings/mongodb-server-8.0.gpg ] https://repo.mongodb.org/apt/ubuntu noble/mongodb-org/8.0 multiverse" | sudo tee /etc/apt/sources.list.d/mongodb-org-8.0.listThen update the local package database:
sudo apt-get updateB. Install Pritunl and MongoDB
Using the added repositories above, we can easily install Pritunl and MongoDB on Ubuntu 24.04. The command to achieve this is as shown below:
sudo apt --assume-yes install pritunl mongodb-org
sudo ufw disable
Once the installation is complete, start and enable the Pritunl and MongoDB services:
sudo systemctl restart pritunl mongod
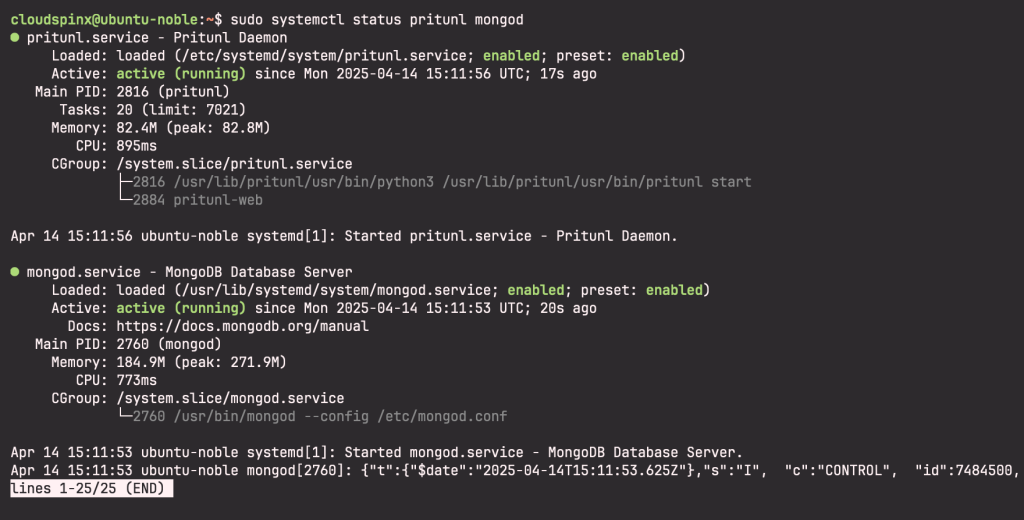
sudo systemctl enable pritunl mongodConfirm service status:
Option 2 – Install Pritunl VPN Server using Docker
Ensure that Docker is installed. The quickest way to get Docker installed on Ubuntu 24.04, is using the curl command below:
curl -fsSL get.docker.com -o get-docker.sh
sudo sh get-docker.sh
Start and enable docker.
sudo systemctl enable --now dockerAdd your system user to the docker group.
sudo usermod -aG docker $USER
newgrp docker
Proceed and install Docker Compose:
curl -s https://api.github.com/repos/docker/compose/releases/latest | grep browser_download_url  | grep docker-compose-linux-x86_64 | cut -d '"' -f 4 | wget -qi -
chmod +x docker-compose-linux-x86_64
sudo mv docker-compose-linux-x86_64 /usr/local/bin/docker-compose
Verify the installation.
$ docker-compose version
Docker Compose version vx.y.z
Create a docker-compose file for the installation.
vim docker-compose.ymlAdd the below lines to the file.
version: '3'

services:
  mongo:
    image: mongo:latest
    container_name: pritunldb
    hostname: pritunldb
    volumes:
      - /data/pritunl:/data/db
    ports:
      - 27017:27017

  pritunl:
    image: goofball222/pritunl:latest
    container_name: pritunl
    hostname: pritunl
    depends_on:
        - mongo
    privileged: true
    sysctls:
      - net.ipv6.conf.all.disable_ipv6=0
    links:
      - mongo
    volumes:
      - /etc/localtime:/etc/localtime:ro
    ports:
      - 80:80
      - 443:443
      - 1194:1194
      - 1194:1194/udp
      - 1195:1195/udp
    environment:
      - TZ=EAT
Create a persistent volume.
sudo mkdir -p /data/pritunlStart the containers.
docker-compose up -dCheck if they are running:
$ docker ps
CONTAINER ID   IMAGE                        COMMAND                  CREATED          STATUS          PORTS                                                                                                                                                                                          NAMES
fdfdc8592095   goofball222/pritunl:latest   "docker-entrypoint.s…"   22 seconds ago   Up 19 seconds   0.0.0.0:80->80/tcp, :::80->80/tcp, 0.0.0.0:443->443/tcp, :::443->443/tcp, 0.0.0.0:1194->1194/tcp, :::1194->1194/tcp, 0.0.0.0:1194-1195->1194-1195/udp, :::1194-1195->1194-1195/udp, 9700/tcp   pritunl
69b7704d0d47   mongo:latest                 "docker-entrypoint.s…"   25 seconds ago   Up 21 seconds   0.0.0.0:27017->27017/tcp, :::27017->27017/tcp                                                                                                                                                  pritunldb
Manage the Pritunl and MongoDB Containers
For the above containers to start automatically on system boot, we need to create a systemd service file.
sudo vim /etc/systemd/system/pritunl_container.serviceAdd the below lines to the file:
[Unit]
Description=Pritunl and MongoDB
Requires=docker.service
After=docker.service

[Service]
Type=oneshot
ExecStart=/usr/local/bin/docker-compose -f /home/cloudspinx/docker-compose.yml up -d
ExecStop=/usr/local/bin/docker-compose -f /home/cloudspinx/docker-compose.yml stop
StandardOutput=syslog
RemainAfterExit=yes

[Install]
WantedBy=multi-user.target
Remember that /home/$USER/docker-compose.yml should be the exact path to your docker-compose.yml file.
Reload the system daemon.
sudo systemctl daemon-reloadStart and enable the services to run automatically on boot.
sudo systemctl start pritunl_container
sudo systemctl enable pritunl_container
3. Configure the Pritunl VPN server
The Pritunl VPN server is configured using the web interface accessible using the URL https://IP_Address.
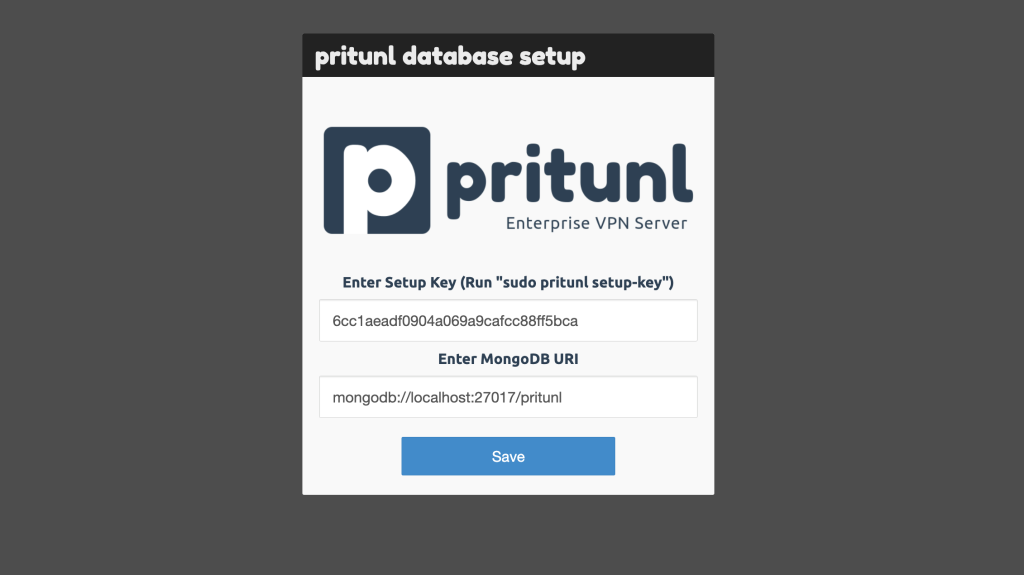
But before that, obtain the authentication key to the MongoDB database. This step is only involved if you installed the Pritunl VPN server from APT:
##For APT (Not needed for Docker)
sudo pritunl setup-key
Copy the key and use it on the web page as shown:
Save the details and update the database.
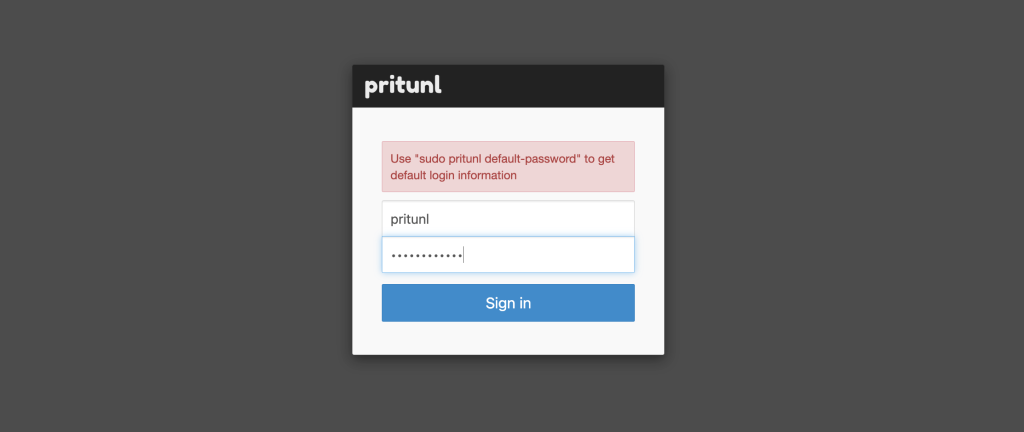
Now obtain the default server login credentials with the command.
##For APT
sudo pritunl default-password

##For Docker
docker exec pritunl  pritunl default-password
Sample Output:

Use the credentials to log in to the Pritunl dashboard.
Once authenticated, you are required to change the default password and IP address:
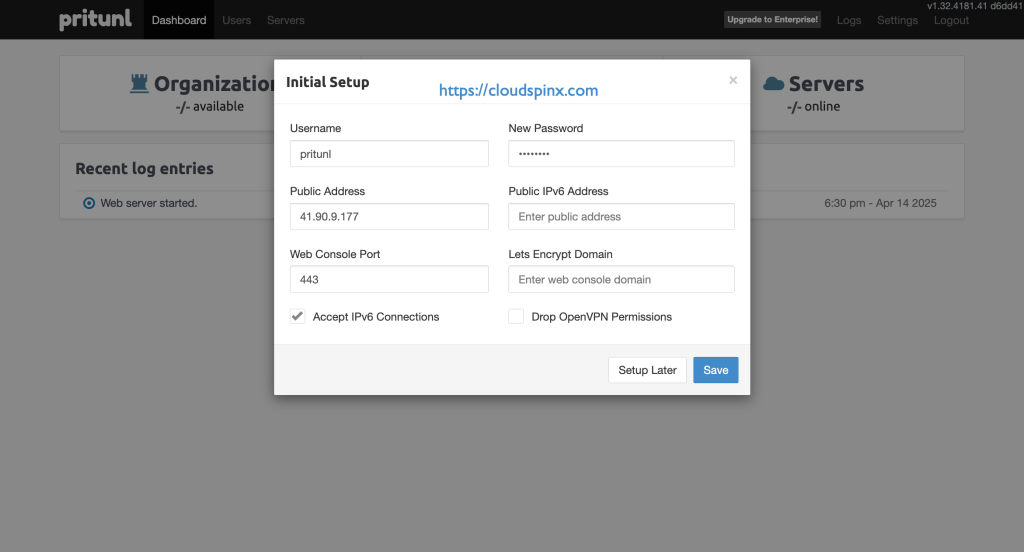
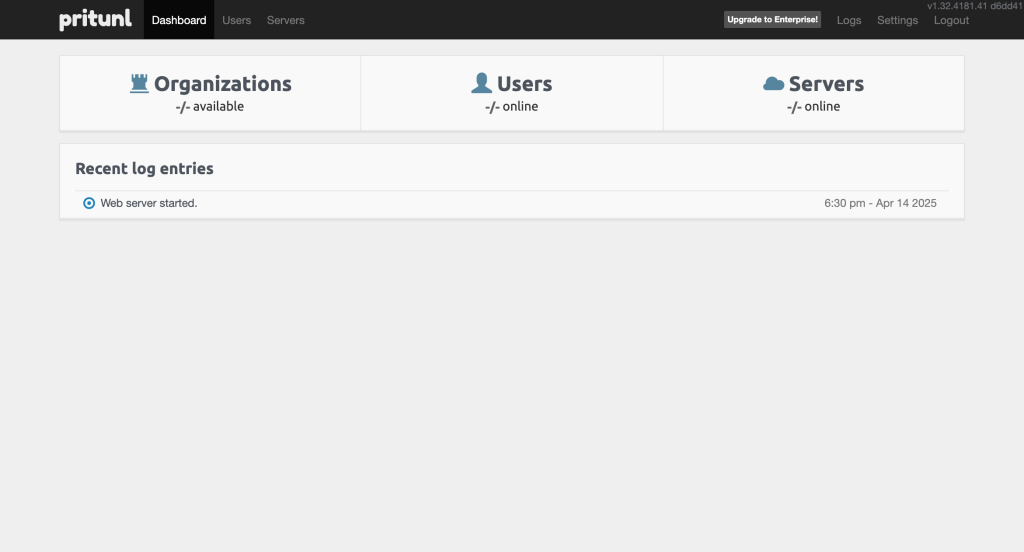
Once the changes have been made, you will be allowed to access the Pritunl dashboard.
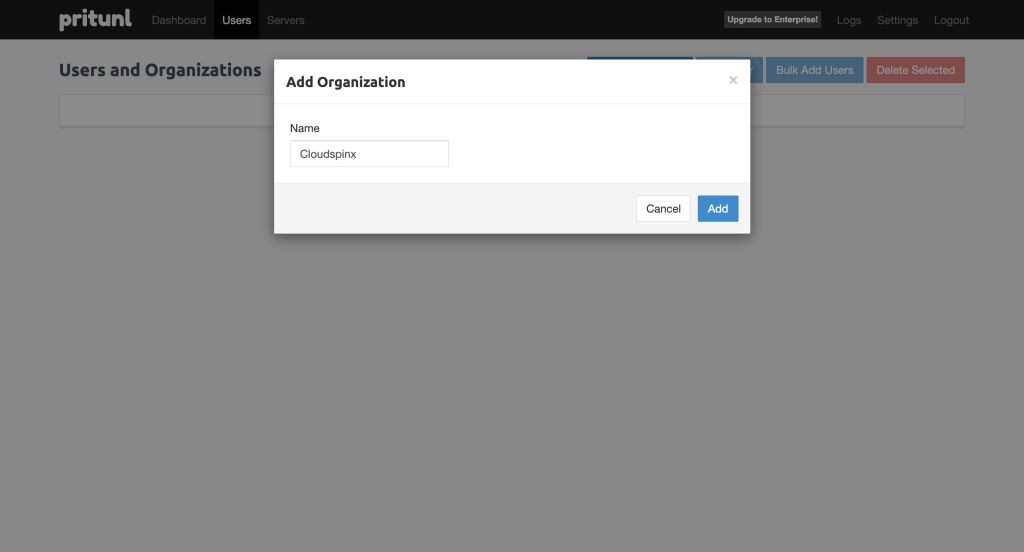
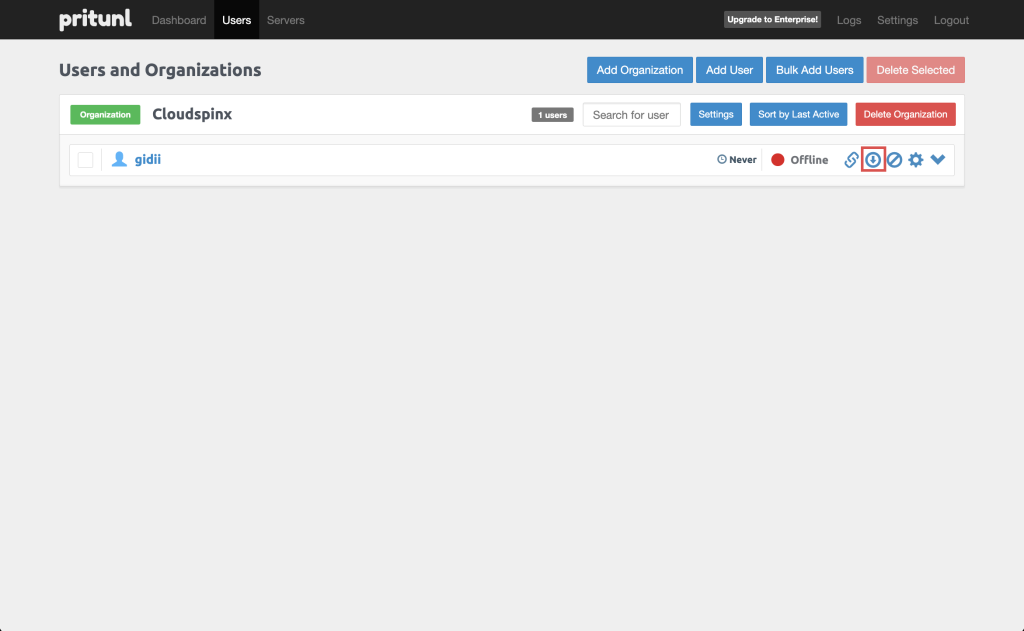
Adding Users to the Pritunl VPN server
Before you can add a user, you need to add an organization. Go ahead and add an organization in the Users and Organizations tab:
Now add a user and link them to the created organization.
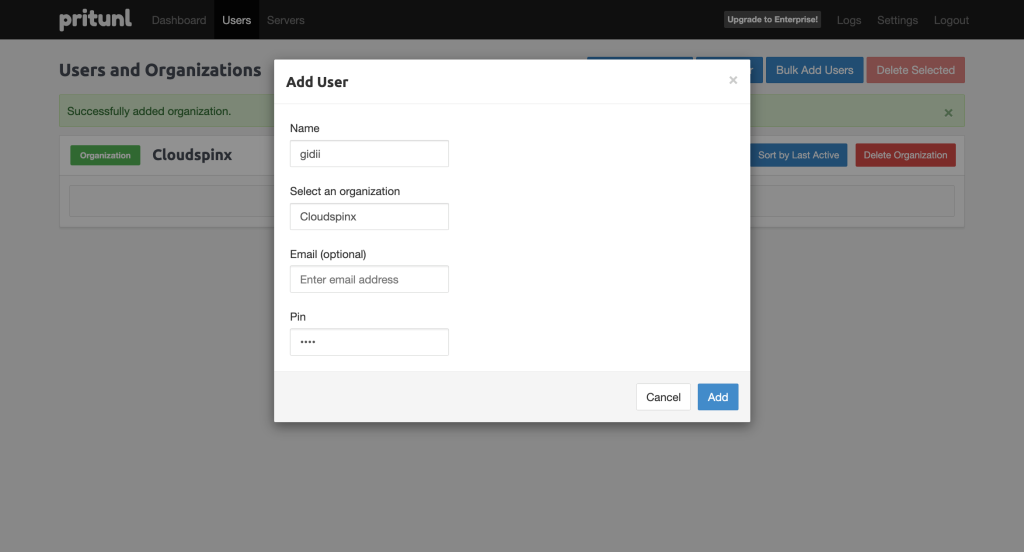
Remember to set a PIN that will be used by the user to connect to the Pritunl VPN server.
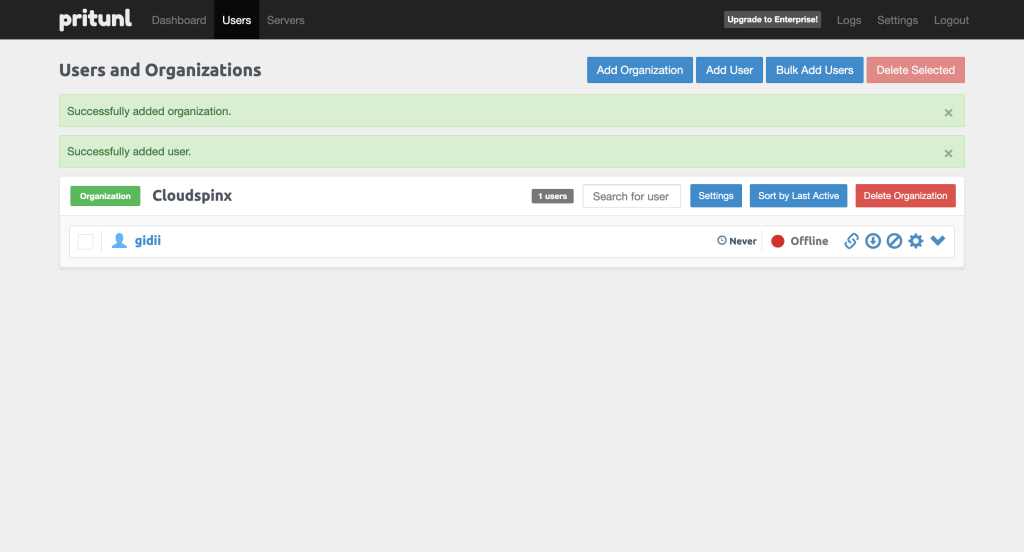
After providing the required details, proceed and add a server in the Servers tab.
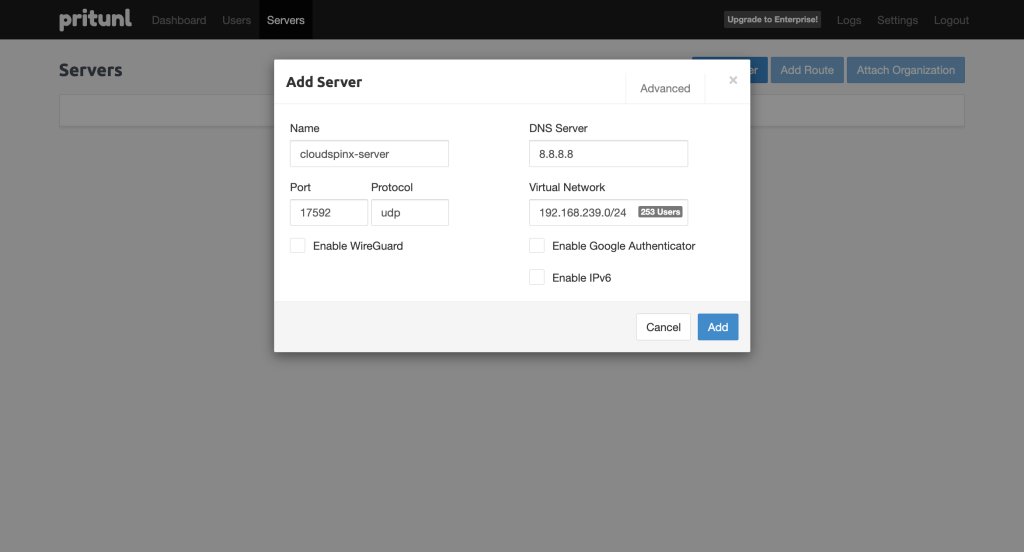
Here, you need to provide the name, port, network, and DNS to be used by the client. You can retain the defaults if you installed Pritunl using APT.
While on the above page, you can enable Wireguard and make the required configurations for the wireguard client. Once added, the server will appear as shown. Before you start, ensure that you have the created organization attached. You can also add a route to your server.

With the server running, proceed to the user tab and download the client profile.
4. Configure Pritunl Client
The Pritunl client can be installed on the desired system. For this guide, we will install the client on Ubuntu 22.04. Add the Pritunl repository to the system.
sudo tee /etc/apt/sources.list.d/pritunl.list << EOF
deb [ signed-by=/usr/share/keyrings/pritunl.gpg ] https://repo.pritunl.com/stable/apt noble main
EOF
Add the GPG keys:
curl -fsSL https://raw.githubusercontent.com/pritunl/pgp/master/pritunl_repo_pub.asc | sudo gpg -o /usr/share/keyrings/pritunl.gpg --dearmor --yesUpdate the system and install the Pritunl client package:
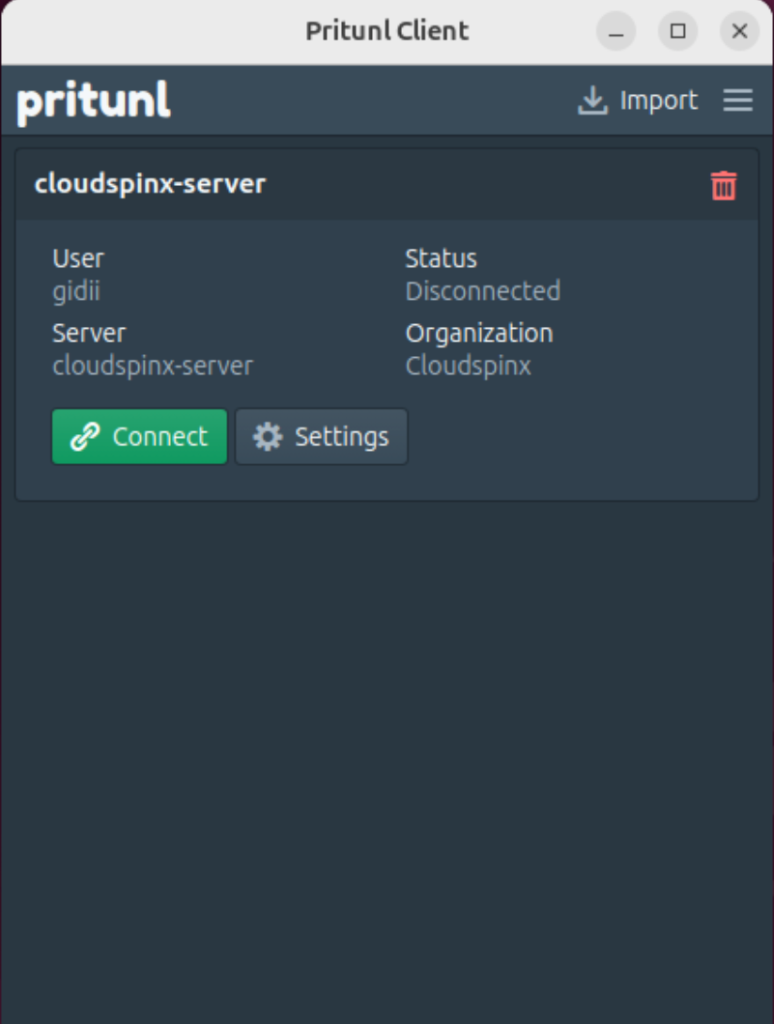
sudo apt update && sudo apt install pritunl-client-electronOnce installed, launch the application from the App menu:

Unzip the dowloaded profile:
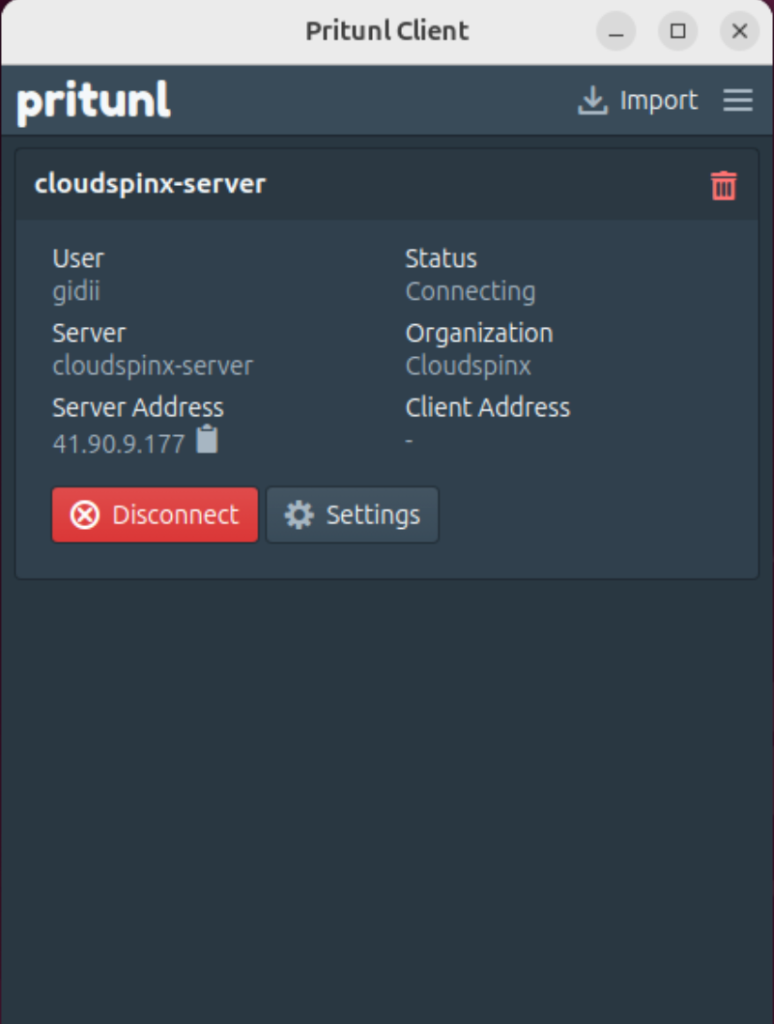
tar -xvf gidii.tarThen import the unzipped profile and click connect on the top-right corner.
Provide the PIN set earlier on the Pritunl server.
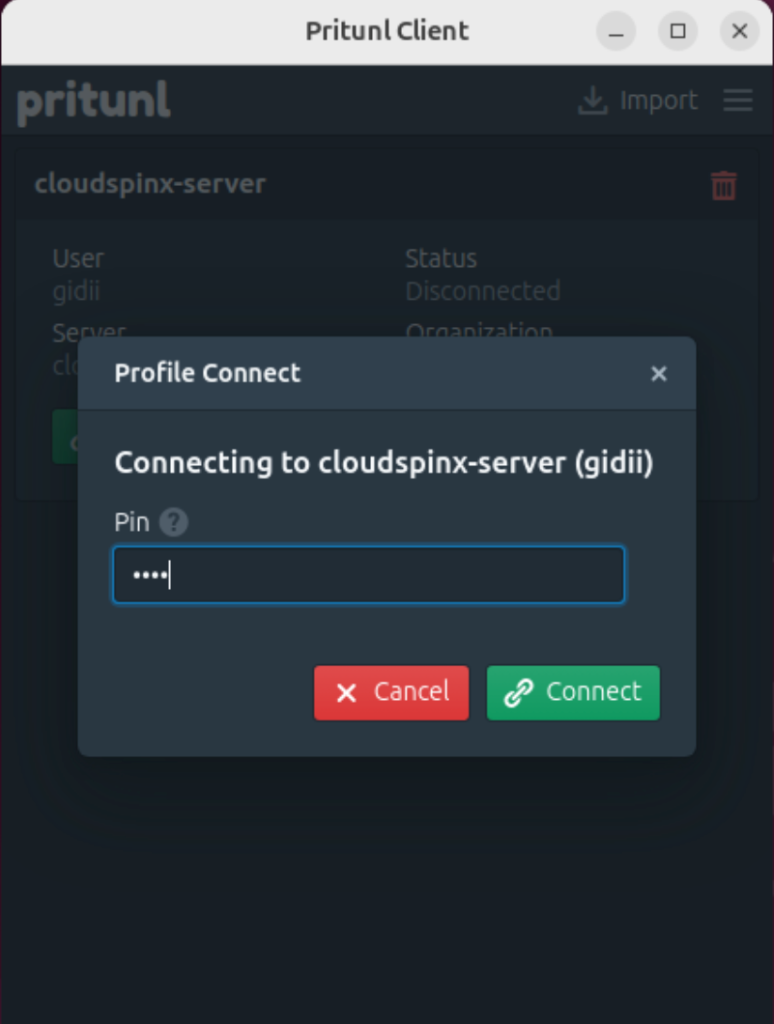
If everything is okay, the client should connect to the server.
You can also check the connection from the command line:
$ ifconfig tun0
tun0: flags=4305<UP,POINTOPOINT,RUNNING,NOARP,MULTICAST>  mtu 1500
        inet 192.168.239.2  netmask 255.255.255.0  destination 192.168.240.2
        inet6 fe80::2eab:8584:77b2:f23b  prefixlen 64  scopeid 0x20<link>
        unspec 00-00-00-00-00-00-00-00-00-00-00-00-00-00-00-00  txqueuelen 100  (UNSPEC)
        RX packets 94  bytes 42403 (42.4 KB)
        RX errors 0  dropped 0  overruns 0  frame 0
        TX packets 199  bytes 33704 (33.7 KB)
        TX errors 0  dropped 0 overruns 0  carrier 0  collisions 0
Final thoughts.
Now you have Pritunl VPN installed and configured on Ubuntu 24.04. Proceed and enjoy the awesomeness of this tool.
See more:


