aaPanel is a free and open-source lightweight control panel for managing web servers through a GUI interface. aaPanel is designed to be simple yet very powerful. It is easy to deploy in a majority of web servers including Apache, Nginx, MySQL, PHP, and OPenLiteSpeed.
aaPanel comes with features that make it very easy to use the reason why it is gaining popularity by the day. Let us evaluate some of these features briefly.
Features of aaPanel control panel
Some aapanel key features are outlined below:
- aapanel allows you to install only the extensions you want.
- With aapanel server resources are managed in real time.
- aapanel has a powerful online editor
- aapanel has free security extension which makes very secure to use.
- It is cross-platform
- aapanel utilises very minimal system resources.
- it provides a one click function for developing environment and software
- Task scheduling e.g database and website backup is very easy.
- aapanel makes Files management a simple activity.
If you are looking for an alternative to Cpanel, VestaCP, etc, then aaPanel is the guy.
In this brief, we will Install and Use aaPanel on Ubuntu.
Setup Pre-requisites
Ensure you have the following requirements in place:
- Memory of 512MB and above.
- Hard disk of 100MB or more
- Clean Ubuntu with no Apache/Nginx/php/MySQL installed.
At the time of this article, 7.x is the Official Version available for download. Let’s get started.
1 – Update Ubuntu system
To ensure your APT index is up to date.
sudo apt update -y && sudo apt upgrade -yCheck if a system reboot is required after the upgrades are applied.
[ -e /var/run/reboot-required ] && sudo rebootOnce your OS packages are updated, proceed to install aapanel.
2 – Install aaPanel
The aapanel installation script is available for download on the aapanel official website.
Install wget tool:
sudo apt install wget -yThen Download aaPanel in your Ubuntu system:
wget -O install.sh https://www.aapanel.com/script/install_7.0_en.shRun aaPanel installer script on Ubuntu:
sudo bash install.shWhen the installation begins, provide the installation directory by agreeing to the prompt by entering y and pressing enter:
+----------------------------------------------------------------------
| aaPanel FOR CentOS/Ubuntu/Debian
+----------------------------------------------------------------------
| Copyright © 2015-2099 BT-SOFT(https://www.aapanel.com) All rights reserved.
+----------------------------------------------------------------------
| The WebPanel URL will be https://SERVER_IP:29189 when installed.
+----------------------------------------------------------------------

Do you want to install aaPanel to the /www directory now?(y/n): y
Available disk space on the install partition: 7 G
Reading package lists... Done
Building dependency tree... Done
Reading state information... Done
The following packages were automatically installed and are no longer required:
  apache2-bin apache2-data apache2-utils libapr1t64 libaprutil1-dbd-sqlite3 libaprutil1-ldap libaprutil1t64 libintl-perl libintl-xs-perl
  liblua5.4-0 libmodule-find-perl libmodule-scandeps-perl libproc-processtable-perl libsort-naturally-perl libterm-readkey-perl ssl-cert
Use 'sudo apt autoremove' to remove them.
The following packages will be REMOVED:
  needrestart
.
.
.
Firewall reloaded
Stopping Bt-Tasks...	done
Stopping Bt-Panel...	done
Starting Bt-Panel....	done
Starting Bt-Tasks... 	done
==================================================================
Congratulations! Installed successfully!
==================================================================
aaPanel Internet Address: https://41.90.9.177:29189/c5572a6e
aaPanel Internal Address: https://192.168.1.180:29189/c5572a6e
username: eq782rqk
password: 8f18d068
Warning:
If you cannot access the panel,
release the following port (29189|888|80|443|20|21) in the security group
==================================================================
Time consumed: 2 Minute!
The command above installs aapanel and all its dependencies.
From the output, aapanel URL address , admin username and password has been created for you. We can also deduce the default port on which aapanel will LISTEN on, ie port 29189.
You can verify this by issuing the command:
ss -tulw
sudo netstat -tulpn | grep LISTEN
sudo lsof -i -P -n | grep LISTEN
ss -antpl | grep 29189
Sample output:
$ ss -tulw
Netid        State         Recv-Q        Send-Q                      Local Address:Port                      Peer Address:Port        Process
icmp6        UNCONN        0             0                                *%enp1s0:ipv6-icmp                            *:*
udp          UNCONN        0             0                              127.0.0.54:domain                         0.0.0.0:*
udp          UNCONN        0             0                           127.0.0.53%lo:domain                         0.0.0.0:*
udp          UNCONN        0             0                    192.168.1.180%enp1s0:bootpc                         0.0.0.0:*
udp          UNCONN        0             0                                 0.0.0.0:29189                          0.0.0.0:*
udp          UNCONN        0             0                                    [::]:29189                             [::]:*
tcp          LISTEN        0             4096                        127.0.0.53%lo:domain                         0.0.0.0:*
tcp          LISTEN        0             4096                           127.0.0.54:domain                         0.0.0.0:*
tcp          LISTEN        0             511                               0.0.0.0:29189                          0.0.0.0:*
tcp          LISTEN        0             4096                                    *:ssh                                  *:*
tcp          LISTEN        0             511                                  [::]:29189                             [::]:*
Another thing that happens during installation is that aapanel enables and configures UFW firewall to automatically allow the port 29189 through firewall.
To see UFW status:
sudo ufw statusThe sample output:
Status: active

To                         Action      From
--                         ------      ----
Apache                     ALLOW       Anywhere
20/tcp                     ALLOW       Anywhere
21/tcp                     ALLOW       Anywhere
22/tcp                     ALLOW       Anywhere
80/tcp                     ALLOW       Anywhere
443/tcp                    ALLOW       Anywhere
888/tcp                    ALLOW       Anywhere
39000:40000/tcp            ALLOW       Anywhere
29189/tcp                  ALLOW       Anywhere
Apache (v6)                ALLOW       Anywhere (v6)
20/tcp (v6)                ALLOW       Anywhere (v6)
21/tcp (v6)                ALLOW       Anywhere (v6)
22/tcp (v6)                ALLOW       Anywhere (v6)
80/tcp (v6)                ALLOW       Anywhere (v6)
443/tcp (v6)               ALLOW       Anywhere (v6)
888/tcp (v6)               ALLOW       Anywhere (v6)
39000:40000/tcp (v6)       ALLOW       Anywhere (v6)
29189/tcp (v6)             ALLOW       Anywhere (v6)
3 – Access aaPanel Web GUI
To access the web user interface, on your browser issue http://<YOUR_SERVER_IP_ADDRESS>:29189/c5572a6e.
https://192.168.1.180:29189/c5572a6eThe screenshot shows aaPanel login page.
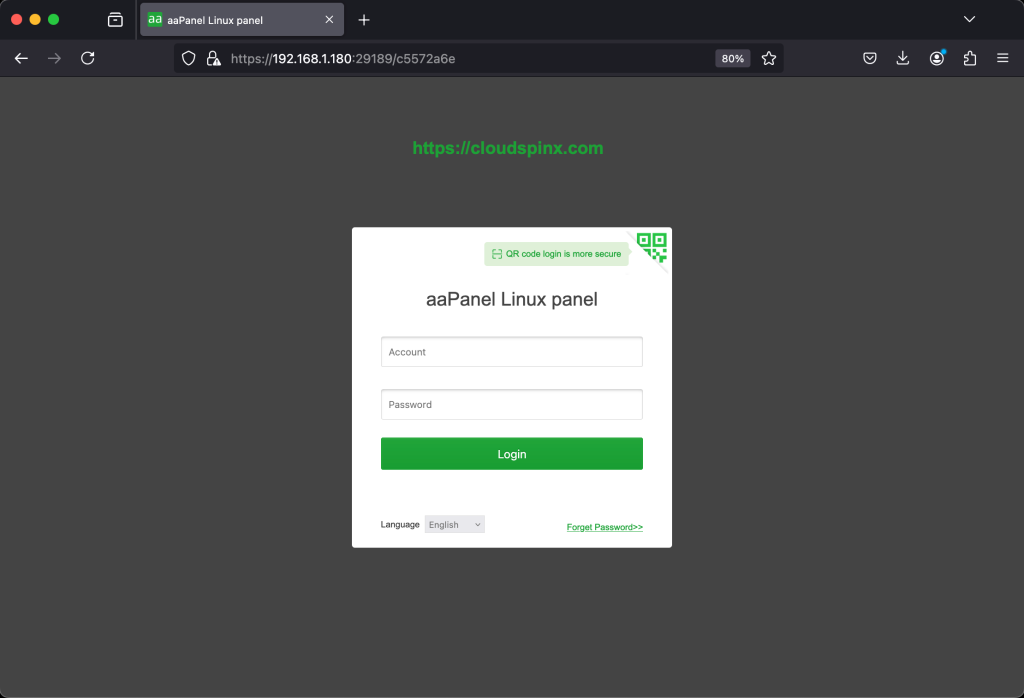
Next, enter the admin username and password generated when we installed the aapanel installation script.
username: eq782rqk
password: 8f18d068
Provide access credentials and click Login.
Install LNMP recommended features
From the screen output, there is a bunch of software that you can install using a single click. On the left side there are also many features associated with aaPanel. We will proceed to install the LNMP recommended features.
Select the features you wish to install from the LNMP to have the software packages installed.
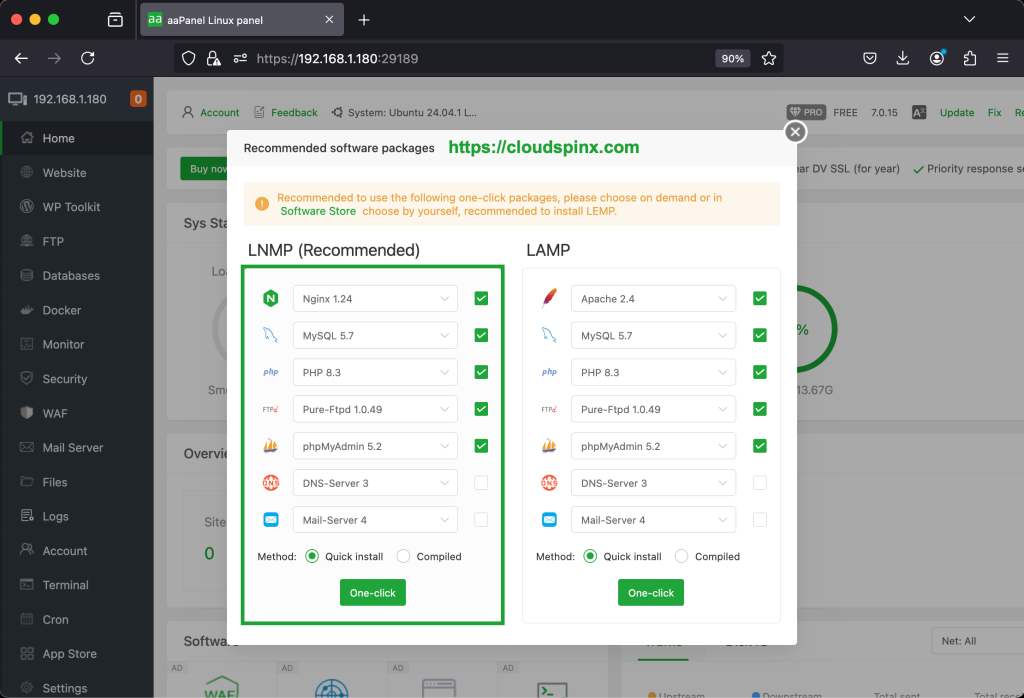
After you have made the selection, click on One-click to install the packages. You will see the status of software packages as they get installed.
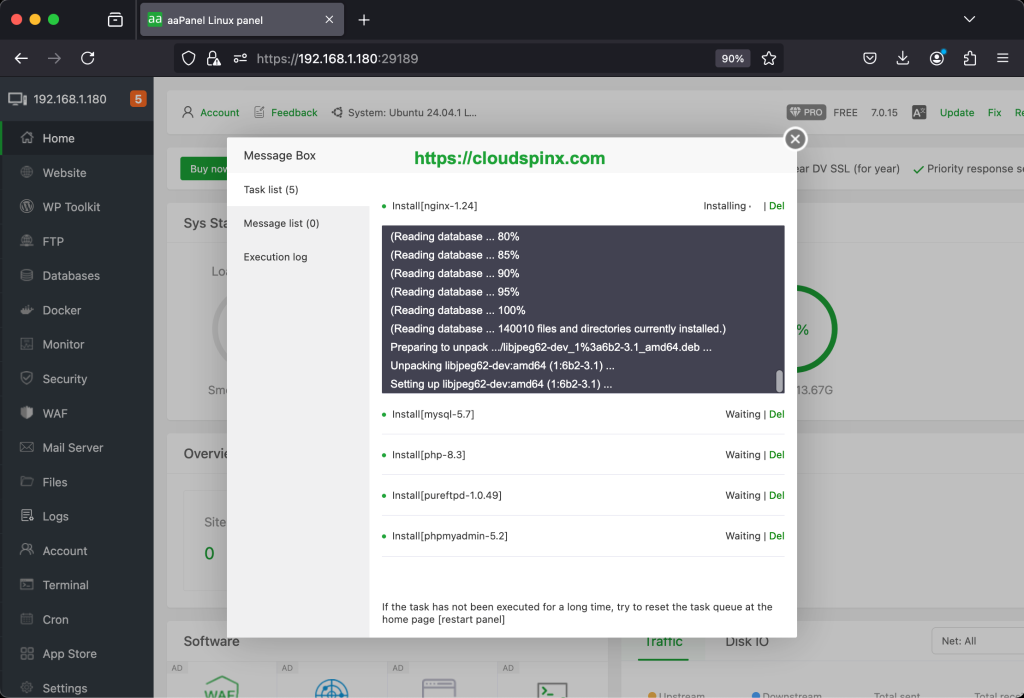
The process takes some time to install the recommended features. Please wait as it completes. On completion, you will see the following status.

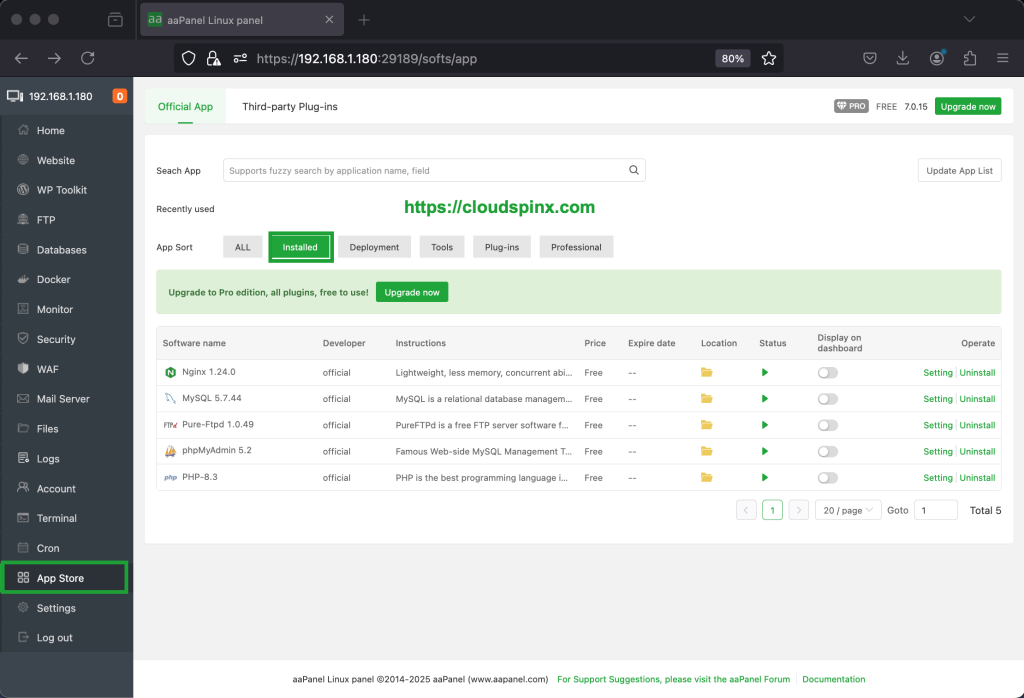
Install PHP extensions to the server
Go to App Store on the left and click on it, then select installed, on PHP-8.3 click on settings as shown below:
Once you click on settings , a new page appears. Navigate to Install extensions, make the choice of the extension you wish to install on the right side of the panel. Click install and confirm with OK on the dialogue box.
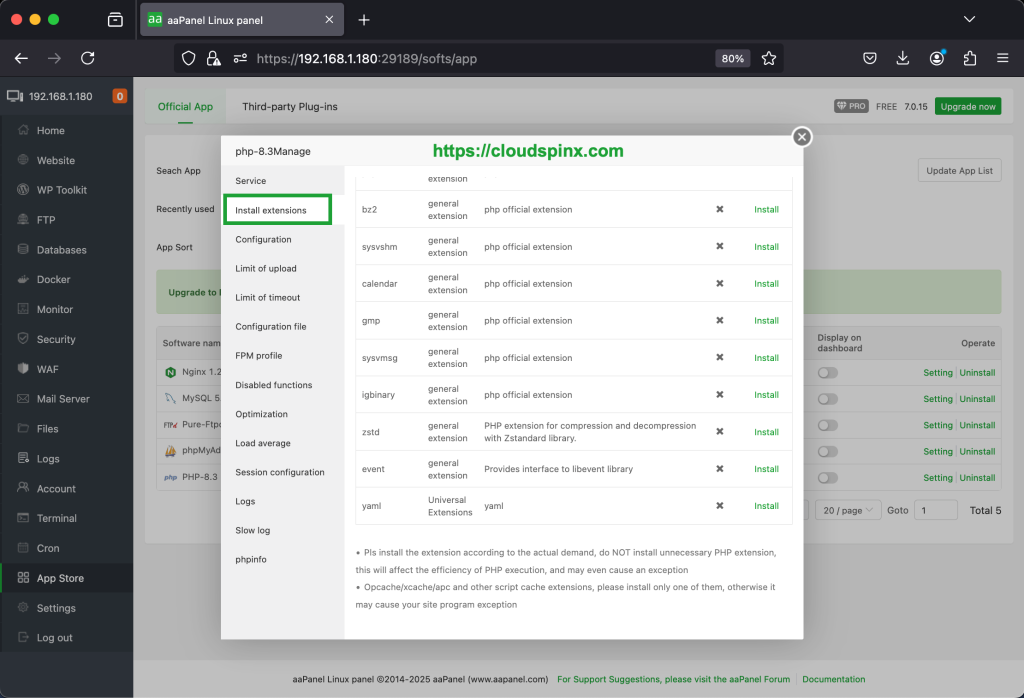
In this way you are able to install your required PHP extensions.
4 – Add domain and create a website
If you have followed along, its time to get more exciting. We will now see how to add a domain and create a sample website using the aapanel.
1. Configure the DNS records for your Domain.
We will navigate to website tab to create the A records. Click on website then Add site.
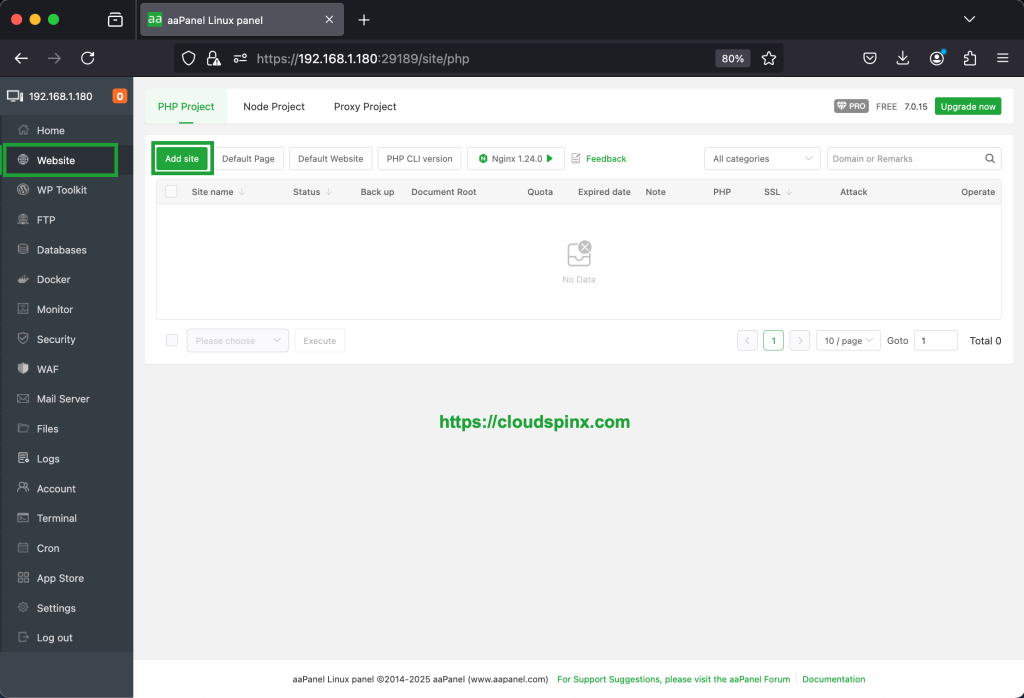
Then on create site supply your domain name and click Submit.
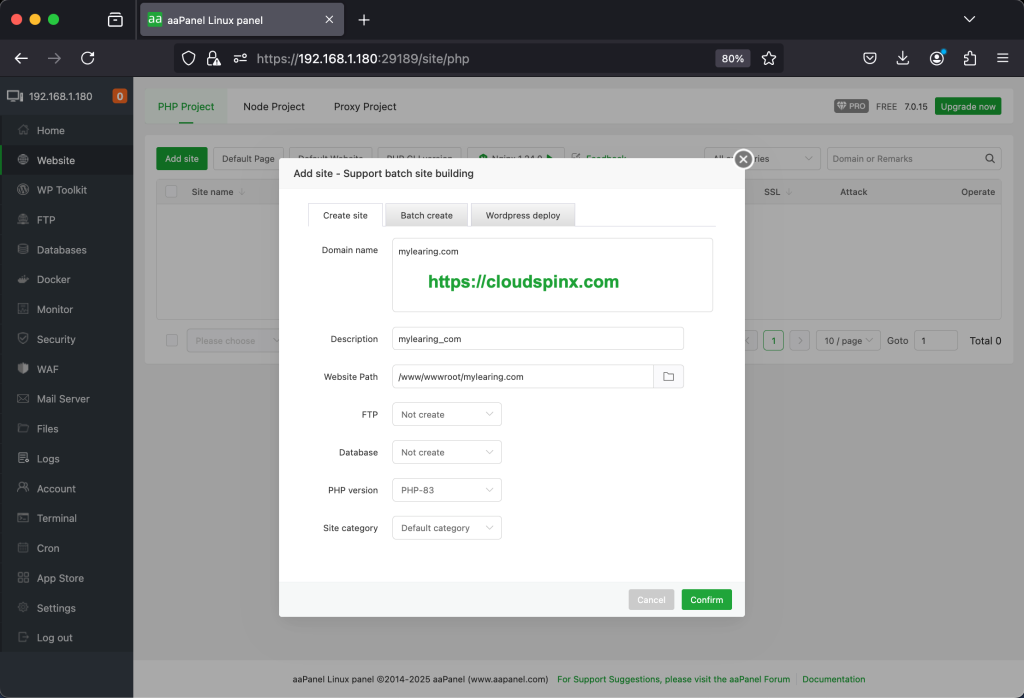
On clicking submit, your A records are added as shown below.
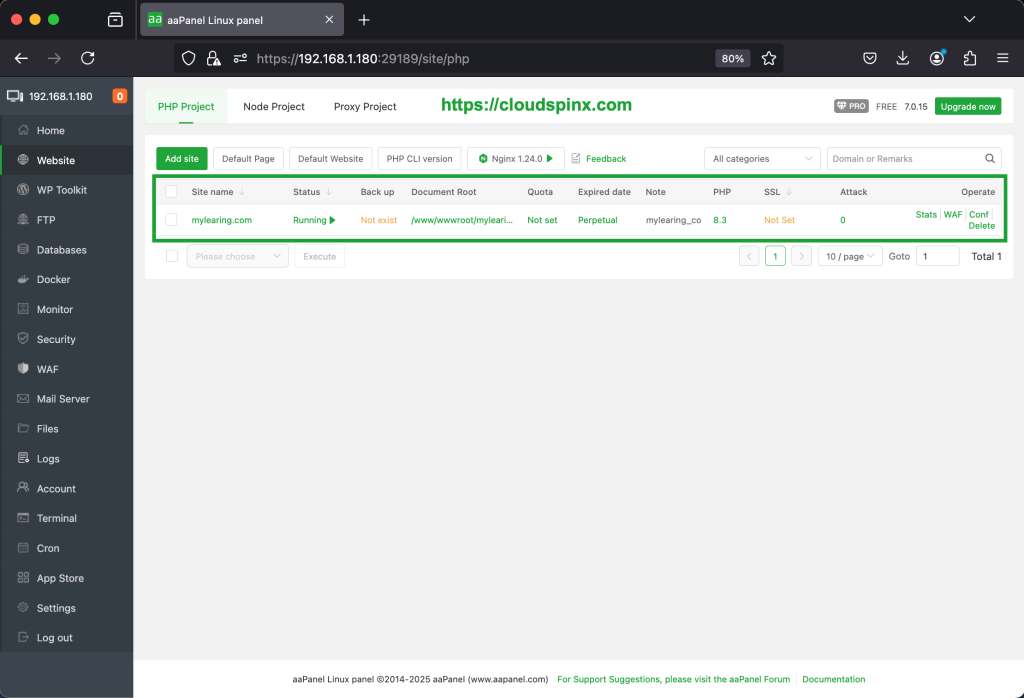
To see the root files, click Files to see your files plus permissions assigned to them:

To encrypt your website with an SSL certificate, click on website, you will see your newly created domain with SSL not set . Click on SSL. This takes you to another page where your will select your created domain under Let’s Encrypt. Then click on Apply.
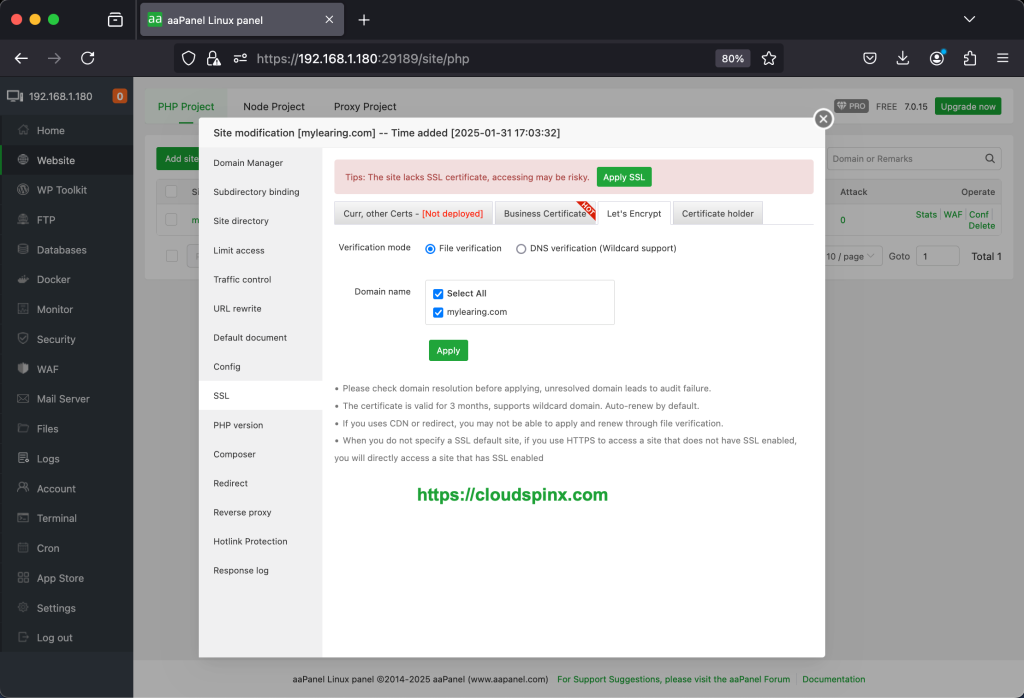
mydomain.com will not generate the SSL certificate as it was used for demonstration purposes. Your domain should be able to generate the SSL.
To access your website, you will go to your browser and type https://mylearning.com.
Conclusion
That is a brief on how to Install and Use aaPanel on Ubuntu to create a fully functional website. We hope the steps were clear and that you have successfully Installed aaPanel on your Ubuntu.
Thank you for following.
More resources: