Virtualization is the creation of a virtual version of something, this is achieved by allowing hardware components of a single computer such as storage, memory, and processor to be shared among multiple partitions called virtual machines(VMs). This way, the VMs are able to run as independent Operating Systems on the underlying Operating system known as the host machine.
Virtualization occurs in a number of types. We have;
- Operating System virtualization
- Network virtualization
- Storage Virtualization
- Hardware virtualization
- Server Virtualization
- Application Virtualization
- Desktop Virtualization
- Data Virtualization
🧠 Don’t just learn KVM – master it with the best-selling eBook trusted by thousands.
KVM Virtualization
Known as a Kernel-based Virtual machine, KVM is an open-source virtualization technology built into Linux. The specific purpose of KVM is to turn Linux into a type-1 hypervisor(bare-metal) that allows a host machine to run multiple virtual machines. Avi Kivity developed KVM in the year 2006, the following year, it was merged into the Linux Kernel mainline in kernel version 2.6.20.
KVM is well known because of the advantages it possesses over other virtualization technologies. The first advantage is:
- KVM can be used in various Operating Systems including Linux or Windows, unlike others that rely on a specific OS.
- KVM allows you to have your own RAM and CPU separately where you can not share your resources with other users.
- KVM is able to accommodate websites with very high traffics, this is because the dedicated resources cannot be affected by the performance of other servers.
- Since KVM runs on the Linux Kernel, it is considered more efficient because it already has the features needed by the hypervisor.
With its prominent features, KVM has been adopted and put into action by top cloud companies worldwide. Amazon has lately been issuing its offerings mainly based on KVM technology. Google on the other hand also uses KVM technology as the bottom rock for its Google Container Products.
Install and Use KVM Virtualization on Oracle Linux 9
The installation of KVM on oracle Linux includes configuring the engine on the host, configuring KVM hosts, networks, and storage, and finally creating virtual machines.
Step 1: Enable hardware/Nested virtualization
You have to ensure your hardware virtualization from your BIOS is enabled. To check the type of processor for your processor, run:
$ sudo  grep -e 'vendor_id' /proc/cpuinfo
vendor_id	: GenuineIntel
vendor_id	: GenuineIntel
Once the hardware virtualization is enabled in the BIOS, verify whether VT-x/VT-d or AMD-v extension is enabled by running the following command:
$ grep --color --perl-regexp 'vmx|svm' /proc/cpuinfoYour output should show you the flag available, either svm or vmx. For my case, am using a vmx flag since my processor is intel.
You can as well use the lscpu command to do the above task:
$ lscpu | grep Virtualization
Virtualization:                  VT-x
Virtualization type:             full
Step 2: Update and upgrade the system
Make sure your Oracle Linux 9 is fully upgraded to its packages. Let’s first update the DNF package repository cache of your oracle Linux 9 machine by running the following command.
$ sudo dnf makecache
Oracle Linux 9 BaseOS Latest  (x86_64)                                                                                4.5 kB/s | 3.6 kB     00:00
Oracle Linux 9 Application Stream Packages (x86_64)                                                                   4.7 kB/s | 3.6 kB     00:00
Oracle Linux 9 UEK Release 7 (x86_64)                                                                                 3.7 kB/s | 3.0 kB     00:00
Metadata cache created.
Now proceed to upgrade all the existing software packages with the use of the following command:
sudo dnf updateYour system should now be fully updated. Reboot your Oracle Linux 9 system for the changes to take effect:
sudo rebootStep 3: Set SELinux to permissive mode
Leaving SELinux in its default (enforcing) mode will lead to permission denied errors while creating KVM virtual machines. To avoid this error, edit the etc/selinux/config by changing the mode to permissive
$ sudo vim /etc/selinux/config
# This file controls the state of SELinux on the system.
# SELINUX= can take one of these three values:
#     enforcing - SELinux security policy is enforced.
#     permissive - SELinux prints warnings instead of enforcing.
#     disabled - No SELinux policy is loaded.
# See also:
# https://docs.fedoraproject.org/en-US/quick-docs/getting-started-with-selinux/#getting-started-with-selinux-selinux-states-and-modes
#
# NOTE: In earlier Fedora kernel builds, SELINUX=disabled would also
# fully disable SELinux during boot. If you need a system with SELinux
# fully disabled instead of SELinux running with no policy loaded, you
# need to pass selinux=0 to the kernel command line. You can use grubby
# to persistently set the bootloader to boot with selinux=0:
#
#    grubby --update-kernel ALL --args selinux=0
#
# To revert back to SELinux enabled:
#
#    grubby --update-kernel ALL --remove-args selinux
#
SELINUX=permissive
# SELINUXTYPE= can take one of these three values:
#     targeted - Targeted processes are protected,
#     minimum - Modification of targeted policy. Only selected processes are protected.
#     mls - Multi Level Security protection.
SELINUXTYPE=targeted
Save and exit the file.Reboot your Oracle Linux 9 system for the changes to take effect:
sudo rebootStep 4: Install KVM in Oracle Linux 9
Remove any existing virtualization packages that might have been installed before.
sudo dnf remove libvirt qemu-kvm edk2Enable yum repositories
sudo dnf install -y oraclelinux-release-el9
sudo dnf config-manager --enable ol9_kvm_utils ol9_UEKR7
To install KVM on your machine, we will use the virtualization host package group by running the following command:
sudo dnf groupinstall "Virtualization Host"When prompted, press y and hit enter to continue with the installation.
Installing Environment Groups:
 Virtualization Host
Installing Groups:
 Base
 Core
 Standard
 Virtualization Hypervisor
 Virtualization Tools

Transaction Summary
======================================================================================================================================================
Install  91 Packages

Total download size: 42 M
Installed size: 151 M
Is this ok [y/N]: y

The process may take a while to complete.
======================================================================================================================================================
KVM should be completely installed. Now verify that Kernel modules are loaded:
$ lsmod | grep kvm

kvm_intel             385024  0
kvm                  1118208  1 kvm_intel
irqbypass              16384  1 kvm
Now proceed to the installation of KVM tools like virt manager.
$ sudo dnf install qemu-kvm virt-install virt-viewer virt-manager
Transaction Summary
===================================================================================================================================================================================================================
Install  45 Packages

Total download size: 30 M
Installed size: 68 M
Is this ok [y/N]: Y
Step 5: Start and Enable the KVM daemon
At this point, start the libvirtd service by running the following command. Libvirtd is a server-side daemon component of libvirt virtualization management system. Runs on a host server and helps in managing virtualized guests like starting, stopping, migrating guests, and managing network and storage for the host and guests.
sudo systemctl start libvirtdProceed to enable libvirtd service to start on boot with the following command:
sudo systemctl enable --now libvirtdFinally check service status to check if its running:
$ systemctl status libvirtd
● libvirtd.service - Virtualization daemon
     Loaded: loaded (/usr/lib/systemd/system/libvirtd.service; enabled; vendor preset: disabled)
     Active: active (running) since Tue 2022-08-27 09:49:33 EAT; 2s ago
TriggeredBy: ● libvirtd-ro.socket
             ○ libvirtd-tls.socket
             ● libvirtd-admin.socket
             ○ libvirtd-tcp.socket
             ● libvirtd.socket
       Docs: man:libvirtd(8)
             https://libvirt.org
   Main PID: 79705 (libvirtd)
      Tasks: 20 (limit: 32768)
     Memory: 18.4M
        CPU: 1.196s
     CGroup: /system.slice/libvirtd.service
             └─79705 /usr/sbin/libvirtd
Step 6: Configuring KVM on Oracle Linux 9
By default, KVM creates its path (/var/lib/libvirt/images) where it stores virtual machine volumes. To Identify existing storage domains on the host, use virsh command.
$ virsh pool-list
 Name      State    Autostart
-------------------------------
 default   active   yes
We note there is only one storage pool (default) on the host and is active. This storage pool is created automatically when KVM is installed.
$ sudo virsh pool-dumpxml default | grep -i path
    <path>/var/lib/libvirt/images</path>
Create your new storage location path for both VMs and ISOs
sudo mkdir -p /opt/kvm/storage_pool-01Stop the “default” storage pool to make it inactive.
$ virsh pool-destroy default
Pool default destroyed
Use the virsh command to edit default storage.
$ sudo virsh pool-edit defaultThis will open an XML file where storage variables are defined. Edit the storage path in <path>/var/lib/libvirt/images</path> to your storage location. Mine will be as shown below.
<pool type='dir'>
  <name>default</name>
  <uuid>c4701ef4-ab81-408c-8f01-ba9086f0c91b</uuid>
  <capacity unit='bytes'>0</capacity>
  <allocation unit='bytes'>0</allocation>
  <available unit='bytes'>0</available>
  <source>
  </source>
  <target>
    <path>/opt/kvm/storage_pool-01</path>
    <permissions>
      <mode>0711</mode>
      <owner>0</owner>
      <group>0</group>
      <label>system_u:object_r:virt_image_t:s0</label>
    </permissions>
  </target>
</pool>
Start default storage pool and enable autostart on system boot.
$ sudo virsh pool-start default
Pool default started

$ sudo virsh pool-autostart default
Pool default marked as autostarted
Verify that the storage path is set as expected.
$ sudo virsh pool-dumpxml default | grep -i path
    	<path>/opt/kvm/storage_pool-01</path>
Restart libvirtd service to apply the changes.
sudo systemctl restart libvirtdAdd your user to libvirt and KVM groups.
By default, libvirtd can only be accessed by the root user or user with root privilege via sudo command. To access it as a normal user, add your user to libvirt group.
sudo usermod -a -G libvirt $(whoami)
sudo usermod -a -G kvm $(whoami)
Download ISO images in Oracle Linux 9 KVM Host.
Now navigate to the iso-images directory and start the installation or you can download the image and later move it into the directory.
Once the download is complete, we can now proceed to create a virtual machine.
Step 7: Create VMs With KVM on Oracle Linux 9
We are going to use ISO downloaded to create our first VM on KVM in Oracle Linux 9. Below script will create a VM called Linuxmint, 2G RAM, using the storage domain we created and the default bridge
sudo virt-install \
--virt-type kvm \
--name=MyLinux \
--vcpus=2 \
--memory=2048 \
--cdrom=/opt/kvm/iso-images/iso-file-name.iso \
--disk size=20 \
--network network=default \
--graphics vnc,listen=0.0.0.0 \
--noautoconsole \
--os-variant=generic
Replace the above to match your server.
You will receive the below output.
Starting install...
Allocating 'MyLinux-1.qcow2'                                                                                                                                                              |  20 GB  00:00:00

Domain is still running. Installation may be in progress.
You can reconnect to the console to complete the installation process.
Check using virsh command if your VM is up.
$ virsh list --all
 Id   Name        State
---------------------------
 3    Linuxmint   running
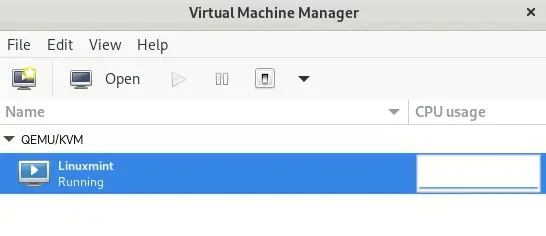
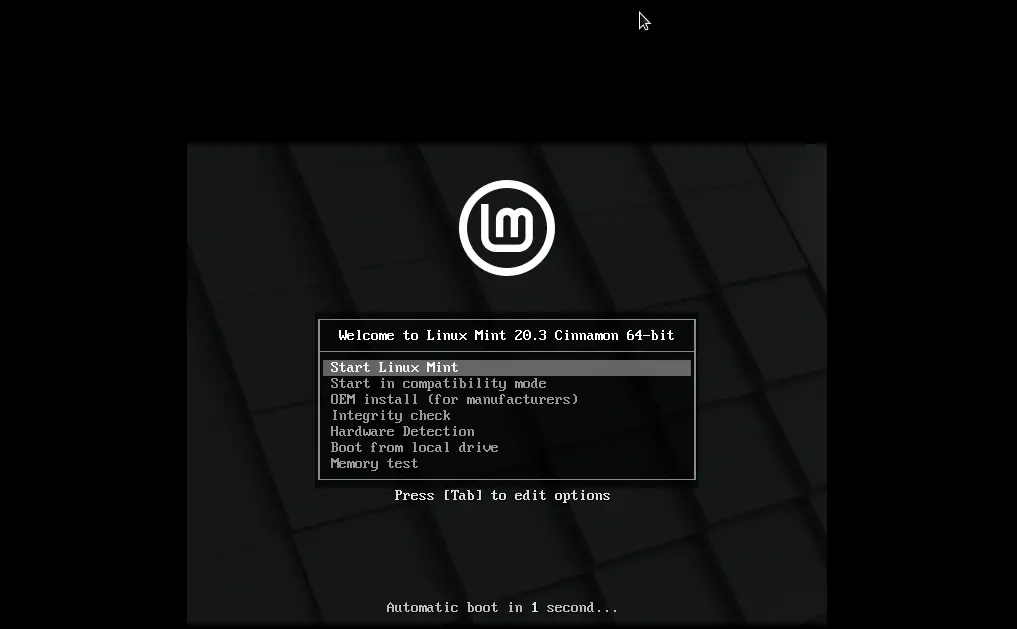
Connect via virtual machine manager console to complete installation.

Complete installation via console now.

Conclusion.
This step marks the end of our today’s guide on how to install KVM on Oracle Linux 9, the latest Oracle distro OS. We have also covered how you can configure storage domains, and create VMs using CLI and GUI as well. You can add and manage your host via WebVirtCloud, the KVM web admin console. Follow the links below for more articles;


