
In the software development industry, JavaScript is now a standard language. With the help of JavaScript programming and AJAX, the front-end developers hope to produce user interfaces with plenty of features. The server-side web developers’ paradigm has changed to JavaScript because of its non-blocking nature.
These days, JavaScript is the major language used by several front-end frameworks, like TezJS, VueJS, React, Angular, etc. thanks to its code optimization capabilities. In fact, selecting JavaScript development services as your top choice will undoubtedly bring many opportunities to grasp a single language while still acquiring “full-stack” skills.
Node.js
NodeJs is a cross-platform environment that allows JavaScript code to run and be executed outside of a browser. You can create server-side JavaScript apps using this version of Chrome’s V8 JavaScript runtime engine. It comes equipped with everything needed to run a JavaScript program.
What is Node.js Used For?
The major benefit of utilizing Node.js is the ability to create business solutions. The following are a few of the programming language’s common applications:
- Backend Operation of Social Media Platforms.
- Development of SPAs (Single Page Applications).
- Data Streaming.
- Development of IoT Applications:
- Chatbots.
Node.js provides some of the most notable features, making it unique for organizations.
1. Scalability.
2. Improved performance.
3. Freedom in App Development.
4. Superb Ecosystem.
5. A single programming language
NPM
The default package manager for NodeJs is NPM (Node Package Manager). NodeJs enables developers to create scalable applications in a specific amount of time by acting as a JavaScript runtime environment.
NPM makes it possible for open-source web developers to share and borrow packages for the creation of apps. Additionally, it serves as the application’s command-line utility for dependency management, version management, and package installation in the project.
NPM’s core:
- Website: You can locate packages for your project on the official NPM website. Additionally, you can build up profiles and create them to manage and access all kinds of goods.
- Command Line Interface (CLI): The CLI is a program that you may use to interact with NPM packages and repositories from the terminal on your computer.
- Registry: It has a big collection of meta-data and JavaScript projects. As a result, you are free to utilize any supported NPM registry. Additionally, you may use someone else’s registration in accordance with their conditions of use.
PM2
The PM2 process manager for Node.js has a built-in load balancer. It enables you to keep running apps alive indefinitely (even when catastrophes happen) and makes production deployments easier. Through its clustering capability, it also enables you to expand your application in real time and receive insights into the runtime performance and resource usage of your application.
Node.js 24 is the most recent release of the Node.js runtime, which was introduced in May 2025 and designated as the new Active Long Term Support (LTS) version. This release brings various enhancements and new features focused on performance, security, and developer experience.
Install and Use Node.js on Windows 11 / Windows 10
Follow the below steps for successful installation of Node.js 24 on Windows 11 / Windows 10.
Install Using Chocolatey
Chocolatey is a package manager for the Windows Operating system, follow the steps below to install Node.js 22 using Chocolatey:
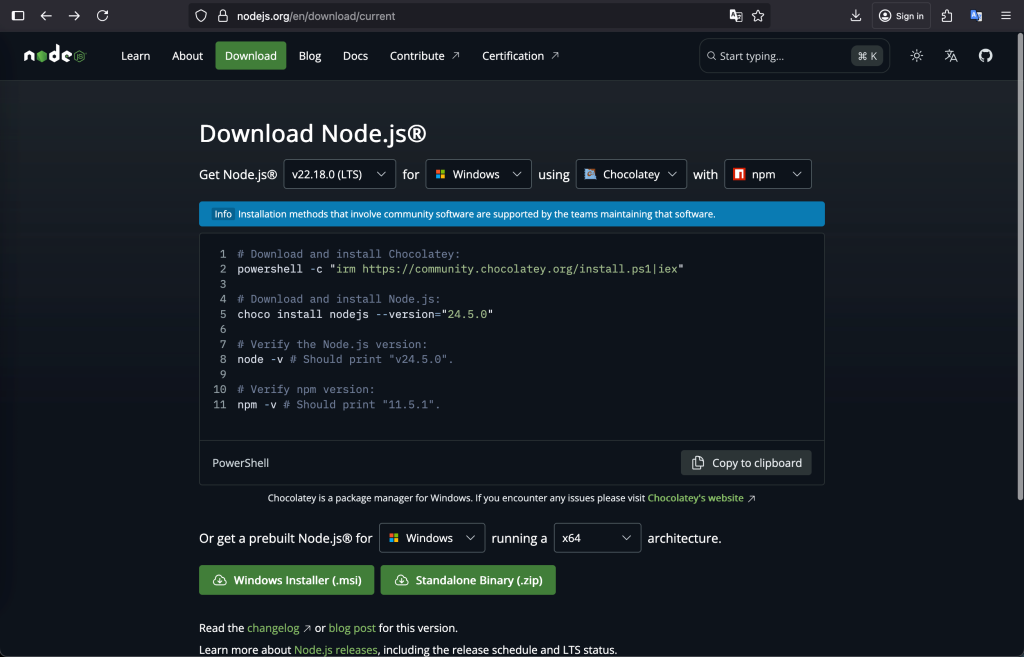
# 1. Download and Install Chocolatey
First, before you can use it, you need to install Chocolatey on your Windows 11 / Windows 10. Use the command below to install it:
powershell -c "irm https://community.chocolatey.org/install.ps1|iex"# 2. Download and Install Node.js
Now that you have installed Chcocolatey, you can use to install Node.js:
choco install nodejs --version="22.18.0"Having done that, check for node and npm on the system:
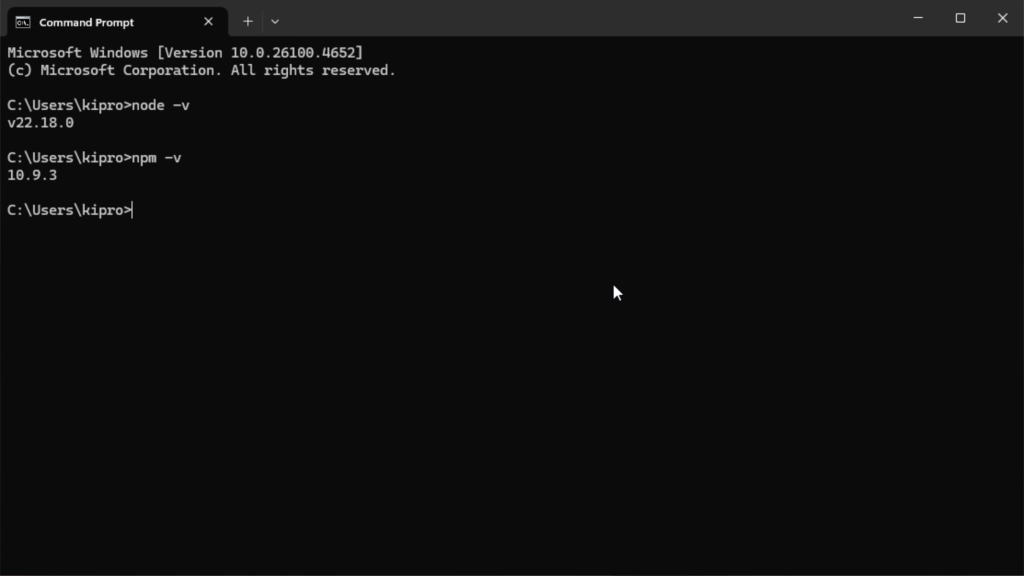
# Verify the Node.js version:
node -v # Should print "v22.18.0".

# Verify npm version:
npm -v # Should print "10.9.3".
Install Using Prebuilt Node.js Packages
Node.js can also be installed on Windows using prebuilt packages. Follow the steps below to install Node.js on Windows using prebuilt packages:
#1. Download the Installer
Visit the official NodeJs official website to get the Windows Installer. Verify that you have the newest NodeJs version downloaded. NPM package manager is among its components.
In this case, we select the Widnows Installer (.msi):
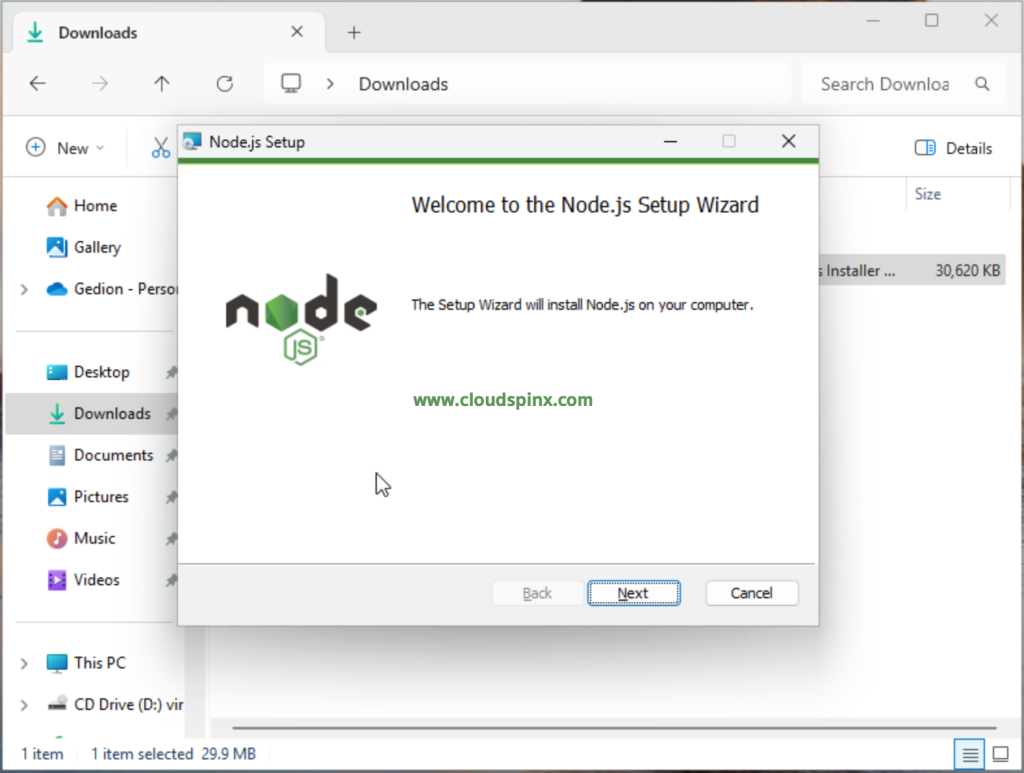
You are strongly encouraged to use the LTS (Long-term Support) version. Your browser will download the .msi file. Select the appropriate location for it. After downloading the installer package, double-click it to begin the installation process.
#2. Install Node.js and NPM
Following clicking the “Next” button after receiving a welcome message, click Next:
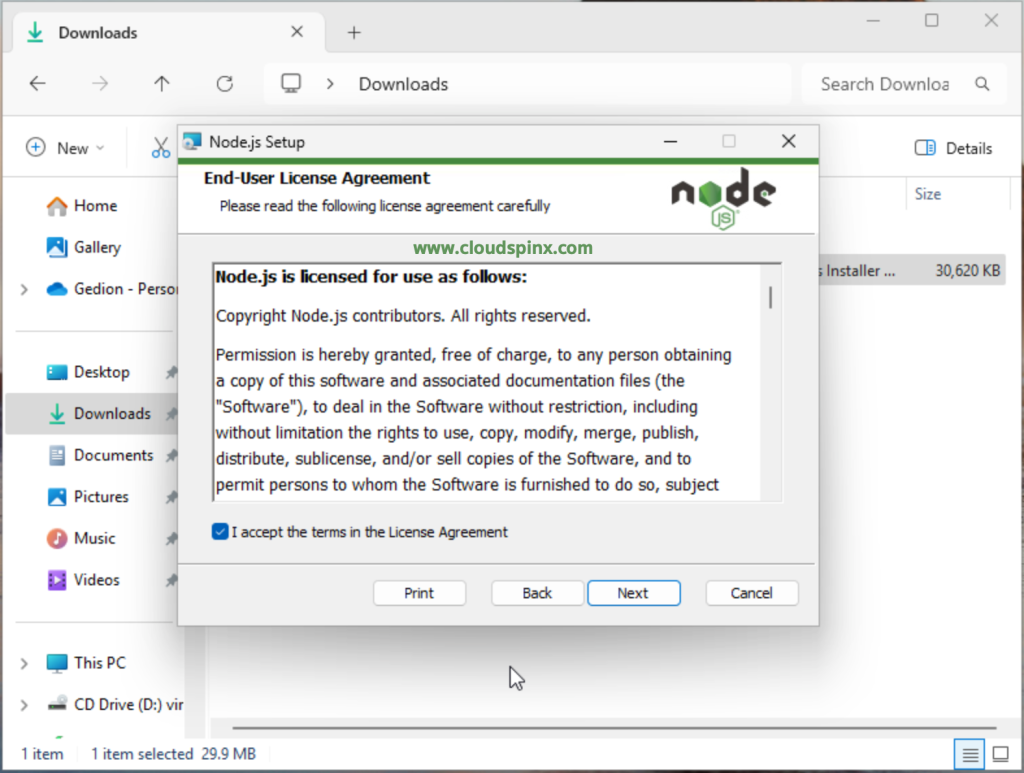
Aree to the License terms, then click Next:
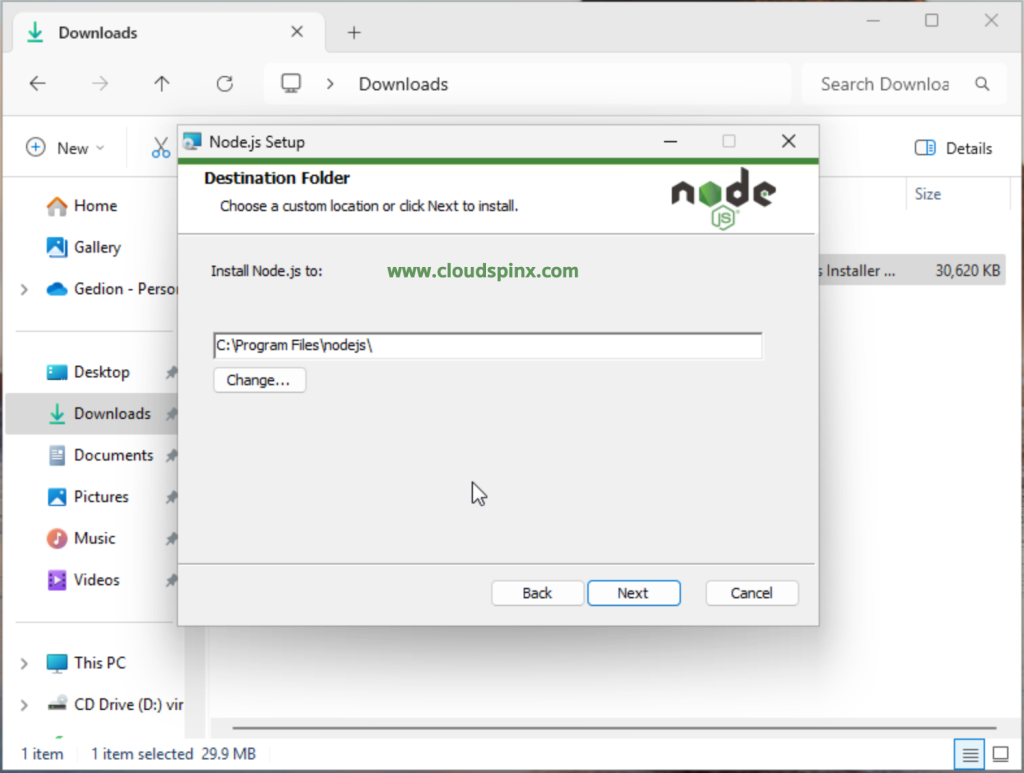
Select the location where you wish Node.js to be installed.
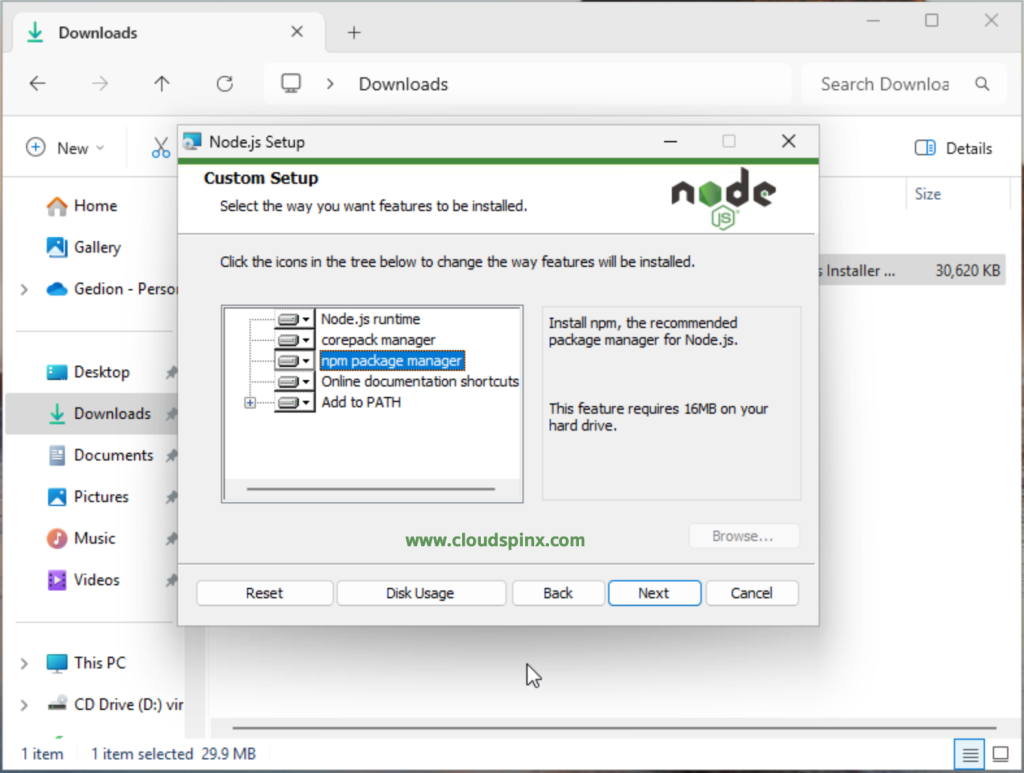
A customized page setup will appear on the screen once you click the Next button. Don’t select the Node.js runtime by default; instead, select the npm package manager. We can install NPM and Node together in this manner:
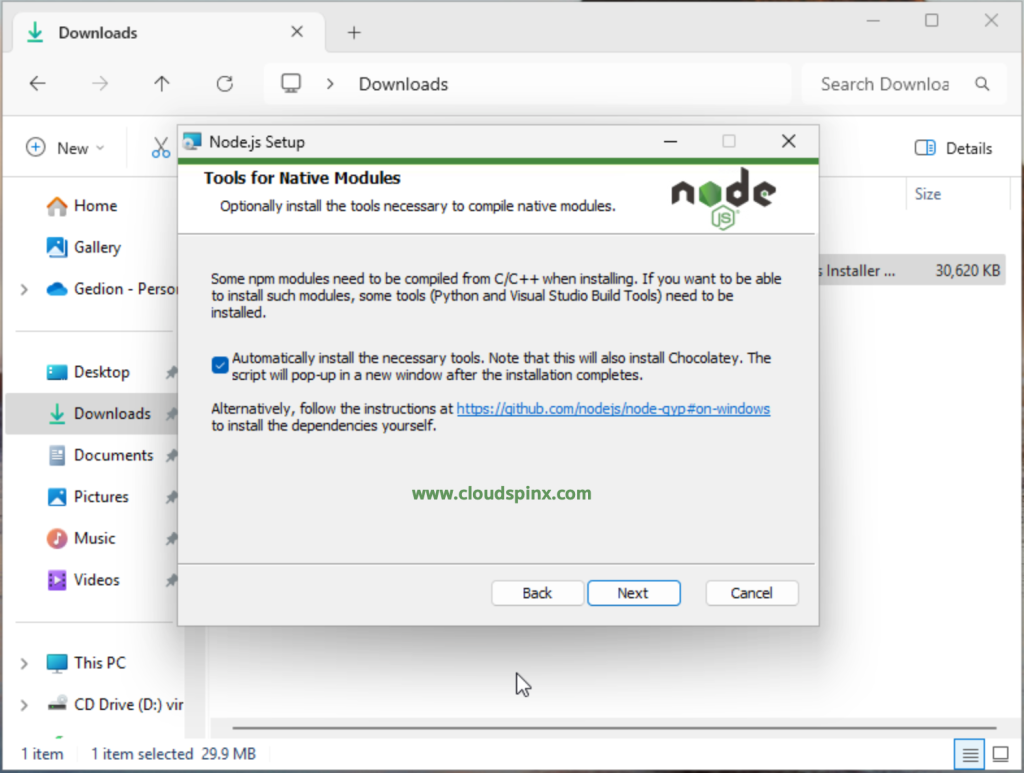
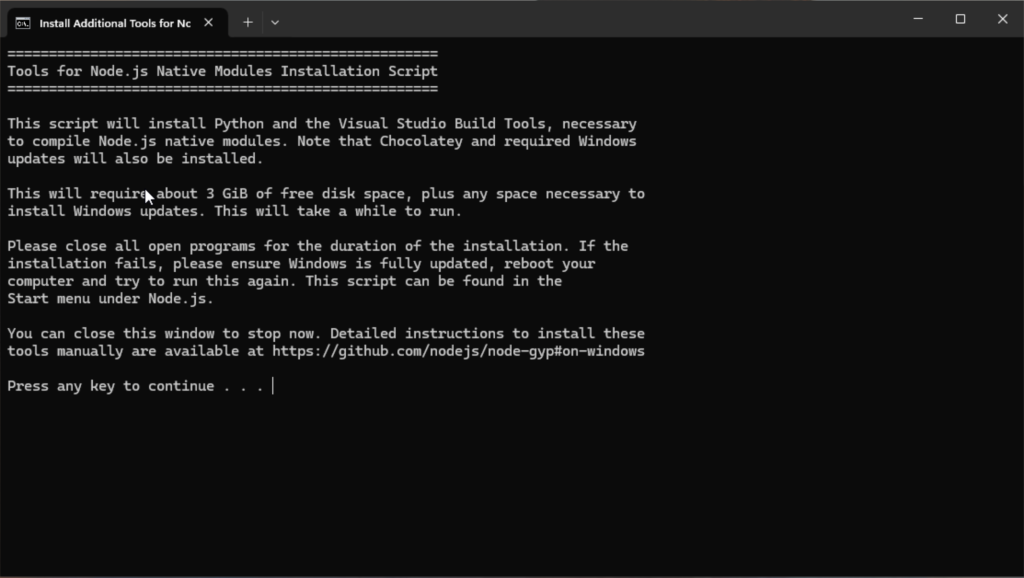
Check the box that says, Automatically Install Necessary Tools. This is because some npm modules need to be compiled from C/C++ when installing:
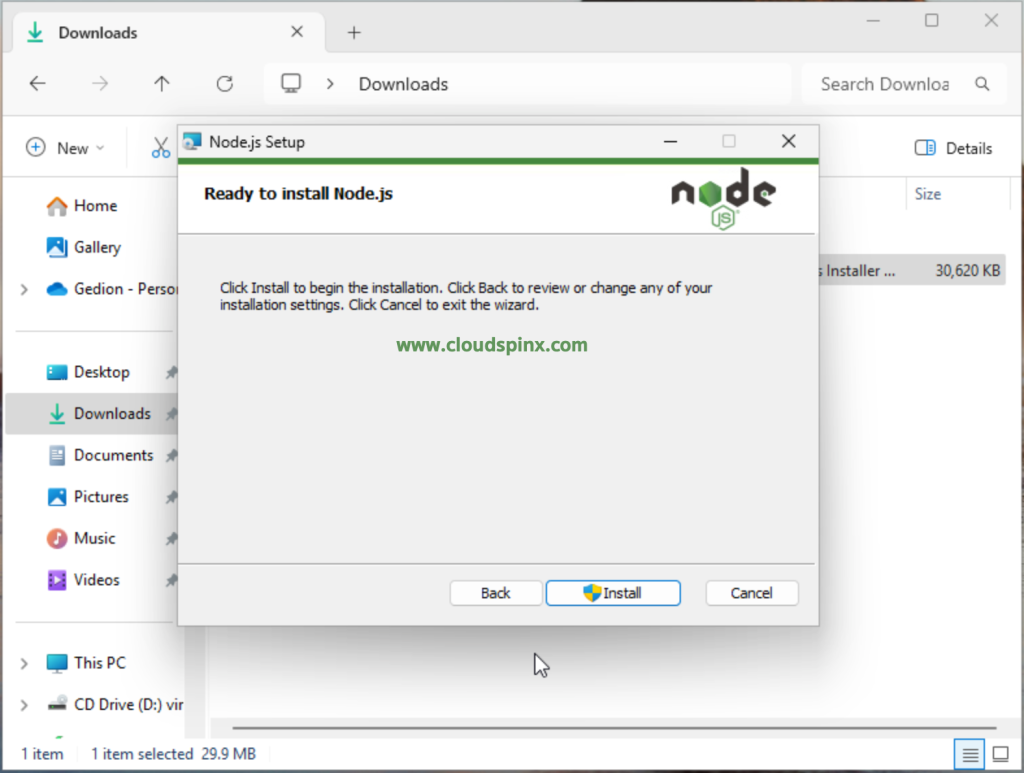
To install Node and NPM, the setup is prepared. Click the Install:
Allow the app to make changes to your computer when prompted, then proceed with the installation:
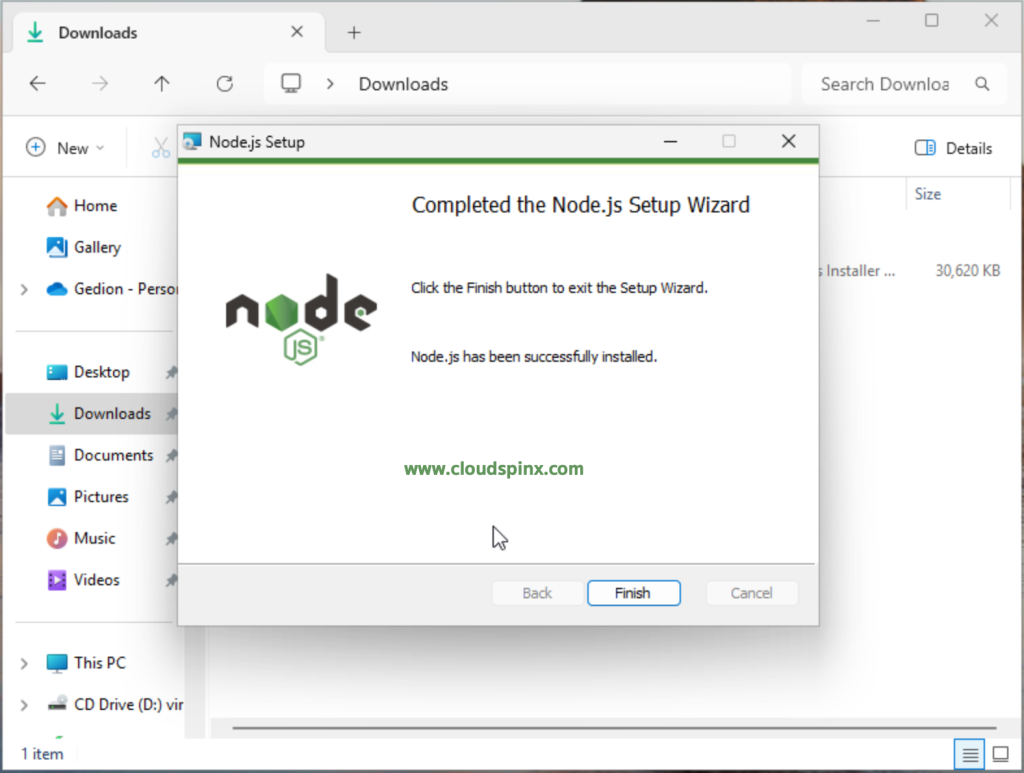
Click Finish to close the installation wizard. Since we had chosen to install the necessary tools automatically, proceed by pressing any key when promted by the command prompt:
Check that Node.js was succesfully installed:
Basic Node.js Usage
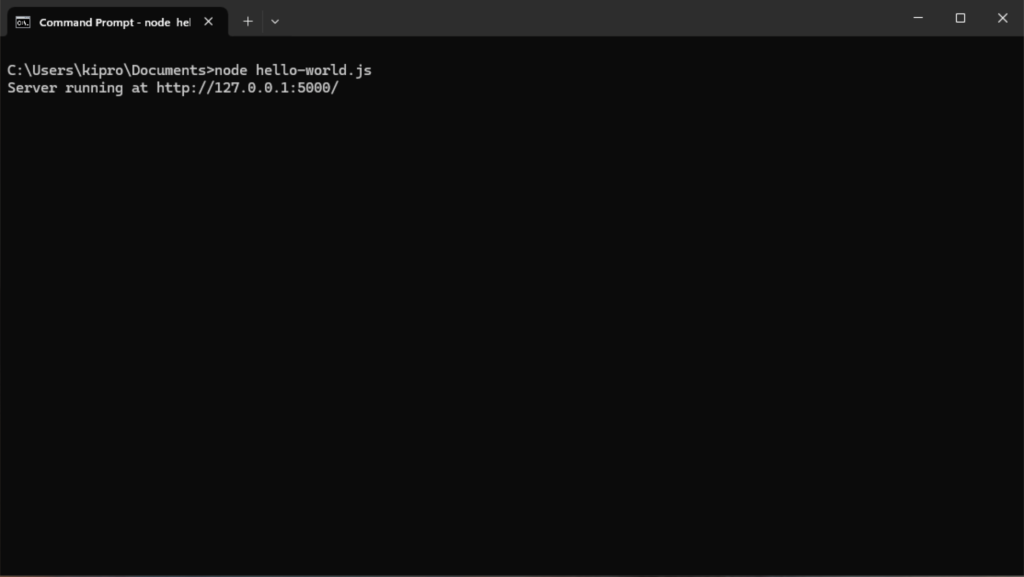
Open a text editor of your choice and add the example code below. In the example below I will save it as hello-world.js:
const http = require('http');

const hostname = '127.0.0.1'; // or '0.0.0.0' for all network interfaces
const port = 5000;

const server = http.createServer((req, res) => {
  res.statusCode = 200;
  res.setHeader('Content-Type', 'text/plain');
  res.end('Hello from Technixleo');
});

server.listen(port, hostname, () => {
  console.log(`Server running at http://${hostname}:${port}/`);
});
Save & exit!
Then, type the following commands into the Windows command prompt or PowerShell.
node hello-world.jsSample Output:
Access it in your browser.
http://localhost:5000
Usage of NPM & PM2
PM2 is a daemon process manager that will assist you in managing and maintaining your app’s processes. PM2 is simple to use; it is available as a simple and intuitive CLI that can be installed using NPM.
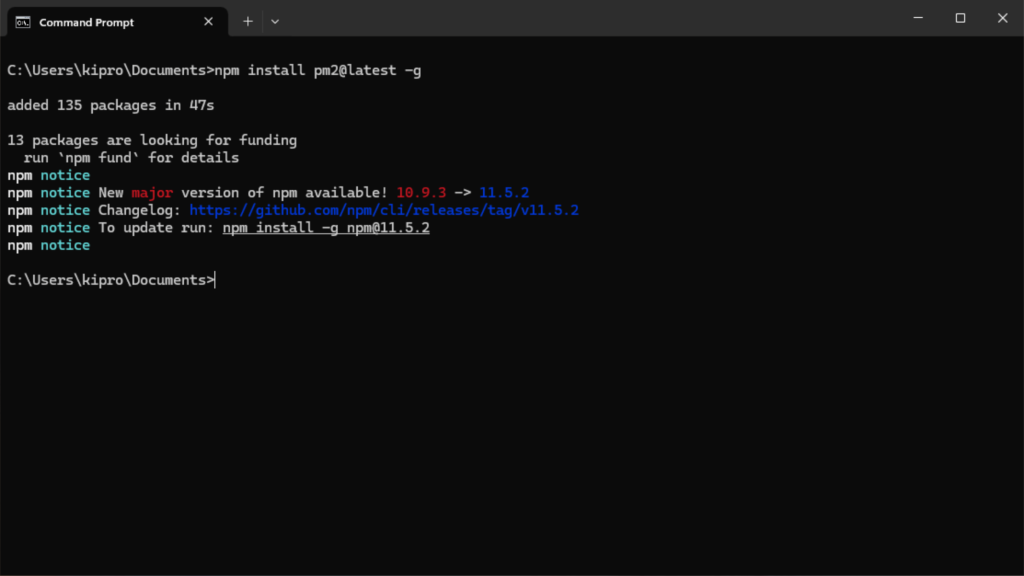
The most recent PM2 version can be installed using NPM or Yarn:
npm install pm2@latest -g
yarn global add pm2
Sample Output:
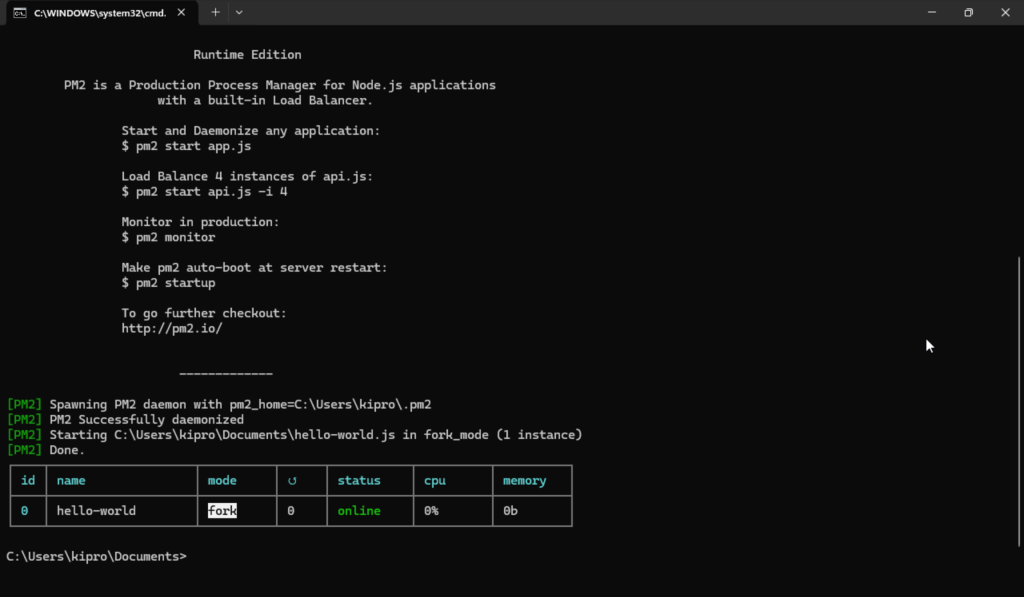
Start an app
Using the following command line is the simplest method for starting, daemonizing, and monitoring your app’s processes: I will start Helloworld.js in my case.
pm2 start helloworld.jsOutput:
Several choices you can give the CLI include:
# Specify an app name
--name <app_name>

# Watch and Restart app when files change
--watch

# Set memory threshold for app reload
--max-memory-restart <200MB>

# Specify log file
--log <log_path>

# Pass extra arguments to the script
-- arg1 arg2 arg3

# Delay between automatic restarts
--restart-delay <delay in ms>

# Prefix logs with time
--time

# Do not auto restart app
--no-autorestart

# Specify cron for forced restart
--cron <cron_pattern>

# Attach to application log
--no-daemon
Check status, logs, and metrics
List the current state of each application that PM2 manages:
pm2 [list|ls|status]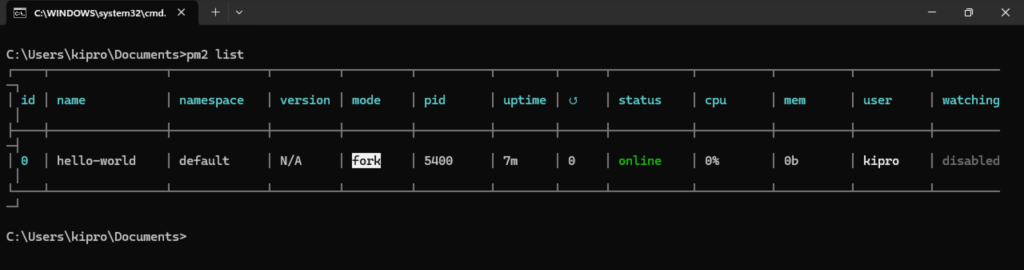
Display logs
To show logs instantly:
pm2 logsDigging in older logs:
pm2 logs --lines 200Terminal Based Dashboard
The following real-time dashboard can be inserted right into your terminal:
pm2 monit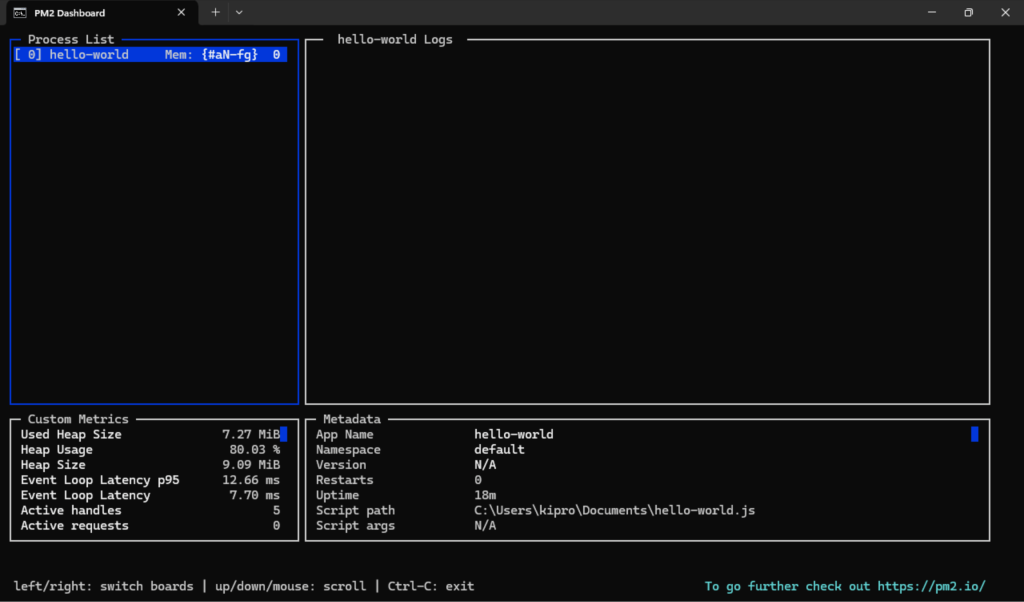
pm2.io: Monitoring & Diagnostic Web Interface
Dashboard on the web, cross-server diagnostic system:
pm2 plusSetup startup script
It is crucial to restart PM2 along with the processes you manage when the server boots or reboots. Simply execute the following command to create an active startup script to fix this:
pm2 startupLikewise, to set a process list to be frozen for automatic respawn.
pm2 saveMore info on startup script generator here.
Cheat Sheet
The following commands are important to know. Simply test them on your working machine using a sample application or your live web application:
# Fork mode
pm2 start app.js --name my-api # Name process

# Cluster mode
pm2 start app.js -i 0        # Will start maximum processes with LB depending on available CPUs
pm2 start app.js -i max      # Same as above, but deprecated.
pm2 scale app +3             # Scales `app` up by 3 workers
pm2 scale app 2              # Scales `app` up or down to 2 workers total

# Listing

pm2 list               # Display all processes status
pm2 jlist              # Print process list in raw JSON
pm2 prettylist         # Print process list in beautified JSON

pm2 describe 0         # Display all information about a specific process

pm2 monit              # Monitor all processes

# Logs

pm2 logs [--raw]       # Display all processes logs in streaming
pm2 flush              # Empty all log files
pm2 reloadLogs         # Reload all logs

# Actions

pm2 stop all           # Stop all processes
pm2 restart all        # Restart all processes

pm2 reload all         # Will 0s downtime reload (for NETWORKED apps)

pm2 stop 0             # Stop specific process id
pm2 restart 0          # Restart specific process id

pm2 delete 0           # Will remove process from pm2 list
pm2 delete all         # Will remove all processes from pm2 list

# Misc

pm2 reset <process>    # Reset meta data (restarted time...)
pm2 updatePM2          # Update in memory pm2
pm2 ping               # Ensure pm2 daemon has been launched
pm2 sendSignal SIGUSR2 my-app # Send system signal to script
pm2 start app.js --no-daemon
pm2 start app.js --no-vizion
pm2 start app.js --no-autorestart
Wrapping up
As demonstrated, Node.js was installed using the MSI installation module, which is accessible on the Node.js website. A Node.js application can be started on the client after this installation has installed the necessary component
Other related guides:


