Budgie is a desktop environment developed by the Solus project as well as contributors from various communities such as Arch Linux, Manjaro, openSUSE Tumbleweed, and Ubuntu Budgie. Budgie’s design is based on the principles of simplicity, minimalism, and elegance.
In this guide I will demonstrate how to Install Budgie Desktop Environment on Debian.
Features of Budgie Desktop Environment
The features include:
- In comparison to the GNOME desktop environment, it has a high performance.
- Under the Bottom Panel choices, you may choose the applets you want in the panel.
- You may customize window and icon themes, as well as whether you want a global dark theme and whether or not you want windows to use animations, under Style.
- Solus provides a similar user experience to KDE Plasma or GNOME with the Dash to Panel extension, resulting in a positive user experience.
- In comparison to other desktop environments, the Budgie Desktop Environment is attractive.
Budgie Desktop Environment System Requirements
Here are minimum system requirements for the installation of Budgie Desktop Environment:
- a 64-bit CPU with a clock speed of at least 2 GHz
- system memory of at least 4 GB
- free disk space of at least 25 GB A minimum of 8.6 GB is required.
- A graphics card and monitor with a resolution of 1024×768 pixels are required.
Install Budgie Desktop Environment on Debian
Installing the Budgie Desktop Environment on Debian is as simple as following the steps below (Bullseye).
Step 1 – Update Debian System
Before you begin any installation, make sure the system packages are up to date:
sudo apt update -yAlso perform a system upgrade and reboot the system
sudo reboot nowStep 2 – Install Budgie Desktop Environment on Debian
Run the following command on a Debian Linux desktop to install Budgie Desktop Environment:
sudo apt install budgie-desktopAccept the installation prompt to proceed:
Reading package lists... Done
Building dependency tree... Done
Reading state information... Done
The following additional packages will be installed:
  budgie-control-center budgie-control-center-data budgie-core budgie-desktop-view gir1.2-budgie-1.0 gir1.2-budgieraven-1.0 gnome-bluetooth-common
  gnome-power-manager gnome-screensaver libbudgie-appindexer0 libbudgie-plugin0 libbudgie-private0 libbudgie-raven-plugin0 libbudgietheme0
  libcolord-gtk1 libdbus-glib-1-2 libgnome-bluetooth13 libraven0 libxdo3 xdotool
Suggested packages:
  libcanberra-gtk-module arc-theme papirus-icon-theme slick-greeter
The following NEW packages will be installed:
  budgie-control-center budgie-control-center-data budgie-core budgie-desktop budgie-desktop-view gir1.2-budgie-1.0 gir1.2-budgieraven-1.0
  gnome-bluetooth-common gnome-power-manager gnome-screensaver libbudgie-appindexer0 libbudgie-plugin0 libbudgie-private0 libbudgie-raven-plugin0
  libbudgietheme0 libcolord-gtk1 libdbus-glib-1-2 libgnome-bluetooth13 libraven0 libxdo3 xdotool
0 upgraded, 21 newly installed, 0 to remove and 5 not upgraded.
Need to get 8,175 kB of archives.
After this operation, 29.7 MB of additional disk space will be used.
Do you want to continue? [Y/n] y
This may take a long time depending on your internet speed. You’ll need to restart your computer once you’ve completed.
Step 3 – Using Budgie Desktop Environment on Debian
After installation reboot your machine.
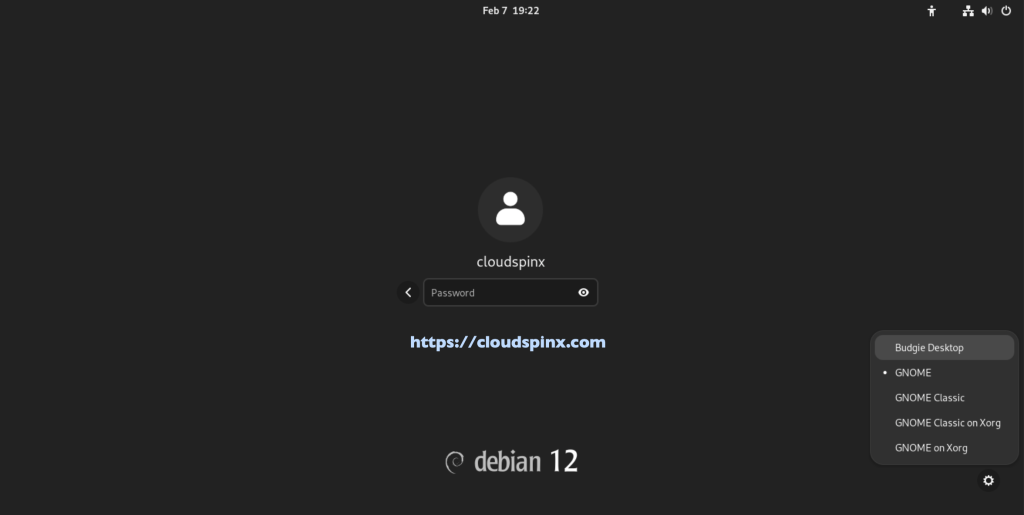
sudo systemctl rebootUse the Desktop switcher on the Login screen to select Budgie DE.
Budgie Desktop Environment start as shown below:
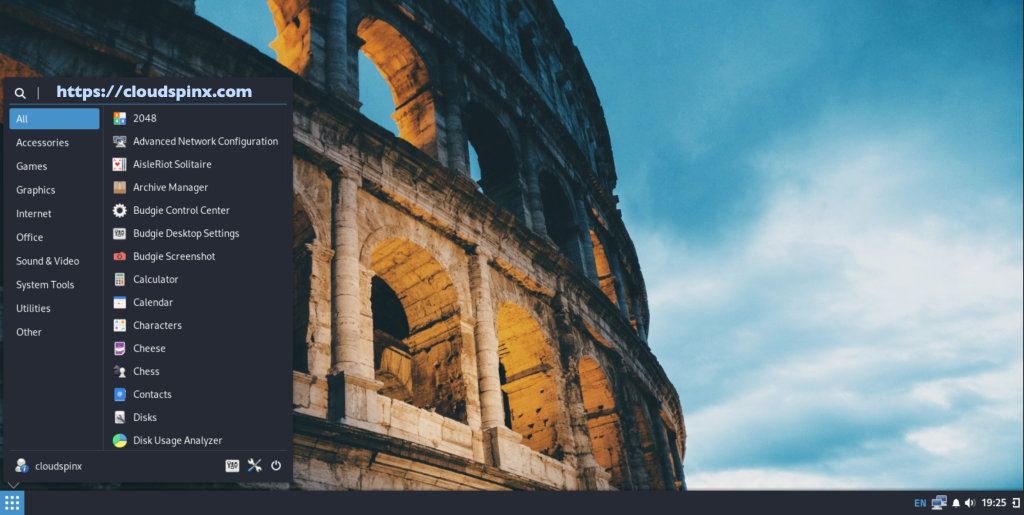
Step 4 – Configurations of Budgie Desktop Environment
Here are some of the configurations to make after installing Budgie Desktop Environment.
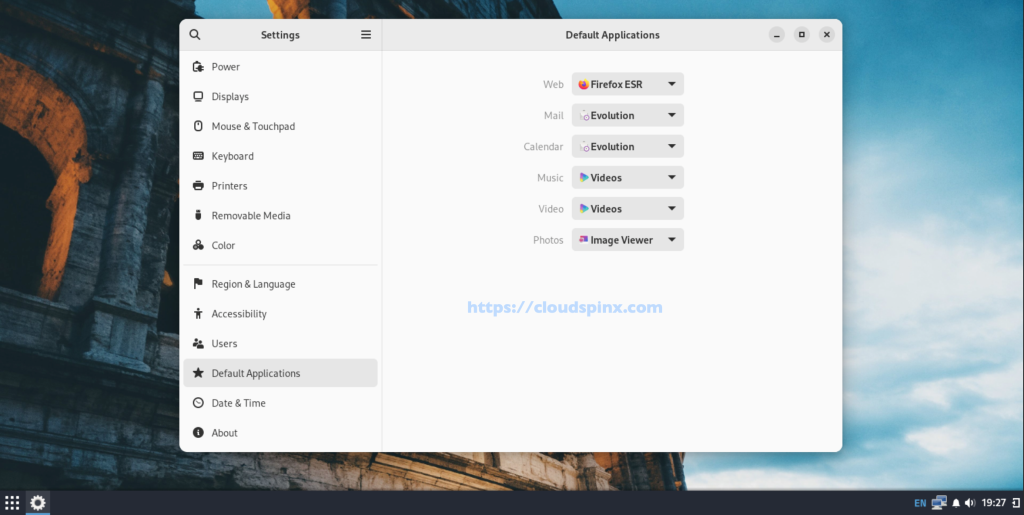
Default Applications
Set your default application in Budgie Desktop Environment as shown below:
Navigate to Settings -> Default Applications.
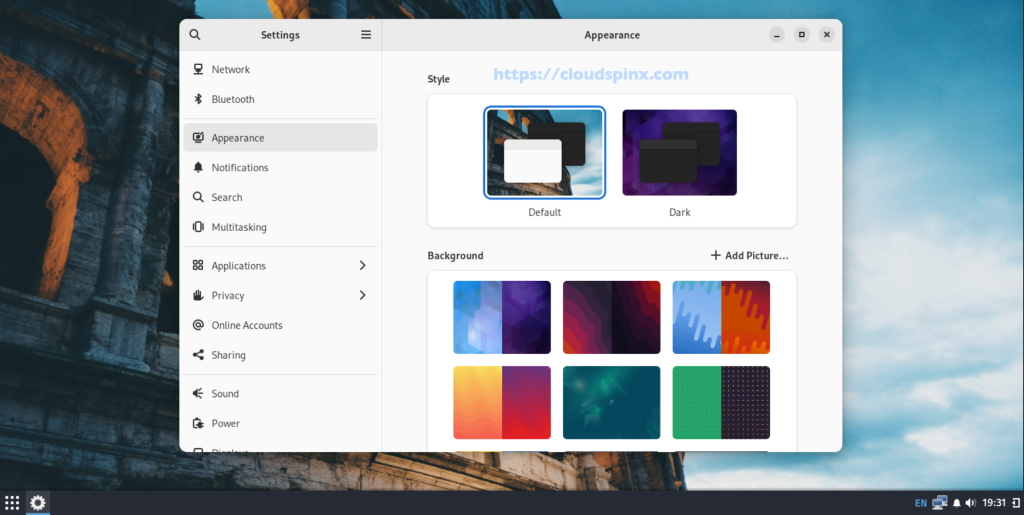
Set Background Image
Navigate to Settings -> Appearance -> Background.
Select Background image of your choice.
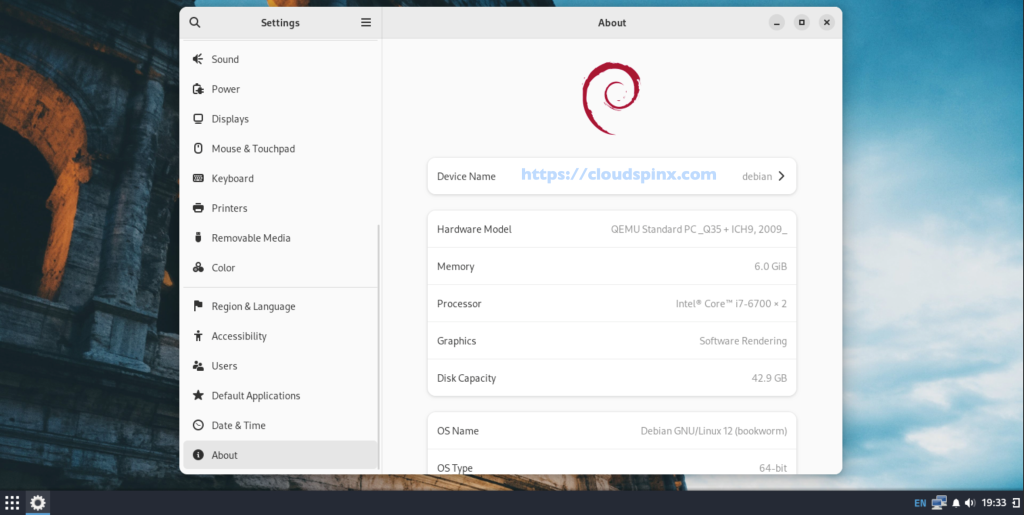
Display System Information
Navigate to Settings -> About.
Conclusion
The installation of the Budgie Desktop Environment on Debian is now complete. Make use of the Budgie Desktop Environment’s many features. I hope you enjoyed reading it.
More Guides of the same:


