GlassFish is an open-source application server project started by Sun Microsystems for the Java EE platform, then sponsored by Oracle and now by Eclipse Foundation supported by Payara, Oracle and Redhat. GlassFish allows developers to create applications for enterprise that are portable, scalable and that integrate with legacy technologies. In this guide, we will demonstrate how to install and Use Eclipse GlassFish 7.x on Rocky Linux / CentOS / AlmaLinux.
GlassFish has the following features:
- Java EE Security API
- Java API for JSON Binding (JSON-B)
- Interceptors
- Bean Validation (BV)
- Application Client Container
- JavaMail resources
- Message security
- Contexts and Dependency Injection for Java EE (CDI)
Before we install Eclipse GlassFish we need to install a few necessary packages.
sudo dnf install -y wget unzipStep 1 – Install and configure Java
One of the dependencies required by GlassFish is Java, we install Java or OpenJDK.
sudo dnf install java-17-openjdk-develDependency Tree:
....
Transaction Summary
================================================================================
Install  3 Packages

Total download size: 43 M
Installed size: 177 M
Is this ok [y/N]: y
We then set the JAVA_HOME environment.
$ sudo update-alternatives --config java
 sudo update-alternatives --config java

There are 3 programs which provide 'java'.

  Selection    Command
-----------------------------------------------
   1           java-11-openjdk.x86_64 (/usr/lib/jvm/java-11-openjdk-11.0.23.0.9-3.el8.x86_64/bin/java)
 + 2           java-17-openjdk.x86_64 (/usr/lib/jvm/java-17-openjdk-17.0.11.0.9-2.el8.x86_64/bin/java)
*  3           java-1.8.0-openjdk.x86_64 (/usr/lib/jvm/java-1.8.0-openjdk-1.8.0.412.b08-2.el8.x86_64/jre/bin/java)

Enter to keep the current selection[+], or type selection number: 2
From the output, copy the Java path to this file.
vim ~/.bash_profileAt the end of the file, paste this.
export JAVA_HOME=/usr/lib/jvm/jre-openjdk
export PATH=$PATH:$JAVA_HOME/bin
Then source the path.
source ~/.bash_profileCoonfirm the path is set.
$ echo $JAVA_HOME
/usr/lib/jvm/jre-openjdk

$ java -version
openjdk version "17.0.11" 2024-04-16 LTS
OpenJDK Runtime Environment (Red_Hat-17.0.11.0.9-3) (build 17.0.11+9-LTS)
OpenJDK 64-Bit Server VM (Red_Hat-17.0.11.0.9-3) (build 17.0.11+9-LTS, mixed mode, sharing)
Step 2 – Install Eclipse GlassFish
We first create a user for GlassFish.
sudo useradd -s /sbin/nologin glassfishThen proceed and download the version of GlassFish from the official download page. Get the latest release URL and download it using wget.
wget https://download.eclipse.org/ee4j/glassfish/glassfish-7.0.15.zipWith a complete download, unzip the file.
sudo unzip -d /opt/ glassfish-7.*.zipGrant ownership of the file to the GlassFish user created above.
sudo chown -R glassfish:glassfish /opt/glassfish7/Step 3 – Create a GlassFish Service
We need to create a systemd service for Eclipse GlassFish server by editing the file
sudo vi /usr/lib/systemd/system/glassfish7.serviceIn the file, add this content.
[Unit]
Description = GlassFish Server
After = syslog.target network.target

[Service]
User = glassfish
ExecStart = /usr/bin/java -jar /opt/glassfish7/glassfish/lib/client/appserver-cli.jar start-domain
ExecStop = /usr/bin/java -jar /opt/glassfish7/glassfish/lib/client/appserver-cli.jar stop-domain
ExecReload = /usr/bin/java -jar /opt/glassfish7/glassfish/lib/client/appserver-cli.jar restart-domain
Type = forking

[Install]
WantedBy = multi-user.target
Start and enbale GlassFish to run on boot.
sudo systemctl start glassfish7.service
sudo systemctl enable glassfish7.service
Check if GlassFish service is running.
$ systemctl status glassfish7.service
● glassfish.service - GlassFish Server
   Loaded: loaded (/usr/lib/systemd/system/glassfish7.service; enabled; vendor preset: disabled)
   Active: active (running) since Wed 2024-07-17 15:07:17 UTC; 3s ago
  Process: 10056 ExecStart=/usr/bin/java -jar /opt/glassfish7/glassfish/lib/client/appserver-cli.jar start-domain (code=exited, status=0/SUCCESS)
 Main PID: 10077 (java)
    Tasks: 97 (limit: 48750)
   Memory: 368.8M
   CGroup: /system.slice/glassfish.service
           └─10077 /usr/lib/jvm/java-17-openjdk-17.0.11.0.9-2.el8.x86_64/bin/java -cp /opt/glassfish7/glassfish/modules/glassfish.jar -DWALL_CLOCK_START=2024-07-17T15:07:11.484693043Z -XX:+UnlockDi>

Jul 17 15:07:11 rocky8.cloudspinx.com systemd[1]: Starting GlassFish Server...
Jul 17 15:07:16 rocky8.cloudspinx.com java[10056]: Waiting for domain1 to start .....
Jul 17 15:07:16 rocky8.cloudspinx.com java[10056]: Waiting finished after 4,964 ms.
Jul 17 15:07:16 rocky8.cloudspinx.com java[10056]: Successfully started the domain : domain1
Jul 17 15:07:16 rocky8.cloudspinx.com java[10056]: domain  Location: /opt/glassfish7/glassfish/domains/domain1
Jul 17 15:07:16 rocky8.cloudspinx.com java[10056]: Log File: /opt/glassfish7/glassfish/domains/domain1/logs/server.log
Jul 17 15:07:16 rocky8.cloudspinx.com java[10056]: Admin Port: 4,848
Jul 17 15:07:16 rocky8.cloudspinx.com java[10056]: Command start-domain executed successfully.
Jul 17 15:07:17 rocky8.cloudspinx.com systemd[1]: Started GlassFish Server.
With the service running, allow the below ports through the firewall.
sudo firewall-cmd --add-port={4848,8080,8181}/tcp --permanent
sudo firewall-cmd --reload
Step 4 – Configure Eclipse GlassFish
Set up GlassFish binaries path environment variable:
sed -i 's/^PATH=*/PATH=\/opt\/glassfish7\/bin:/g' ~/.bash_profileBy default, GlassFish has no password, so we need to set a password for GlassFish admin user and enable secure login.
$ sudo /opt/glassfish7/bin/asadmin --port 4848 change-admin-password
Enter admin user name [default: admin]>admin
Enter the admin password>  <ENTER>
Enter the new admin password>
Enter the new admin password again>
Command change-admin-password executed successfully.
When asked to enter the admin password, click enter and proceed to Enter the new admin password.Enter and confirm your password.
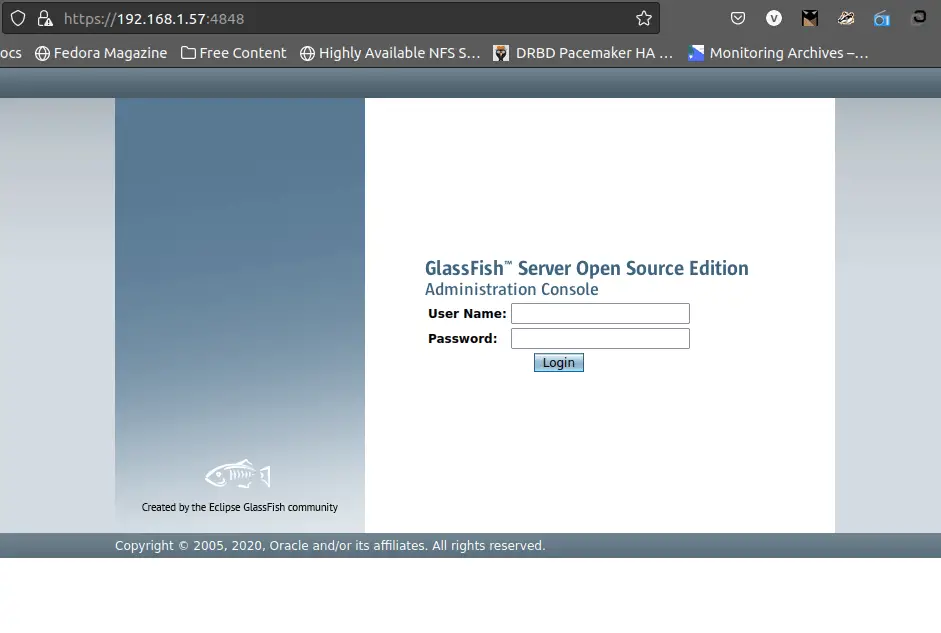
Now GlassFish admin console is running as a clear text HTTP service. Enable secure login with this command.
$ sudo /opt/glassfish7/bin/asadmin --port 4848 enable-secure-admin
Enter admin user name>  admin
Enter admin password for user "admin"> <ENTER-PASSWORD>
You must restart all running servers for the change in secure admin to take effect.
Command enable-secure-admin executed successfully.
For the changes to apply, restart GlassFish.
sudo systemctl restart glassfish.serviceStep 5 – Access Eclipse GlashFish Web UI
Access Eclipse Glassfish Admin console using the url https://server-ip-or-domain:4848/
Enter your login credentials for the Admin user you set.
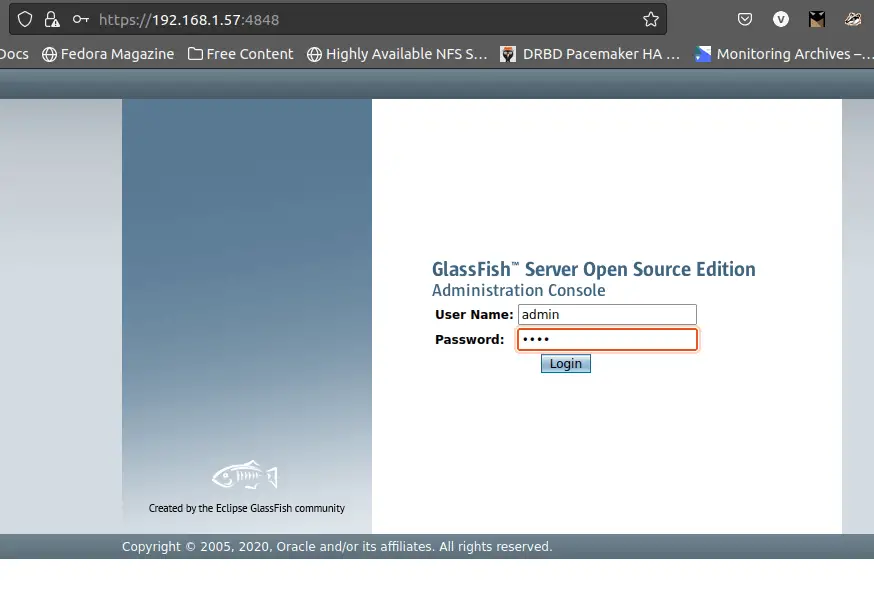
On successful login, you will see this page. This is the Eclipse GlassFish console.
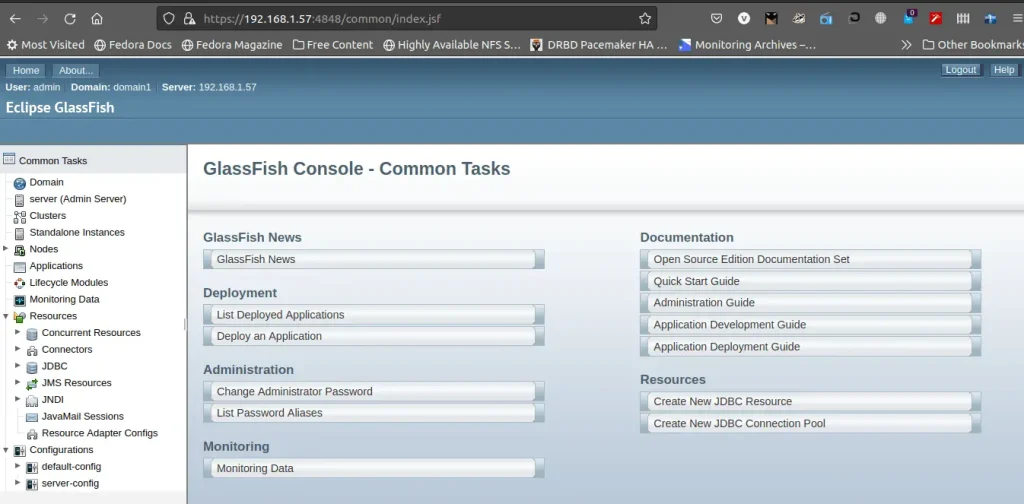
Form this Homepage, you can see common tasks such as the deployment(deployed applications), Administration, Monitoring e.t.c
Deploying a sample Application
On the left of the page, click on Nodes. In the tree list, select Applications.
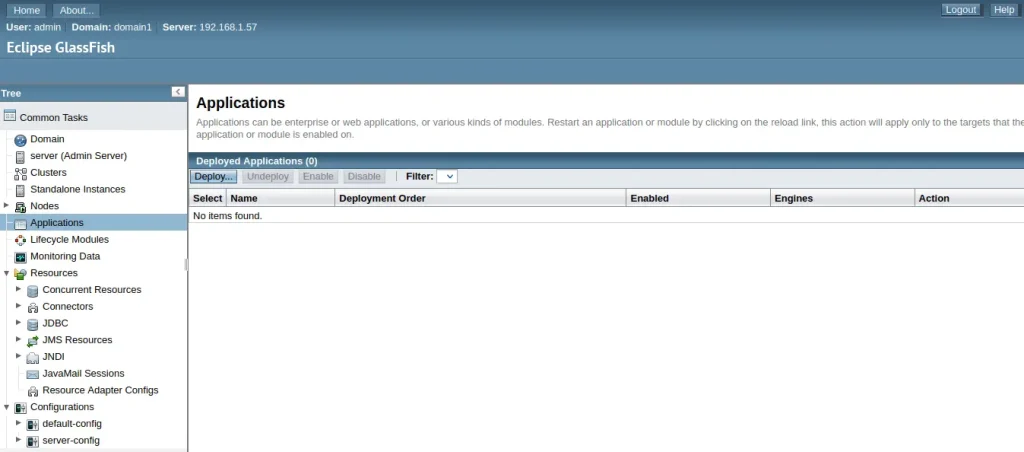
While here, click deploy. You will be required to select a package file(example a .war file) from your system’s directory or from a local directory accessible from GlassFish server.
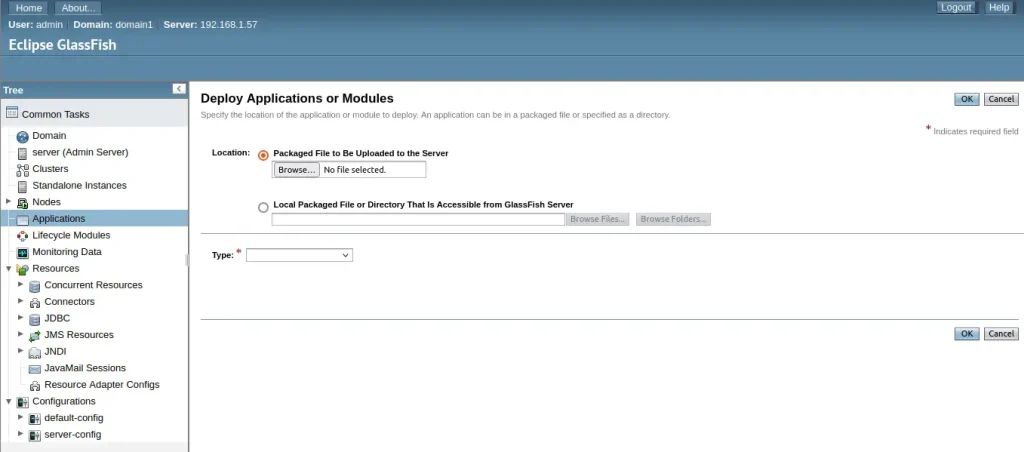
With the file selected, you are required to specify the type of the file either a web application, application client, connector module e.t.c
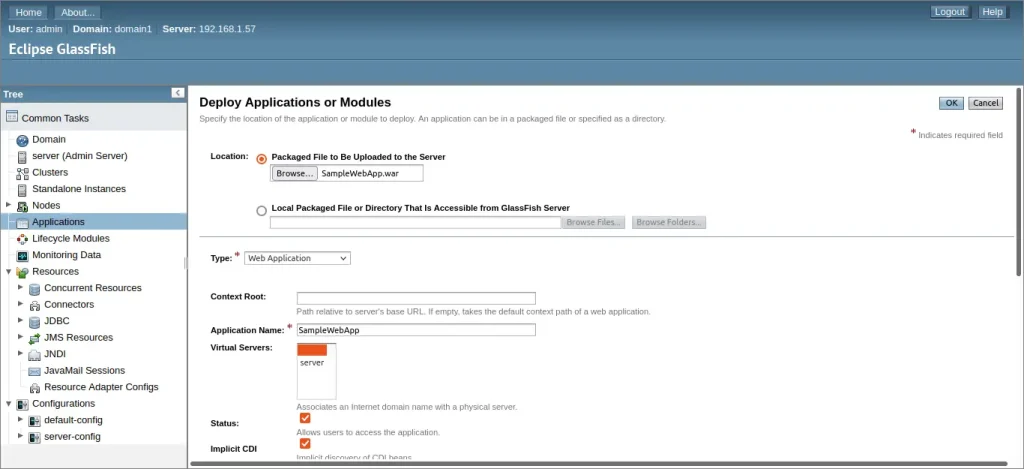
Scroll to the bottom of the page and click OK. You will have your web application ready to be Launched.
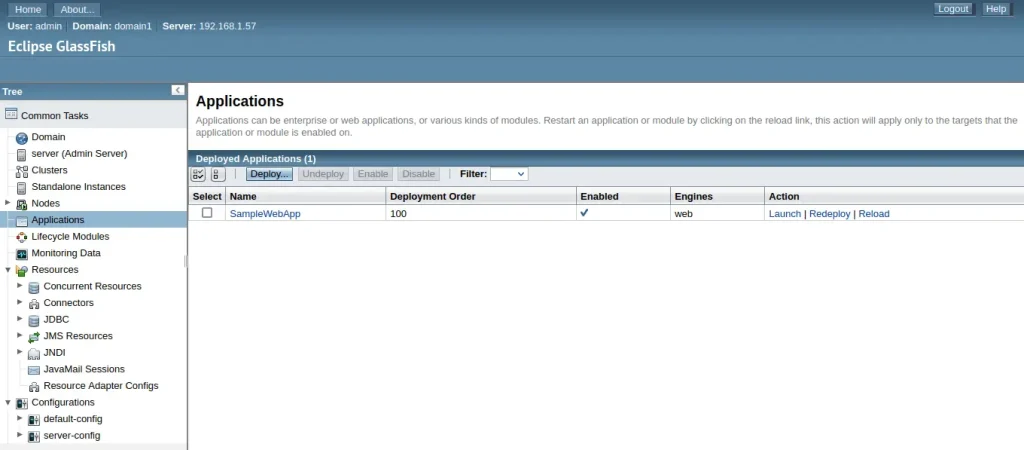
While here, you can Launch, redeploy and reload your deployment.
To undeploy your application, just click at it and select undeploy as shown.
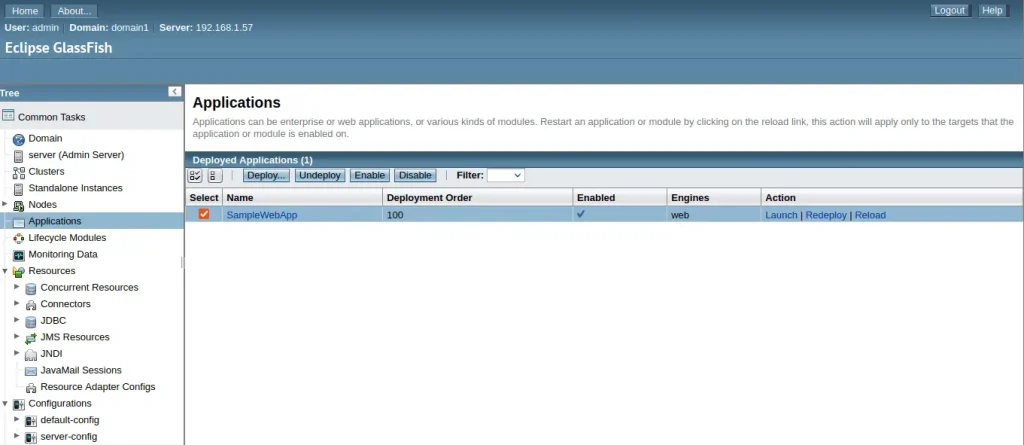
Conclusion
We have come to the end of this guide. We have walked through the installation and use of Eclipse GlassFish 7.x on Rocky Linux / CentOS / AlmaLinux. We hope you benefited from this article.
Explore More with CloudSpinx
Visit CloudSpinx, your go-to IT consulting partner for smarter, streamlined solutions.
Check out these other articles:

