Want to manage virtual machines the easy way on your Arch, Manjaro, or EndeavourOS box? It only takes the installation of a powerful, open-source virtualization application called KVM and giving a nice, web-based interface to Cockpit to manage your virtual world in just a few clicks.
Whether it’s your first time or one of many, this tutorial will walk you through a swift installation process in which your system will immediately start working as a virtualization powerhouse in no time. Forget those unclear manipulations in a command-line interface; say hello to intuitive VM management.
🧠 Don’t just learn KVM – master it with the best-selling eBook trusted by thousands.
Update System Packages
It’s always a good practice to ensure that your system packages are upto date before installing anything. This saves you from running into errors such as “database file for … does not exist” :
sudo pacman -SyuCheck if Virtualization Is Enabled
The first step is to verify if you have virtualization support enabled on your server. To do so, run the following command:
grep -Ec '(vmx|svm)' /proc/cpuinfoIf virtualization is enabled, the output value should be greater than 0, if not, you may need to enable virtualization in your BIOS/UEFI settings.
Install KVM and Virtualization Tools
Now that you are sure that your system supports virtualization, you need to install all KVM-related packages including:
- qemu-full: User-space KVM emulator, manages communication between hosts and VMs
- qemu-img: Provides create, convert, modify, and snapshot, offline disk images
- libvirt: Virtualization API/daemon/management tool
- libvirt-install: CLI tool to create guest VMs
- virt-manager: GUI tool to create and manage guest VMs
- virt-viewer: GUI console to connect to running VMs
Do so by running the command below:
sudo pacman -S qemu-full qemu-img libvirt virt-install virt-manager virt-viewerInstall Cockpit and Cockpit Machines
Cockpit allows linux users to perform system tasks on their servers using a mouse. It is much easier and simpler start containers, administer storage, configure networks, and inspect logs with a grahpical interface.
To install cockpit and cockpit mcahines, run the command below:
sudo pacman -S cockpit cockpit-machinesSample output:
[devops@endeavouros ~]$ sudo pacman -S cockpit cockpit-machines
resolving dependencies...
looking for conflicting packages...

Package (6)             New Version  Net Change  Download Size

core/cracklib           2.10.2-1       0.90 MiB       0.27 MiB
extra/kexec-tools       2.0.29-2       0.21 MiB       0.08 MiB
extra/libpwquality      1.4.5-5        0.43 MiB       0.09 MiB
extra/libvirt-dbus      1.4.1-3        0.28 MiB       0.06 MiB
extra/cockpit           326-2          7.66 MiB       5.59 MiB
extra/cockpit-machines  321-1          0.97 MiB       0.97 MiB

Total Download Size:    7.06 MiB
Total Installed Size:  10.45 MiB

:: Proceed with installation? [Y/n] Y
Enable and Start Necessary Services
Once installation is complete, start and enable libvirt virtualization daemon and cockpit service:
sudo systemctl enable --now libvirtd
sudo systemctl enable --now cockpit.socket
Sample output:
[devops@endeavouros ~]$ systemctl status libvirtd
● libvirtd.service - libvirt legacy monolithic daemon
     Loaded: loaded (/usr/lib/systemd/system/libvirtd.service; enabled; preset: disabled)
     Active: active (running) since Mon 2024-10-14 13:34:48 EAT; 3min 13s ago
 Invocation: a7cb2f14295b4f33a19cb904a5b5e4e0
TriggeredBy: ● libvirtd.socket
             ● libvirtd-ro.socket
             ● libvirtd-admin.socket
       Docs: man:libvirtd(8)
             https://libvirt.org/
   Main PID: 33937 (libvirtd)
      Tasks: 21 (limit: 32768)
     Memory: 16.5M (peak: 55.3M)
        CPU: 4.821s
     CGroup: /system.slice/libvirtd.service
             └─33937 /usr/bin/libvirtd --timeout 120

Oct 14 13:34:48 endeavouros systemd[1]: Starting libvirt legacy monolithic daemon...
Oct 14 13:34:48 endeavouros systemd[1]: Started libvirt legacy monolithic daemon.
[devops@endeavouros ~]$ systemctl status cockpit.socket
● cockpit.socket - Cockpit Web Service Socket
     Loaded: loaded (/usr/lib/systemd/system/cockpit.socket; enabled; preset: disabled)
     Active: active (running) since Mon 2024-10-14 12:55:40 EAT; 42min ago
 Invocation: 13531932bf89490093f9681840891a37
   Triggers: ● cockpit.service
       Docs: man:cockpit-ws(8)
     Listen: [::]:9090 (Stream)
    Process: 32190 ExecStartPost=/usr/share/cockpit/motd/update-motd  localhost (code=exited, status=0/SUCCESS)
    Process: 32203 ExecStartPost=/bin/ln -snf active.motd /run/cockpit/motd (code=exited, status=0/SUCCESS)
      Tasks: 0 (limit: 28671)
     Memory: 8K (peak: 2.1M)
        CPU: 20ms
     CGroup: /system.slice/cockpit.socket

Oct 14 12:55:40 endeavouros systemd[1]: Starting Cockpit Web Service Socket...
Oct 14 12:55:40 endeavouros systemd[1]: Listening on Cockpit Web Service Socket.
[devops@endeavouros ~]$
Add User to libvirt Group
Now, ensure your user is part of the libvirt group to manage virtual machines without root privileges. Do so by running the command below:
sudo usermod -aG libvirt $(whoami)Then logout and log back in for the group changes to be applied.
Access Cockpit Web Interface
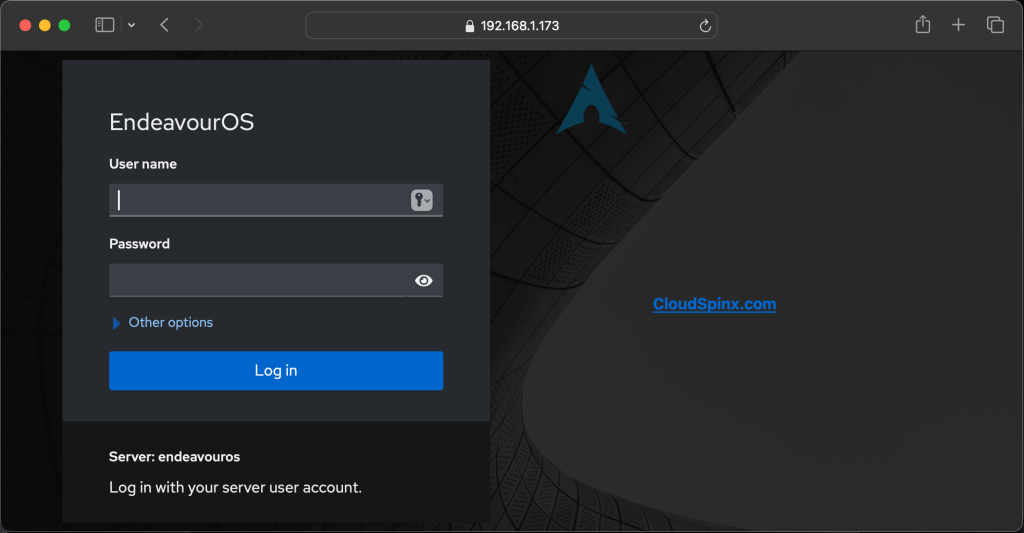
Having intalled cockpit succesfully, it’s time to access it. When you login after installing and starting cockpit service, the system displays the URL for accessing the web UI. Depending on your settings, you can click on the link, or just copy the URL then open up your browser and enter the URL:
Web console: https://endeavouros:9090/ or https://192.168.1.173:9090/

Last login: Mon Oct 14 12:55:10 2024 from 192.168.1.177
[devops@endeavouros ~]$https://<your-server-ip>:9090If your connection is being refused, then it’s a firewall issue. Open the firewall to allow conection via port 9090, then reload the firewall:
sudo firewall-cmd --permanent --add-port=9090/tcp
sudo firewall-cmd --reload
Now proceed to log in with your system user credentials.

Verify KVM Installation
To ensure that KVM was installed correctly, you can check if the necessary KVM kernel modules are loaded. Use the following commands:
#for Intel processors
lsmod | grep kvm_intel

#for AMD processors
lsmod | grep kvm_amd
OR
sudo virsh list -all
Sample Output:
[devops@endeavouros ~]$ lsmod | grep kvm_intel
kvm_intel             430080  0
kvm                  1368064  1 kvm_intel
[devops@endeavouros ~]$ virsh list --all
 Id   Name   State
--------------------

[devops@endeavouros ~]$
In the end, KVM with Cockpit on Arch, Manjaro, or EndeavourOS indeed finally makes your system a serious virtualization platform-complete with arguably the friendliest web interface. Whether it is testing other environments or going into production-level VMs, this setup truly makes it flexible and at your fingertips. Happy virtualizing!. Our Linux Engineers are available 24/7 to help out with any issues you may be facing.


