OBS-Studio is an open-source software used for capturing, compositing, encoding, recording and streaming audiovisual content. You can use OBS studio Screen-cast included screen recording, camera image and sound record. It can be used to stream content on various servers such as Twitter, Twitch, YouTube, Facebook Live, Mixer e.t.c. OBS studio is available for Windows, Mac and Linux Operating Systems.
🚀 Support our work by purchasing the Ultimate Ubuntu Desktop Handbook today.
OBS Studio has the following features:
- Drag and drop.
- Live to stream.
- Free and open-source.
- Video transitions.
- Game overlay.
- Real-time video/audio capturing and mixing.
- Fully configurable with multiple video sources.
- Export to multiple formats.
- Video recording.
- Video transitions.
- Individual audio mixer with per-source supporting filters.
In this Guide, we will walk through the installation of OBS Studio on Ubuntu 24.04 / Debian 12 Linux.
Install OBS Studio on Ubuntu 24.04 / Debian 12
In this guide, we will install OBS studio on Ubuntu 24.04 / Debian 12 using the following steps:
Step 1- Update System.
Before we do anything on our Ubuntu 24.04 / Debian 12 system, ensure that it is updated and upgraded.
sudo apt update -y && sudo apt upgrade -yStep 2- Install OBS Studio on Ubuntu 24.04 / Debian 12
There are several ways to get OBS Studio installed on Ubuntu 24.04 / Debian 12. Among them are:
Method 1: Install OBS Studio on Ubuntu 24.04 / Debian 12 from Snap.
This is achieved by issuing the command:
sudo snap install obs-studioWith a successful installation, connect the media.
sudo snap connect obs-studio:camera
sudo snap connect obs-studio:removable-media
Method 2: Install OBS Studio on Ubuntu 24.04 / Debian 12 from PPA
For this method, we first have to add PPA to our system.
sudo add-apt-repository ppa:obsproject/obs-studio
sudo apt update -y
Once PPA repository is added to our system, we proceed and install OBS Studio.
sudo apt install obs-studio
sudo apt install ffmpeg
Run OBS Studio on Ubuntu 24.04 / Debian 12
With OBS Studio installed on our system, we now proceed and launch it from the App Menu.
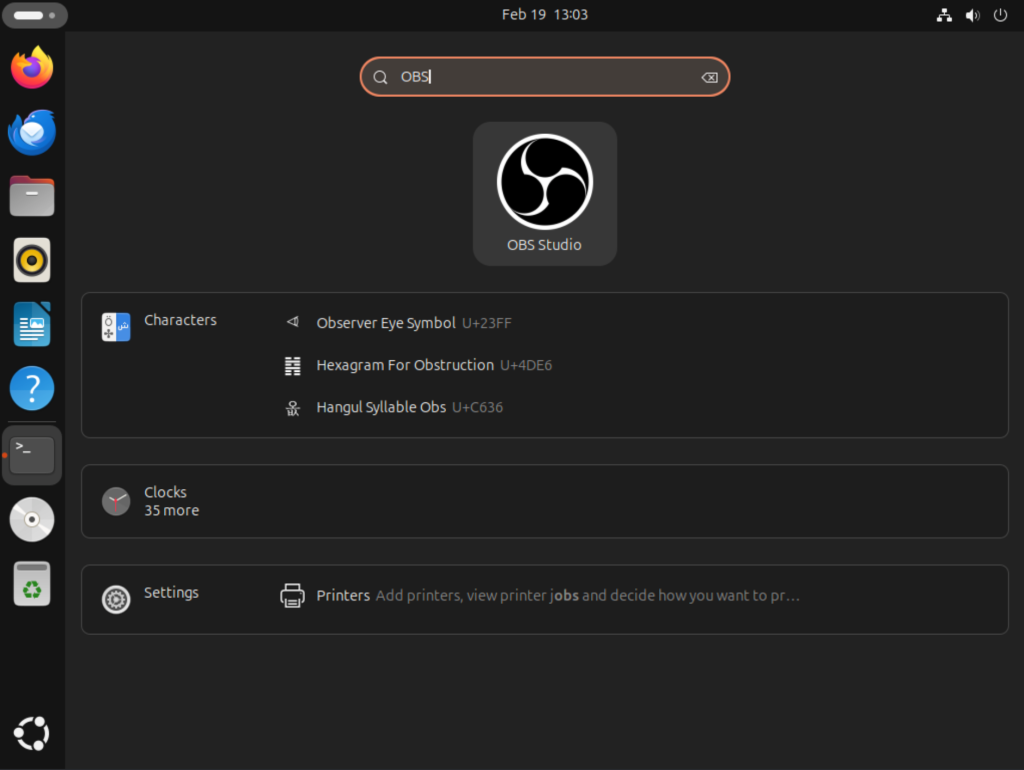
When the application is started, you will see this interface.
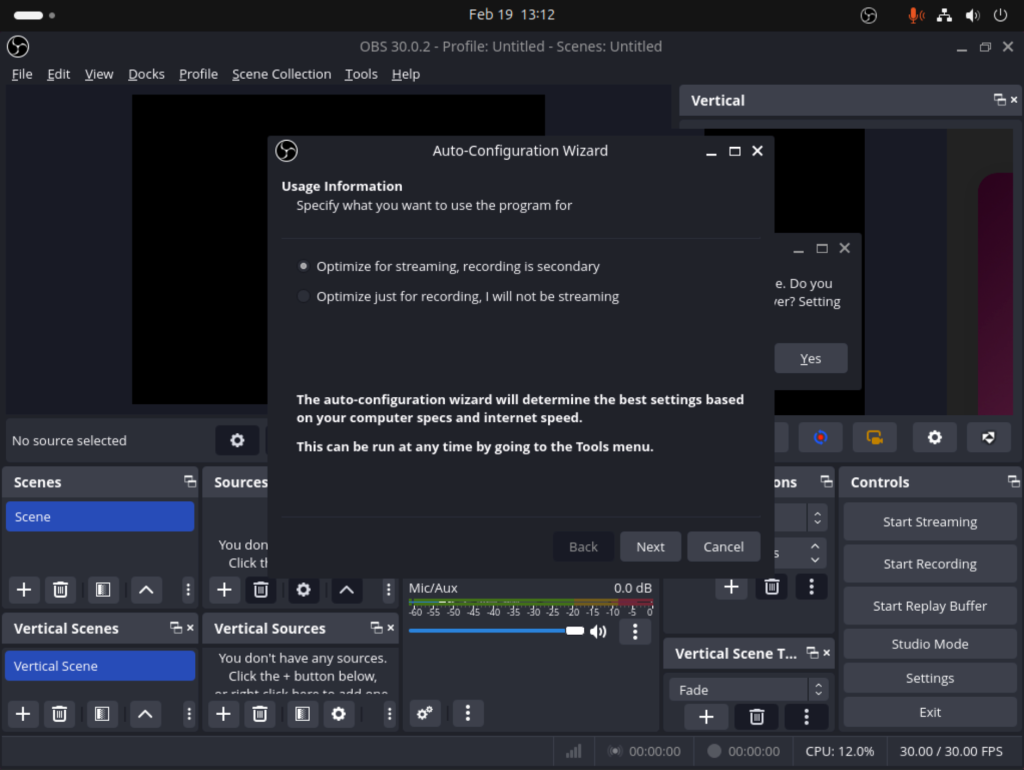
OBS Studio Auto-configuration assistant
When the app is launched for the first time, the pop up with the name “Auto-configuration assistant” appears. This will help you set important things and adjust them to your hardware. This is achieved by selecting the desired option on the displayed list either optimize for streaming or optimize for recording. I will go for “optimize for streaming, recording is secondary” and click Next
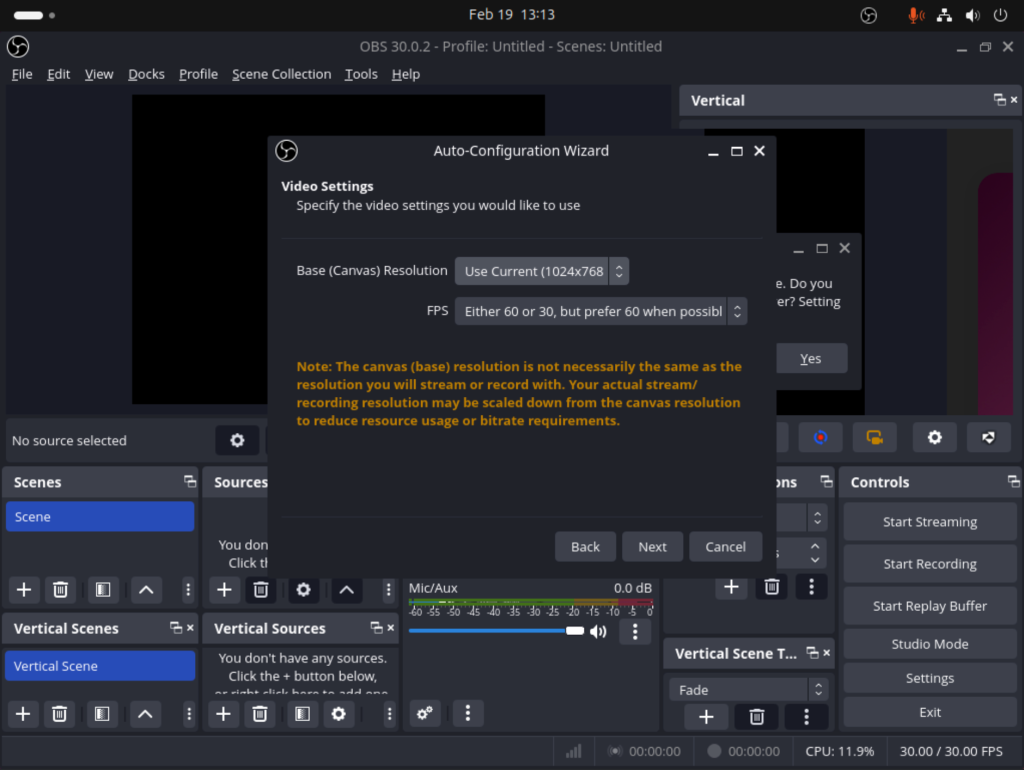
Then you are to enter the quality and resolution of the streaming video.
On the next page, you are required to choose and set the stream information.
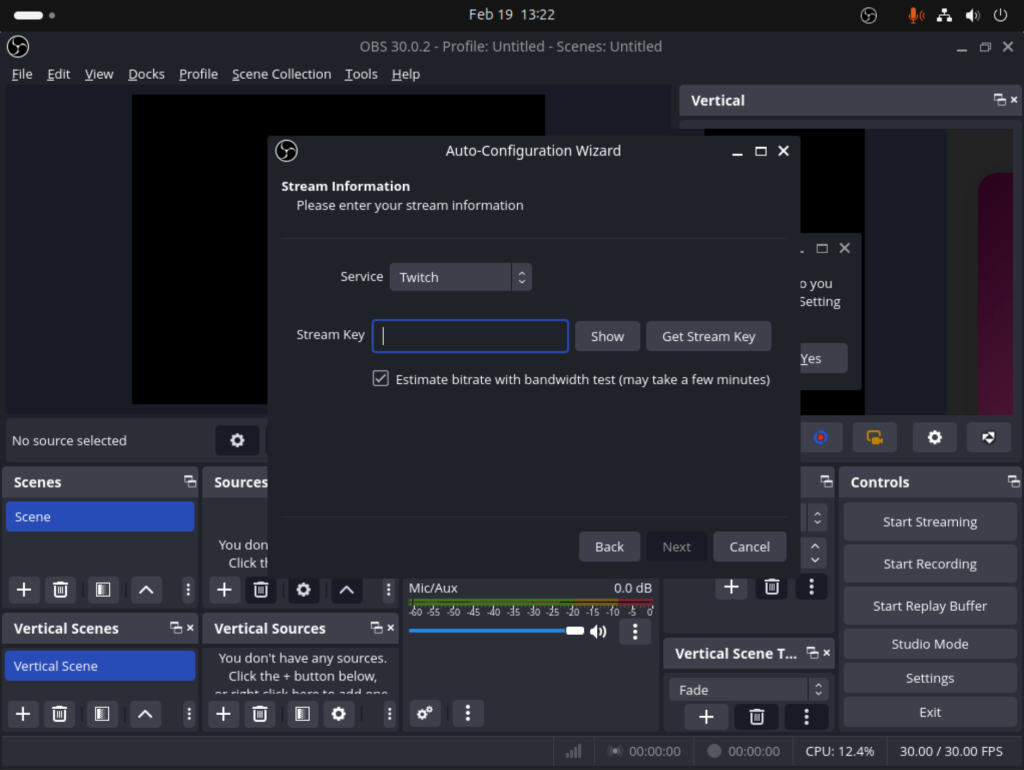
Enter the stream key and proceed to setup your broadcast.
Capture your Desktop Screen
For screen recording, select it under the Sources window and click + and select Screen Capture. When you click Ok, your screen is automatically recognized and the image will be displayed as preview in the next window.
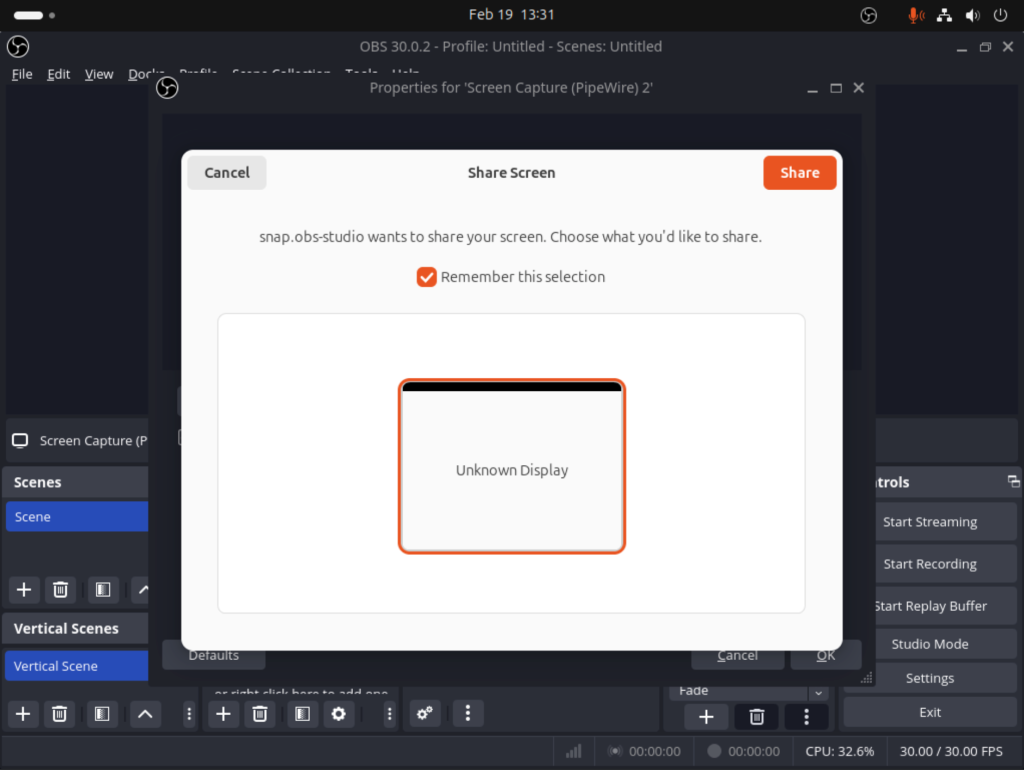
The screen capture window preview will be displayed as such:
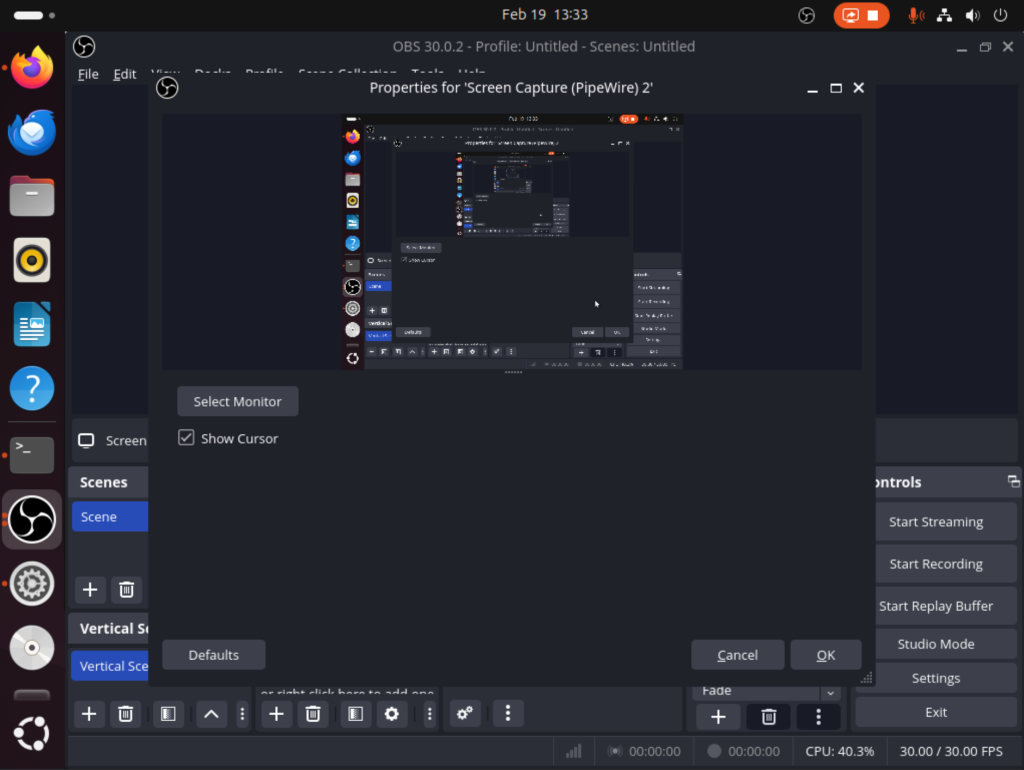
One can switch the screen to broadcast by adding a scene and selecting a screen to broadcast.
Set up additional image sources
One can add other image sources such as a webcam e.t.c. This feature is found in Sources then video capture device.
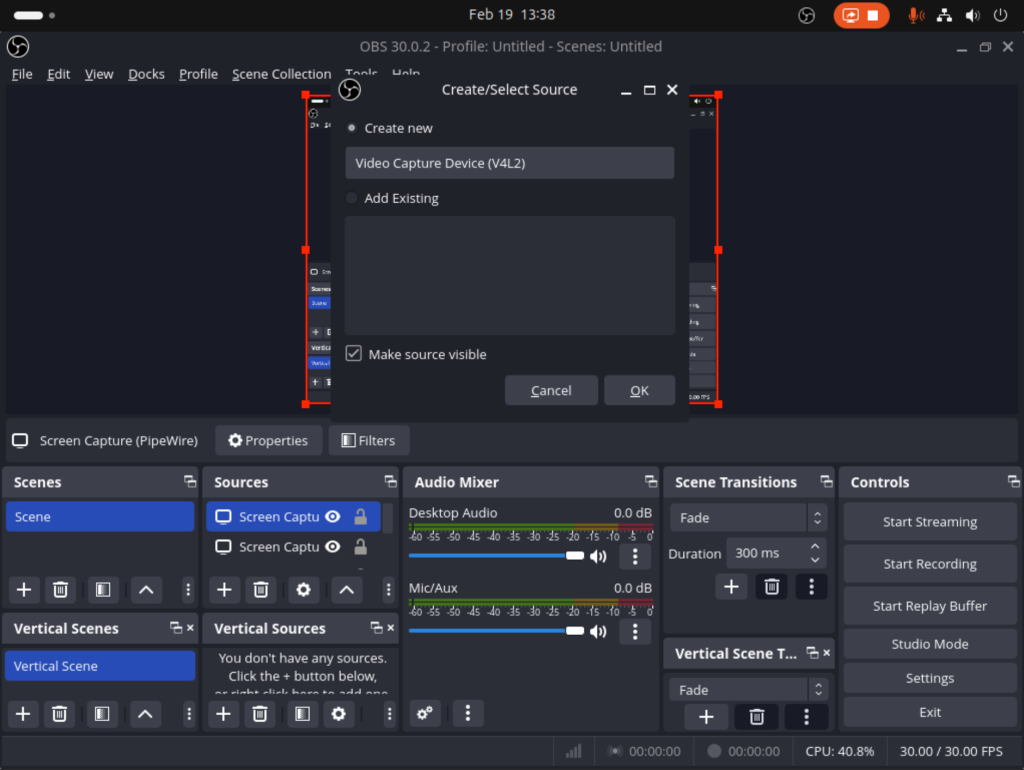
Start and stop recording/Streaming on OBS Studio
After making appropriate settings in OBS studio, you start recording/streaming by hitting “Start recording” or “start streaming” button at the bottom right. Similarly to stop recording/streaming hit the stop button. When you stop recording, the video is saved in MKV format and the folder is displayed by clicking on File → Video recording.
Conclusion
In this article, we have successfully gone through how to install OBS Studio on Ubuntu 24.04 | Debian 12 system. I have also demonstrated a few configurations to OBS Studio. I hope this article helped you.
Video Courses to Learn Linux System Administration:
- Linux Mastery: Master the Linux Command Line in 11.5 Hours
- Complete Linux Training Course to Get Your Dream IT Job
- Learn Linux in 5 Days and Level Up Your Career
- Linux Administration Bootcamp: Go from Beginner to Advanced
- Complete Linux Bash Shell Scripting with Real Life Examples
- Linux Shell Scripting: A Project-Based Approach to Learning
See more articles on our page:


