

osTicket is a free and open-source commercial customer support ticketing system. It is a simple lightweight web-based application that allows one to organize, manage and archive support requests. It is developed and maintained by Enhancesoft. It is written in PHP programming language and supports various database types such as PostgreSQL, MySQL and can also integrate with LDAP/Active directory for central authentication.
osTicket has the following features:
- Custom Columns and Queues.
- Service Level Agreements.
- Agent Collision Avoidance-has the ticket locking mechanism.
- Advanced Search.
- Auto-Responder-can be configured to auto reply to new requests.
- Help Topics-helps to route inquiries to the right department.
- Ticket Filters.
- Thread Action.
- Assign, Transfer, & Referral-Tickets can be transferred between departments.
This guide demonstrates how to install and configure osTicket on Rocky Linux 9 | AlmaLinux 9. Let’s get started.
Step 1: Update your System
Before we begin on our osTicket installation, you need to update your system and also install the required dependencies.
sudo dnf -y update
sudo dnf -y install yum-utils curl wget unzip vim
Step 2: Install LAMP Stack
We will install the LAMP stack for osTicket to run. LAMP stack is a combination of Apache Web server, MySQL or MariaDB, and PHP. We will get these packages from the EPEL and Remi repositories which we need to add to our system as below.
sudo dnf -y install https://dl.fedoraproject.org/pub/epel/epel-release-latest-9.noarch.rpm
sudo dnf -y install https://rpms.remirepo.net/enterprise/remi-release-9.rpm
Reset PHP.
sudo dnf module reset php -yEnable PHP 8.4 module:
sudo dnf module install php:remi-8.4 -yNow install LAMP stack.
sudo dnf install httpd mariadb mariadb-server php-{mysqlnd,pear,cgi,common,curl,gettext,zip,opcache,apcu,imap,intl,gd} -yConfirm the PHP version installed.
$ php -v
PHP 8.4.16 (cli) (built: Dec 16 2025 16:03:34) (NTS gcc x86_64)
Copyright (c) The PHP Group
Built by Remi's RPM repository <https://rpms.remirepo.net/> #StandWithUkraine
Zend Engine v4.4.16, Copyright (c) Zend Technologies
    with Zend OPcache v8.4.16, Copyright (c), by Zend Technologies
Step 3: Configure MariaDB database
Now with the LAMP stack successfully installed, we now start and enable MariaDB as below.
sudo systemctl enable --now mariadbHarden MariaDB as below:
sudo mariadb-secure-installationSample Output:
Enter current password for root (enter for none): JUST PRESS ENTER
Set root password? [Y/n] y
New password: SET-PASSWORD
Re-enter new password:RE-ENTER PASWORD
.........
Remove anonymous users? [Y/n] y
..........
Disallow root login remotely? [Y/n] y
..........
Remove test database and access to it? [Y/n] y
..........
Reload privilege tables now? [Y/n] y
.........
Thanks for using MariaDB!
Now login to MariaDB shell using the created root password.
mariadb -u root -pThe next thing to do here is to create a database for osTicket.
## CREATE THE OSTICKET DATABATE ##
CREATE DATABASE osticket_db;
GRANT ALL PRIVILEGES ON osticket_db.* TO osticket_user@localhost IDENTIFIED BY "StrongP@ssw0rd";
FLUSH PRIVILEGES;
QUIT;
Step 4: Download and Install osTicket
Download the latest available version of osTicket from the official downloads page. Alternatively, one can download osTicket using the cURL command as below.
curl -s https://api.github.com/repos/osTicket/osTicket/releases/latest \
  | grep browser_download_url \
  | grep "browser_download_url" \
  | cut -d '"' -f 4 \
  | wget -i -
With the file downloaded, extract it as below.
unzip osTicket-v*.zip -d osTicketIn the osTicket folder, there will be two files. scripts and upload.
$ ls -1 osTicket
scripts
upload
Now move the osTicket folder to /var/www/ directory.
sudo mv osTicket /var/www/We then create an osTicket configuration by copying the file below.
sudo cp /var/www/osTicket/upload/include/ost-sampleconfig.php /var/www/osTicket/upload/include/ost-config.php Change the ownership of the osTcicket directory to Apache user and group as shown.
sudo chown -R apache:apache /var/www/osTicketStep 5: Configure Apache Web Server
Let’s configure apache for osTicket by first creating the VirtualHost file.
sudo vim /etc/httpd/conf.d/osticket.confIn the file, add the below contents replacing where highlighted appropriately.
<VirtualHost *:80>
     ServerAdmin [email protected]
     DocumentRoot /var/www/osTicket/upload
     ServerName osticket.example.com
     ServerAlias www.osticket.example.com
     <Directory /var/www/osTicket/>
          Options FollowSymlinks
          AllowOverride All
          Require all granted
     </Directory>

     ErrorLog /var/log/httpd/osticket_error.log
     CustomLog /var/log/httpd/osticket_access.log combined
</VirtualHost>
Check the syntax of the created configuration file.
$ sudo apachectl -t
Syntax OK
Start and enable php-fpm service.
sudo systemctl enable --now php-fpmCheck the status of the service.
sudo systemctl status php-fpmConfigure SELinux by labeling file contexts as below.
sudo setsebool -P httpd_can_network_connect 1
sudo semanage fcontext -a -t httpd_sys_rw_content_t "/var/www/osTicket(/.*)?"
sudo restorecon -Rv /var/www/osTicket/
Remove apache welcome page:
sudo rm /etc/httpd/conf.d/welcome.confRestart the Apache service.
sudo systemctl restart httpdThen allow HTTP and HTTPS ports through the firewall.
sudo firewall-cmd --add-service={http,https} --permanent
sudo firewall-cmd --reload
At this point, you can proceed and install osTicket on Rocky Linux 9 | AlmaLinux 9 using the Web UI with the URL http://HostName or http://IP_Address.
Step 6: Secure osTicket with Let’s Encrypt
It is still possible to access and install osTicket on Rocky Linux 9| AlmaLinux 9 without SSL. However, this is done to allow you to access the web via HTTPS. For this to happen, you should install SSL certificates or any other certificates on your system.
We need to install Certbot as below.
sudo dnf install certbot python3-certbot-apacheThen install the SSL certificate for Apache as below.
sudo certbot --apacheProceed to an interactive prompt and install the certificate.
Saving debug log to /var/log/letsencrypt/letsencrypt.log
Plugins selected: Authenticator nginx, Installer nginx
Enter email address (used for urgent renewal and security notices)
 (Enter 'c' to cancel): Enter a valid Email address here

- - - - - - - - - - - - - - - - - - - - - - - - - - - - - - - - - - - - - - - -
Please read the Terms of Service at
https://letsencrypt.org/documents/LE-SA-v1.2-November-15-2017.pdf. You must
agree in order to register with the ACME server. Do you agree?
- - - - - - - - - - - - - - - - - - - - - - - - - - - - - - - - - - - - - - - -
(Y)es/(N)o: y

- - - - - - - - - - - - - - - - - - - - - - - - - - - - - - - - - - - - - - - -
Would you be willing, once your first certificate is successfully issued, to
share your email address with the Electronic Frontier Foundation, a founding
partner of the Let's Encrypt project and the non-profit organization that
develops Certbot? We'd like to send you email about our work encrypting the web,
EFF news, campaigns, and ways to support digital freedom.
- - - - - - - - - - - - - - - - - - - - - - - - - - - - - - - - - - - - - - - -
(Y)es/(N)o: Y
Account registered.

Which names would you like to activate HTTPS for?
- - - - - - - - - - - - - - - - - - - - - - - - - - - - - - - - - - - - - - - -
1: osticket.example.com
- - - - - - - - - - - - - - - - - - - - - - - - - - - - - - - - - - - - - - - -
Select the appropriate numbers separated by commas and/or spaces, or leave input
blank to select all options shown (Enter 'c' to cancel): 1
Requesting a certificate for osticket.techwizpro.com

Successfully received certificate.
Certificate is saved at: /etc/letsencrypt/live/osticket.example.com/fullchain.pem
Key is saved at:         /etc/letsencrypt/live/osticket.example.com/privkey.pem
This certificate expires on 2021-12-08.
These files will be updated when the certificate renews.
With the certificate installed you will see the below congratulatory message.
Deploying certificate
Successfully deployed certificate for osticket.example.com to /etc/httpd/conf.d/osticket-le-ssl.conf
Congratulations! You have successfully enabled HTTPS on https://osticket.example.com

NEXT STEPS:
- The certificate will need to be renewed before it expires. Certbot can automatically renew the certificate in the background, but you may need to take steps to enable that functionality. See https://certbot.org/renewal-setup for instructions.

- - - - - - - - - - - - - - - - - - - - - - - - - - - - - - - - - - - - - - - -
If you like Certbot, please consider supporting our work by:
 * Donating to ISRG / Let's Encrypt:   https://letsencrypt.org/donate
 * Donating to EFF:                    https://eff.org/donate-le
- - - - - - - - - - - - - - - - - - - - - - - - - - - - - - - - - - - - - - - -
Restart Apache for the changes made to apply.
sudo systemctl restart httpdStep 7: Install and configure osTicket
Now with SSL encryption, we are set to access the web console using https://Your_hostname. You should see this page.
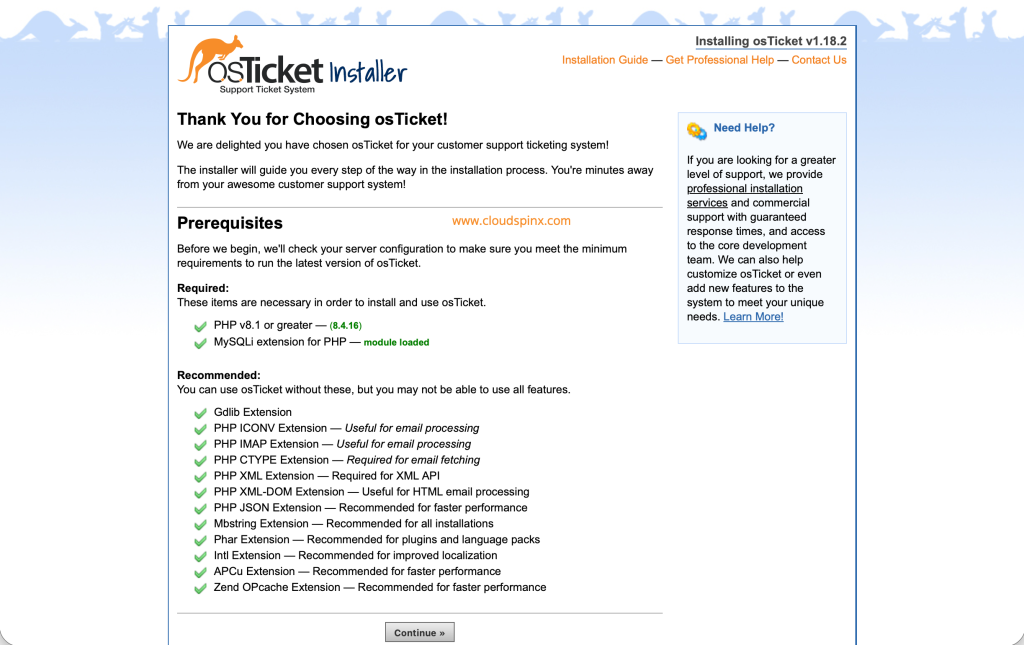
Confirm all the requirements are met as shown above. Then proceed to the next page where you are required to fill in the relevant information.
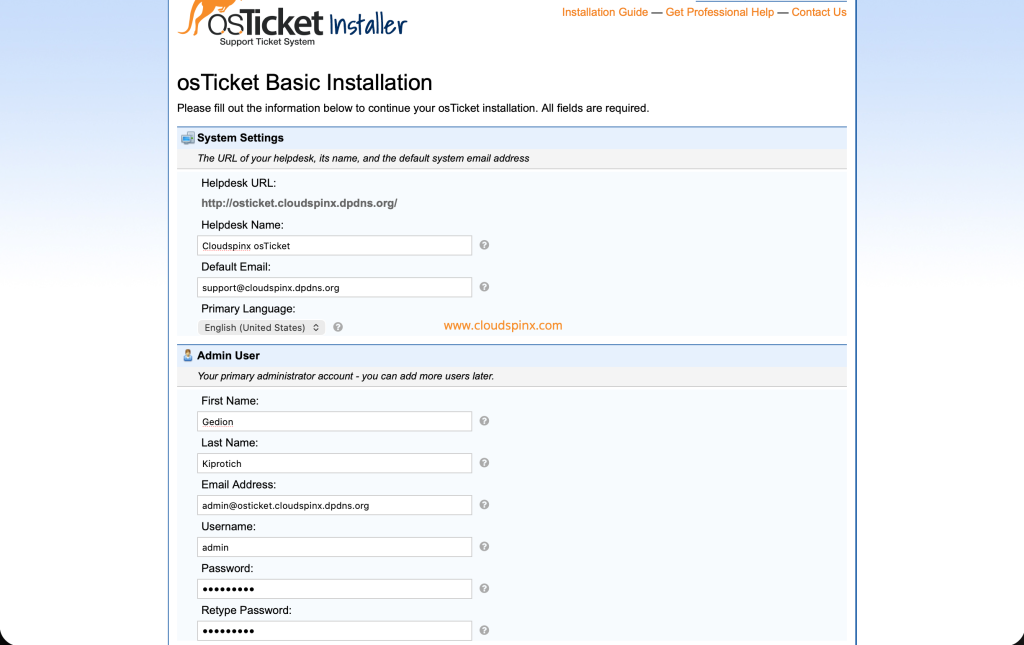
Provide the database details i.e the username, password, and database name.
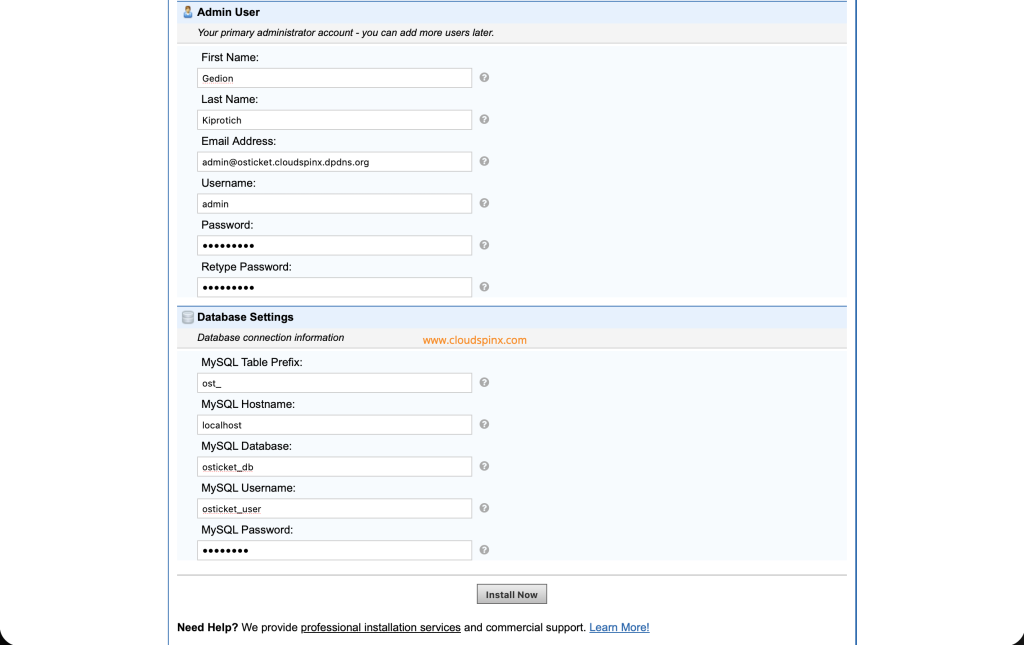
With all the required details filled in, click “Install Now“. On successful installation, you will see the below page.
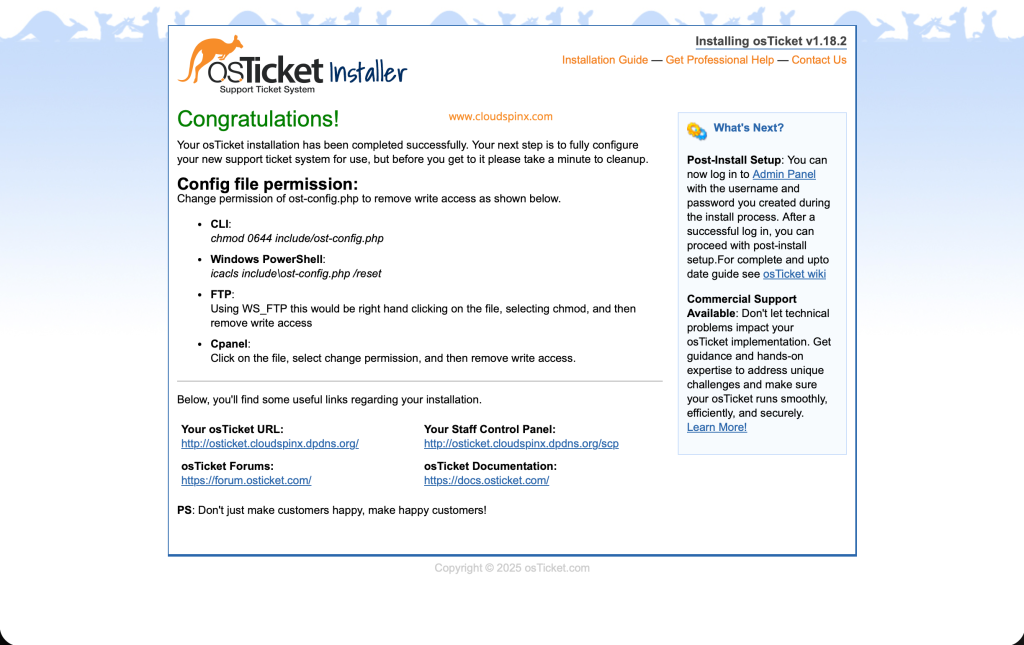
Now remove write access to the config.php as below.
sudo chmod 0644 /var/www/osTicket/upload/include/ost-config.phpDelete the setup file as below.
sudo rm -rf /var/www/osTicket/upload/setup/Now proceed and login to the backend system i.e the staff control panel using the URL htttps://server_hostname/scp:
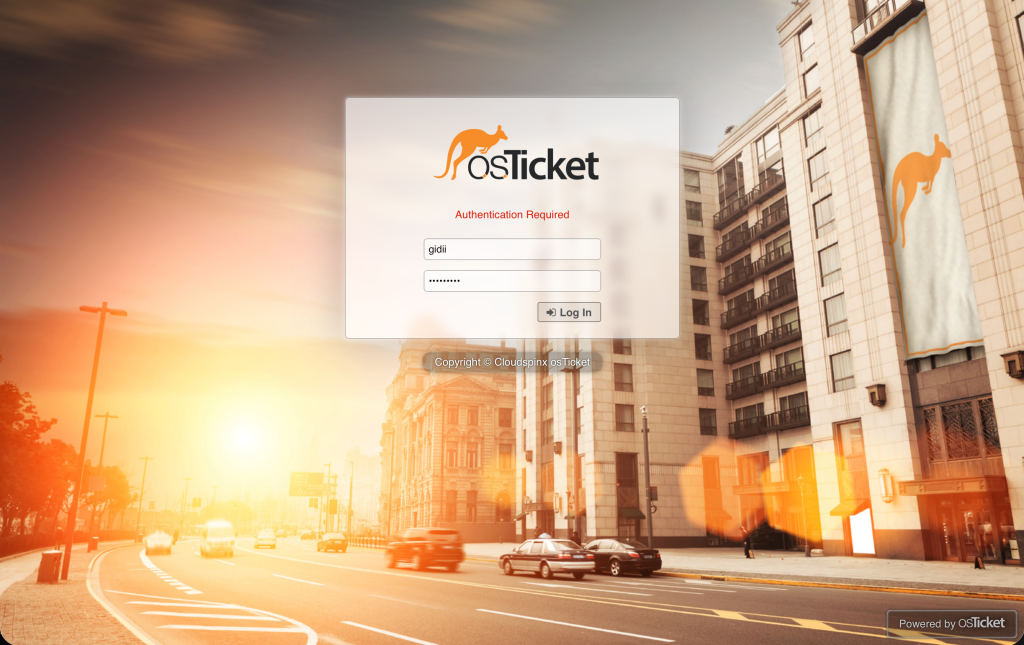
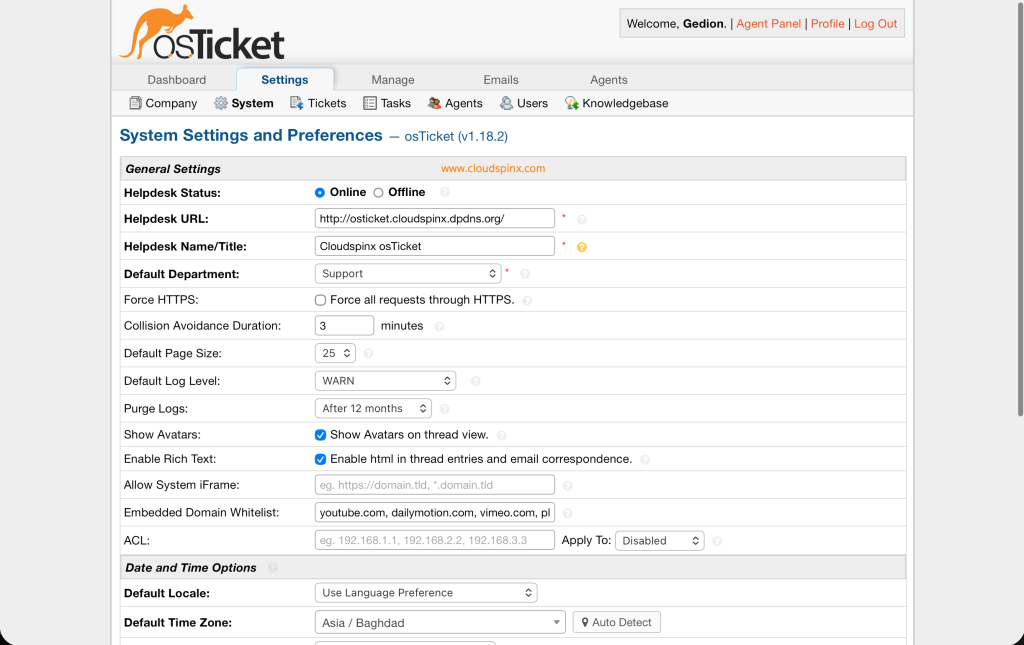
On successful login, you will see this page.
Now we want to try and raise a ticket. To be able to raise a ticket, you will use the URL https://your-hostname/:

Click open ticket and fill in the required information.
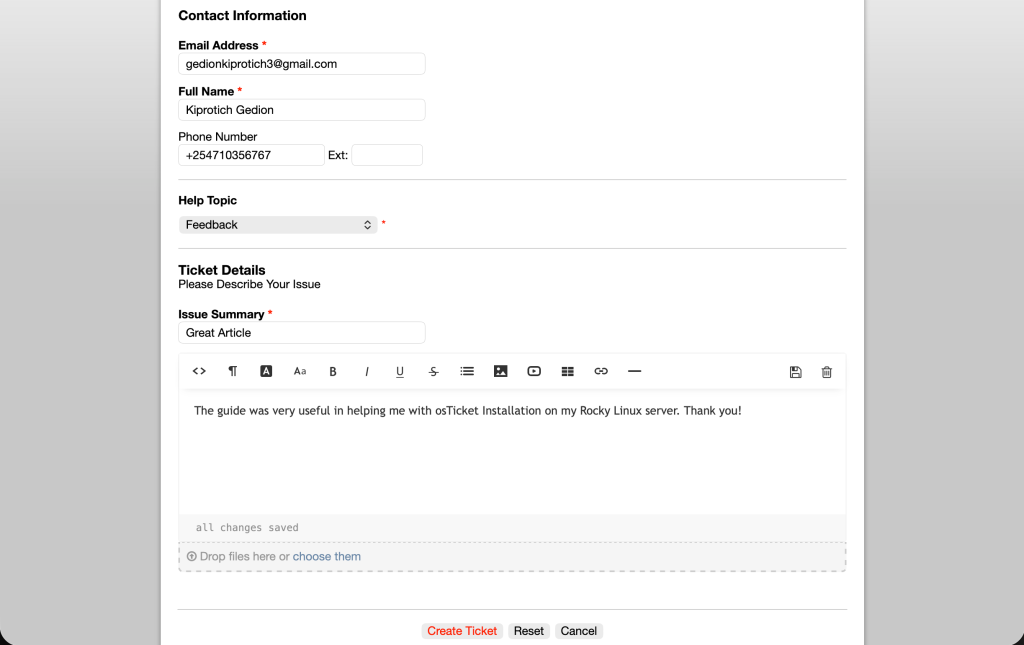
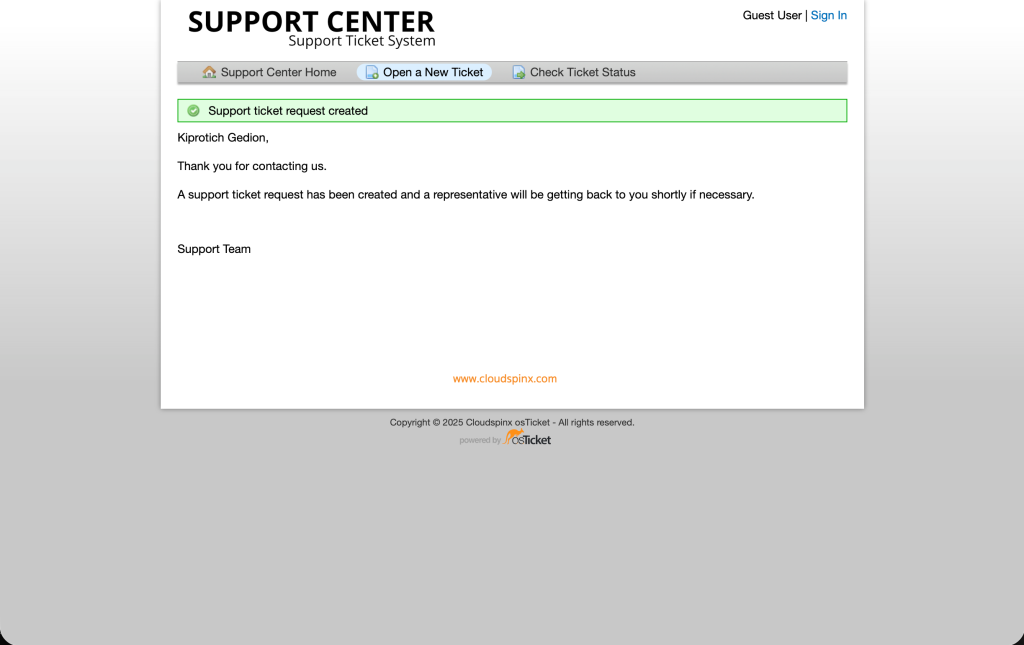
When done, click on Create ticket. You’ll see the ticket has been opened successfully as below.
Got to the staff control panel and see if the ticket was received. It should appear as below.
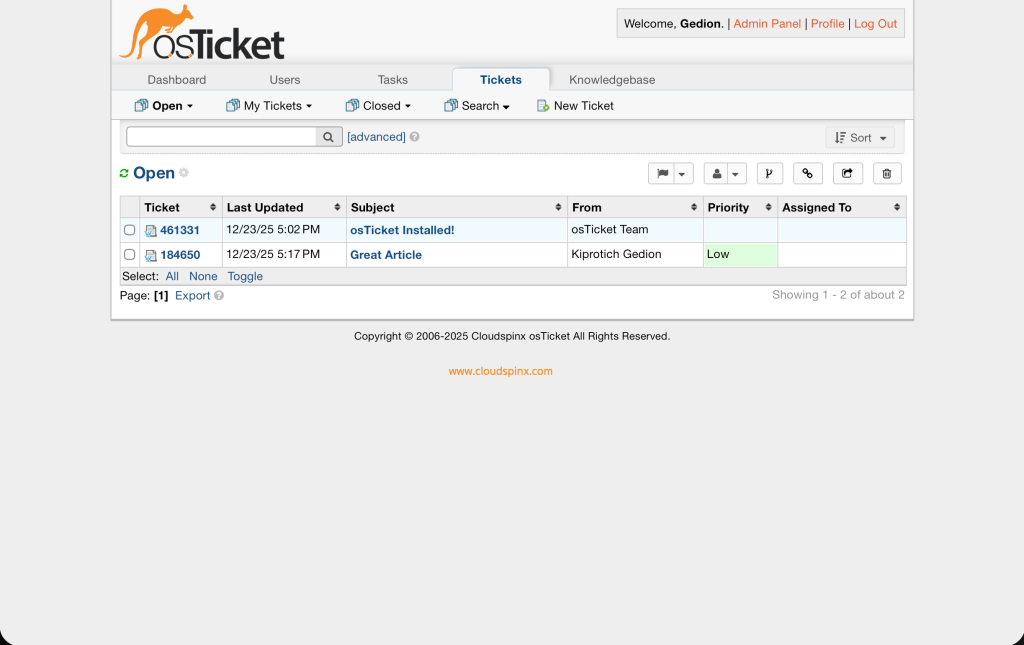
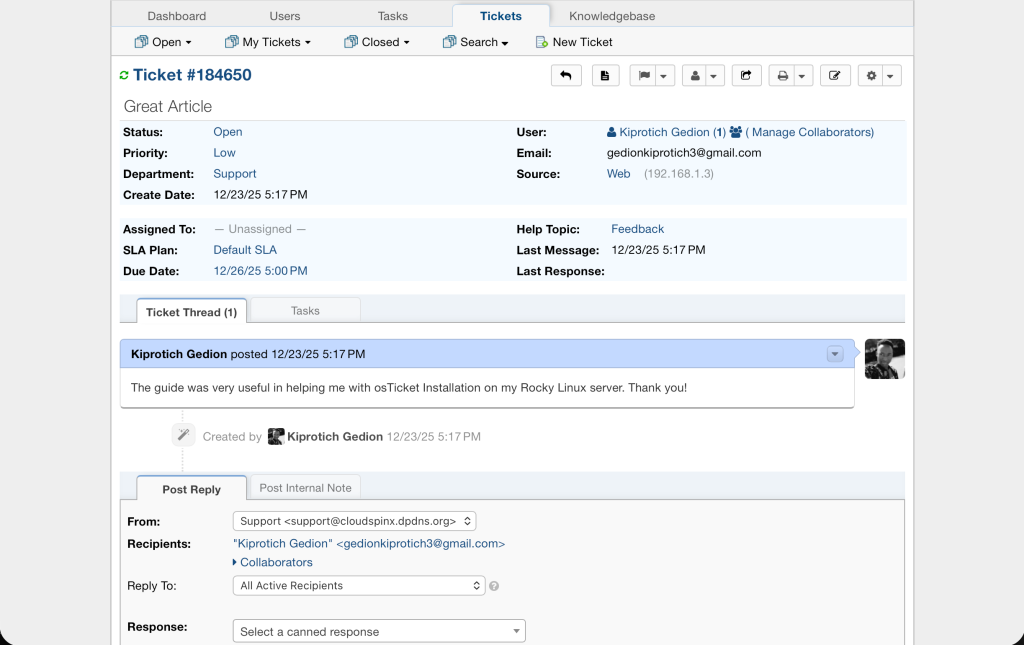
You can view the details of the ticket by clicking on it.
That marks the end of our guide on how to install and configure osTicket on Rocky Linux 9 | AlmaLinux 9. Now you are set to start organizing, managing and archiving support requests. I hope you found this guide helpful.


