In this article, we will walk through the installation and use of PhpMyAdmin on Rocky Linux 8 / AlmaLinux 8. PhpMyAdmin is a free and open source application written in PHP language. It is used to manage databases such as MariaDB and MySQL using a web interface. With PhpMyAdmin, database admins can perform operations such as:
- creating, editing and dropping a database.
- Create and edit tables
- Browse through databases and tables
- Performing maintenance on tables
- Load and export data
- Manage users and their privileges
- Create complex queries using Query-by-example (QBE)
- create PDF graphics of the database
- Manage InnoDB tables and foreign keys
Before we install PhpMyAdmin, we need to have:
- Database (either MySQL or MariaDB) on your system.
- A web server (Nginx or Apache)
- PHP installed
Step 1: Install Nginx / MariaDB / PHP
1. Make sure your system is up-to-date:
sudo dnf -y update2. Proceed and install Nginx web server as below:
sudo dnf -y install nginx3. Install MariaDB on and create a database.
sudo dnf -y install mariadb mariadb-serverStart and enable MariaDB.
sudo systemctl start mariadb
sudo systemctl enable mariadb
Harden your database server installation.
sudo mysql_secure_installationFollow the process as below:
NOTE: RUNNING ALL PARTS OF THIS SCRIPT IS RECOMMENDED FOR ALL MariaDB
      SERVERS IN PRODUCTION USE!  PLEASE READ EACH STEP CAREFULLY!

In order to log into MariaDB to secure it, we'll need the current
password for the root user.  If you've just installed MariaDB, and
you haven't set the root password yet, the password will be blank,
so you should just press enter here.

Enter current password for root (enter for none):
OK, successfully used password, moving on...

Setting the root password ensures that nobody can log into the MariaDB
root user without the proper authorisation.

Set root password? [Y/n] y
New password:
Re-enter new password:
Password updated successfully!
Reloading privilege tables..
 ... Success!


By default, a MariaDB installation has an anonymous user, allowing anyone
to log into MariaDB without having to have a user account created for
them.  This is intended only for testing, and to make the installation
go a bit smoother.  You should remove them before moving into a
production environment.

Remove anonymous users? [Y/n] y
 ... Success!

Normally, root should only be allowed to connect from 'localhost'.  This
ensures that someone cannot guess at the root password from the network.

Disallow root login remotely? [Y/n] y
 ... Success!

By default, MariaDB comes with a database named 'test' that anyone can
access.  This is also intended only for testing, and should be removed
before moving into a production environment.

Remove test database and access to it? [Y/n] y
 - Dropping test database...
 ... Success!
 - Removing privileges on test database...
 ... Success!

Reloading the privilege tables will ensure that all changes made so far
will take effect immediately.

Reload privilege tables now? [Y/n] y
 ... Success!

Cleaning up...

All done!  If you've completed all of the above steps, your MariaDB
installation should now be secure.

Thanks for using MariaDB!
Create a database in MariaDB.
$ mysql -u root -p
CREATE DATABASE phpmyadmin CHARACTER SET utf8 COLLATE utf8_unicode_ci;
CREATE USER 'phpmyadmin'@'%' IDENTIFIED BY 'P@ssw0rd';
GRANT ALL PRIVILEGES ON *.* TO 'phpmyadmin'@'%';
FLUSH PRIVILEGES;
exit
4. Install PHP and its dependancies.
sudo dnf -y install http://rpms.remirepo.net/enterprise/remi-release-8.rpm
sudo dnf module -y reset php
sudo dnf module install php:remi-8.2 -y
sudo dnf -y install php php-{cli,common,fpm,curl,gd,mbstring,process,snmp,xml,zip,memcached,mysqlnd,json,mbstring,pdo,pdo-dblib,xml}
Set your time:
$ sudo vi /etc/php.ini
date.timezone = Africa/Nairobi
Then edit the file below:
sudo vi /etc/php-fpm.d/www.confEdit your file to match this.
user = nginx

; RPM: Keep a group allowed to write in log dir.
group = nginx

;listen = 127.0.0.1:9000
listen = /run/php-fpm/www.sock

listen.owner = nginx
listen.group = nginx
listen.mode = 0660
Start and enable httpd web server.
sudo systemctl enable php-fpm
sudo systemctl restart php-fpm
Check the installed version of PHP.
$ php -v
PHP 8.2.21 (cli) (built: Jul  2 2024 12:51:54) (NTS gcc x86_64)
Copyright (c) The PHP Group
Zend Engine v4.2.21, Copyright (c) Zend Technologies
Check the installed version of Mysql.
$ mysql -V
mysql  Ver 15.1 Distrib 10.3.28-MariaDB, for Linux (x86_64) using readline 5.1
Start and enable nginx.
sudo systemctl start nginx
sudo systemctl enable nginx
Step 2: Install PhpMyAdmin on Rocky / AlmaLinux
At the time of writing this article, PhpMyAdmin is not available on the default repositories. To confirm this run:
dnf whatprovides phpmyadminSample output:
Error: No Matches foundWith this output, we are now required to download the latest version of PhpMyAdmin from phpMyAdmin downloads page. Always check the official page for the latest version of phpMyAdmin.
wget https://www.phpmyadmin.net/downloads/phpMyAdmin-latest-all-languages.tar.gzProceeding with our installation, create a directory as below.
sudo mkdir /usr/share/nginx/phpmyadminIn the created directory, extract the file.
sudo tar xzf phpMyAdmin-latest-all-languages.tar.gz -C /usr/share/nginx/phpmyadmin --strip-components=1Step 3: Configure Nginx for phpMyAdmin
Now edit the nginx server for phpMyAdmin by configuring the /etc/nginx/conf.d/phpmyadmin.conf file as below.
sudo vi /etc/nginx/conf.d/phpmyadmin.confPaste the following:
server {
    listen       80;
    server_name  phpmyadmin.example.com;
    root         /usr/share/nginx/phpmyadmin;

    access_log /var/log/nginx/phpmyadmin_access.log;
    error_log /var/log/nginx/phpmyadmin_error.log;

    index   index.php;

    location / {
        try_files    $uri $uri/ /index.php?$args;
    }
    location ~ \.php$ {
         try_files $uri =404;
         fastcgi_intercept_errors on;
         include        fastcgi_params;
         fastcgi_param  SCRIPT_FILENAME  $document_root$fastcgi_script_name;
         fastcgi_pass unix:/run/php-fpm/www.sock;
     }
}
Change ownership of the file /etc/nginx/nginx.conf
sudo chown nginx:nginx /etc/nginx/nginx.confCheck the syntax of the created file.
$ sudo nginx -t
nginx: the configuration file /etc/nginx/nginx.conf syntax is ok
nginx: configuration file /etc/nginx/nginx.conf test is successful
Restart Nginx as below:
sudo systemctl restart nginxStep 4: Configure phpMyAdmin
Now we want to configure phpMyAdmin. We begin by renaming the sample configuration file as below:
sudo cp /usr/share/nginx/phpmyadmin/config{.sample,}.inc.phpCreate an authentication script to encrypt password. Generate using blowfish secret online and edit as below.
sudo vi /usr/share/nginx/phpmyadmin/config.inc.phpChange this line /** $cfg['blowfish_secret'] = ''; /* YOU MUST FILL IN THIS FOR COOKIE AUTH! */
To this:
$cfg['blowfish_secret'] = 'm[a9LgO=Yo:n1ayWfi:UcR=sDx;vceBn';Set permissions for /var/lib/php/session/ directory:
sudo chown -R nginx:nginx  /var/lib/php/session/
sudo chown -R nginx:nginx /usr/share/nginx/phpmyadmin
Restart Nginx and php-fpm for changes to apply
sudo systemctl restart nginx php-fpmAdd firewall rules on as below;
sudo firewall-cmd --zone public --add-service http
sudo firewall-cmd --permanent --zone public --add-service http
sudo firewall-cmd --reload
Set SELinux in Enforcing Mode
Configure SELinux as below:
sudo yum -y install policycoreutils-python-utils
sudo semanage fcontext -a -t httpd_sys_rw_content_t "/usr/share/nginx/phpmyadmin(/.*)?"
sudo restorecon -Rv /usr/share/nginx/phpmyadmin
Then restart nginx
sudo systemctl restart nginxStep 5: Access phpMyAdmin Web Interface
With all the above configurations, we now have to access the phpMyAdmin from a browser using http://server-host-name
If you didn’t add domain A record to your DNS server you can configure /etc/hosts in your local machine:
$ sudo vim /etc/hosts
192.161.1.26 phpmyadmin.example.com
You should see an interface like this:
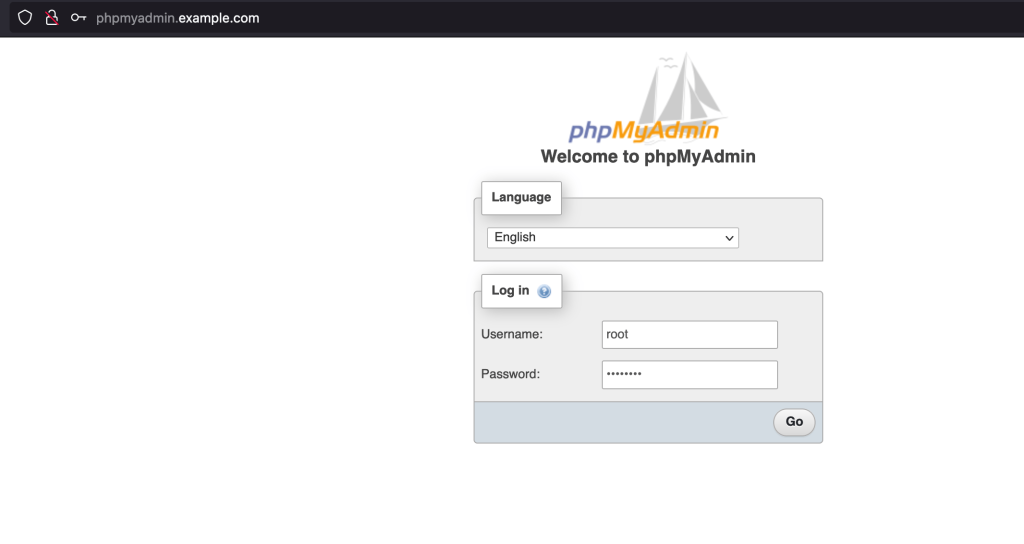
Login with the User you created and password in MariaDB above. In this instance I created a user “phpmyadmin” with password “P@ssw0rd“. Or root user and its password to manage all databases.
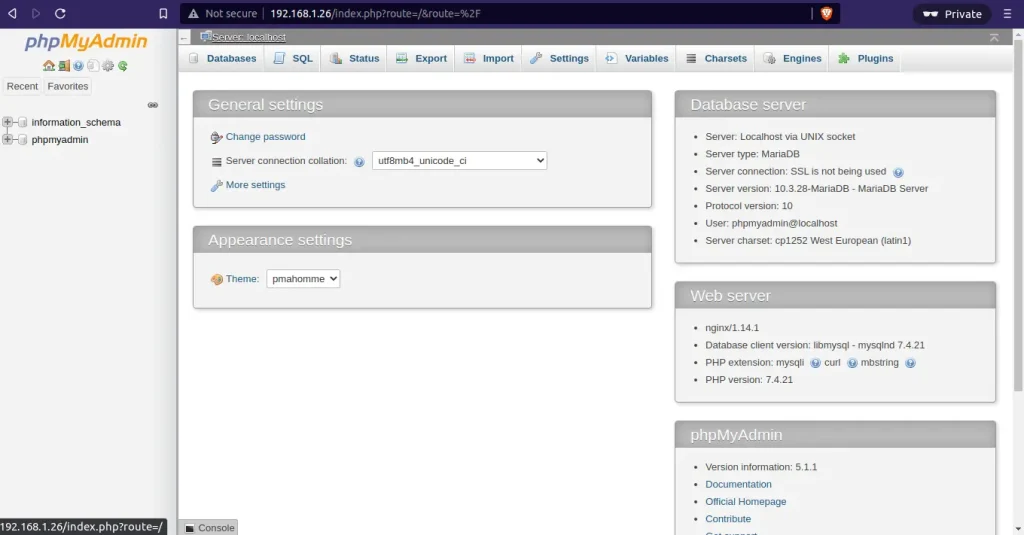
On successful login, you will see this landing page.
Step 6: How to Use phpMyAdmin
We will create a sample database and tables in phpMyAdmin from the web interface.
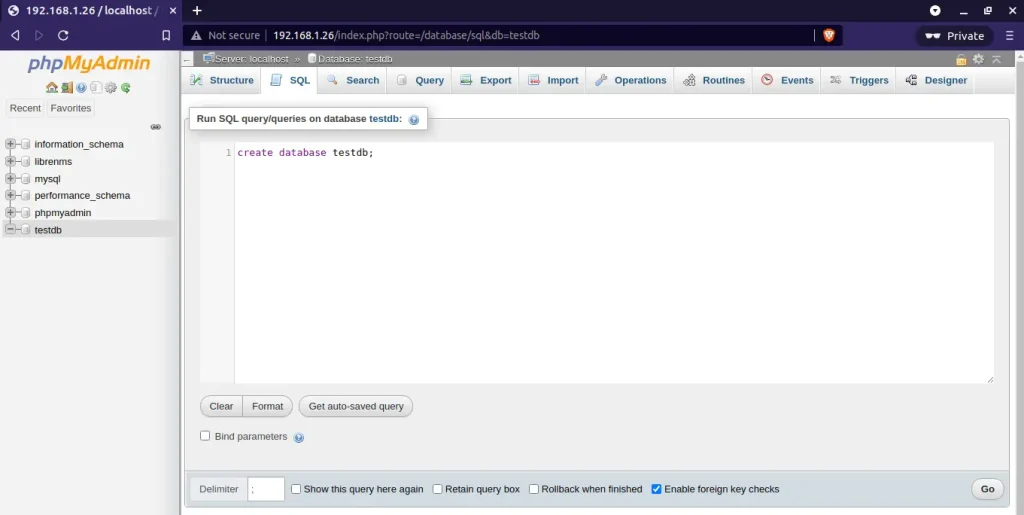
Lets create a database, “testdb” by navigating to the SQL tab and write the command below the click “GO” as below.
Now we want to create a table in the created database. On the side panel, select the database.
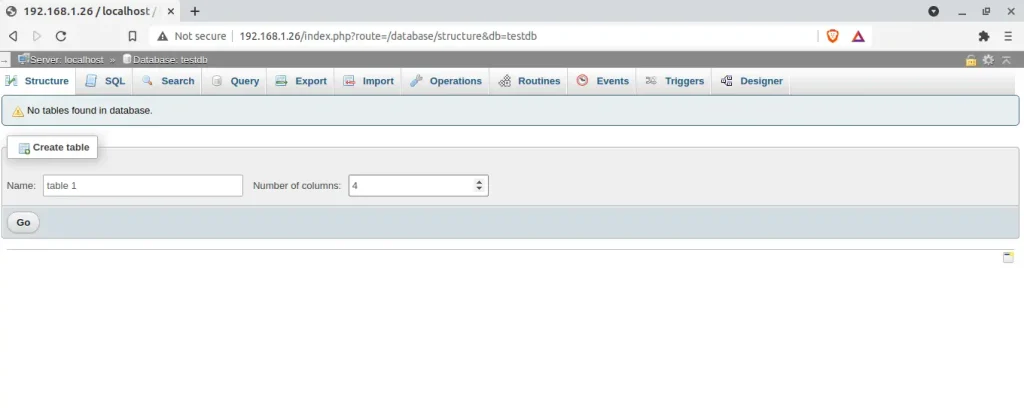
After filling the above table information, click GO and the table will be created in the database, testdb.
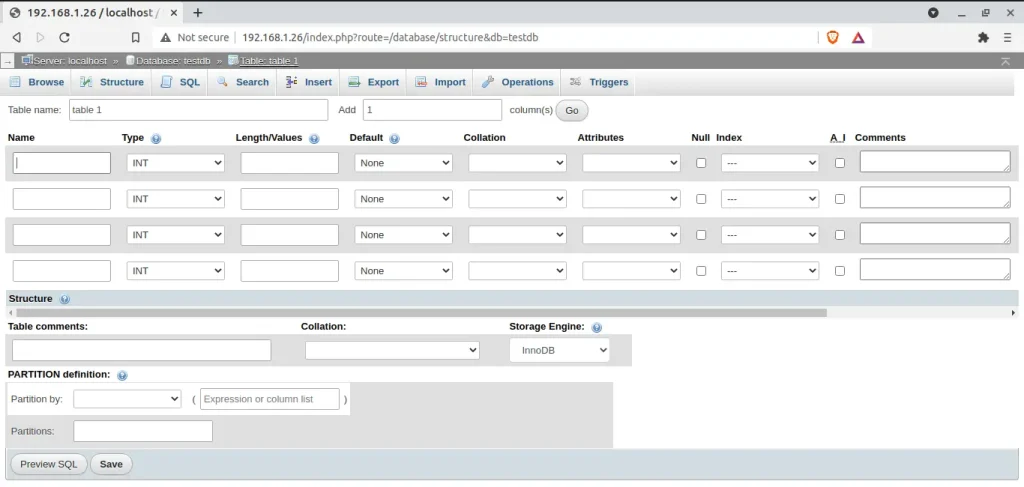
With the above page, you can now add data to your created table and save.
Explore More with CloudSpinx
Looking to streamline your tech stack? At CloudSpinx, we deliver robust solutions and services tailored to your needs.
Learn more about how we can support your journey with CloudSpinx.
Check out more articles:

