PostgreSQL is one of the most used database management systems. It is robust, highly available and easy to install. PostgreSQL is an open-source, advanced and enterprise class relational databases which supports both SQL (relational) and JSON (non-relational). It is a highly stable database system backed by a community of developers. It is used as a primary database for many web applications and also mobile and analytics applications. PostgresSQL supports a wide range of languages which include: Java, Python, C#, Ruby, JavaScript (Node.js), Perl, C/C+, go and Tcl.
Features of PostgreSQL
PostgreSQL has many advanced features as compared to other database management systems. These include:
- Table inheritance.
- Nested transactions.
- Multi-version concurrency control.
- Sophisticated locking mechanism.
- Foreign key referential integrity
- Asynchronous replication.
- Views, rules and subquery.
The current versions of PostgreSQL support the following additional features.
Installing PostgreSQL 18 on Oracle Linux 10
The following steps guide on how to install PostgreSQL on Oracle Linux 10.
Step 1: Update system packages
It is always good to ensure that your system is up to date when carrying out installations.
sudo dnf updateStep 2: Add PostgreSQL repository
Use the below command to add the official PostgreSQL on Oracle Linux 10.
sudo dnf install -y https://download.postgresql.org/pub/repos/yum/reporpms/EL-10-x86_64/pgdg-redhat-repo-latest.noarch.rpmStep 3: Install PostgreSQL on Oracle 12 on Oracle Linux 10
We need to disable any other existing PostgreSQL if there is then install PostgreSQL 18. Run the below commands:
sudo dnf module disable postgresql
sudo dnf install -y postgresql18-server
When installation is complete, you should see an output as below:

Step 4: Initialize and start Database Service
We first need to initialize database before starting. Use the following command:
$ sudo /usr/pgsql-18/bin/postgresql-18-setup initdb
Initializing database --- OK
Now we can start and enable database service.
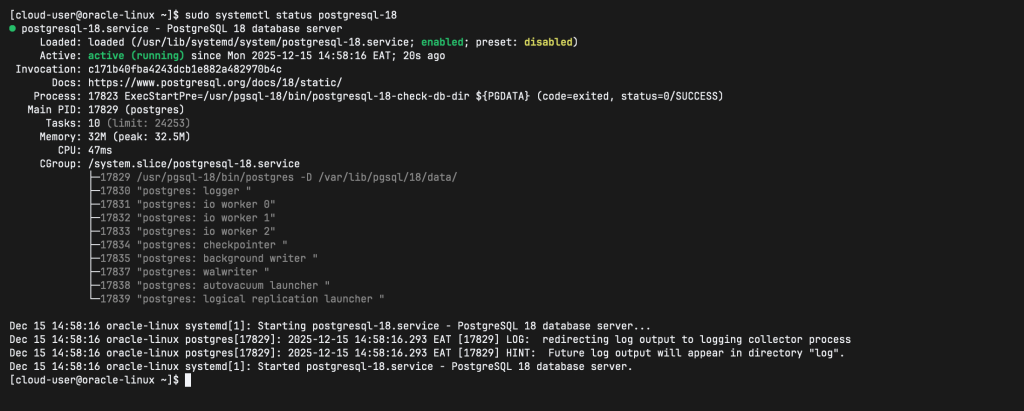
sudo systemctl enable --now postgresql-18Confirm status if postgresql is running using the below command.
sudo systemctl status postgresql-18The output should be as below if running:
If running Firewall service and remote clients should connect to your database server, allow PostgreSQL service.
sudo firewall-cmd --permanent --add-service=postgresql
sudo firewall-cmd --reload
Step 5: Set PostgreSQL admin user
To set PostgreSQL admin user, run:
$ sudo su postgres
$ psql -c "alter user postgres with password 'MyStrongPassword'"
ALTER ROLE
Step 6: Enable Remote Access
Edit Postgresql configuration file to set listen address. You can set to your system IP address or use ‘*’ for any.
sudo vim /var/lib/pgsql/18/data/postgresql.conf Add listen address as shown:
listen_addresses = '192.168.100.178'
#OR
listen_addresses = '0.0.0.0'
Also allow remote connection by editing the shown the below file
sudo vim /var/lib/pgsql/18/data/pg_hba.confAdd the following content
# Accept from anywhere
host all all 0.0.0.0/0 md5
# Accept from specific subnets
host all all 192.168.1.0/24 md5
Restart database service after the changes
sudo systemctl restart postgresql-18Test remote connection by using the shown command:
$ psql -U <dbuser> -h <serverip> -p 5432 <dbname>This has been a step by step guide on how to install PostgreSQL on Oracle Linux 10.