
Salt is a python-based configuration management platform. Salt stack consists of a salt master which is designed to control a number of slaves called minions. In this guide, we are going to look at how to configure salt master and minions on Ubuntu 24.04. I have the following servers for my set up:
- 192.168.1.196 salt master.
- 192.168.1.197 salt minion.
Features of Saltstack
Saltstack presents quite a number of important features compared to the other automation tools:
- Fault tolerance – It is possible for salt minions to connect to multiple masters at ago. All available masters will have to be as a YAML list and any master can direct commands in the stack.
- Flexible – Salt management approach can be configured to follow the most popular system management models such as server-agent, agent-only as so on.
- Scalable – A salt master handles ten thousand minions.
- Parallel Execution model – Commands can execute remote systems in a parallel manner.
- Salt stack is easy to set up.
- Python API – Provides a simple programming interface and it’s easy to mold to different applications.
Install Salt on Ubuntu 24.04
Salt installation depends on Python, which should already be installed on your Ubuntu system. If not, install it with the following commands:
sudo apt-get update
sudo apt-get install python3
We are going to use Salt Bootstrap to install Salt. Salt Bootstrap is a configuration script that automatically detects Operating System, sets the correct repositories, and installs Salt. The script has to be run on the master and the minions.
wget -O bootstrap-salt.sh https://github.com/saltstack/salt-bootstrap/releases/latest/download/bootstrap-salt.sh
sudo sh bootstrap-salt.sh -M -N -P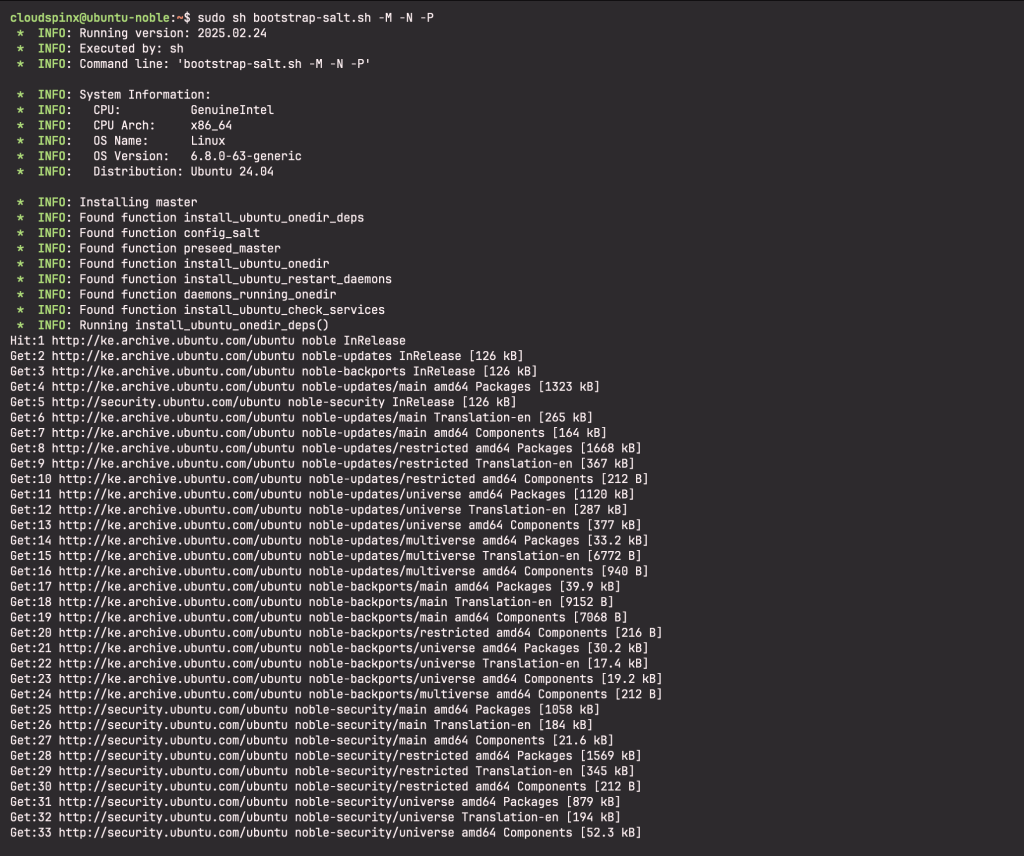
Configure Salt Master on Ubuntu 24.04
The salt-master service comes with default server configurations in a YAML configuration file located at /etc/salt/master with all the settings commented. It is recommended that you add custom settings in YAML to /etc/salt/master.d/ as .conf files on the Salt master.
Use the default master file as a reference for various settings as needed. On the master, the configuration file is located in /etc/salt/master where we will configure the network interface in which the Salt server is working on. Edit as below:
sudo vim /etc/salt/master.d/network.confBy default, the master binds to all available network interfaces, then listens on ports 4505 and 4506. The example config below overrides the default settings:
# The network interface to bind to
interface: 192.168.1.196

# The Request/Reply port
ret_port: 4506

# The port minions bind to for commands, aka the publish port
publish_port: 4505
Save the file and restart the Salt service:
sudo systemctl restart salt-master
sudo systemctl status salt-master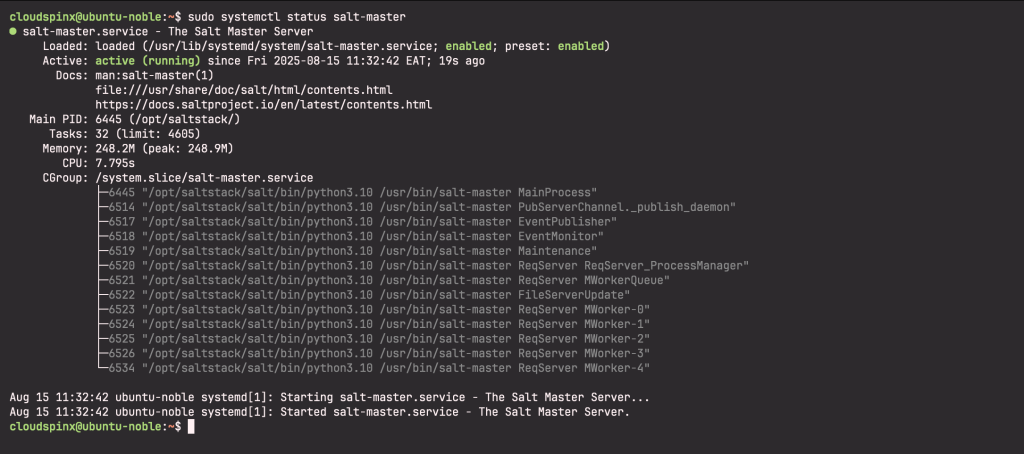
Configure Firewall
Ensure to open salt default ports through the firewall. Salt uses ports 4505 and 4506:
sudo ufw allow proto tcp from any to any port 4505,4506Configure salt Minions on Ubuntu 24.04
Ensure to also install Python on Salt Minions as explained above. Once installed, run bootstrap script to install Salt minion.
wget -O bootstrap-salt.sh https://github.com/saltstack/salt-bootstrap/releases/latest/download/bootstrap-salt.sh
sudo sh bootstrap-salt.sh -P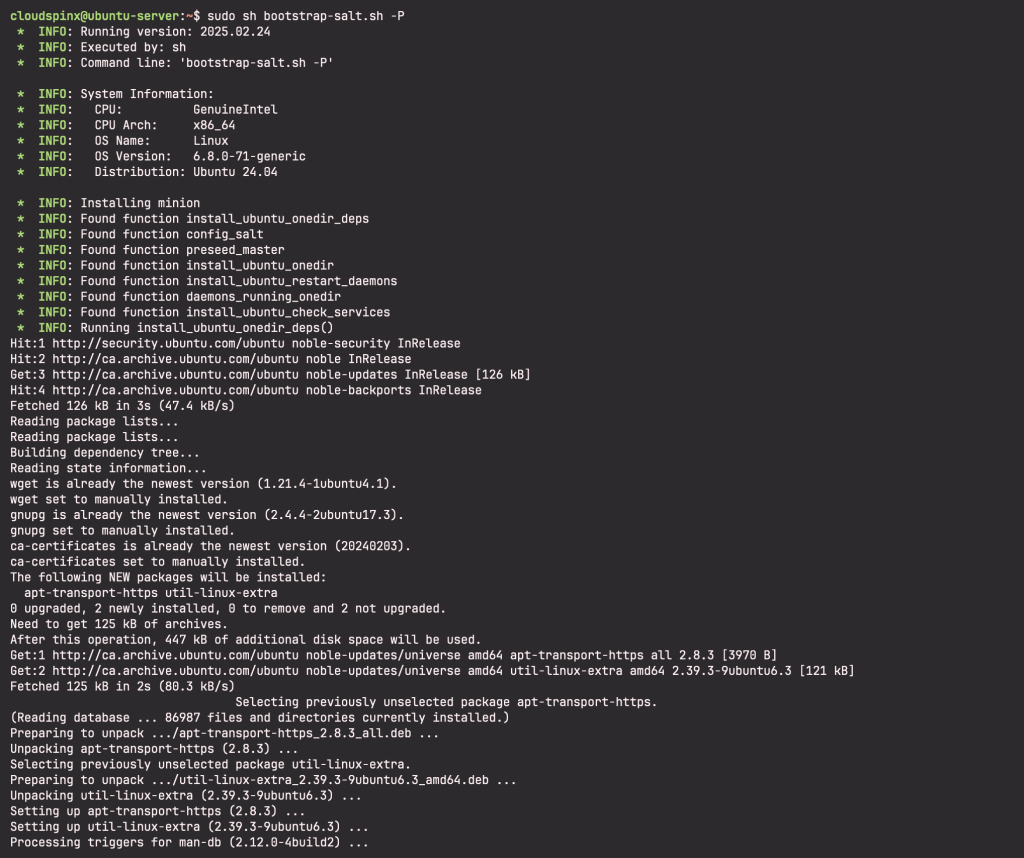
The salt-minion service comes with a DNS/hostname configuration setup by default. The default minion YAML configuration at /etc/salt/minion contains all the commented settings, use it as a reference for various settings as needed.
While /etc/salt/minion file can accept configuration settings, the best practice is to use the /etc/salt/minion.d/ configuration directory. Using this directory allows you to put configuration options into logical separations.
sudo vim /etc/salt/minion.d/master.confSet the master IP:
# Set the location of the salt master server. If the master server cannot be
# resolved, then the minion will fail to start.
master: 192.168.1.196
Authenticate Minions
To authenticate minions, we need to add master public fingerprint to minion configuration. To list the master fingerprints and any minions connected to it, we use the command below:
$ sudo salt-key --finger-all
Local Keys:
master.pem:  e5:3f:1f:b2:1a:78:6b:23:4a:50:23:67:fa:e7:20:23:0c:1a:a2:9a:6e:c2:ea:0f:1d:10:49:b1:87:60:c5:1a
master.pub:  65:04:f9:f5:de:f8:2b:ac:cf:8b:69:33:37:61:e0:09:0b:27:67:c1:04:88:0e:4d:03:94:83:19:28:99:54:15
Copy master.pub fingerprint and paste it in minion configuration file; /etc/salt/minion.d/master.conf:
# Fingerprint of the master public key to validate the identity of your Salt master
# before the initial key exchange. The master fingerprint can be found by running
# "salt-key -f master.pub" on the Salt master.
master_finger: '65:04:f9:f5:de:f8:2b:ac:cf:8b:69:33:37:61:e0:09:0b:27:67:c1:04:88:0e:4d:03:94:83:19:28:99:54:15'
Also give the minion a name in a new configuration file called /etc/salt/minion.d/id.conf configuration file:
# clusters.
id: Ubuntu1
Save the file and restart minion
sudo systemctl restart salt-minionTo check minion’s fingerprint, run the below command:
$ sudo salt-call key.finger --local
local:
    47:b6:b4:61:4e:06:96:66:b6:8c:f9:4d:15:58:fa:ee:b2:46:20:ad:b2:8f:4c:d2:f7:5e:94:d3:12:fa:74:40
Confirm if you are getting the same fingerprint from the master
$ sudo salt-key --finger-all
Local Keys:
master.pem:  e5:3f:1f:b2:1a:78:6b:23:4a:50:23:67:fa:e7:20:23:0c:1a:a2:9a:6e:c2:ea:0f:1d:10:49:b1:87:60:c5:1a
master.pub:  65:04:f9:f5:de:f8:2b:ac:cf:8b:69:33:37:61:e0:09:0b:27:67:c1:04:88:0e:4d:03:94:83:19:28:99:54:15
Unaccepted Keys:
Ubuntu1:  47:b6:b4:61:4e:06:96:66:b6:8c:f9:4d:15:58:fa:ee:b2:46:20:ad:b2:8f:4c:d2:f7:5e:94:d3:12:fa:74:40
From the above output, our master has been accepted on the minion. Now proceed to accept all the minions on the master as below:
$ sudo salt-key -a Ubuntu1
The following keys are going to be accepted:
Unaccepted Keys:
Ubuntu1
Proceed? [n/Y] Y
Key for minion Ubuntu1 acceptedThe following keys are going to be accepted:
Unaccepted Keys:
Ubuntu1
Proceed? [n/Y] y
Key for minion Ubuntu1 accepted.
We can run a test ping to verify communication between master and minion. On the master, run the below command:
$ sudo salt Ubuntu1 test.ping
Ubuntu1:
   True
Running commands on salt minions from salt master
Salt master is the command-and-control center for salt minions. For example, we can run remote commands from the salt master command line, examples below:
To check disk space on all salt minions:
$ sudo salt '*' disk.usage
  Ubuntu1:
    ----------
    /:
        ----------
        1K-blocks:
            47162132
        available:
            41828168
        capacity:
            7%
        filesystem:
            /dev/sda2
        used:
            2905856
    /boot:
        ----------
        1K-blocks:
            996780
        available:
            826068
        capacity:
            11%
        filesystem:
            /dev/sda3
        used:
            101900
    /dev/shm:
        ----------
        1K-blocks:
            2004636
        available:
            2004584
        capacity:
            1%
        filesystem:
            tmpfs
        used:
            52
    /run:
        ----------
        1K-blocks:
            400928
        available:
            399916
        capacity:
            1%
        filesystem:
            tmpfs
        used:
            1012
    /run/lock:
        ----------
        1K-blocks:
            5120
        available:
            5120
        capacity:
            0%
        filesystem:
            tmpfs
        used:
            0
    /run/user/1000:
        ----------
        1K-blocks:
            400924
        available:
            400912
        capacity:
            1%
        filesystem:
            tmpfs
        used:
            12
To install Nginx on my salt minion, Ubuntu1, I would run a command as below:
sudo salt Ubuntu1 pkg.install nginx 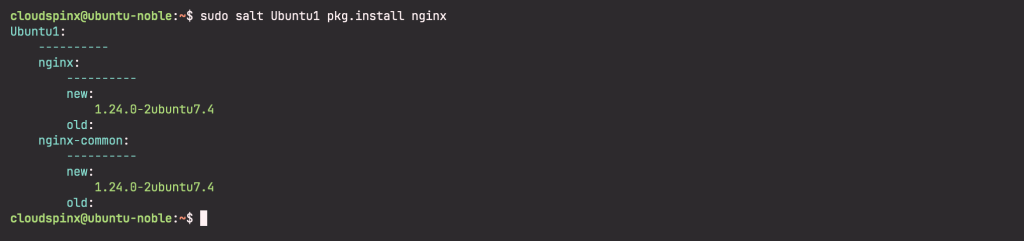
cmd.run is run to run shell commands on salt minions from the salt master.
sudo salt '*' cmd.run 'ls -l /etc/salt' 
Salt master State Files
Apart from running remote commands from salt master command line, we can define configuration files, which declare what state a minion should be in. The difference between command line remote commands and configuration management is that remote commands run a command on remote hosts while configuration management says the remote server/minion should have this installed. This means the configuration management checks through the remote server to satisfy what has been declared. Configuration management files are called state files and they have extension .sls (salt state).
sudo mkdir /srv/salt
sudo vim /srv/salt/nginx.sls
For example, the state file below, located in /srv/salt/nginx.sls ensures that rsync and curl are installed, nginx installed, run and enabled on boot.
network_utilities:
  pkg.installed:
    - pkgs:
      - rsync
      - curl

nginx_pkg:
  pkg.installed:
    - name: nginx

nginx_service:
  service.running:
    - name: nginx
    - enable: True
    - require:
      - pkg: nginx_pkg
To apply the state to all minion servers, we run the command below:
sudo salt '*' state.apply nginx 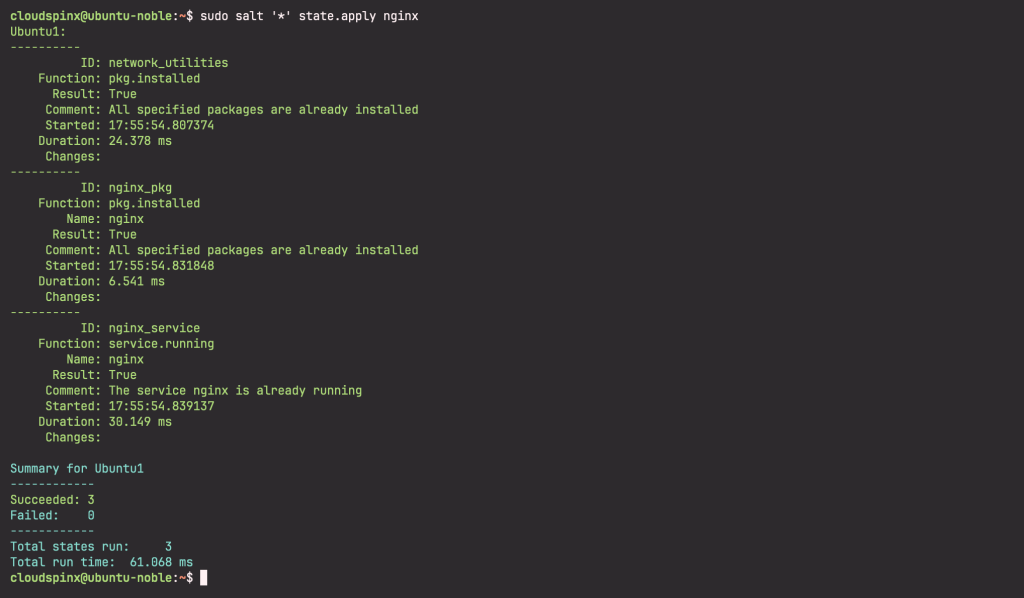
You have successfully installed SaltStack on Ubuntu 24.04 and learned how to deploy simple automation. I hope the guide has been useful. Enjoy! Below are more interesting Linux guides for you:


