
One of the most effective control panels for web hosting that is used to host websites and administer web servers is cPanel. Users can handle and manage email, files, databases, domains, programs, various PHP versions, and every component of the web server using cPanel, in addition to Linux-based servers. Additionally, cPanel allows users to upload, edit, delete, and view files on the web server.
Users can create and administer MySQL and PostgreSQL databases, monitor websites, manage firewalls and security settings, and backup data with the aid of this great control panel. One of cPanel’s many useful features is its easy-to-use interface, which makes it quicker and easier for new users to become familiar with it. It is also highly customisable.
The majority of Linux customers prefer utilizing cPanel to set up and administer their websites since it performs optimally and can be installed and used on Red Hat Enterprise Linux-based distributions, unlike other control panels. This article’s focus is on installing cPanel/WHM on Rocky Linux and AlmaLinux.
Prerequisites
Your hostname must meet the following requirements:
- Be a registered and fully-qualified domain name.
- Does not match any of your server’s domains.
- Be a maximum of 60 characters in length.
- Resolves to a valid IPv4 or IPv6 address.
Your IP address must be a valid IP address
Installing cPanel & WHM on Rocky Linux 9 / AlmaLinux 9
You can install cPanel & WHM versions 114 and later on the Rocky Linux 9 operating system. Installing cPanel on Rocky Linux | AlmaLinux involves the following steps:
Step 1: Update package repositories
Before installing any software, it’s recommended to always ensure that your system repositories are upto date:
sudo yum update -y Step 2: Install Perl & Curl
cPanel is written with Perl programming language. Installing Perl is a requirement for a successfull installation of cPanel. Curl is the utility used to download the cPanel installer.
Run the command below to install Perl and curl:
sudo yum install perl curl -yStep 3: Configure Server Hostname
To be able to install and use cPanel, you must enter configure a hostname that meets the following requirements:
- Be a registered and fully-qualified domain name.
- Does not match any of your server’s domains.
- Be a maximum of 60 characters in length.
- Resolves to a valid IPv4 or IPv6 address.
Use the following command:
sudo hostnamectl set-hostname myserver.mydomain.com
#Example
sudo hostnamectl set-hostname panel.africanfine.com
Step 4: Disable Network Manager Service
Since cPanel is not compatible with Network Manager Service, you need to ensure that it is disabled. Execute the command below to do so:
service NetworkManager stopStep 5: Disable SELinux and Firewall Temporarily
SELinux is a Linux kernel security module that supports access control security policies through a mechanism. SELinux is disabled by default on Rocky Linux, if you have it enabled, you must disable it before installing cPanel. Edit the /etc/selinux/config file to set the SELINUX parameter to disabled, and then reboot the server. The contents of the /etc/selinux/config file should resemble the following example:
# This file controls the state of SELinux on the system.
# SELINUX= can take one of these three values:
# enforcing - SELinux security policy is enforced.
# permissive - SELinux prints warnings instead of enforcing.
# disabled - No SELinux policy is loaded.
SELINUX=disabled
# SELINUXTYPE= can take one of these two values:
# targeted - Only targeted network daemons are protected.
# strict - Full SELinux protection.
SELINUXTYPE=targeted
The installer will attempt to open the necessary ports during the installation process. We recommend that you disable OS firewalls before you run the cPanel & WHM installation. When the installation process finishes, we recommend that you then configure a firewall. Disable SELinux and your system firewall by running:
iptables-save > ~/firewall.rules
systemctl stop firewalld.service
systemctl disable firewalld.service
Step 6: Install cPanel with a 15-day trial license
To install cPanel & WHM on your server, run the following command. cPanel will be installed with a trial license and do not need to buy a license.
cd /home && curl -o latest -L https://securedownloads.cpanel.net/latest && sh latestSample Output:
Verifying archive integrity... All good.
Uncompressing cPanel & WHM Installer......................
        ____                  _
    ___|  _ \ __ _ _ __   ___| |
   / __| |_) / _` | '_ \ / _ \ |
  | (__|  __/ (_| | | | |  __/ |
   \___|_|   \__,_|_| |_|\___|_|

  Installer Version v00172 rd5a7dd73dab22602bb395930b65463ace75e8860

256 files removed
Beginning main installation.
2025-02-21 10:41:17  108 [96225] ( INFO): cPanel & WHM installation started at: Fri Feb 21 10:41:17 2025!
2025-02-21 10:41:17  109 [96225] ( INFO): This installation will require 10-50 minutes, depending on your hardware and network.
2025-02-21 10:41:17  110 [96225] ( INFO): Now is the time to go get another cup of coffee/jolt.
2025-02-21 10:41:17  111 [96225] ( INFO): The install will log to the /var/log/cpanel-install.log file.
2025-02-21 10:41:17  112 [96225] ( INFO):
2025-02-21 10:41:17  113 [96225] ( INFO): Beginning Installation v3...
This command changes your session to the home directory, downloads the latest version of cPanel & WHM, and runs the installation script.
Step 8: Enable Network Manager Service
After successfully installing cPanel & WHM, you need to re-enable Network Manager to regain Networking services on your server. For this purpose, run the command:
service NetworkManager start
chkconfig NetworkManager on
To apply your changes, reboot the Rocky Linux / AlmaLinux server:
sudo rebootStep 9:Acess cPanel Management Panel
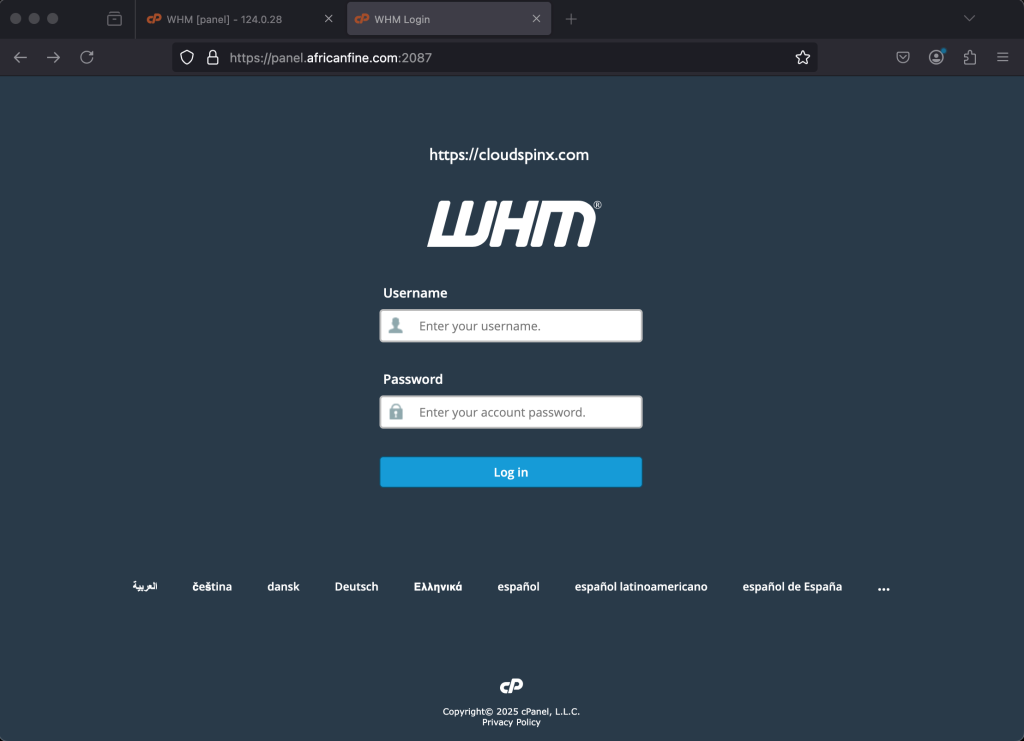
After restarting your server, you can access the cPanel WHM management console by pointing your browser to https://your-server-hostname:2087.

Step 10: Activate Cpanel & WHM License
For the License, you can either use a paid License or a free trial License.
Activate the Free Trial License for cPanel & WHM
To be able to use the cPanel 15-day Free Trial License, you need to do some configurations. Access your server’s WHM Management Panel, https://your-server-hostname:2087 and login to your account using the server root username and root password:
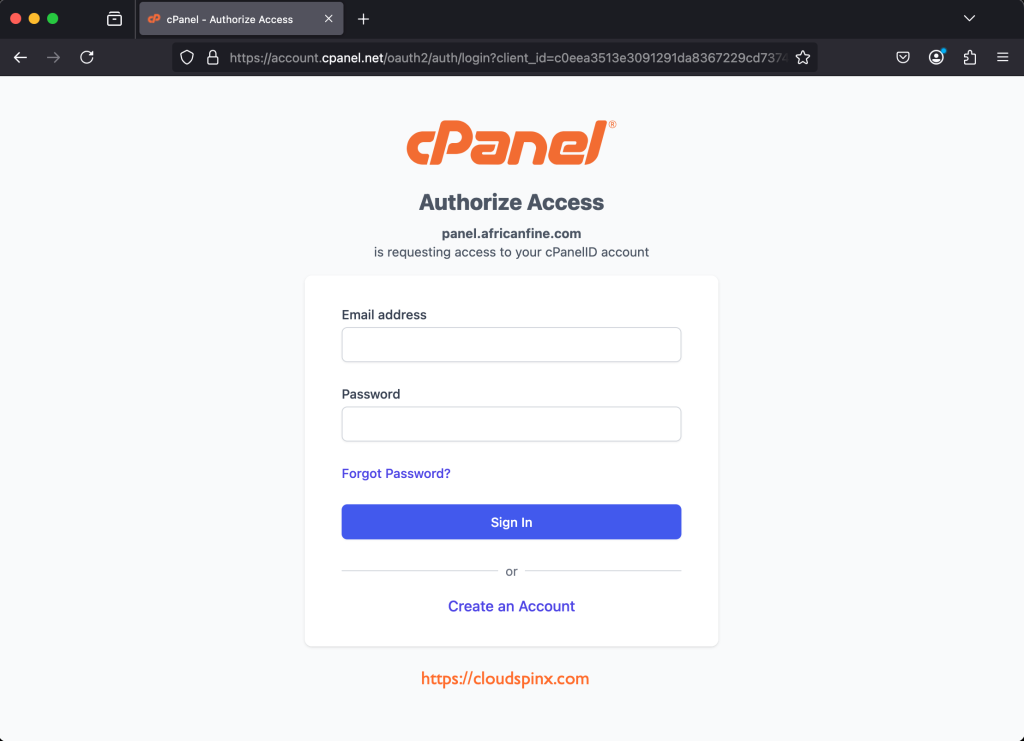
Accept the terms and conditions:

Now you will be prompted to login to your cPanel Store account, click on it.

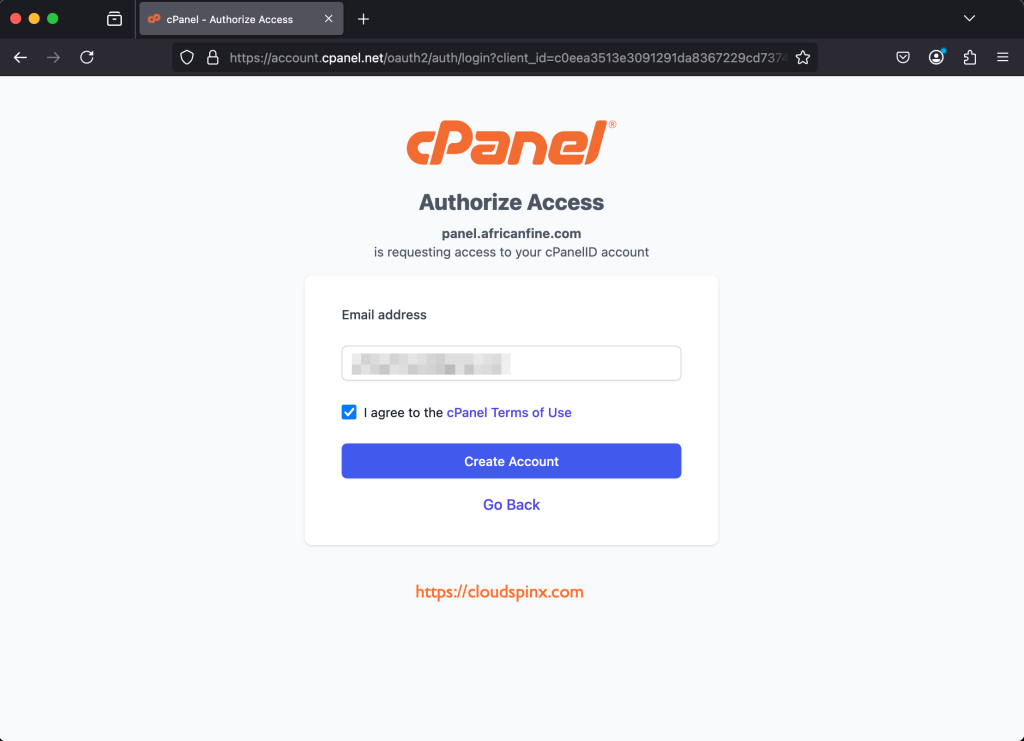
Login with the username and password of your cPanel store account. If you don’t have an account, continue with the steps below.
In the window that opens, Select Create Account option and proceed to do so. After agreeing to the terms of service, enter your email address and click on Create Account:
To set a password for the cPanel account, you will be sent an email to the inbox of the address you provided. Select the allow access option to link your server’s IP to the email address provided.
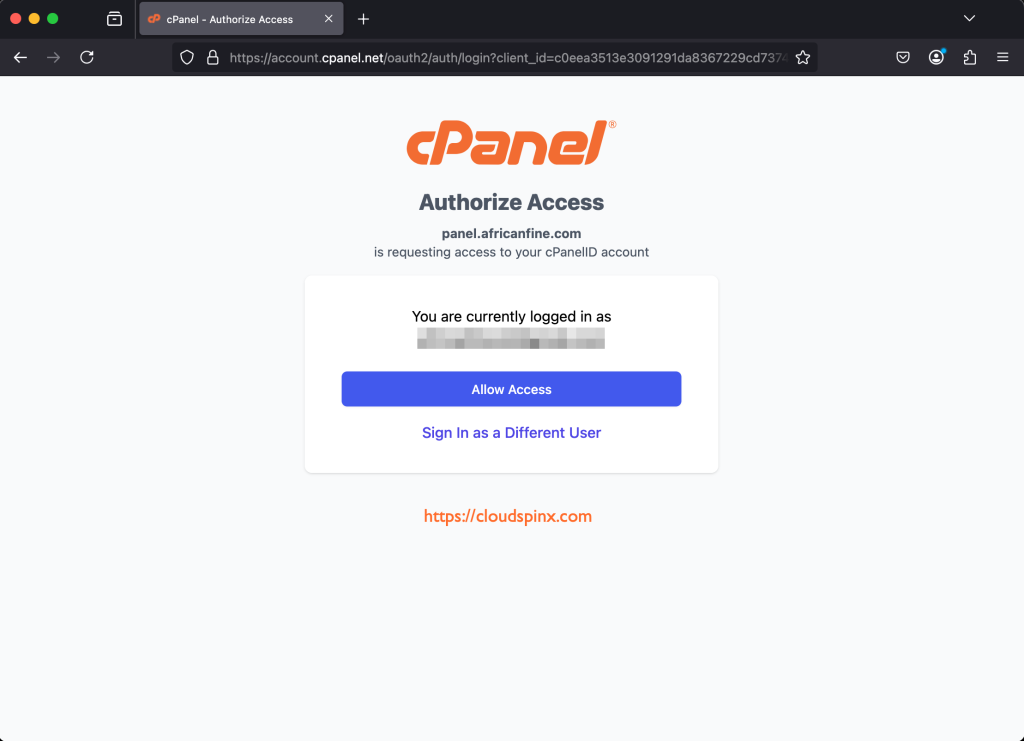
Please use the same browser to access your email, for the above step to be valid. If you did not, you can specify a password by clicking on the link sent to your email inbox.
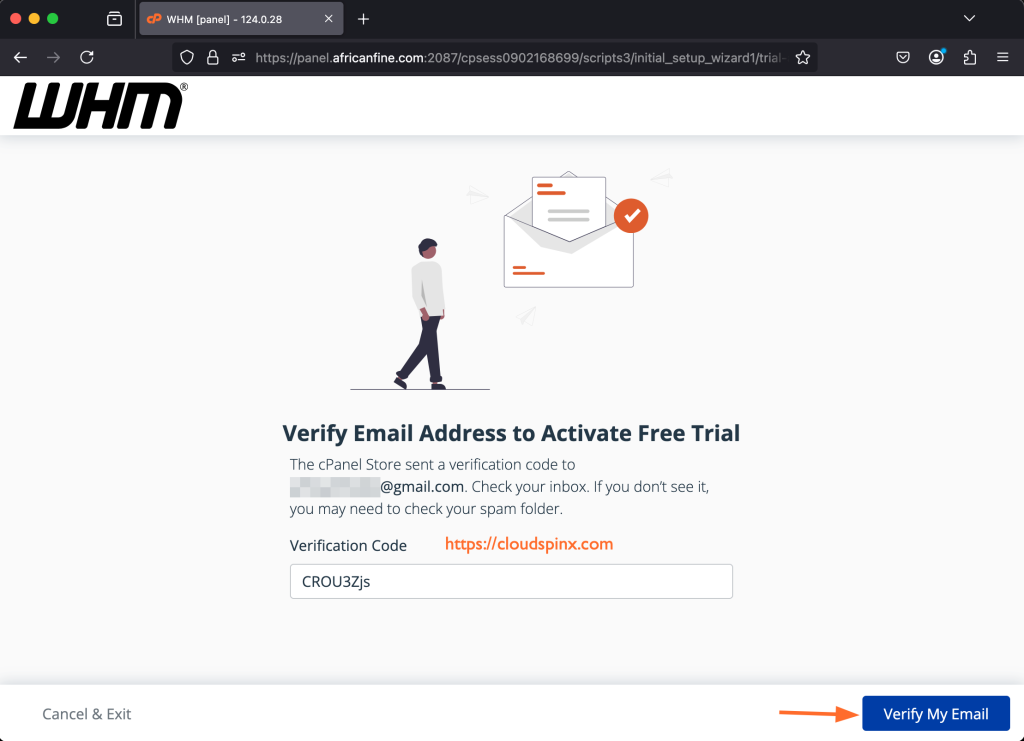
Enter the code sent to your email:
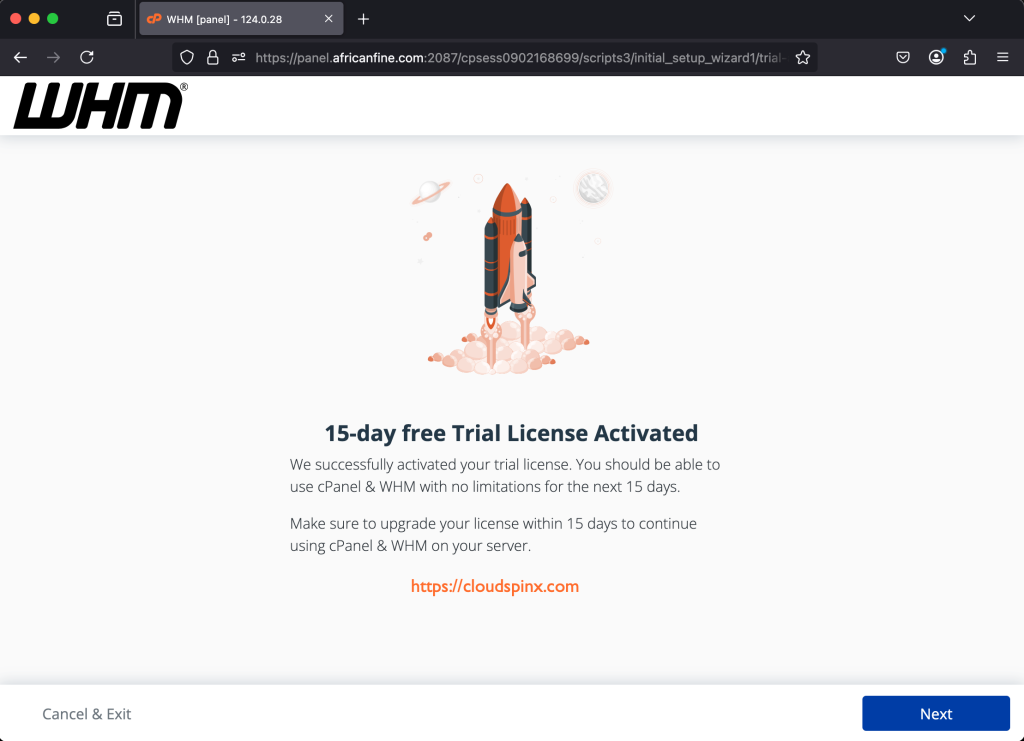
The following page will be displayed, showing that the Trial License has been successfully activated.
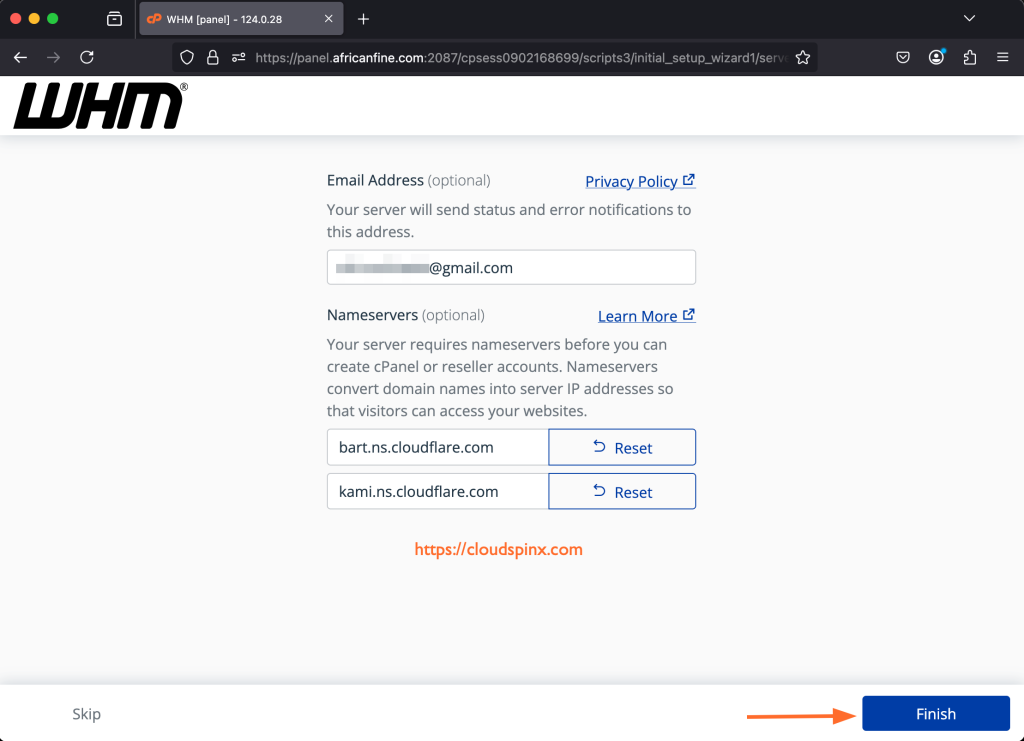
Click Next to proceed with the Server Setup. Provide the nameservers to be able to connect your domain or subdomains to the WHM server:
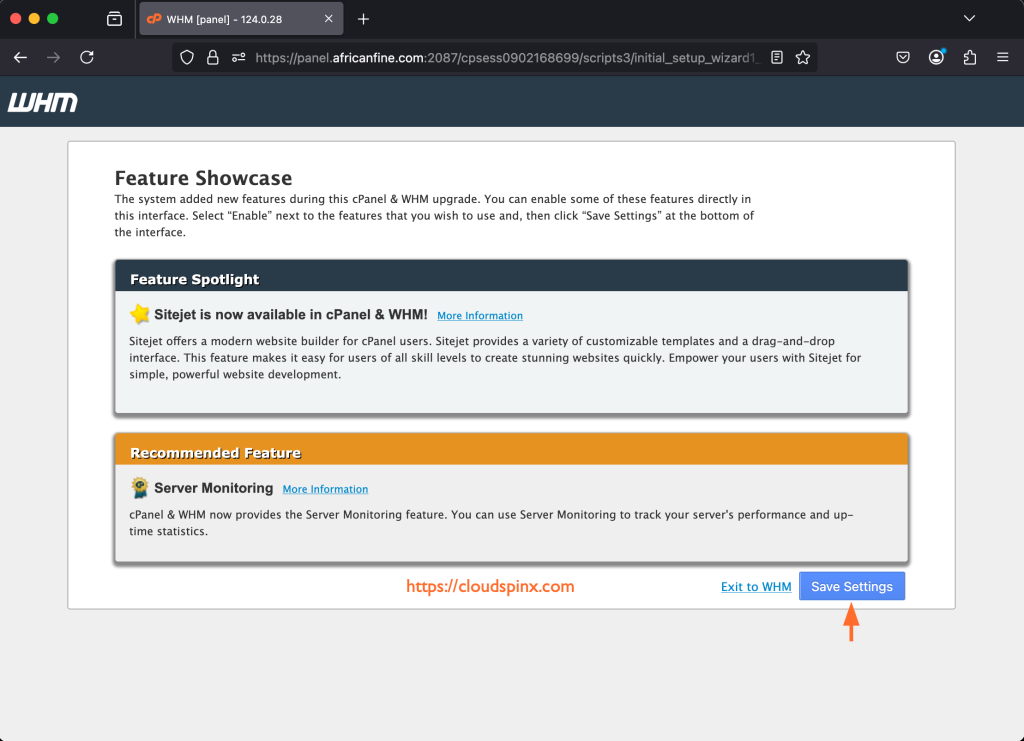
Upto here, you have successfully activated your cPanel Free Trial License. Save the recommended settings:
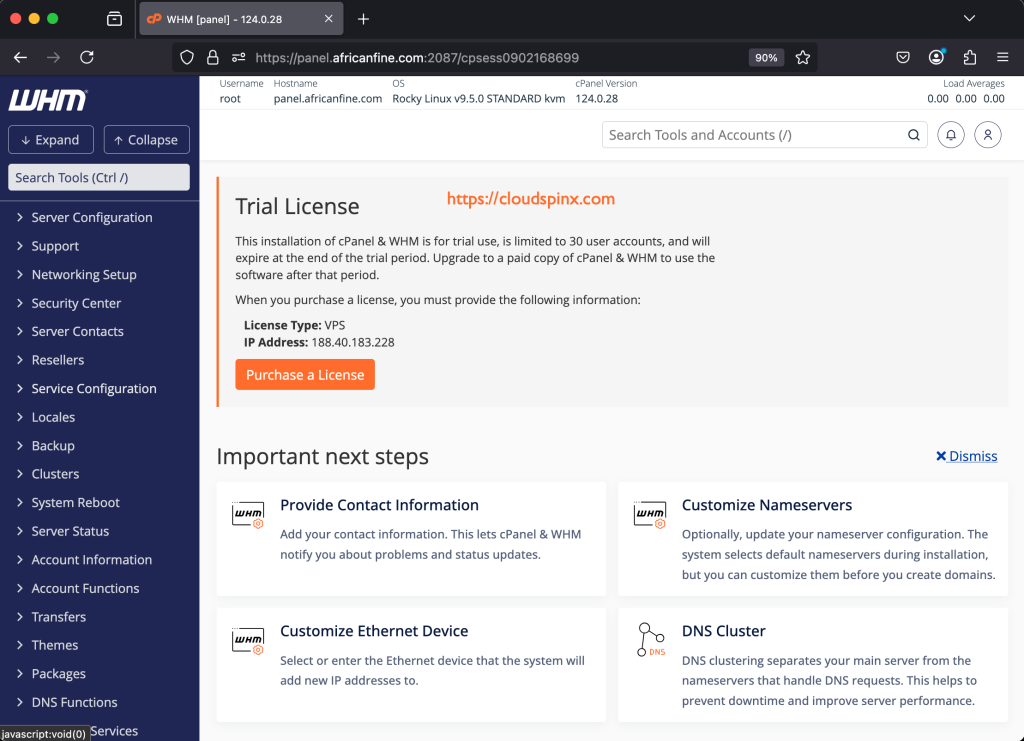
Now you can access cPanel & WHM management console and start managing your websites:
The purpose of this guide was to ease and smoothen the process of installing cPanel & WHM on your Rocky Linux or AlmaLinux Server. I hope it was informative and handy during your installation journey.
More articles from us: