

Virtualization allows for a better and efficient compute resources utilization. One of the most used open source virtualization solutions available is Proxmox VE. It is based on Debian Linux distribution with a modified LTS kernel for stability. In Proxmox VE you can run both virtual machines and containers, with unified storage for better efficiency.
In this tutorial we will be able to install and configure Proxmox VE 8 virtualization on Debian 12 (Bookworm) Linux system. This is done on a Baremetal server server using Debian 12 ISO. It is recommended to use Proxmox VE ISO for the installation as opposed to performing the installation on top of Debian 12 Linux OS.
For Rocky Linux, check: Installing Rocky Linux on Hetzner Root Server
Setup Pre-requisites
For the installation of Proxmox VE 8 on Debian 12 (Bookworm), you need the following requirements to be met;
- A running instance of Debian Bookworm
- A 64-bit processor with support for the Intel 64 or AMD64 CPU extensions.
- Access to Debian server terminal as root or user with sudo
- Internet access on the server
- Adequate hardware resources required to run the instances
For Debian 12 OS installation refer to the following tutorial.
With all the requirements satisfied, proceed with the installation of Proxmox VE 8 with the steps discussed in the next sections.
Update Debian OS
Confirm the system has been updated.
sudo apt -y update && sudo apt -y upgradeThe system might need a reboot after updating.
[ -f /var/run/reboot-required ] && sudo reboot -fSet Proxmox Server hostname
Set a FQDN for your server hostname.
sudo hostnamectl set-hostname pve01.example.com --staticWhere pve01.example.com is replaced with the correct hostname for the system.
Check the IP address of your primary interface.
$ ip ad
1: lo: <LOOPBACK,UP,LOWER_UP> mtu 65536 qdisc noqueue state UNKNOWN group default qlen 1000
    link/loopback 00:00:00:00:00:00 brd 00:00:00:00:00:00
    inet 127.0.0.1/8 scope host lo
       valid_lft forever preferred_lft forever
    inet6 ::1/128 scope host
       valid_lft forever preferred_lft forever
2: enp1s0: <BROADCAST,MULTICAST,UP,LOWER_UP> mtu 1500 qdisc pfifo_fast state UP group default qlen 1000
    link/ether 52:54:00:ef:22:c5 brd ff:ff:ff:ff:ff:ff
    inet 192.168.200.50/24 brd 192.168.200.255 scope global dynamic noprefixroute enp1s0
       valid_lft 1982sec preferred_lft 1982sec
    inet6 fe80::5054:ff:feef:22c5/64 scope link noprefixroute
       valid_lft forever preferred_lft forever
Edit your /etc/hosts file to update IP address and DNS name entry. Remove any hostname reference to 127.0.0.1
$ sudo vim /etc/hosts
192.168.200.50 pve01.example.com pve01
Next set correct timezone on the server.
sudo timedatectl set-timezone Africa/NairobiLet’s logout of the server and back in to
logoutTest if configured hostname is is ok using the hostname command:
$ hostname --ip-address
192.168.200.50
Add the Proxmox VE repository
Install required dependencies before adding the repo.
sudo apt install curl gnupg2 software-properties-common apt-transport-https lsb-release ca-certificatesProxmox VE 8 server packages are contained in the official Proxmox maintained APT repository. Configure the repository in your system.
echo "deb http://download.proxmox.com/debian/pve bookworm pve-no-subscription" | sudo tee /etc/apt/sources.list.d/pve-install-repo.listImport GPG keys used in signing of the repositories.
curl -fsSL http://download.proxmox.com/debian/proxmox-release-bookworm.gpg|sudo gpg --dearmor -o /etc/apt/trusted.gpg.d/proxmox.gpgUpdate your APT sources list
$ sudo apt update
Hit:1 http://security.debian.org/debian-security bookworm-security InRelease
Hit:2 http://deb.debian.org/debian bookworm InRelease
Hit:3 http://deb.debian.org/debian bookworm-updates InRelease
Get:4 http://download.proxmox.com/debian/pve bookworm InRelease [2,768 B]
Hit:5 http://mirror.hetzner.com/debian/packages bookworm InRelease
Hit:6 http://mirror.hetzner.com/debian/packages bookworm-updates InRelease
Hit:7 http://mirror.hetzner.com/debian/security bookworm-security InRelease
Get:8 http://download.proxmox.com/debian/pve bookworm/pve-no-subscription amd64 Packages [129 kB]
Fetched 131 kB in 2s (86.7 kB/s)
Reading package lists... Done
Building dependency tree... Done
Reading state information... Done
9 packages can be upgraded. Run 'apt list --upgradable' to see them.
Upgrade new packages after adding the repository.
$ sudo apt full-upgrade
Reading package lists... Done
Building dependency tree... Done
Reading state information... Done
Calculating upgrade... Done
The following packages will be upgraded:
  ifupdown
1 upgraded, 0 newly installed, 0 to remove and 0 not upgraded.
Need to get 82.0 kB of archives.
After this operation, 2048 B disk space will be freed.
Do you want to continue? [Y/n] y
....
Adding Proxmox VE Ceph Repository (Optional)
This is Proxmox VE’s main Ceph repository and holds the Ceph packages for production use. If you plan on configuring ceph storage, you can also use this repository to update only the Ceph client.
echo "deb http://download.proxmox.com/debian/ceph-quincy bookworm main" | sudo tee /etc/apt/sources.list.d/ceph.listInstall Proxmox VE 8 packages
Begin by installing the official Proxmox VE kernel.
sudo apt install pve-kernel-6.2After the kernel change, it’s recommended to perform a system reboot.
sudo systemctl rebootThen perform the installation of Proxmox base packages by running the following commands:
sudo apt update && sudo apt install proxmox-ve postfix open-iscsiIf you have a mail server in your network, you should configure postfix as a satellite system, and your existing mail server will be the ‘relay host’ which will route the emails send by the proxmox server to the end recipient. If you don’t know what to enter here, choose local only.
Confirm the installation completes without any errors:
...
Setting up pve-manager (8.3.4) ...
update successful
Created symlink /etc/systemd/system/multi-user.target.wants/pvedaemon.service → /lib/systemd/system/pvedaemon.service.
Created symlink /etc/systemd/system/multi-user.target.wants/pveproxy.service → /lib/systemd/system/pveproxy.service.
Created symlink /etc/systemd/system/multi-user.target.wants/spiceproxy.service → /lib/systemd/system/spiceproxy.service.
Created symlink /etc/systemd/system/multi-user.target.wants/pvestatd.service → /lib/systemd/system/pvestatd.service.
Created symlink /etc/systemd/system/getty.target.wants/pvebanner.service → /lib/systemd/system/pvebanner.service.
Created symlink /etc/systemd/system/multi-user.target.wants/pvescheduler.service → /lib/systemd/system/pvescheduler.service.
Created symlink /etc/systemd/system/timers.target.wants/pve-daily-update.timer → /lib/systemd/system/pve-daily-update.timer.
Created symlink /etc/systemd/system/sysinit.target.wants/pvenetcommit.service → /lib/systemd/system/pvenetcommit.service.
Created symlink /etc/systemd/system/pve-manager.service → /lib/systemd/system/pve-guests.service.
Created symlink /etc/systemd/system/multi-user.target.wants/pve-guests.service → /lib/systemd/system/pve-guests.service.
  Configuration node devices/global_filter not found
Backing up lvm.conf before setting pve-manager specific settings..
'/etc/lvm/lvm.conf' -> '/etc/lvm/lvm.conf.bak'
Setting 'global_filter' in /etc/lvm/lvm.conf to prevent zvols and rbds from being scanned:
 => global_filter=["r|/dev/zd.*|","r|/dev/rbd.*|"]
  LVM configuration valid.
Setting up proxmox-ve (8.3.0) ...
Processing triggers for libc-bin (2.36-9+deb12u9) ...
Processing triggers for pve-ha-manager (4.0.6) ...
Remove enterprise repos if no license acquired.
echo "deb http://download.proxmox.com/debian/pve bookworm pve-no-subscription" | sudo tee /etc/apt/sources.list.d/pve-install-repo.list
sudo rm /etc/apt/sources.list.d/pve-enterprise.list
Uninstall Debian default kernel:
sudo apt remove linux-image-amd64 'linux-image-6.1*'Update and check grub2 config by running the following command.
sudo update-grubRemove os-prober package.
sudo apt remove os-proberBlock rpcbind port 111.
sudo iptables -A INPUT -p tcp -m tcp --dport 111 -j DROP
sudo iptables -A INPUT -p udp -m udp --dport 111 -j DROP
sudo /sbin/iptables-save
Or completely remove rpcbind service:
sudo systemctl disable --now rpcbind.socketInstall ZFS tools
Install ZFS packages:
sudo apt update
sudo apt install zfsutils-linux zfs-zed  zfs-initramfs
That ensures ZFS modules are loaded early during boot.
sudo modprobe zfsConfirm the module is loaded:
$ sudo lsmod | grep zfs
zfs                  6189056  0
spl                   143360  1 zfs
Validate ZFS works:
$ sudo zpool list
no pools available
Reboot your Debian system after installation to boot into Proxmox environment.
sudo systemctl rebootProxmox VE Proxy service should be listening on port 8006.
$ sudo ss -tunelp | grep 8006
tcp   LISTEN 0      4096                *:8006             *:*    uid:33 ino:25414 sk:18 cgroup:/system.slice/pveproxy.service v6only:0 <->
Access Proxmox VE web interface
Open your browser and input the Proxmox VE web console URL – (https://serverip_or_hostname:8006).
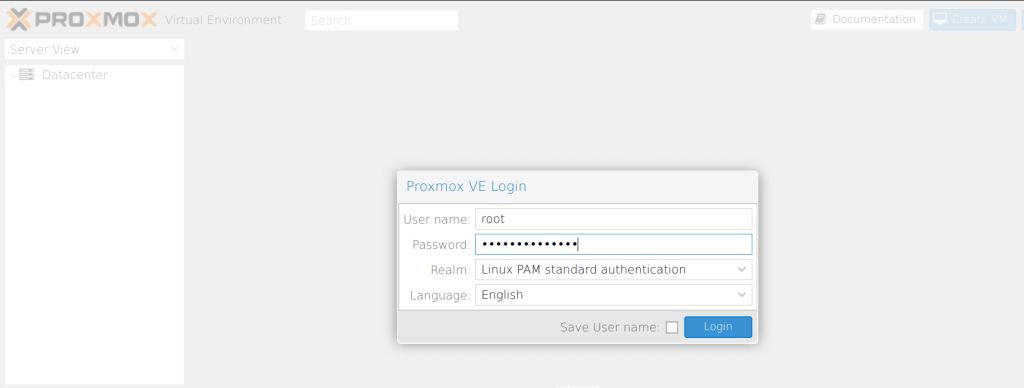
Select “PAM Authentication” and authenticate with server’s root user password to access Proxmox VE dashboard which has a look like below:

If you don’t remember root password, update:
passwd rootOnce logged in, create a Linux Bridge called vmbr0,
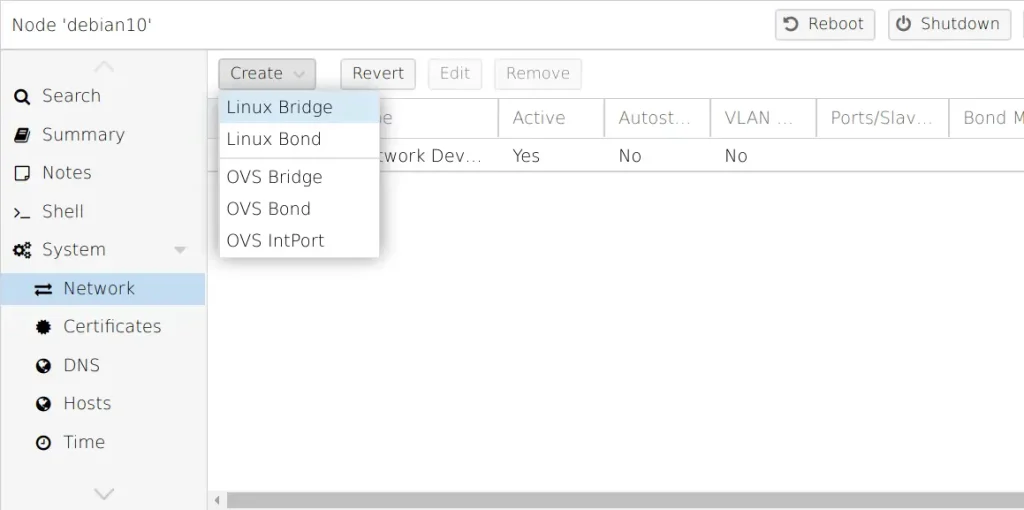
Add the first network interface to be used by the bridge being created.

For Private bridge using NAT check below article:
The official Proxmox Documentation has more guides on the advanced configurations and Proxmox VE Administration.


2 thoughts on “Installing Proxmox VE 8 on Debian 12 (Bookworm)”
You saved my life! I was doing an upgrade from Proxmox 7 to 8, using the official documentation but couldn’t get GUI after.
After running the command: systemctl status pveproxy.service pvedaemon.service
both came up as DEAD (not active). These need to be running to get a GUI
I tried everything but following through your commands one by one, got my GUI working again!!
THANK YOU!
We are happy to learn this was helpful to you.