
Kali Linux is a widely used distribution of Linux well known for it’s use for penetration testing, ethical hacking, and security tasks. Kali Linux is mostly known for its huge collection of pre-installed security tools and utilities.
Kali Purple
Kali Linux Purple is a modified version of Kali Linux used for security evaluations and network penetration testing. It is specifically designed for ethical hackers and cyber security experts that prioritize defensive security measures. The unique and cutting-edge set of tools and layouts provided by Kali Linux Purple are designed to specifically satisfy the needs of professionals in defensive cyber security. It is constructed using the most recent Debian kernel, guaranteeing top efficiency, security, and system compatibility. The interface is made easier to use by the purple theme and icon set.
Unlike traditional Kali Linux, which is known for its use in offensive security, Kali Purple focuses on defensive security capabilities. It enhances the platform’s capabilities with a range of defensive tools and utilities designed to enable the system to proactively identify, respond to, and mitigate cyber security threats.
Why Consider Kali Purple
You might want to consider Kali Purple for the following reasons:
- Defensive security: Kali Linux Purple is created for Blue and Purple team members to provide defensive security. It comes with pre-installed tools to help you recognize, safeguard, detect, react to, and recover crucial data and resources.
- New Tool Categories: Kali Linux Purple comes with new tool categories that have been carefully selected to improve defensive security capabilities. These tools mark a notable change from the toolset offered in typical Kali Linux editions, which is mostly offensive-oriented.
- Performance and Security: Kali Linux Purple is based on the most recent Debian kernel, ensuring the best possible performance, security, and device compatibility.
- Purple Theme: Performance and Security at Their Finest: Kali Linux Purple is based on the most recent Debian kernel, ensuring the best possible performance, security, and device compatibility.
Kali Purple Tools
Over 100 defensive security tools, such as Malcolm, Surricata, Arkime, TheHive, and Zeek, are available in Kali Linux Purple. We’ll take a look at a few of the tools that Kali Purple has to offer.
- Malcolm: A collection of tools for evaluating network traffic are provided by Malcolm, a network traffic analysis tool package. For network security experts, it is a potent tool because it provides facilities for packet capture, analysis, and visualization.
- Surricata: It is an intrusion detection system that has the ability to identify and stop a variety of network-based threats. The fact that it is quick, scalable, and simple to use makes it a popular option for network security experts.
- Arkime: Arkime is a comprehensive packet capture and analysis tool designed for security experts to collect and examine network data in real-time. It is a useful tool for network security specialists because it has a variety of features, including search and filtering capabilities.
- TheHive: This is an incident response and forensic tool, availed to assist security teams in organizing and managing their response activities. With it, team members can track their progress, exchange information, and streamline the incident response process in a collaborative manner.
- Zeek: Another intrusion detection system that is capable of both detecting and preventing a variety of network-based threats is Zeek. It is a popular option for network security professionals because it is made to be quick, scalable, and simple to use.
These were just but a few examples of the hundreds of tools offered by Kali Purple.
Installation of Kali Linux Purple – Step by Step With Screenshots
1. Download Kali Purple Image
To install Kali Purple, you have to download the ISO image from Kali’s official website. Make sure to save it to a memorable location on your PC!. Visit the website and scroll down and click on the download icon:

2. Create Bootable Media
To install Kali Purple, you need to write your downloaded ISO to a USB stick to create the installation media. For this tutorial, we’ll use balenaEtcher, as it runs on Linux, Windows and Mac OS. Choose the version that corresponds to your current operating system, download and install the tool.
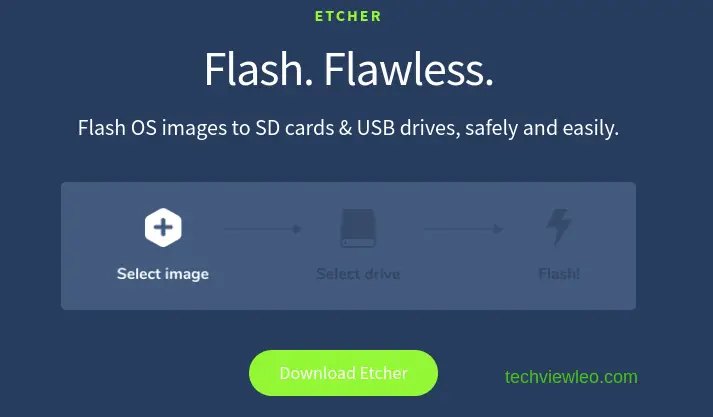
After successful installing the tool, select you ISO image and click the flash button to flash the image.
3. Boot from a USB flash drive
Insert the USB flash drive into the laptop or PC you want to use to install Ubuntu and boot or restart the device. It should recognize the installation media automatically. If not, try holding F2 or F10 during startup and selecting the USB device from the system-specific boot menu.
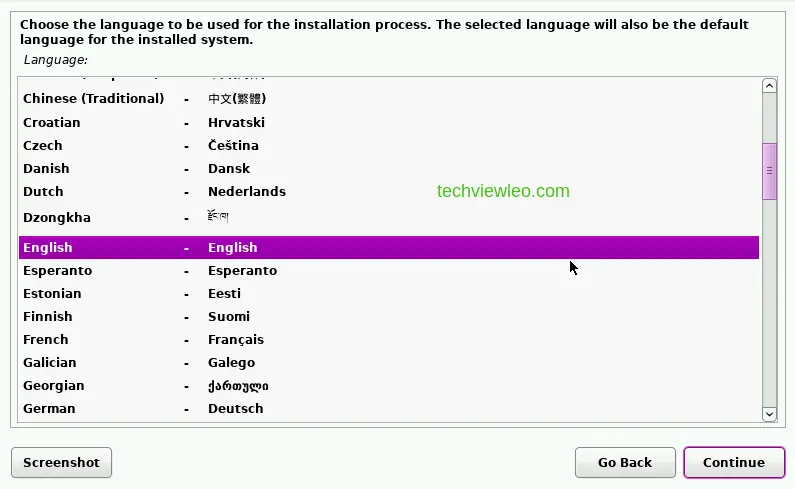
Once the installer has initialized, you’re prompted to choose the language you’d prefer to use during the installation and then your location. The next thing you’ll have to choose is your default locale setting which is the codeset for the combination of language and region you have chosen.
The next thing you’ll do is select your keyboard, once you’ve done that, click continue.

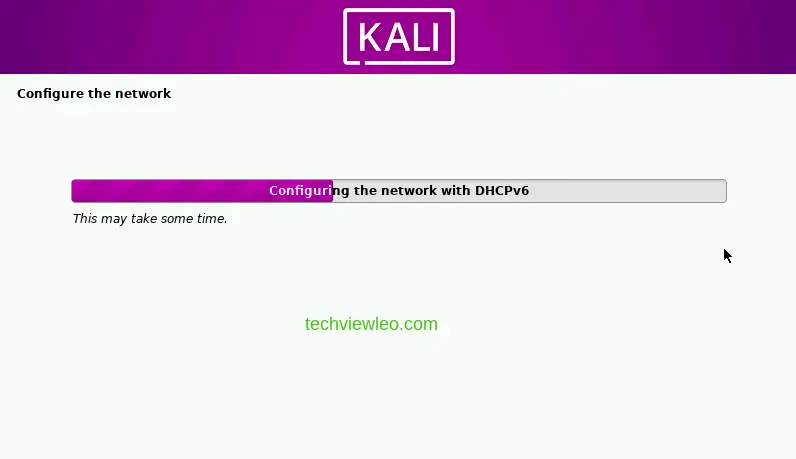
Then the installer will start to detect and mount the installation media followed by some network configurations.
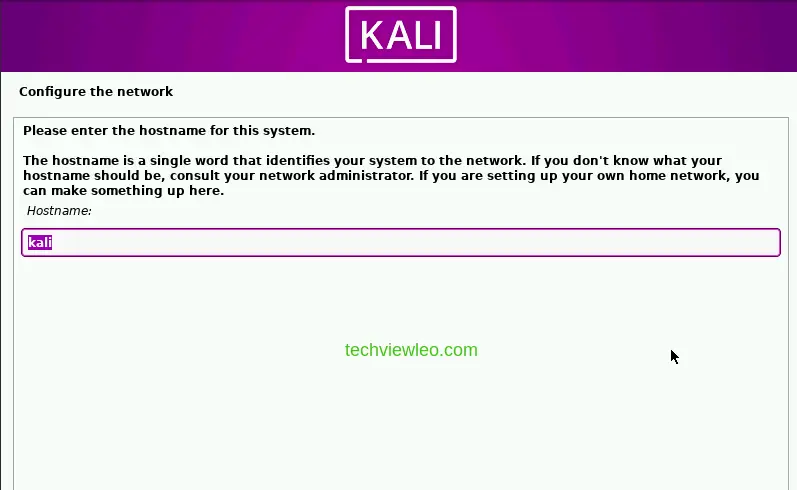
Next, you’ll be asked to choose a hostname for your system, which is a single word that will identify your system to the network.
Next you need to input the name of the new user which will be used to create an account to use for non-administrative activities instead of the root account. Input your name and click continue.

For the username, it will be generated from the name you entered from the previous step. But if you prefer another, you can change it to whatever name you want.
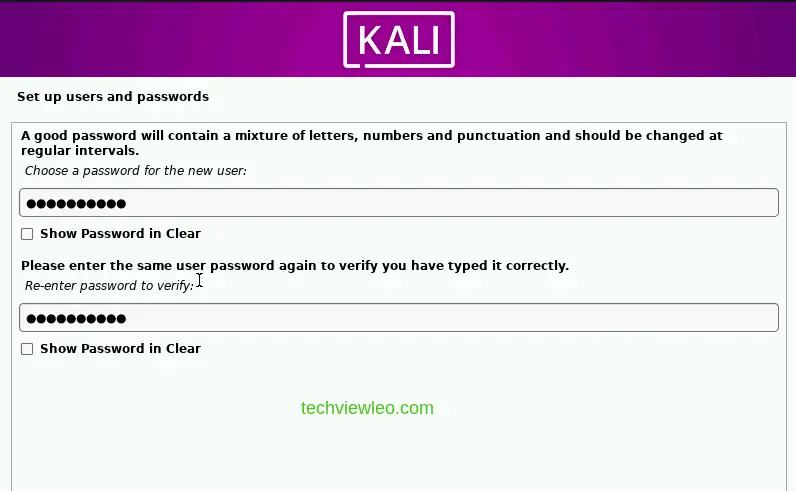
4. Create Your Login Details
The next step is setting up your usernames and passwords. Choose a strong password for the security of your system and ensure to remember the password.
The next task is partitioning of the disk.The installer can guide you through partitioning a disk (using different standard schemes) or, if you prefer, you can do it manually. With guided partitioning you will still have a results.
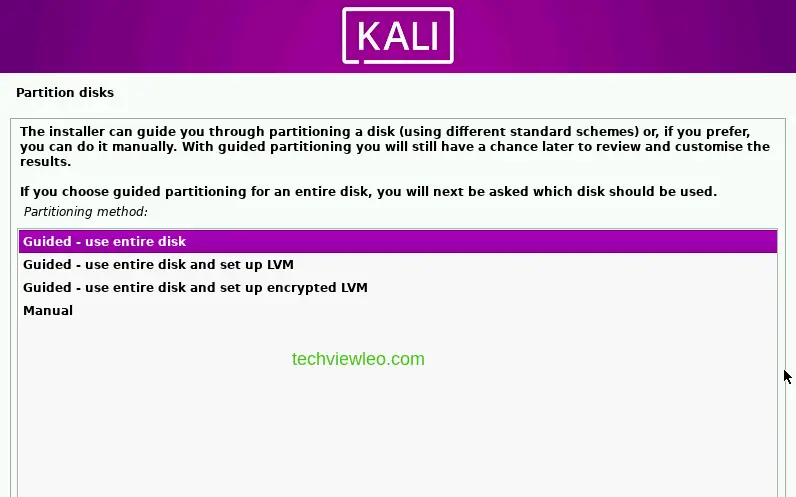
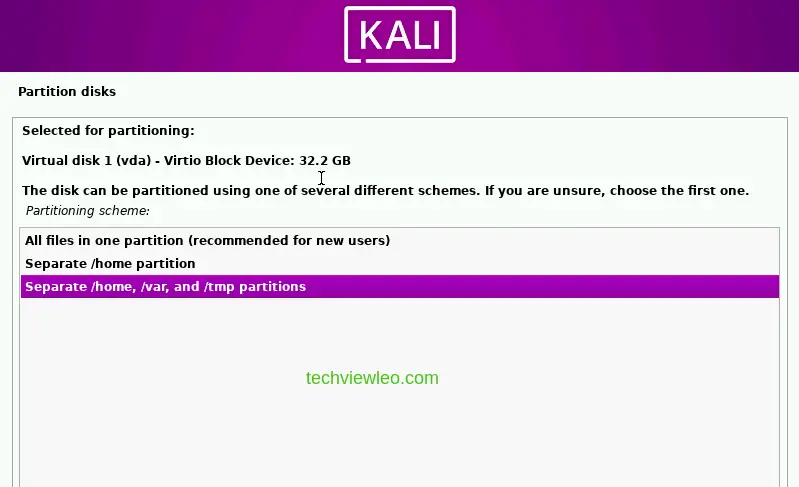
Click on continue in the next page and proceed. After this, you’ll be asked to choose the partitioning scheme you prefer, pick the one you prefer.
Take a look at the overview of the disk partitions before proceeding with the installation.
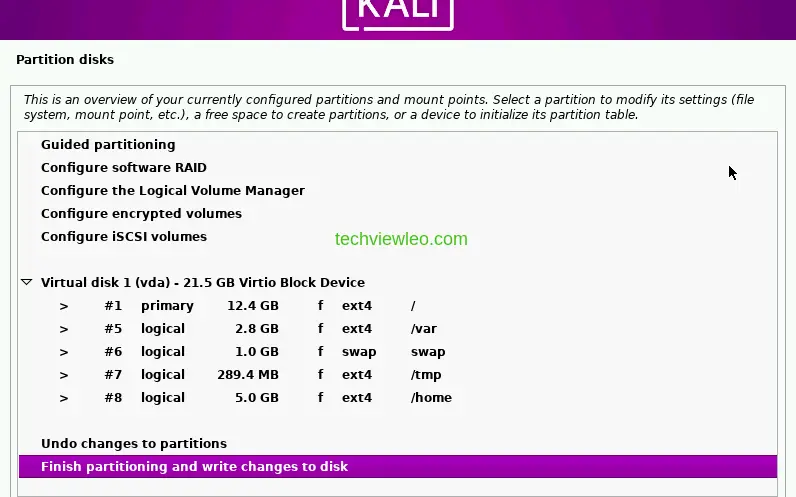
Click on the checkbox Yes on the next page to allow the changes you made to be written to the disk and click continue on the next page.
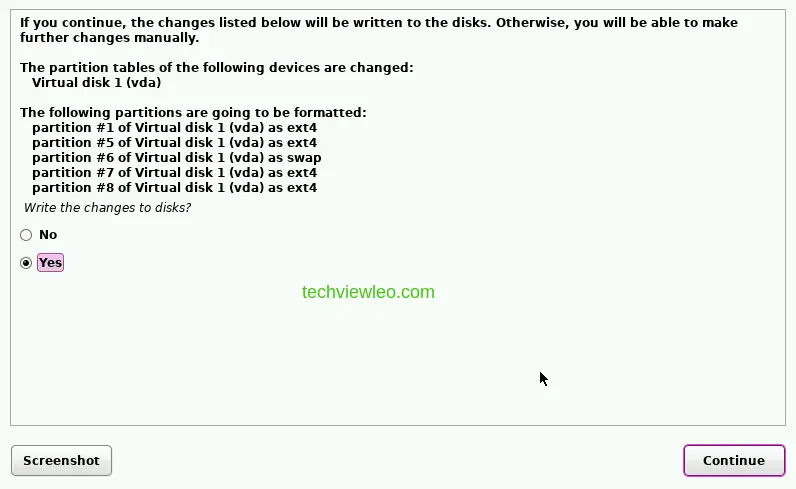
When prompted to write changes to disk, click Yes and then continue.

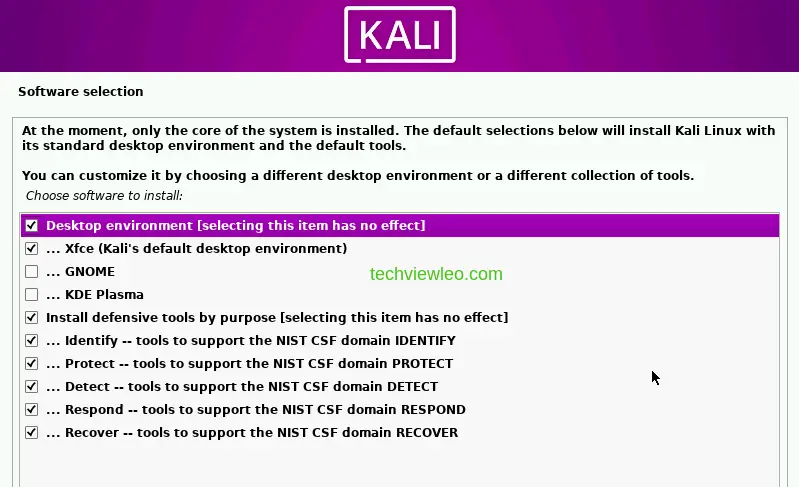
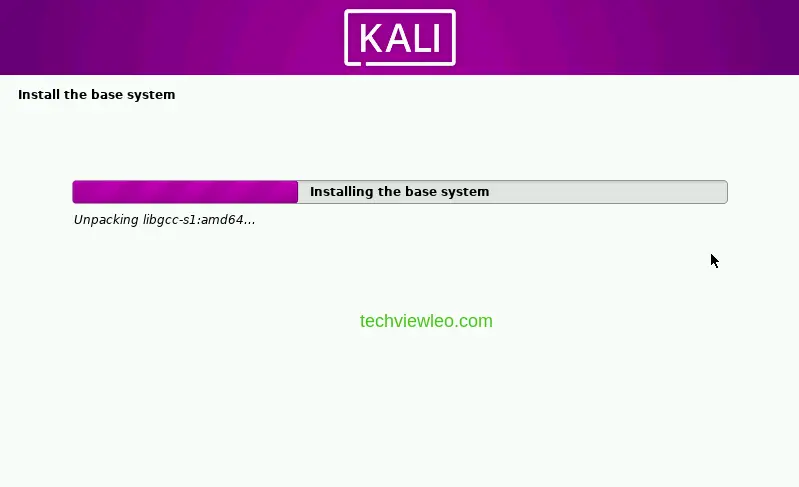
Then the base system installation begins and you will be prompted to choose another desktop environment if you would prefer a different one from the default desktop environment.
Click continue and the base system installation resumes.
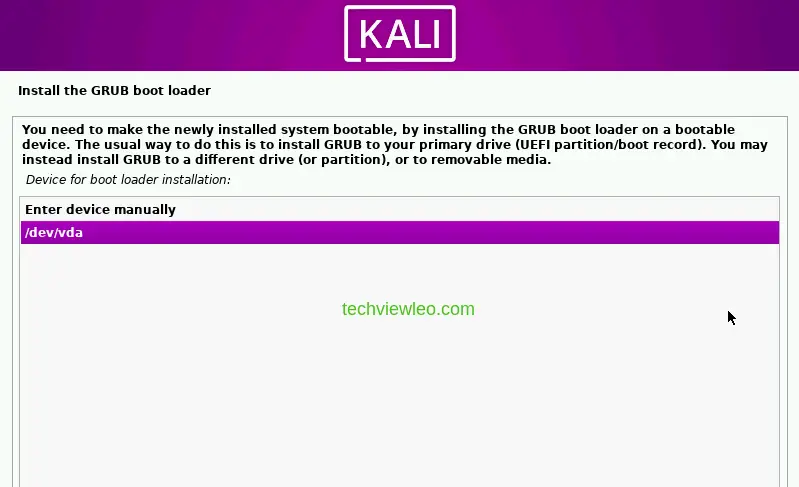
After the base system installation is complete, you’ll also be asked to install GRUB boot loader to your primary drive (UEFI Partition/boot record). Click on yes and then continue.
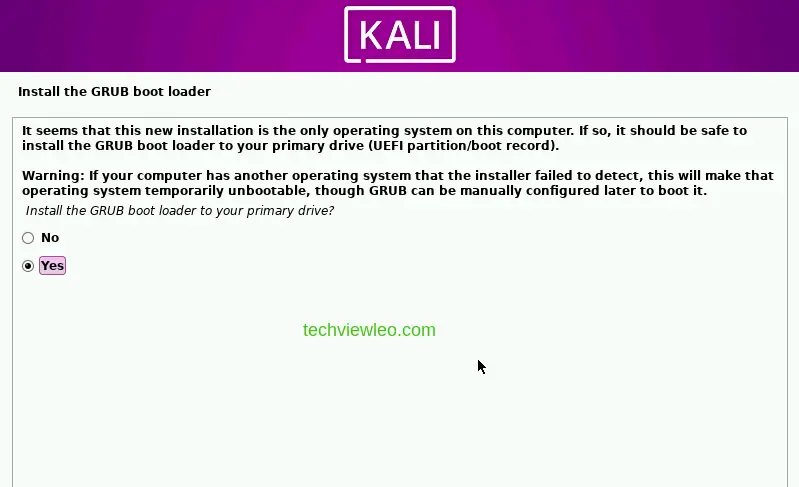
Now you have to choose the device you install GRUB Boot loader in order to make the current system bootable. The usual way to do this is to install GRUB in your primary UEFI pertition. Click on /dev/vda and the continue.
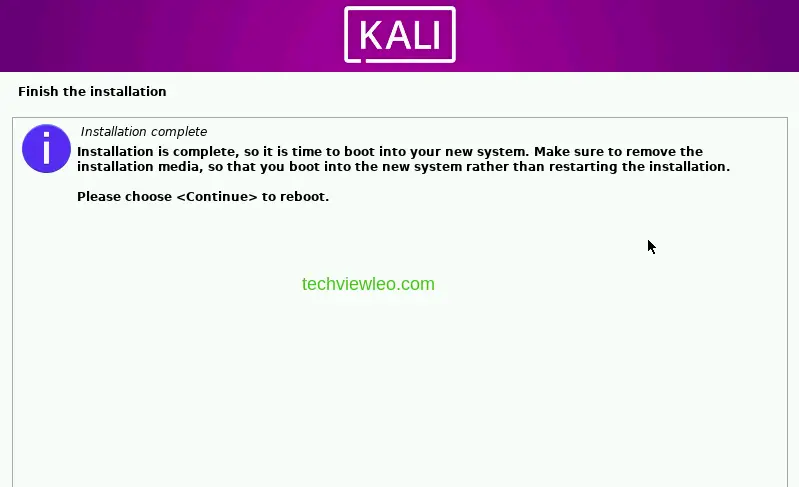
5. Complete Installation
The installation will resume and then complete, you’ll be requested to choose continue, to reboot into your new system.
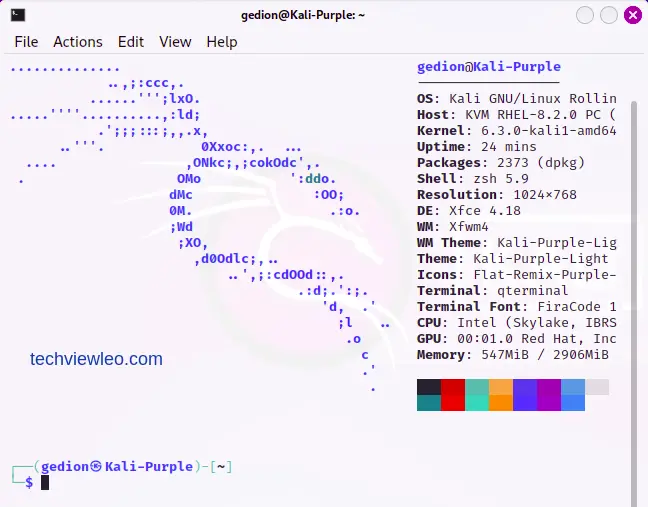
Input your username and the password you set and login to your Kali Purple.

Voila! Welcome to your very own Kali Linux Purple, enjoy. Go to the terminal and start your Kali Purple journey.
Using Kali Purple
Let’s consider some tools and usage examples.
Core Tools
Kali Purple comes with a new suite of tools that go hand in hand with the five domains of NIST Cybersecurity Framework (CSF) 1.1: Identify, Protect, Detect, Respond, and Recover. The fact that they go hand in hand further emphasizes Kali Purple’s potential as a great solution for security professionals by guaranteeing that the tools offered can handle a wide range of defensive cyber security jobs.
It should be noted that in this initial release, several of the recently announced utilities were not enabled by default. Rather, a lot of them required downloading and installation via the Community Wiki’s instructions.
Identify
In this field, evaluating and locating potential vulnerabilities in an organization’s infrastructure is made possible by technologies like GVM (Greenbone Vulnerability Management). GVM helps security teams to keep ahead of possible threats and maintain a solid security posture by continuously scanning systems and networks.
The tool was previously named OpenVAS. This package installs all the required packages, it provides scripts, start and stop the GVM services. To install GVM, run the command below:
sudo apt update && sudo apt install -y gvm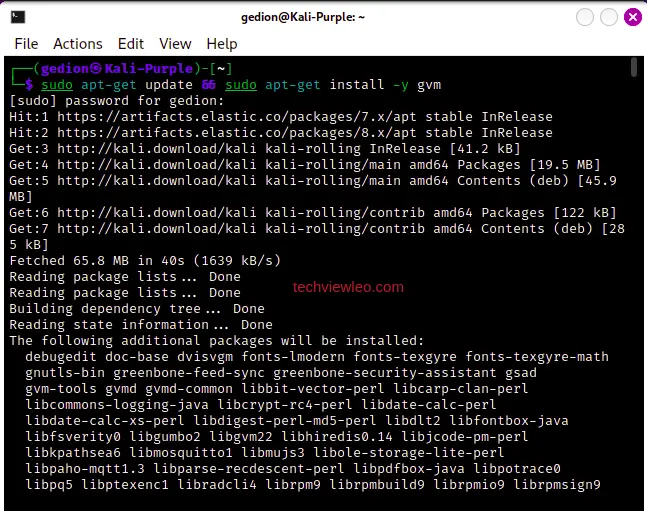
Now, use the command below to set up GVM. This may take a while but be patient as the administrator password will be displayed at the end. Save the password somewhere safe.
sudo gvm-setupWhen you run the command sudo gvm-setup, you might be met with a error since your default PostgreSQL version may not be the most recent, required by libgvmd.
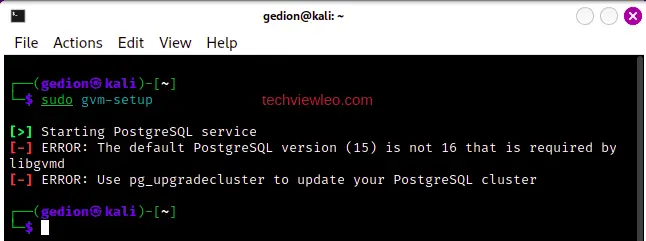
To fix this, you’ll have to rename and update the cluster to the latest version. Let’s go ahead and do that. First, we need to stop PostgreSQL services in preparation for an upgrade:
sudo systemctl stop postgresqlWe need to rename the new postgres cluster so that when we upgrade the old cluster the names won’t conflict:
sudo pg_renamecluster 16 main main_pristineNow, upgrade the old cluster to the latest version. In the command below, replace the version (14) with the old version of Postgres that you’re currently using.
sudo pg_upgradecluster 15 mainWe can start Postgres back up again and this time it should be running the new postgres 16 cluster.
sudo systemctl start postgresqlYou should also see that the old cluster is down and the new version of Postgres is up:
pg_lsclustersOptionally, you can drop the old cluster once you’ve verified the new one works and you don’t need the old cluster anymore.
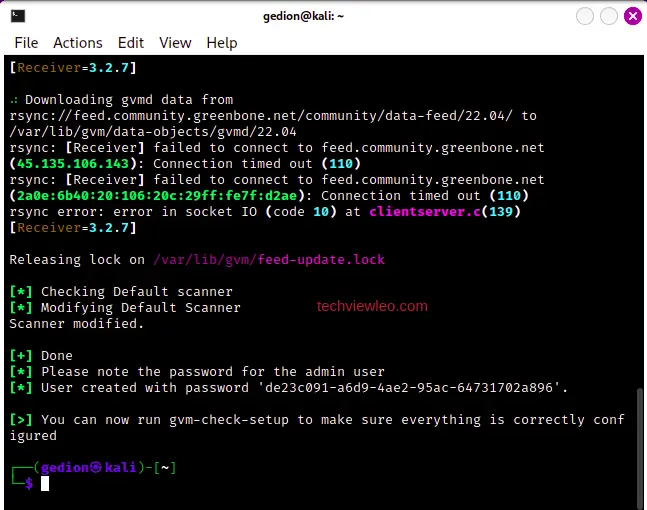
sudo pg_dropcluster 14 main --stopNow, you can run the setup command successfuly:
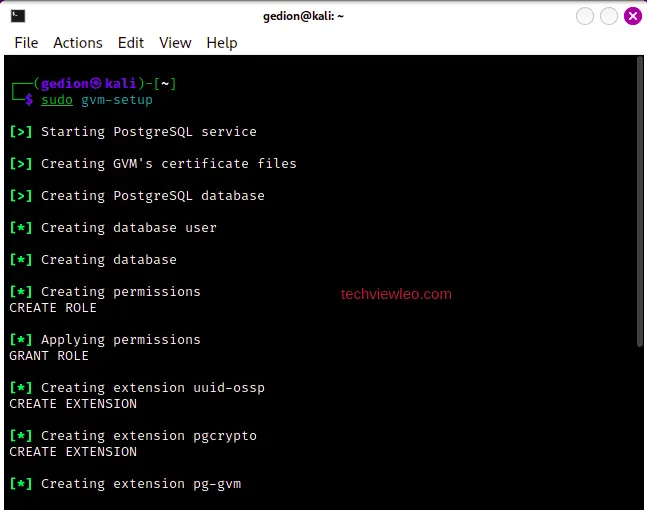
Sample continuation:
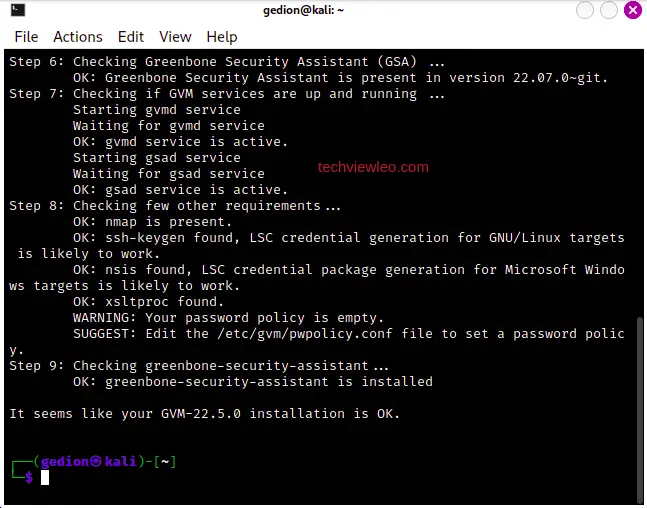
Check the configuration setup using the command below:
sudo gvm-check-setupIf there are any errors, you’ll be provided with fix commands to fix the problems, all you have to do is run the commands.
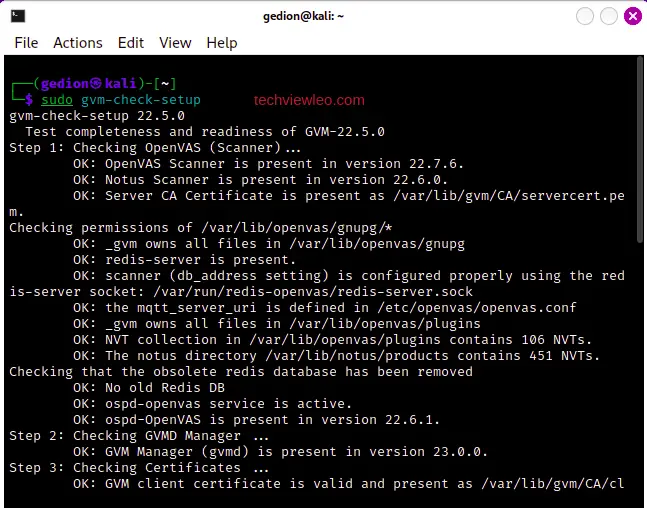
If everything is okay, the system will tell you that everything seems okay and you can proceed.
By default, GVM typically binds to the loopback interface (localhost) for security reasons, as it’s intended to be accessed only from the local machine. But if you’d like to make it available on an external network interface, use the command below:
sudo sed -e 's/127.0.0.1/0.0.0.0/g' -i /lib/systemd/system/gsad.service
sudo systemctl daemon-reload
You can use the following commands to start and stop GVM service:
sudo gvm-stop
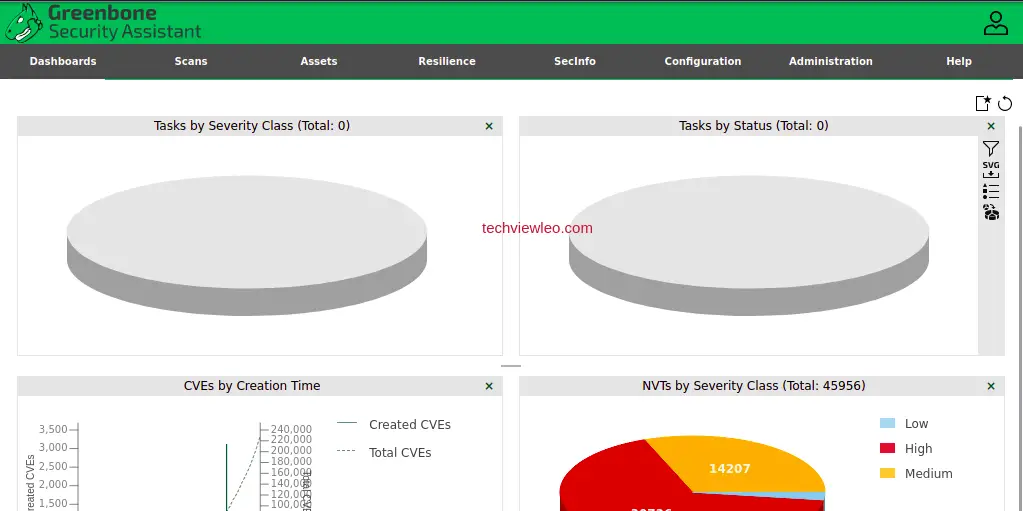
sudo gvm-startWhen you start gvm service, it will open in a web-interface in your default web browser. Head there and login using the username you created during installation.

If not, you can use the command below to create a user and it’s password. Replace <USERNAME> and <PASSWORD> with the actual username and password you want to create:
sudo runuser -u _gvm -- gvmd --create-user=<USERNAME> --password=<PASSWORD>After that, restart gvm with sudo gvm-stop folowed by sudo gvm-start then login with the credentials you already created:
Now, GVM is ready to use. Good Luck!
Protect
Kali Purple comes with a range of tools designed to support an organization’s security protocols. For instance, Elastic Security is a formidable Security Information and Event Management (SIEM) solution that gathers and examines security data from several sources to enable quick identification and threat response. It’s important to remember, too, that some users have mentioned having trouble configuring Elastic Security in Kali Purple. Note that Kali Purple Elastic Server must be operational in order to install and use Elastic Agent.
Since Elastic Agent is intended to operate in a client-server architecture with Elastic Server, Elastic Server installation is a prerequisite. A lightweight agent called Elastic Agent is used to gather information from multiple sources and forward it to Elastic Server for indexing and analysis.
Let’s go ahead and install Elastic server:
Add Elastic Repository
First, add the Elastic software repository to your system, so you can install it and receive updates as follows. Open the terminal and run the following command to add the Elastic APT repository:
sudo apt-get install curl && curl -fsSL https://artifacts.elastic.co/GPG-KEY-elasticsearch | sudo apt-key add -
OR
sudo apt-get install curl && curl -fsSL https://artifacts.elastic.co/GPG-KEY-elasticsearch | sudo gpg --dearmor -o /usr/share/keyrings/elastic-archive-keyring.gpg
Then, import the GPG key for the repository:
echo "deb https://artifacts.elastic.co/packages/7.x/apt stable main" | sudo tee /etc/apt/sources.list.d/elastic-7.x.list
OR
echo "deb [signed-by=/usr/share/keyrings/elastic-archive-keyring.gpg] https://artifacts.elastic.co/packages/7.x/apt stable main" | sudo tee /etc/apt/sources.list.d/elastic-7.x.list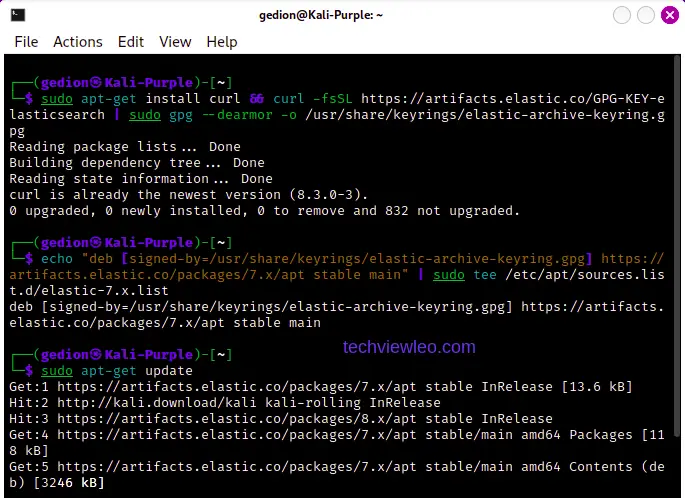
Install Elastic Server
Once the repository is added, update the package list and install Elastic server as follows. Run the following command to update the package list and then install Elastic Server:
sudo apt update
sudo apt install elasticsearch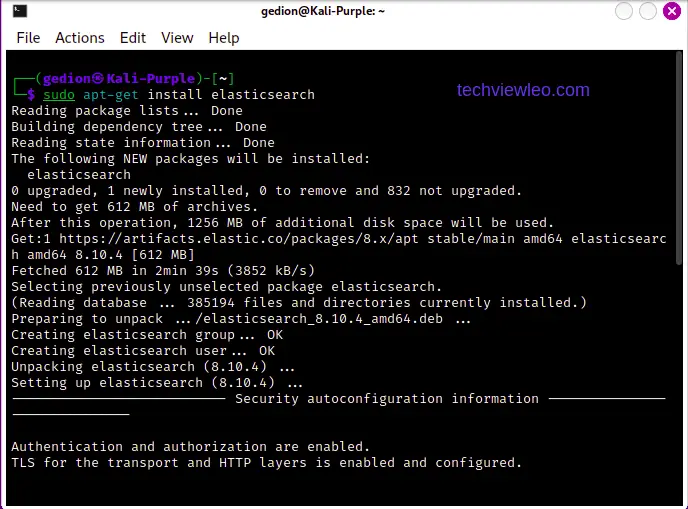
Ensure to take a screenshot of the instructions provided below, they specify configurations for Kibana, which you’ll definitely need.

Configure Elastic Search
After installing Elastic server, you need to configure it as follows. Open the configuration file:
sudo nano /etc/elasticsearch/elasticsearch.ymlUncomment the following line:
network.host: 0.0.0.0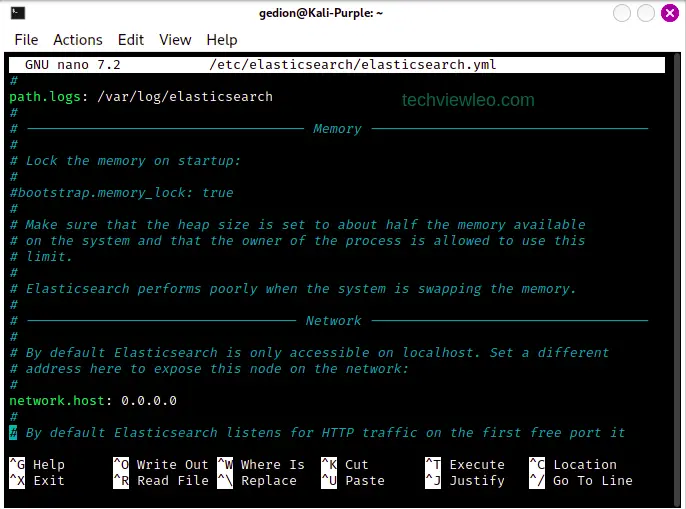
Save and close the file. To configure Elastic server to start automatically on boot up, run the following commands:
sudo systemctl daemon-reload
sudo systemctl enable elasticsearch
Start Elastic Server
Start Elastic server and check it’s service status using the following commands:
sudo systemctl start elasticsearch
sudo systemctl status elasticsearch
Install Kibana
Kibana is a user-friendly web interface for Elasticsearch. It’s main purpose is to provide a user-friendly environment for visualizing and analyzing data stored in Elasticsearch. Run the following command to install it on your system:
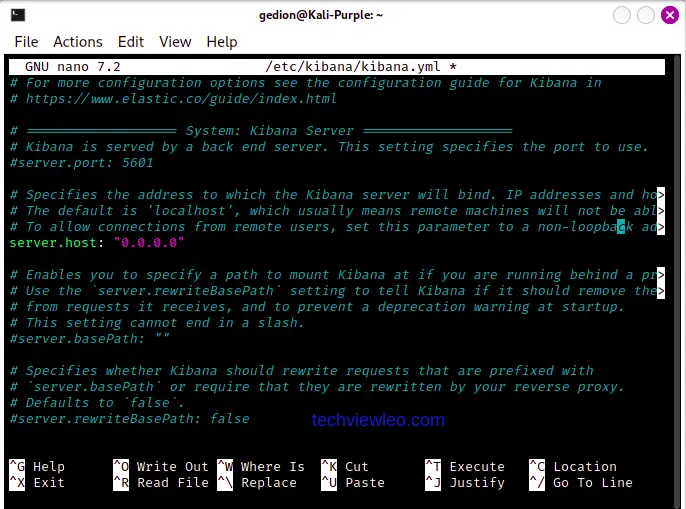
sudo apt-get install kibanaConfigure Kibana
After installing Kibana, you need to configure it. Open the configuration file by running sudo nano /etc/kibana/kibana.yml and commenting the line server.host: "0.0.0.0". Then save and close the file.
Now, start Kibana using the command below:
sudo systemctl start kibana
sudo systemctl status kibana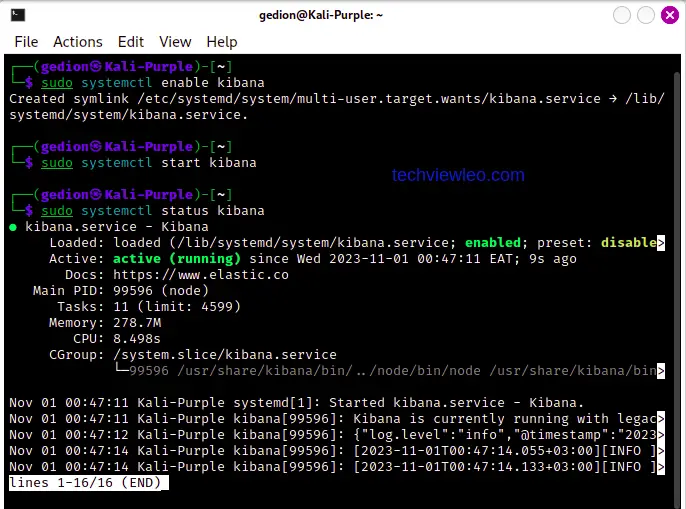
Launch Kibana
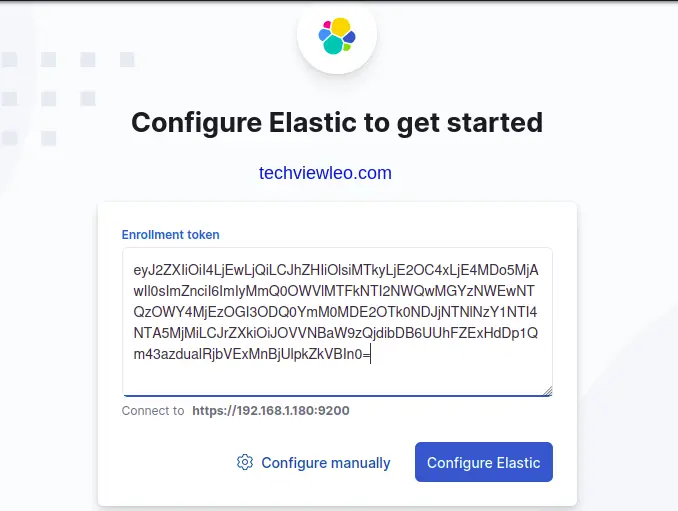
To launch Kibana, go to your browser and type in the URL http://localhost:5601and hit enter. You’ll be taken to the web interface for Elastic search, and then asked to configure elastic to get started. To do that, you’ll need the enrollment token for a Kibana instance.
To obtain the enrollment token, run the following command in your terminal the copy the KEY generated in the terminal:
sudo /usr/share/elasticsearch/bin/elasticsearch-create-enrollment-token -s kibana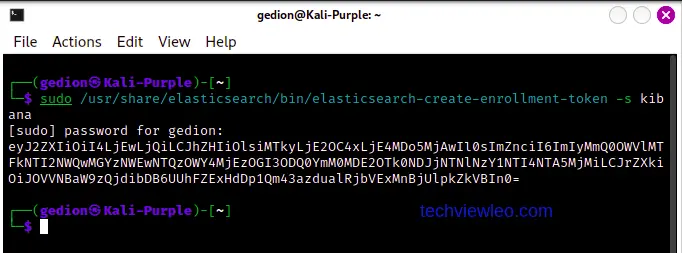
Then paste the KEY you copied from the terminal to the text area provided on the web interface:
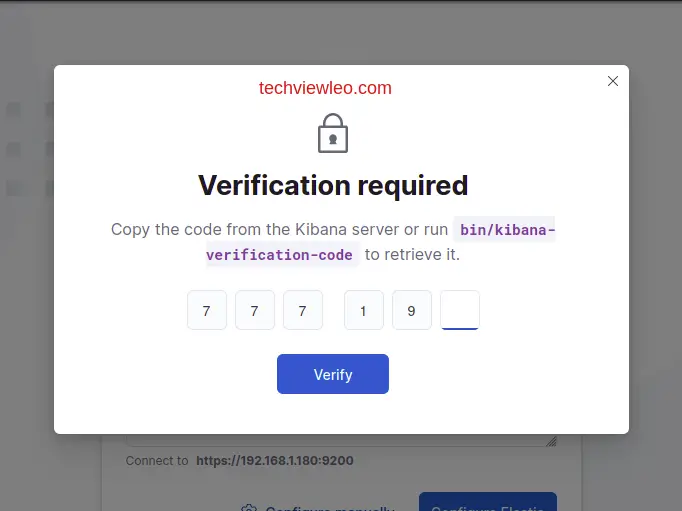
You will be required to retrieve a verification code from your Kibana server before you can proceed. Run the command below to retrieve the code:
sudo /usr/share/kibana/bin/kibana-verification-code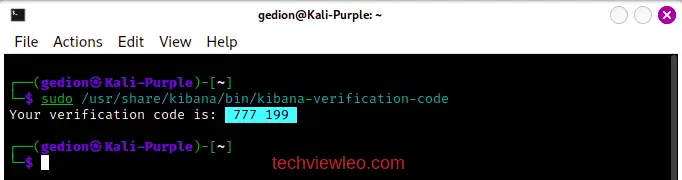
Then paste it to the interface and proceed to verify:
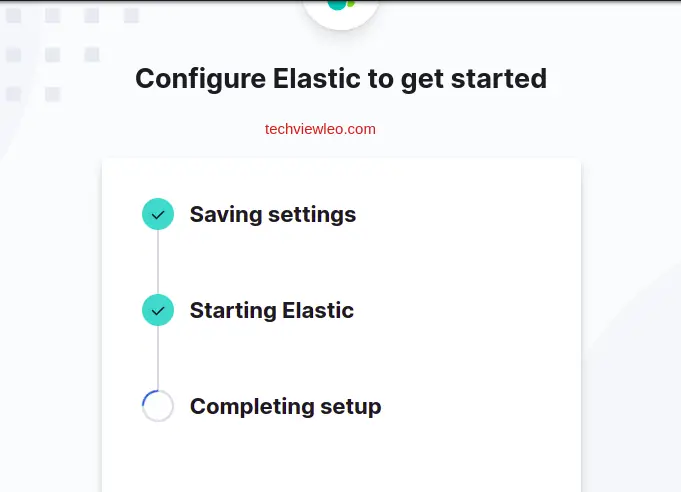
Kibana will proceed to save your settings, start Elastic and complete the set up:
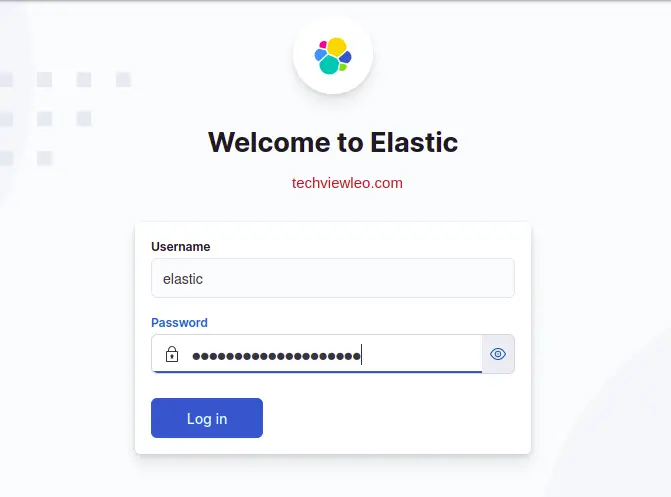
Open a new tab http://localhost:5601 and login to Elastic using elastic as username and the password you saved from earlier. If you didn’t save the password, no worries, just run the following command to reset the password and use it to login:
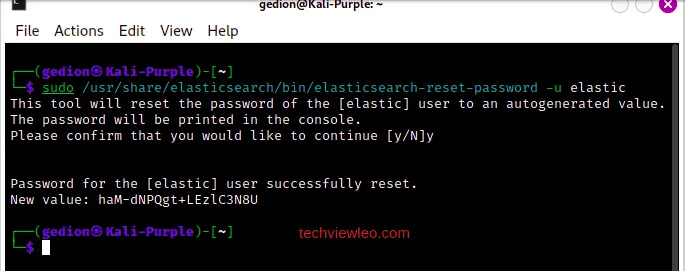
After resetting the password, Login to Elastic:
Install Elastic Agent
Install dependencies
Now that we have Elastic Server running, let’s install the dependencies for Elastic Agent:
sudo apt-get install -y rsyslogCreate fleet policy
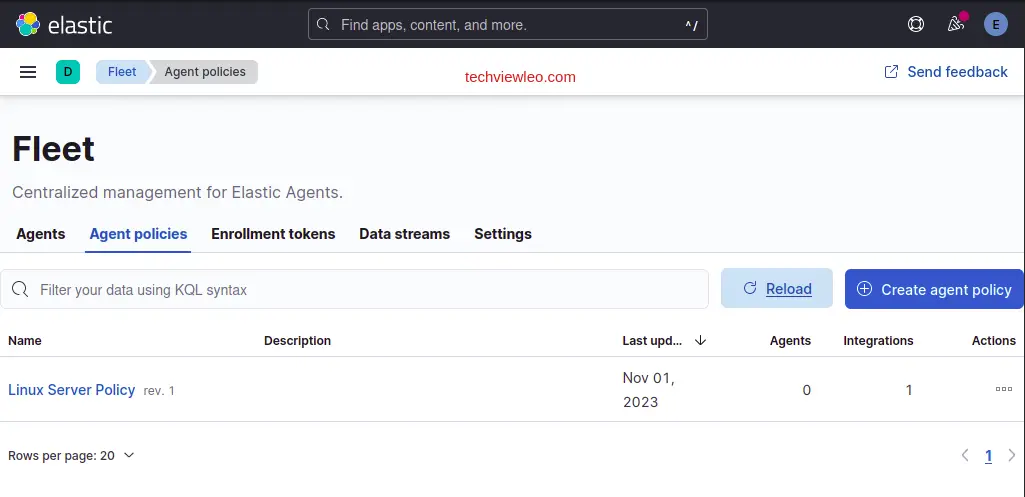
In Elastic, go to Management -> Fleet -> Agent policies. Click create agent policy and name the policy “Linux Server Policy”:

Click “Create agent policy” then on Overview page, click on the newly created policy and click “Add integration”:
Search for elastic agent and click add:

Sample Output continuation:

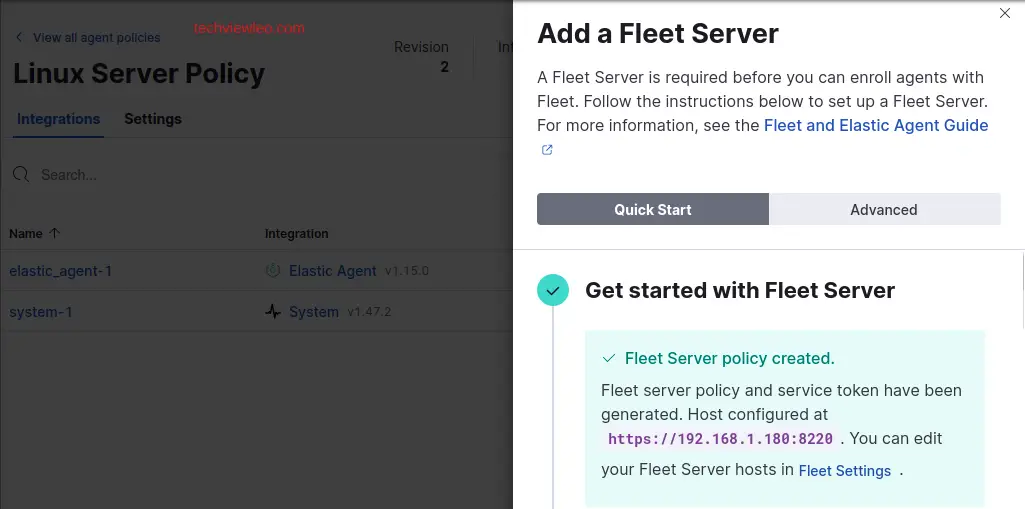
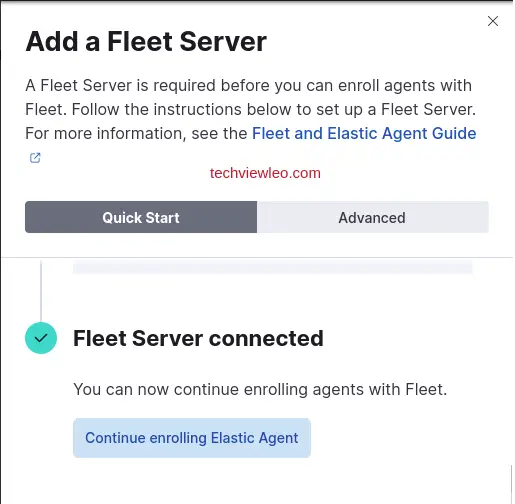
When prompted in the next page, click on “Add Elastic Agent to your host” and then “Add fleet server”.

Under the Quick Start tab, enter as shown below and generate a policy:
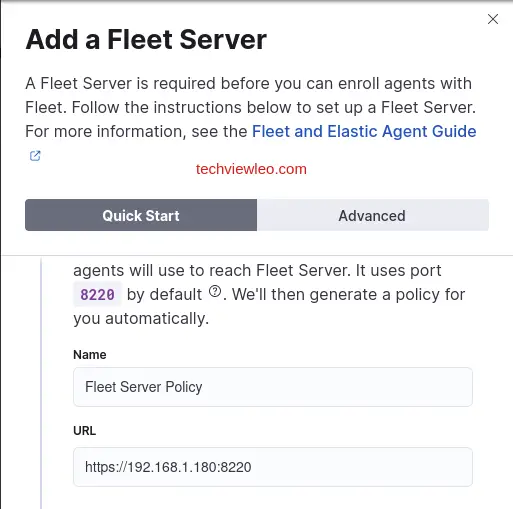
The policy is generated and you can proceed to the next step.
Now, copy the content from the “Linux Tar” tab in step 2. Install Fleet server to a centralized host”:
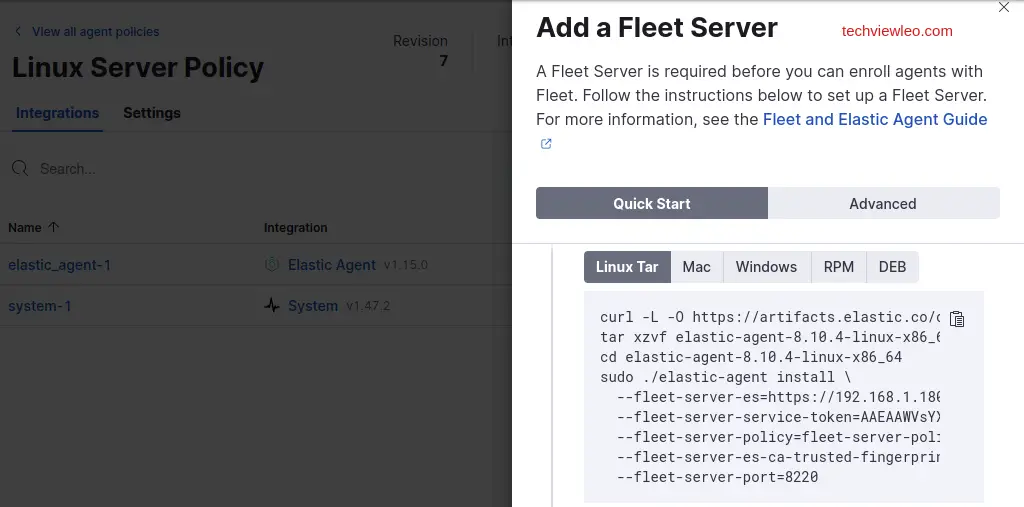
Paste the content into your terminal:
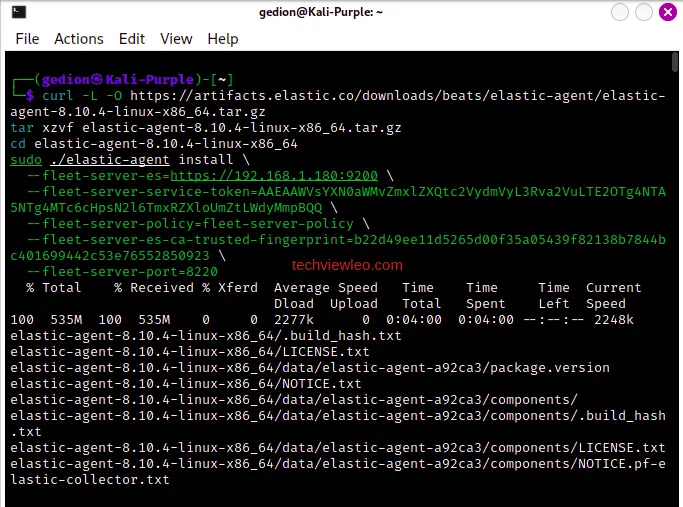
When prompted for your password, enter it and then agree to continue by typing ‘Y’.
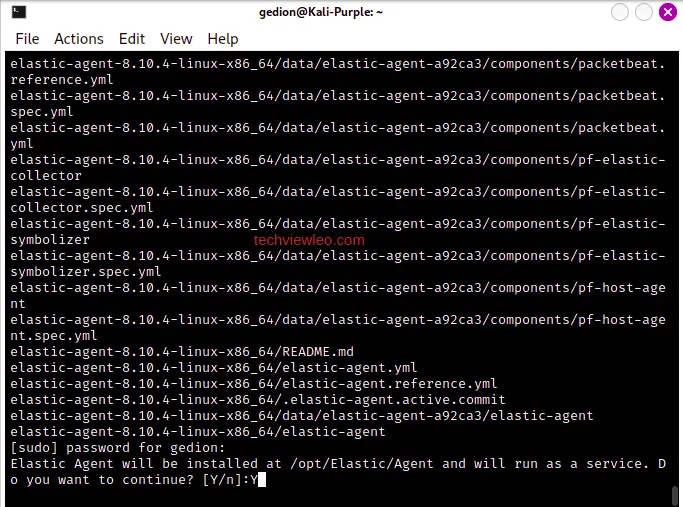
Once installed, Elastic will confirm successful enrollment and data ingestion. Click on “Continue to enroll agent”:
Conclusion
Even though it is still in the early phases of development, Kali Purple has already attracted the attention of the cyber security industry, and enthusiasm is growing for upcoming upgrades and improvements that might improve and expand its feature set as well as show more specific use cases. As the platform develops, Kali Purple might show to be an invaluable tool for assisting you in fortifying your defensive stance.


1 thought on “Installing Kali Linux Purple – Steps with screenshots”
This is a great tutorial.