
The virt-install command-line tool is used to create and configure new virtual machines on KVM. It offers numerous options that allowsusers to customize the virtual machines, including setting the operating system, disk, network, memory, CPU, and more.
The virt-Install CLI tool does the automation of many VM configuration tasks, making it easier to get started with virtualization. In this section we cover in detail the usage of virt-install with plenty of examples.
Confirm if virt-install is present and working on your system.
virt-install --versionIf you get version number in the output it’s installed. The basic syntax of virt-install is:
virt-install [options]Cloudinit
Setting a hostname, creating users, injecting SSH keys, configuring networking, installing packages and other initial configuration efforts often turn out to be the most tedious task for your virtual machines (VMs) or cloud instances. Manually doing this for every VM is inefficient and error-prone, especially if done at scale.
CloudInit solves this problem. It is the industry standard tool for automated initialization of instances across the cloud and virtualization. CloudInit, which originated within Ubuntu and has since expanded, runs at the first run of a VM and applies user-configurations. Creating a production system.
Mastering KVM Virtualization - The Ultimate eBook
From home labs to production clouds - master KVM Host management, automating KVM administration using Terraform, Vagrant, and cloud automation. This eBook will enable you to build scalable virtual infrastructure that works whether you're learning at home or deploying enterprise solutions. Get your full copy today
To put it simply:
- Cloud-Init is a tool used to handle early initialization of a cloud instance.
- You can use it to configure instances at boot time.
- To create a Cloud-Init ISO image, you’ll need a configuration file (usually named
user-data) and a network configuration file (optional, usually namednetwork-config). - The
genisoimagetool can be used to package these files into an ISO image that can be used as a CD-ROM drive in a virtual machine.
Step 1: Create user-data file
Begin by creating user-data file which contains configuration instructions for Cloud-Init.
If you don’t have SSH public key, generate SSH keypair using the command:
ssh-keygen -t rsa -b 2048For users using Windows you can use tools like Putty to generate SSH keys.
On Unix systems, if you didn’t change keys path, your public key will be located in ~/.ssh/id_rsa.pub. The contents of the public key will be placed under ssh-authorized-keys.
Create a new user data file.
vim user-dataSee example below:
#cloud-config
ssh_pwauth: true
disable_root: false
chpasswd:
  list: |
     root:StR0NGRooTPassw0d
  expire: false

users:
  - name: devops
    groups: sudo
    shell: /bin/bash
    sudo: ALL=(ALL) NOPASSWD:ALL
    ssh-authorized-keys:
      - ssh-rsa AAAAB3NzaC1yc2EAAAABIwAAAQEArp1... user@host
package_update: true
package_upgrade: true
package_reboot_if_required: true
runcmd:
  - echo "Hello from KVM test World!"
Here’s a brief explanation of each part of the provided #cloud-config:
#cloud-configis a special comment line used in cloud-init configuration files to indicate that the file is written in cloud-config YAML format.ssh_pwauth: true: Enables SSH password authentication, allowing users to log in with a username and password.disable_root: false: Keeps the root account enabled, allowing direct root login.chpasswd:list: Sets the password for the root user toStR0NGRooTPassw0d.expire: False: Indicates that the password does not expire.
users: Configures user accounts.- name: devops: Creates a user nameddevops.groups: sudo: Adds thedevopsuser to thesudogroup, giving them administrative privileges. Usewheelfor Red Hat based systems.shell: /bin/bash: Sets the user’s default shell to Bash.sudo: ALL=(ALL) NOPASSWD:ALL: Allows thedevopsuser to execute all commands viasudowithout requiring a password.ssh-authorized-keys: Adds an SSH public key for thedevopsuser, allowing key-based SSH authentication.- ssh-rsa AAAAB3NzaC1yc2EAAAABIwAAAQEArp1... user@host: Example SSH public key.
package_update: true: Updates the package list from the repositories.package_upgrade: true: Upgrades all packages to the latest versions available.package_reboot_if_required: true: Automatically reboots the system if a package upgrade requires it.runcmd: Specifies commands to run during the first boot.- echo "Hello from KVM test World!": Outputs “Hello from KVM test World!” to the console.
Step 2: Create the meta-data File
The meta-data file typically contains instance-specific metadata. Create a new file.
vim meta-dataBasic file contents are:
instance-id: <instance-id>
local-hostname: <hostname>instance-id: A unique identifier for the instance. This can be any string, such as a UUID, a unique numeric ID, or a custom identifier.local-hostname: The desired hostname for the instance. This will be set as the system’s hostname.
See example:
instance-id: ubuntu-01
local-hostname: noble
Step 3: Create the network-config File (Optional)
The network-config is an optional file that specifies the network configuration for the instance. You can totally ignore, espcially if using DHCP since it’s default in cloud Images.
vim network-configExample:
version: 2
ethernets:
 alleths:
    match:
      name: "en*"
    dhcp4: true
You can also match by the MAC address to ensure the correct interface is used, regardless of the name:
version: 2
ethernets:
  eth0:
    match:
      macaddress: "52:54:00:12:34:56"
    dhcp4: true
Example on setting Static IP address for a specific interface.
version: 2
ethernets:
  eth0:
    dhcp4: false
    addresses:
      - 192.168.1.10/24
    gateway4: 192.168.1.1
    nameservers:
      addresses:
        - 8.8.8.8
        - 8.8.4.4
Example with search domains
version: 2
ethernets:
  ens3:
    dhcp4: false
    addresses:
      - 192.168.1.10/24
    gateway4: 192.168.1.1
    nameservers:
      search: [cloudspinx.com, systems.example.com]
      addresses: [8.8.8.8, 4.4.4.4]
Two interfaces example (one DHCP and another static IP address)
version: 2
ethernets:
  eth0:
    dhcp4: true
  eth1:
    addresses:
      - 192.168.1.10/24
    gateway4: 192.168.1.1
    nameservers:
      addresses:
        - 8.8.8.8
        - 8.8.4.4
Step 4: Generate Cloud-init ISO Image
Install genisoimage package
- Debian-based systems
sudo apt update && sudo apt install genisoimage- RHEL-based systems
sudo dnf install genisoimageCreate a directory that will host the files.
# For an actual application don't use /tmp directory
CLOUD_DIR=/tmp/cloudinitiso
mkdir $CLOUD_DIR
Copy your user-data, meta-data, and network-config (if applicable) files into the directory:
cp user-data meta-data network-config $CLOUD_DIRUse genisoimage to create the ISO image:
genisoimage -output $CLOUD_DIR/cloud-init.iso \
-volid cidata -joliet -rock $CLOUD_DIR/
Explanation of the options used:
-output: Specifies the output ISO file path.-volid: Sets the volume ID of the ISO image, usually set tocidatafor Cloud-Init.-joliet: Generates Joliet directory records in addition to regular ISO9660 file names.-rock: Generates Rock Ridge attributes for longer file names and POSIX permissions.
Command exection output:
I: -input-charset not specified, using utf-8 (detected in locale settings)
Total translation table size: 0
Total rockridge attributes bytes: 417
Total directory bytes: 0
Path table size(bytes): 10
Max brk space used 0
184 extents written (0 MB)
Validate generated ISO file exist in your local system.
$ file /tmp/cloudinitiso/cloud-init.iso
/tmp/cloudinitiso/cloud-init.iso: ISO 9660 CD-ROM filesystem data 'cidata'
Step 5: Attach cloud-init ISO to the VM
With the ISO file ready, we can attach it to the virtual machine as a CD-ROM device. This is typically done when creating the VM or through your hypervisor’s management interface. For example, with virt-install:
To have a complete test, let’s download Ubuntu 24.04 guest raw image.
wget https://cloud-Images.ubuntu.com/noble/current/noble-server-cloudimg-amd64.imgResize the image using qemu-img, in this example, the Images size is set to 30GB:
IMAGE=noble-server-cloudimg-amd64.img
STORAGE=/var/lib/libvirt/images
SIZE=30G
qemu-img resize $IMAGE $SIZE
In the output you should get:
Image resized.Move OS image to default KVM storage pool or your default custom storage pool path.
sudo mv $IMAGE $STORAGECreate Ubuntu 24.04 VM using downloaded OS image and generated Cloud-Init.
sudo virt-install \
  --name Ubuntu-24.04 \
  --ram 2048 \
  --vcpus 2 \
  --disk path=$STORAGE/$IMAGE  \
  --cdrom $CLOUD_DIR/cloud-init.iso \
  --os-variant ubuntu24.04 \
  --network bridge=virbr0 \
  --graphics none
This will boot the Virtual Machine and apply the configurations as specified in the user-data, meta-data, and network-config files. You can customize other installation options to your liking:
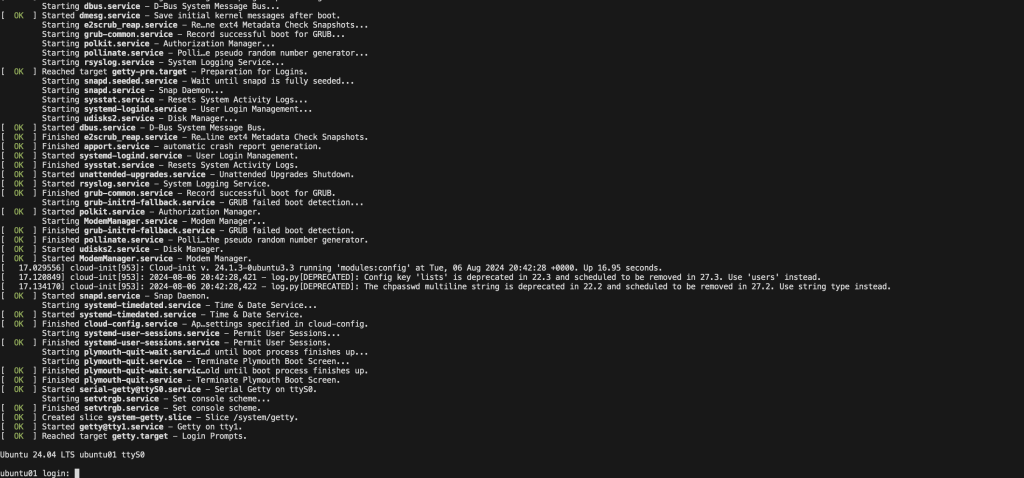
We can test root user login with the password specifid in cloud-data file.
noble login: root
Password:
Welcome to Ubuntu 24.04 LTS (GNU/Linux 6.8.0-39-generic x86_64)

 * Documentation:  https://help.ubuntu.com
 * Management:     https://landscape.canonical.com
 * Support:        https://ubuntu.com/pro

 System information as of Tue Aug  6 21:41:53 UTC 2024

  System load:  0.87              Processes:               141
  Usage of /:   5.8% of 28.02GB   Users logged in:         0
  Memory usage: 10%               IPv4 address for enp1s0: 192.168.122.242
  Swap usage:   0%

Expanded Security Maintenance for Applications is not enabled.

0 updates can be applied immediately.

Enable ESM Apps to receive additional future security updates.
See https://ubuntu.com/esm or run: sudo pro status


The programs included with the Ubuntu system are free software;
the exact distribution terms for each program are described in the
individual files in /usr/share/doc/*/copyright.

Ubuntu comes with ABSOLUTELY NO WARRANTY, to the extent permitted by
applicable law.
Check the cloud-init status to confirm that the utility has completed its defined tasks:
$ cloud-init status
status: done
Test if IP configurations were done to your specifications.
$ ip ad
1: lo: <LOOPBACK,UP,LOWER_UP> mtu 65536 qdisc noqueue state UNKNOWN group default qlen 1000
    link/loopback 00:00:00:00:00:00 brd 00:00:00:00:00:00
    inet 127.0.0.1/8 scope host lo
       valid_lft forever preferred_lft forever
    inet6 ::1/128 scope host noprefixroute
       valid_lft forever preferred_lft forever
2: enp1s0: <BROADCAST,MULTICAST,UP,LOWER_UP> mtu 1500 qdisc pfifo_fast state UP group default qlen 1000
    link/ether 52:54:00:89:c5:80 brd ff:ff:ff:ff:ff:ff
    inet 192.168.122.242/24 metric 100 brd 192.168.122.255 scope global dynamic enp1s0
       valid_lft 3441sec preferred_lft 3441sec
    inet6 fe80::5054:ff:fe89:c580/64 scope link
       valid_lft forever preferred_lft forever
The cloud-init utility creates the cloud-init directory layout under /var/lib/cloud when it runs
ls /var/lib/cloud/instanceThe cloud-init copies user-data into /var/lib/cloud/instance/user-data.txt:
$ cat /var/lib/cloud/instance/user-data.txt
#cloud-config
ssh_pwauth: true
disable_root: false
chpasswd:
  list: |
     root:StR0NGRooTPassw0d
  expire: false

users:
  - name: devops
    groups: sudo
    shell: /bin/bash
    sudo: ALL=(ALL) NOPASSWD:ALL
    ssh-authorized-keys:
      - ssh-rsa AAAAB3NzaC1yc2EAAAADAQABAAABAQDJgFMif0jIfctgx/s3Rm7UD4DKzFTIWStPC/D/q0IEMs+4YCCDvZmohW8l6Cz0DTtlCnKrclOkqZFP9k9iaHhG4qoU1C8DMUHkTkOm2snVQq+1MFtNjlHxon8jESe+NfBIcfImQUopqI7NlOBknTBsABFydwsWw4ogg+1oGynefK6e7YcEToN5aaIpkiq0rNcxkw+VLeKuS+RvWExYEwrT1jY1qjExROfw+yCmPJ5hsBYbiuNA5WrjgfxbAII3f9/CrOJzFH0K9zBgFiQ//ZA+9g8oBvVlN0R6t9/rWvRu9JtV+aY9xgU3feo7WNwJG11iCXT0VN4FXinmh3bWYKjb ubuntu@noble-cloudspinx-com
package_update: true
package_upgrade: true
package_reboot_if_required: true
runcmd:
  - echo "Hello from KVM test World!"
Last we can try login as devops user with the ssh key.
When using KVM network with DHCP, you can check leases table
sudo virsh net-dhcp-leases defaultThe output will be like this.
 Expiry Time           MAC address         Protocol   IP address           Hostname   Client ID or DUID
------------------------------------------------------------------------------------------------------------------------------------------------
 2024-08-06 22:41:10   52:54:00:89:c5:80   ipv4       192.168.122.242/24   noble      ff:56:50:4d:98:00:02:00:00:ab:11:9c:a2:3f:0c:a0:92:53:35
Now that we know the IP address, we can initiate SSH into the VM.
ssh [email protected]You shouldn’t be asked to input the password – which means key-based SSH access is working as configured in cloud-init data file.
Step 6: Install QEMU Guest Agent on Linux
To use certain features on a virtual machine (VM) hosted on your KVM system, you must first configure the VM to use the QEMU Guest Agent (GA).
Some of these features are:
virsh shutdown --mode=agent– A more reliable shutdown method guaranteed to shut down a cooperative guest in a clean state.virsh domfsfreezeandvirsh domfsthaw– Freezes the guest file system in isolation.virsh domfstrim– Instructs the guest to trim its file system, which helps to reduce the data that needs to be transferred during migrations.virsh domtime– Queries or sets the guest’s clock.virsh setvcpus --guest– Instructs the guest to take CPUs offline, which is useful when CPUs cannot be hot-unplugged.virsh domifaddr --source agent– Queries the guest operating system’s IP address by using QEMU GA. For example, this is useful when the guest interface is directly attached to a host interface.virsh domfsinfo– Shows a list of mounted file systems in the running guest.virsh set-user-password– Sets the password for a given user account in the guest.virsh set-user-sshkeys– Edits the authorized SSH keys file for a given user in the guest.
Install the QEMU GA on your Linux machine by running the following commands
- Debian-based systems:
sudo apt update
sudo apt install qemu-guest-agent- RHEL-based systems:
sudo yum install qemu-guest-agent
sudo systemctl enable --now qemu-guest-agent
🌍 Our KVM eBook covers all this in details and more. In the book you will learn:
- Understanding Virt-install
- Linux VM Installation from ISO image
- Linux VM Installation using Cloud-Init
- Windows installation (Desktop and Server) using virt-install
- VMs Installation using Virt-builder
- VMs Install using PXE Boot and virt-install
- VMs Installation using virt-install and kickstart
- GPU Passthrough to Virtual Machines


