

Virtualization is an essential element of today’s IT infrastructure. Thus, it is important to manage the virtual resources efficiently to optimize performance, availability and scalability. Cockpit is an interface that helps to manage the KVM virtual machine. KVM lets you run a virtual machine on Linux.
Cockpit makes command-line tasks easy by providing a dashboard to perform them with ease. This entails managing storage pools to accommodate virtual machine disks, creating and restoring snapshots of virtual machines, performing backups of virtual machines, as well as migration of virtual machines among hosts.
KVM Storage Pools
A storage pool is a logical group of storage volumes that can be assigned to virtual machines, ensuring streamlined disk management. Cockpit simplifies the management of storage pools for KVM virtual machines, allowing administrators to efficiently allocate and organize storage resources.
Mastering KVM Virtualization - The Ultimate eBook
From home labs to production clouds - master KVM Host management, automating KVM administration using Terraform, Vagrant, and cloud automation. This eBook will enable you to build scalable virtual infrastructure that works whether you're learning at home or deploying enterprise solutions. Get your full copy today
Local Storage Pools
Cockpit allows administrators to create and manage storage pools for virtual machines. To create a storage pool, navigate to the storage section by clicking on Storage Pools>Create Storage Pool.
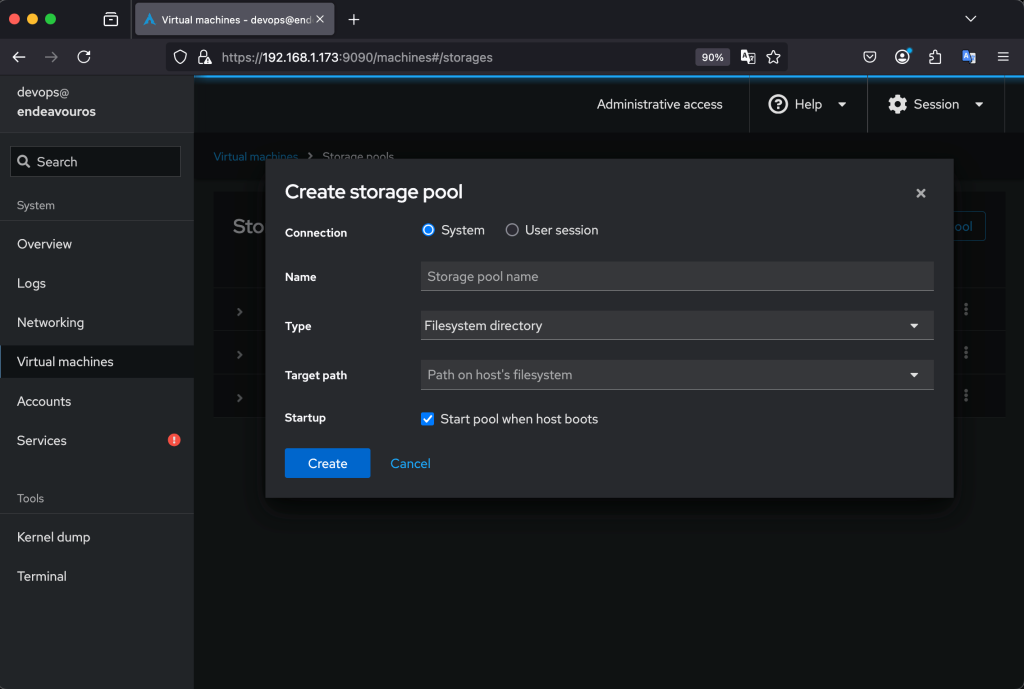
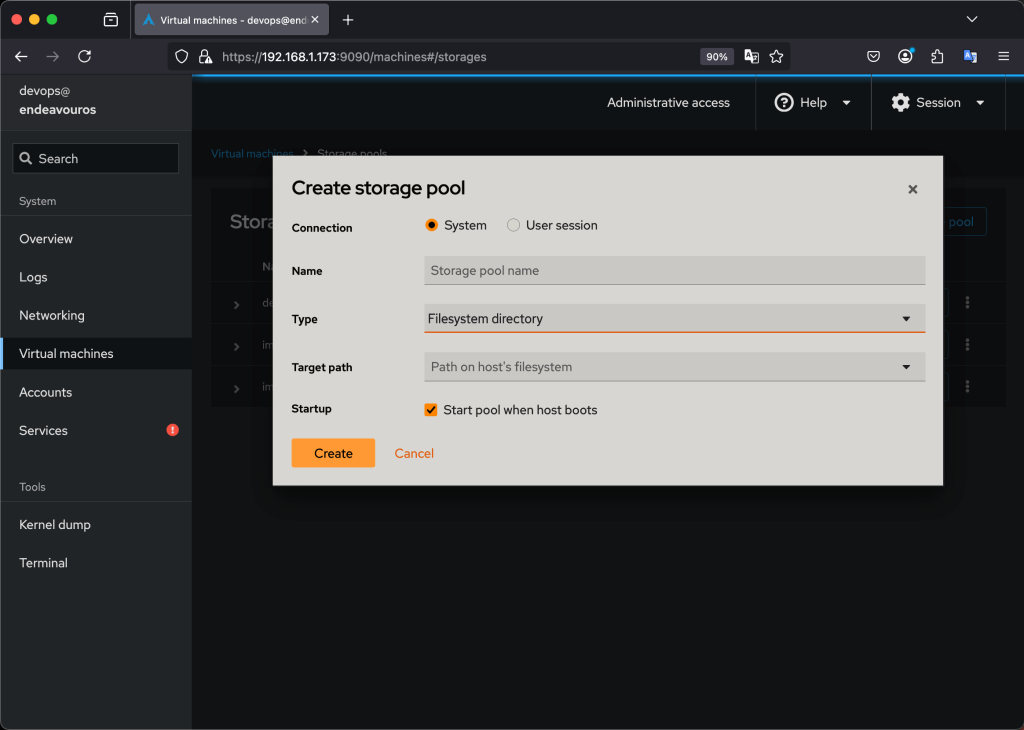
Provide a name for the storage pool, the storage type, and then the path of the storage pool on the host system:
- File System directory: A directory on the host system is designated as the storage pool location.
- Network File system: Enables storing VM images on a remote server accessible via NFS.
- iSCSI target: Allows using iSCSI storage devices as a storage pool.
- Physical disk device: Directly access a physical disk partition as a storage pool.
- LVM volume group: Leverages Logical Volume Manager to create flexible storage pools from multiple physical disks.
- Pre-formatted block device: Used in place of a physical disk device to avoid reformatting a raw disk device.
NFS Storage Pools
File sharing is a wide-spread use case in the server world and accordingly administration of file shares a common and frequent task of system administration.
Pre-requisites
An NFS server with an exported share (e.g., /export/kvm-storage).
- The share directory on the server should be owned by nobody and nogroup.
sudo chown -R nobody:nogroup /export/kvm-storage
sudo chmod 777 /export/kvm-storage- The share should be configured as follows:
# syntax
directory_to_share    client(share_option1,...,share_optionN)
# For Example
/export/kvm-storage 192.168.1.0/24(rw,sync,no_root_squash,no_subtree_check)- NFS Client Utilities:
# Debian/Ubuntu
sudo apt install nfs-common
# RHEL-based
sudo dnf install nfs-utils
# Arch-based
sudo pacman -S nfs-utils
# Fedora
sudo dnf install nfs-utils
# OpenSUSE Leap & Tumbleweed
sudo zypper install nfs-client
Create an empty directory to mount the NFS share. For example, /kvm/nfs in libvirt directory or anywhere else.
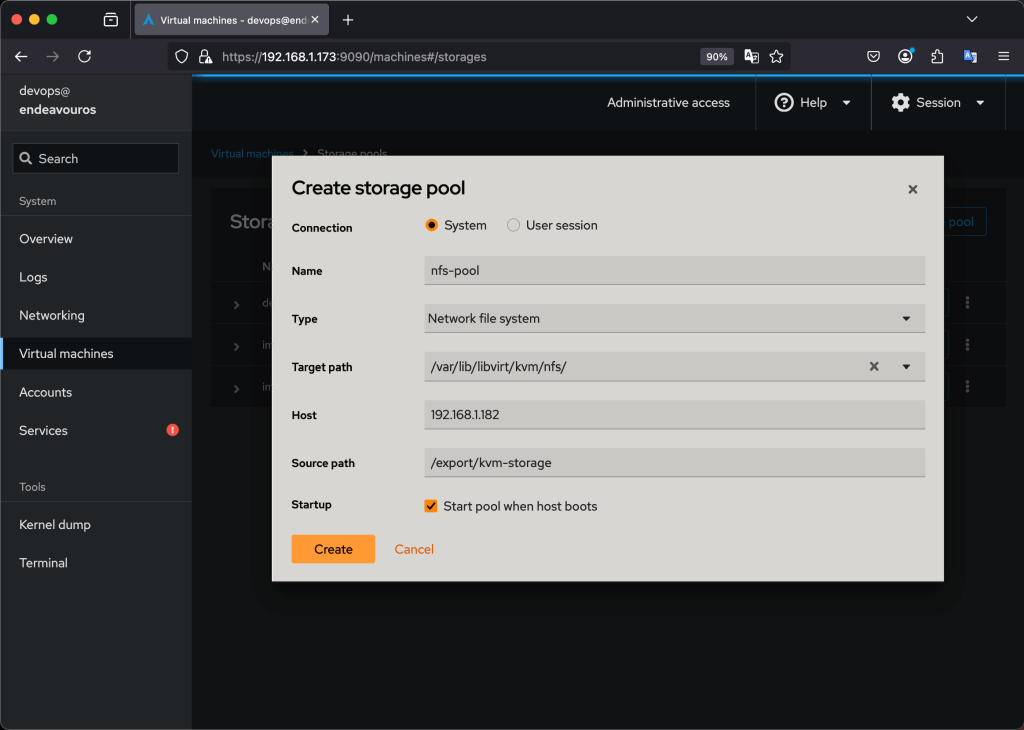
sudo mkdir -p /var/lib/libvirt/kvm/nfsNow login to cockpit and navigate to Virtual Machines → Storage and click on Create Storage Pool.
Define the pool by providing a name (e.g., nfs-pool), then choose Network File System (NFS) as the type. The target path is the empty directory we created previously i.e /var/lib/libvirt/kvm/nfs. Enter the NFS server IP or hostname (e.g., 192.168.1.182) and provide the exported NFS share path (e.g., /export/kvm-storage).
Now click Create. Now you have to activate the storage pool to start using. Click on activate and your storage pool should be active and ready for use:
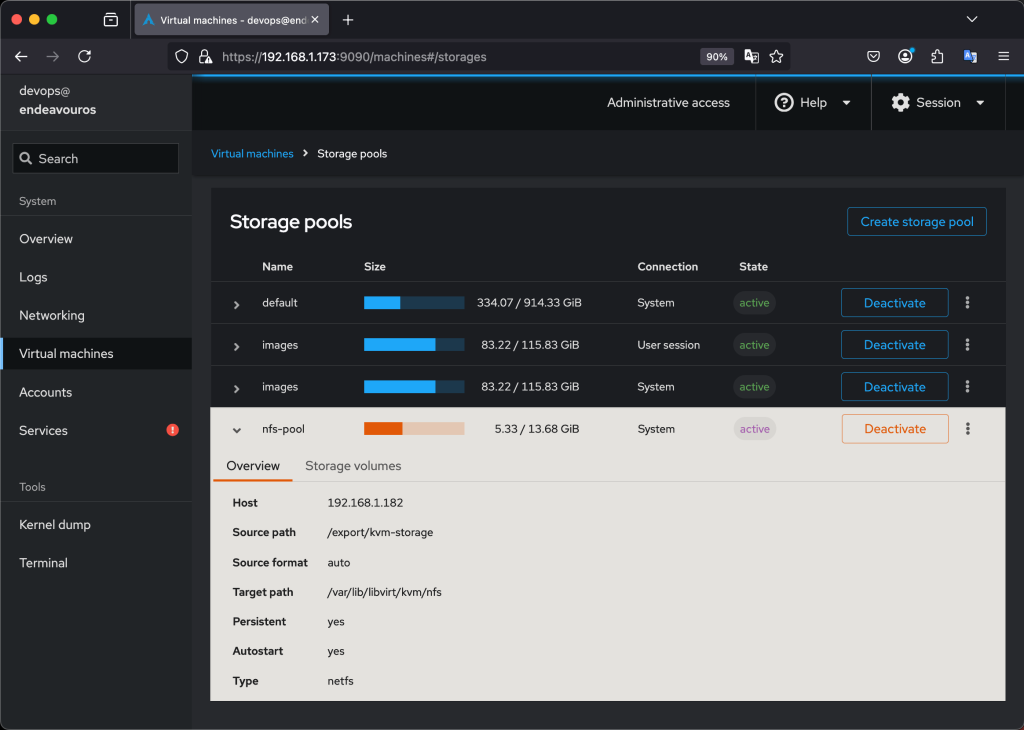
The storage pool can be deactivated any time.
Snapshot Management
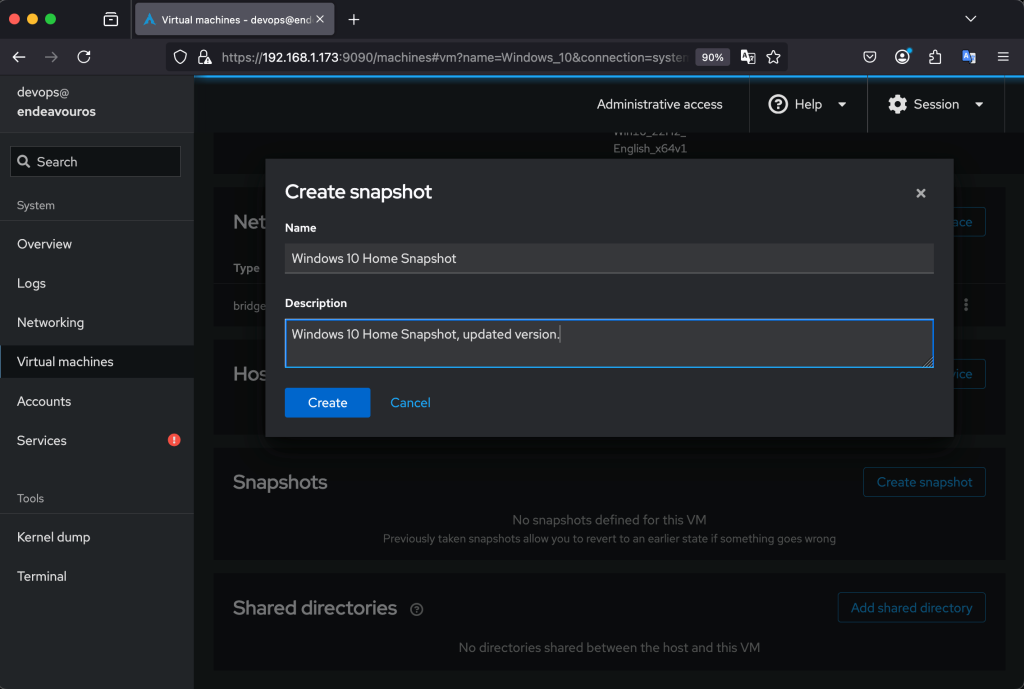
KVM also allows creation of snapshots from the cockpit UI. To create a snapshot using cockpit, click on the target VM, then scroll down to the snapshot section and then click on Create Snapshot.
Provide a name and a short description of the snapshot and then create the snapshot:
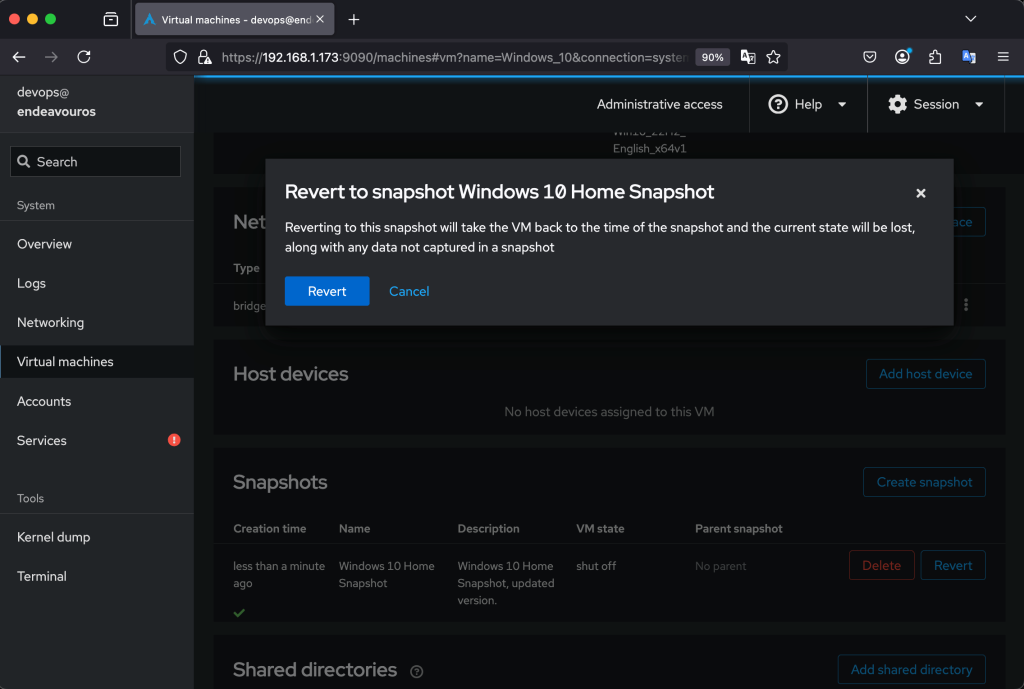
To revert to a snapshot, just click on the button labeled Revert on the Snapshot section and the VM will revert back to the state it was in when the snapshot was taken.
VM Backup and Migration
Using the Virtual machines page in the web console, Cockpit administrators can migrate a live running virtual machine (VM) instance on the managed host to another KVM host system.
Follow these steps to migrate a live running VM instance on the managed host system to another KVM host system.
In the Cockpit navigation pane, click Virtual machines and the Virtual machines page appears. In the Virtual machines page, navigate to the VM instance that you want to migrate and select Migrate from the actions menu [⋮].
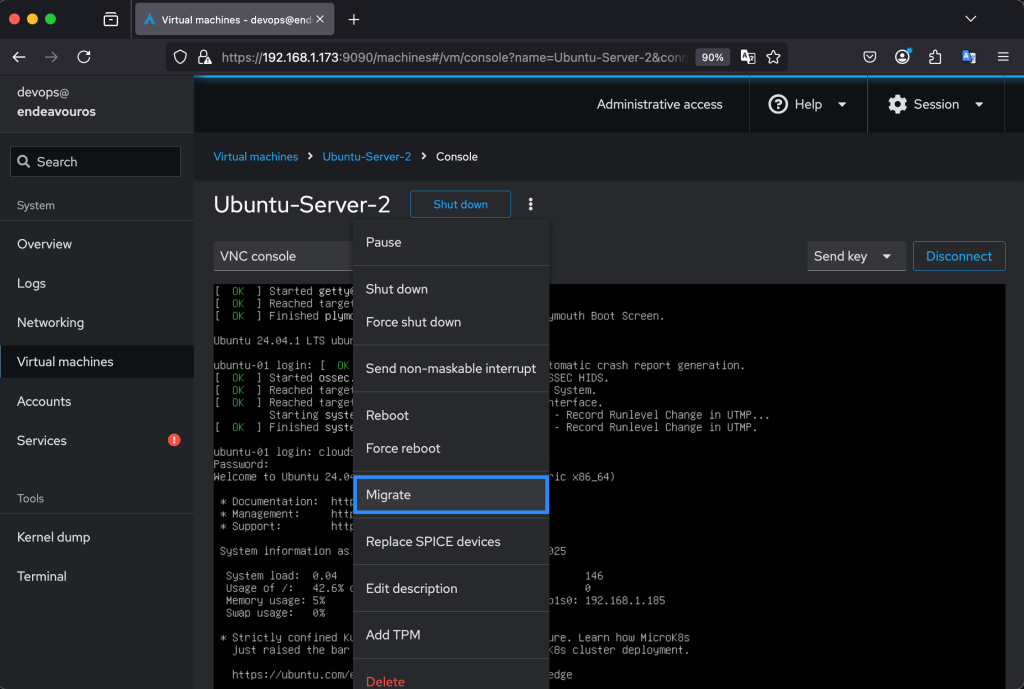
Then the Migrate VM to another host window pop’s up.
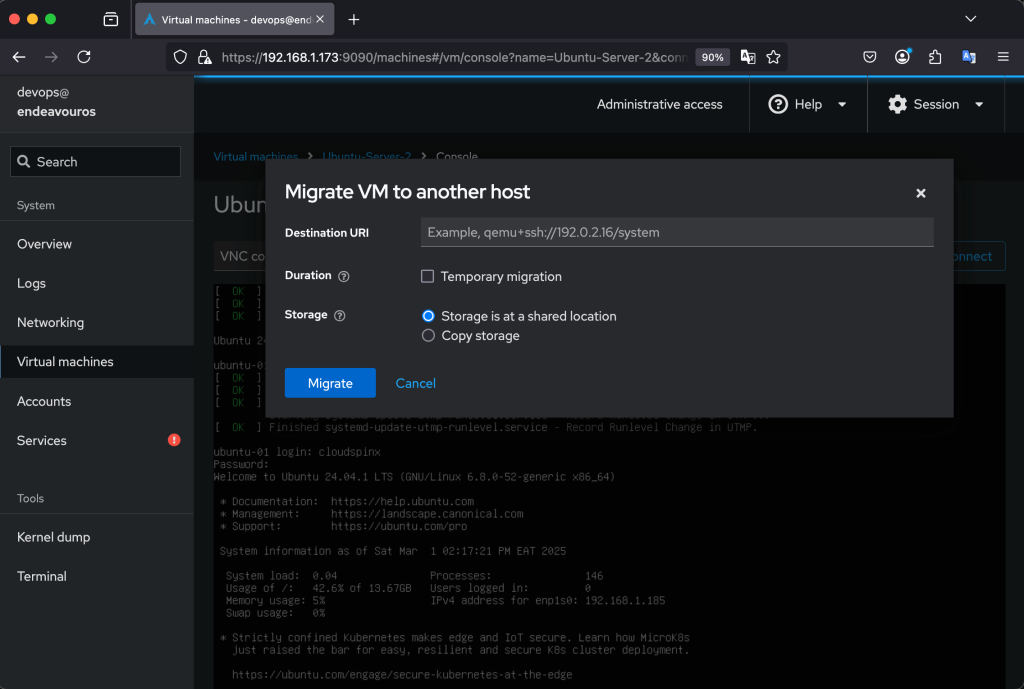
In the ‘Migrate VM to another host dialog‘, specify the destination URI for the remote qemu system and then click Migrate.
| Destination URI | Enter the URI of the destination host |
|---|---|
| Duration | Specify the duration of the migration: Permanent – (default) Clear the check box to migrate the VM permanently. Permanent migration removes all the VM configuration from the source host. Temporary – Select the checkbox to migrate the VM temporary. A temporary migration makes a copy of the VM on the destination host. This copy is deleted from the destination host when the VM is shut down. The original VM remains on the source host. |
🌍 Our KVM eBook covers all this in details and more. In the book you will learn:
- Cockpit installation
- Configure and Access Cockpit dashboard
- Creating Virtual Machines using Cockpit
- Managing Virtual Machines using Cockpit
- Network Configurations and Management
- Managing Storage Pools
- Snapshot Management
- VM Backup and Migration


