In this guide, we are going to be creating a Windows server 2022 image in raw format, suitable to uploading to your OpenStack cloud environment. We are going to be installing our VM in our CentOS Stream server using cockpit.
Setup Pre-requisites
So, before we can start the task at hand, we’ll need to be prepare everything in order such as downloading ISOs.
- Download Windows Server 2022 iso and virtio-win iso, then place them in our
/var/lib/libvirt/images/directory. - Install cockpit for GUI access VMs in our server.
Step 1: Install KVM and Cockpit
Ensure that KVM is installed in your Linux system, refer to the following article for a complete how-to guide:
Now, we need to install cockpit which will allow us to proceed with the graphical installation of Windows server. Installing cockpit is pretty much a piece of cake, so let’s get to it. Install and start cockpit service using the commands below:
# Debian based systems
sudo apt update
sudo apt install cockpit
sudo systemctl start cockpit
sudo systemctl enable cockpit

# RHEL based systems
sudo dnf update
sudo dnf install cockpit
sudo systemctl start cockpit
sudo systemctl enable cockpit
To access cockpit, open your browser and access the web console at: https://your_server_hostname:9090/ or https://your_server_ip:9090/
Step 2: Create Windows Server VM
To create our VM, we’ll use QEMU/KVM virtualization. So, creating vm directly from cockpit might not allow us to change bridge type, so instead you may have to use cli, then once spin the instance, we’ll continue from cockpit UI.
We will use Openvswitch as the network bridge instead of the regular Linux bridge because it has all the essential features suitable for cloud environments. Besides, it has smooth integration with OpenStack Neutron for dynamic network management and is optimized for scalability, performance, and multi-tenant isolation, making it a better fit for complex cloud networking needs.
So, from our server CLI, we’ll run virt-install with all the VM specs. Here’s what we need to do;
- Specify the VM name
- Allocate RAM
- Allocate Virtual CPUs for the VM
- Pass the host CPU model and features to the VM
- Specifies the OS variant as Windows Server 2022
- Create a 15 GB virtual disk for the VM, using the QCOW2 format, optimized for space efficiency. Specify the disk bus as bus=virtio for the VM
- Mount the Windows Server 2022 installation ISO file as a virtual CD-ROM to boot from
- Add a second CD-ROM with the Virtio drivers ISO for Windows
- Connect the VM to the
br-privbridge and specify openvswitch - Specifies the KVM virtualization technology to run the VM
- Configures the VM to use UEFI boot
- Specifies the Q35 machine type
virt-install \
 --name win2022_template \
 --ram 4096 \
 --vcpus sockets=1,cores=2 \
 --cpu host \
 --os-variant win2k22 \
 --disk path=/var/lib/libvirt/images/win2022_template.qcow2,size=15,bus=virtio,format=qcow2 \
 --cdrom /var/lib/libvirt/images/en-us_windows_server_2022.iso \
 --disk path=/var/lib/libvirt/images/virtio-win.iso,device=cdrom \
 --network bridge=virbr0 \
 --virt-type kvm \
 --boot uefi \
 --machine q35 \
For Open vSwitch:
--network=bridge:br-ex,model=virtio,virtualport_type=openvswitch \Run the virt-install command directly in the terminal:
WARNING  Graphics requested but DISPLAY is not set. Not running virt-viewer.
WARNING  No console to launch for the guest, defaulting to --wait -1

Starting install...
Allocating 'win2022_template.qcow2'                                                                                                                                                |  15 GB  00:00:00
Creating domain...                                                                                                                                                                 |         00:00:00

Domain is still running. Installation may be in progress.
Waiting for the installation to complete.
When you switch to cockpit UI, your VM instance is up and running;
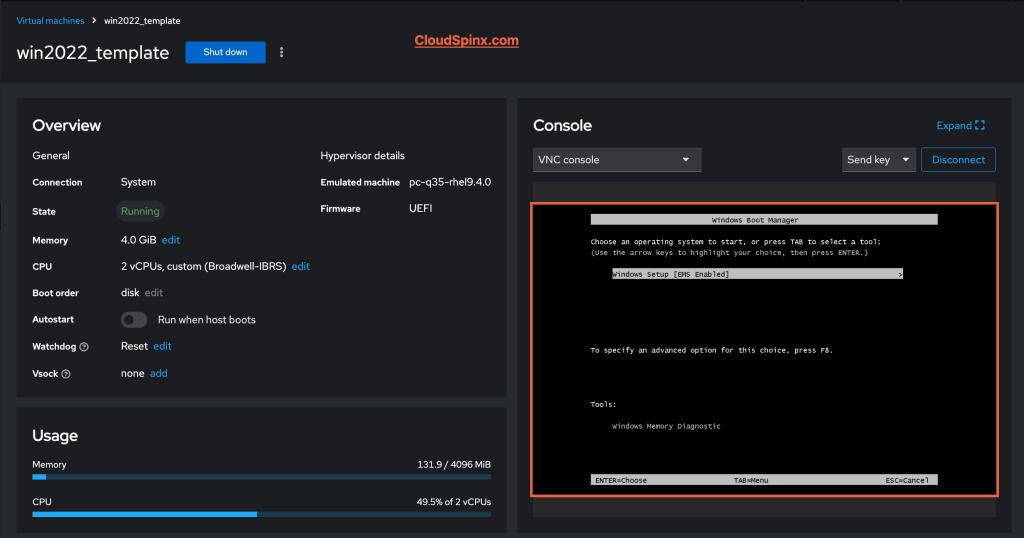
Since the timeout for selecting boot from CD or DVD will be over, just enter the boot manager, then reset, and the press any key as instructed, to boot from a CD.
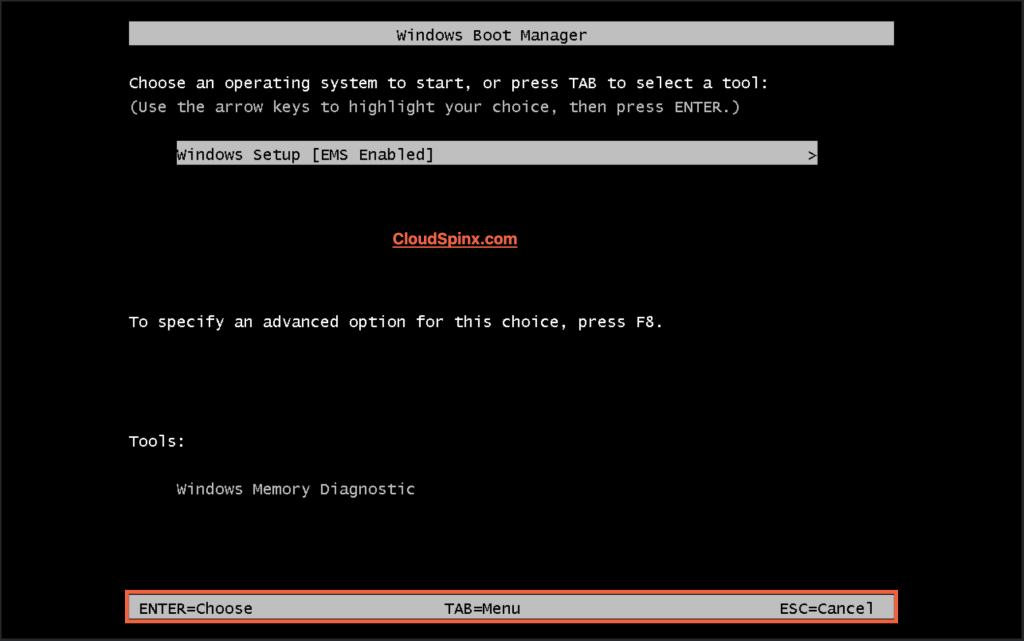
Hit enter to proceed and allow the windows boot loader to load the files and boot. After booting the VM, the installation of Windows will start automatically.
Step 3: Windows Server Installation
Go ahead and choose your installation language and some regional settings, after which click Install Now in the next window.
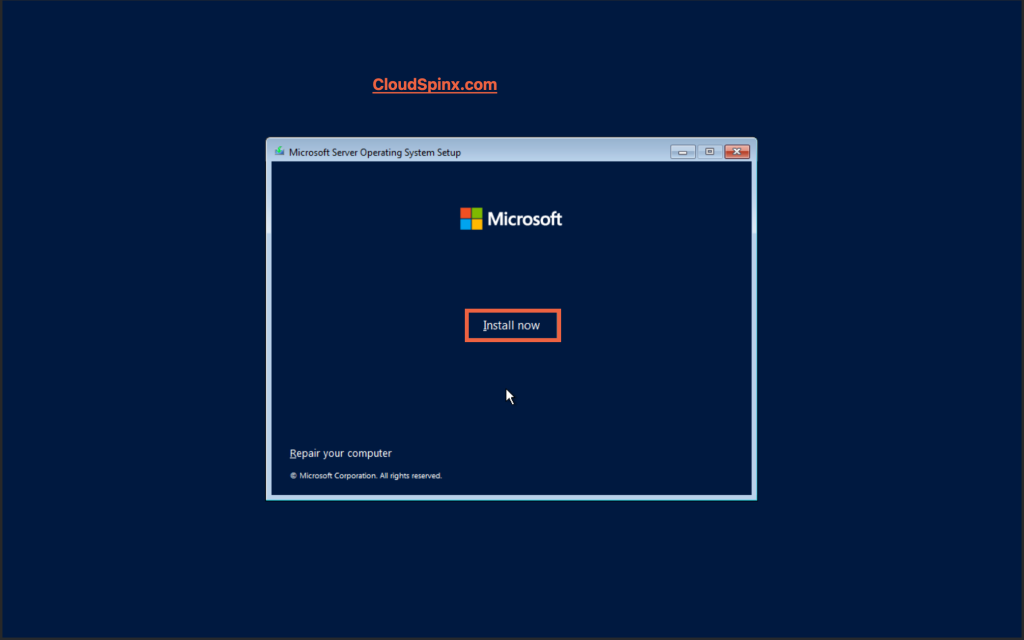
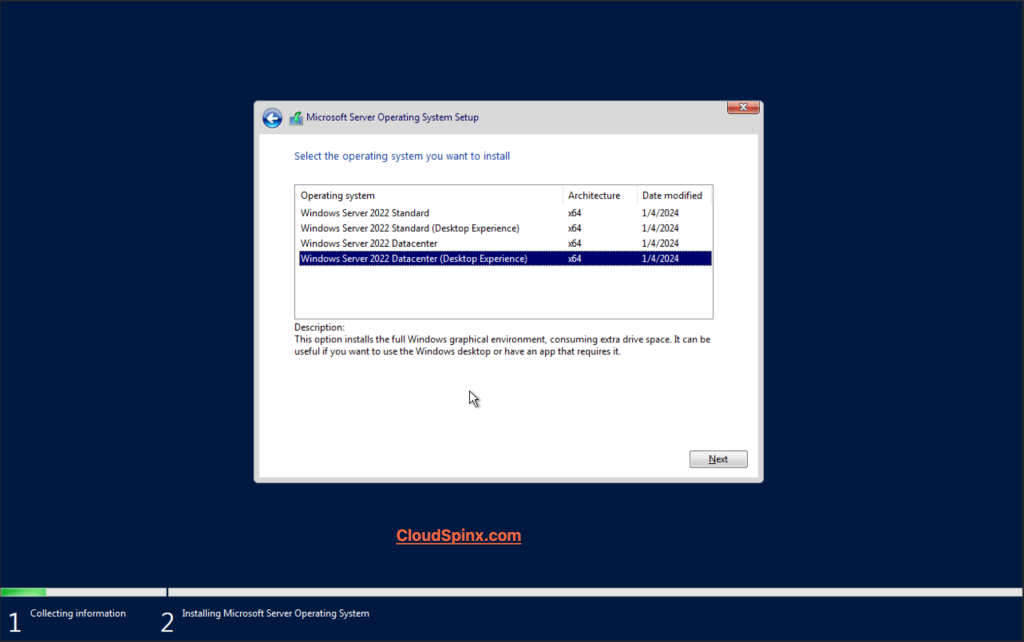
In this example we will choose Windows Server 2022 Datacenter Evaluation (Desktop Experience).
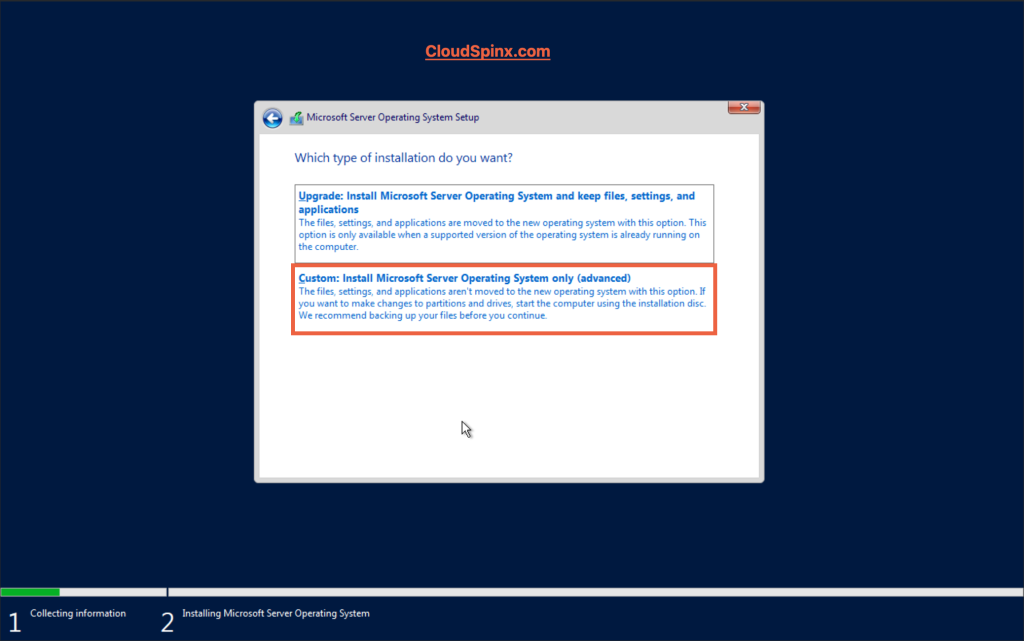
Read and accept the license terms to continue with the installation. Select Custom: Install Windows only (advanced).
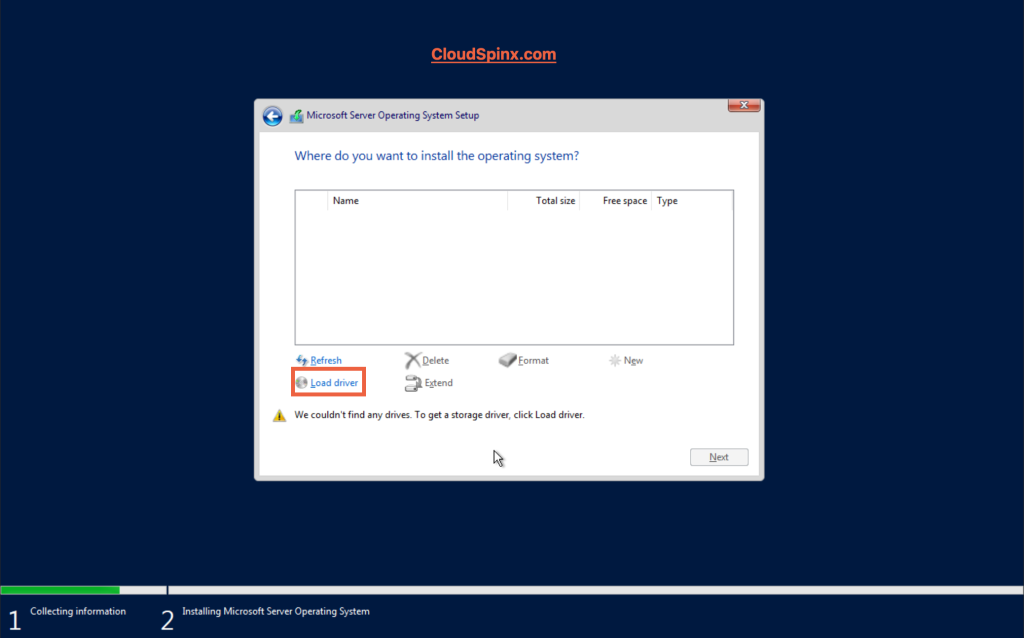
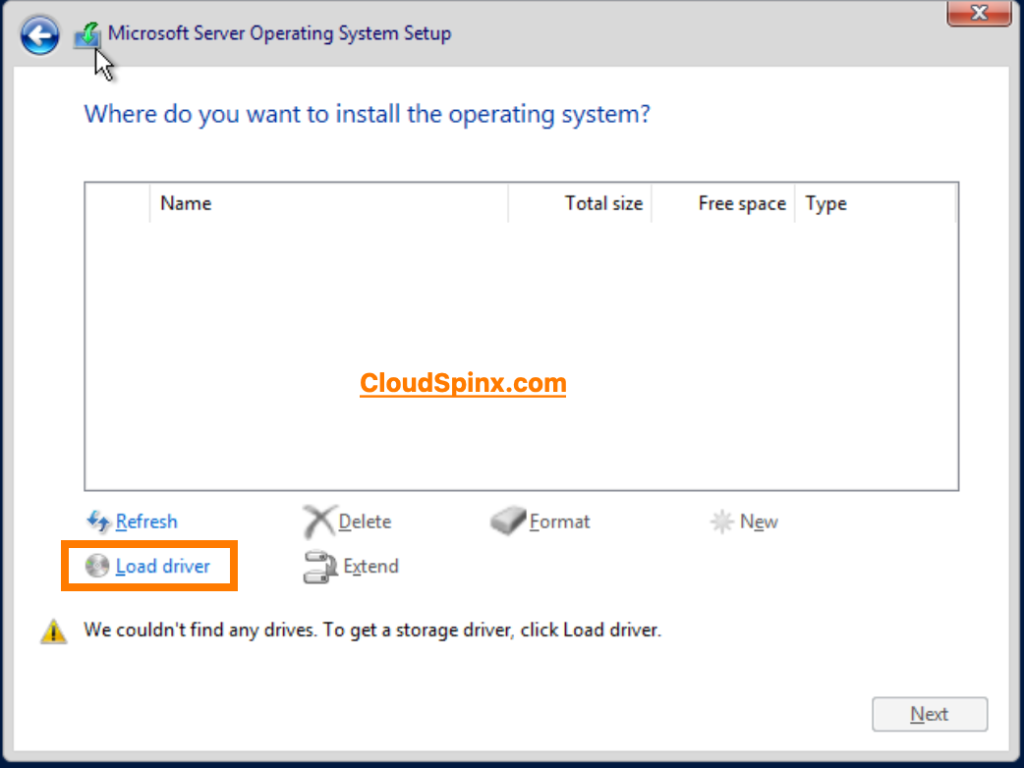
Load Network Driver.
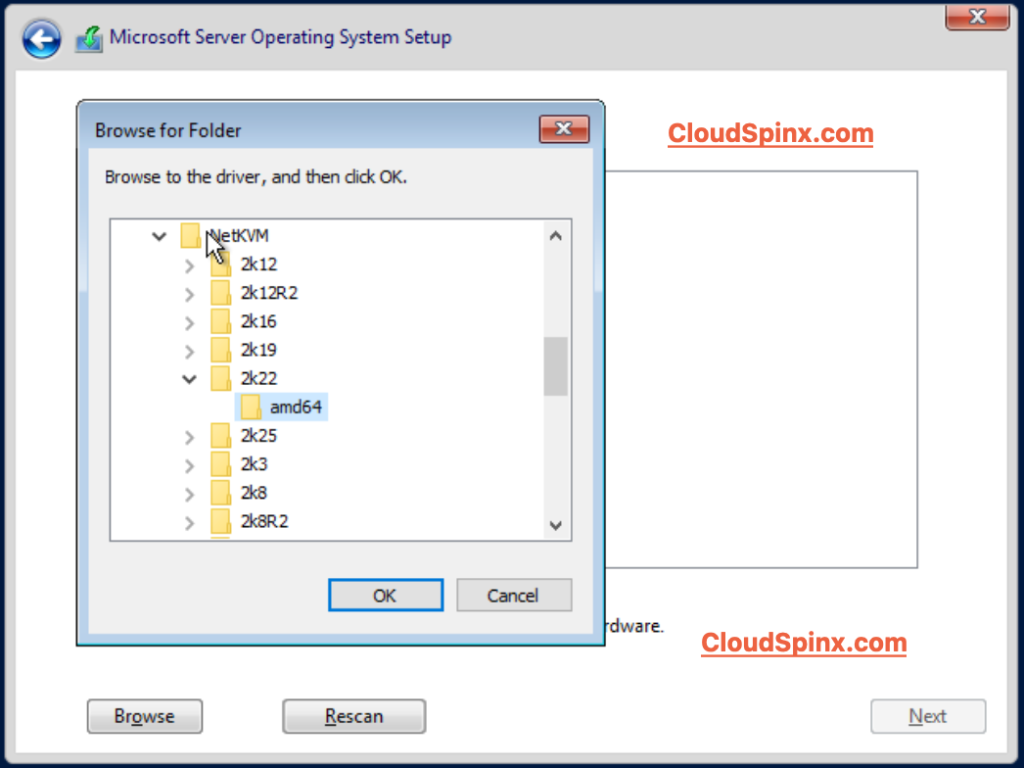
Click on Browse in the popup window.
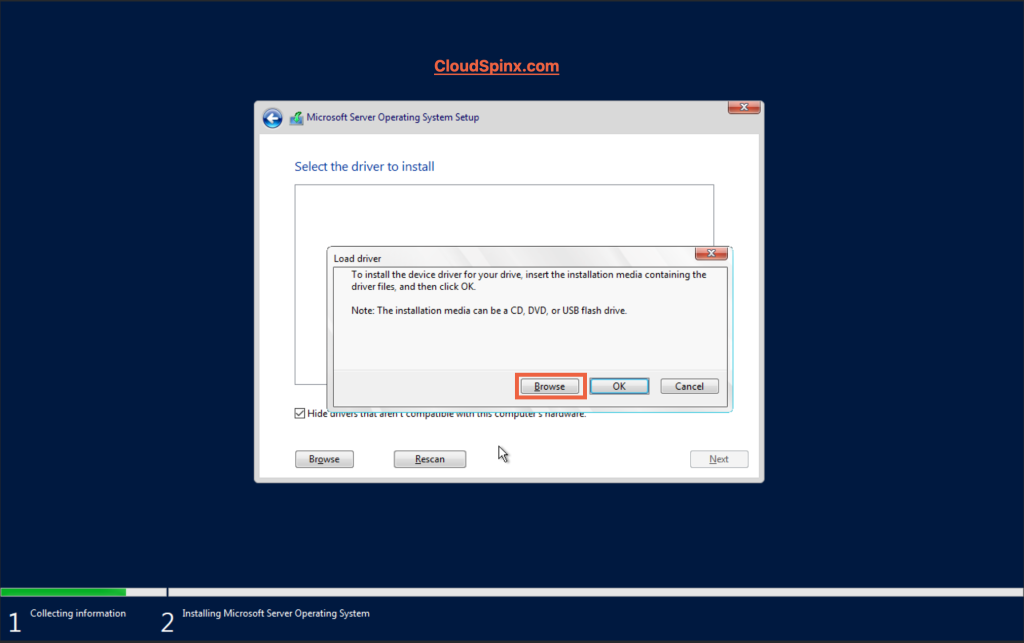
Choose your CDROM(the CD Drive labeled with virtio), then look for Drivers>NetKVM>2k22>amd64, then click on OK.
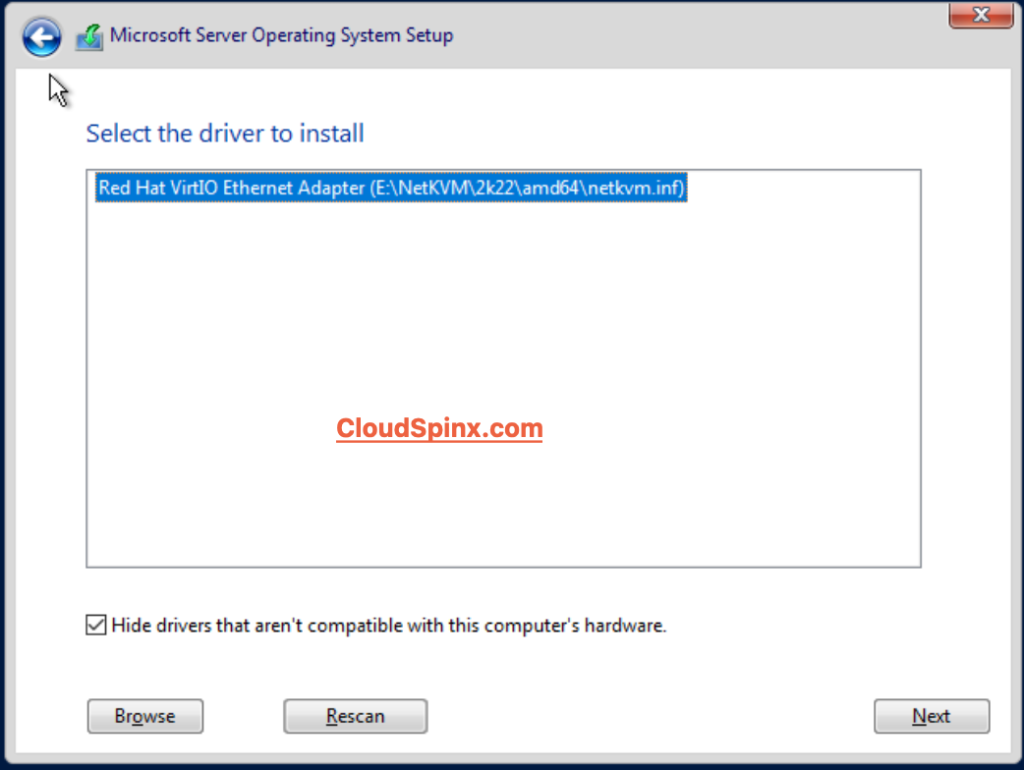
Click on next after selecting the Red Hat VirtIO Ethernet Adapter driver.
Next, we have to load the virtio disk driver.
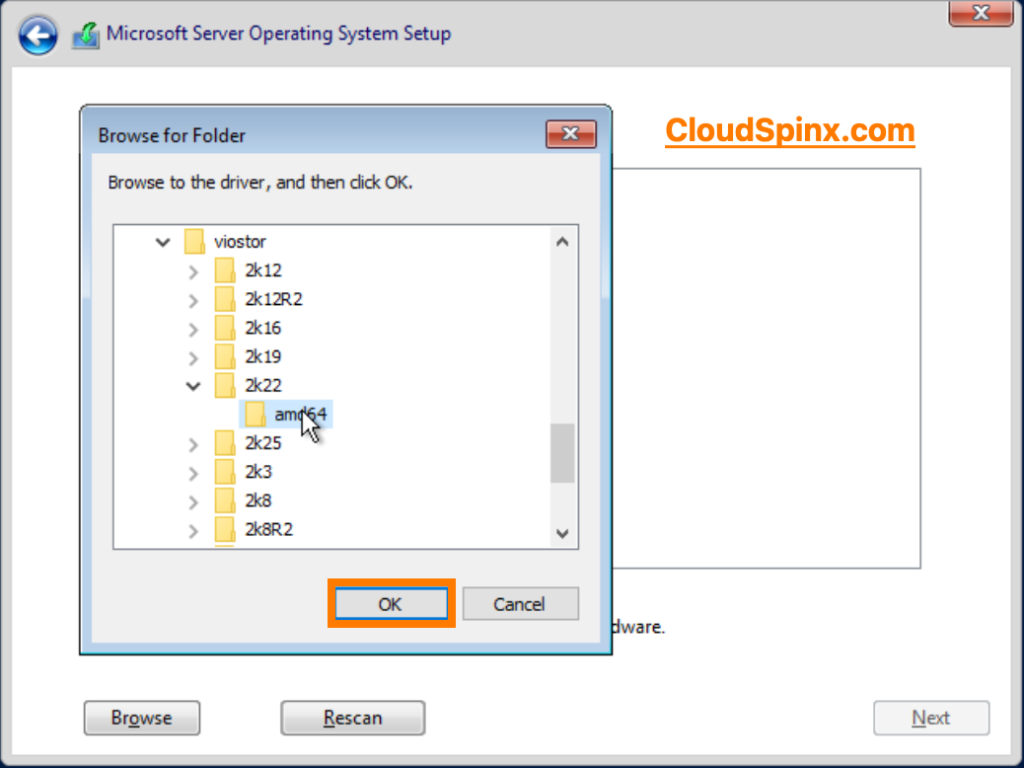
Click on Browse in the popup window, then choose your CDROM(the CD Drive labeled with virtio), then look for Drivers>viostor>2k22>amd64, then click on OK.
Click on next after selecting the Red Hat VirtIO SCSI controller.
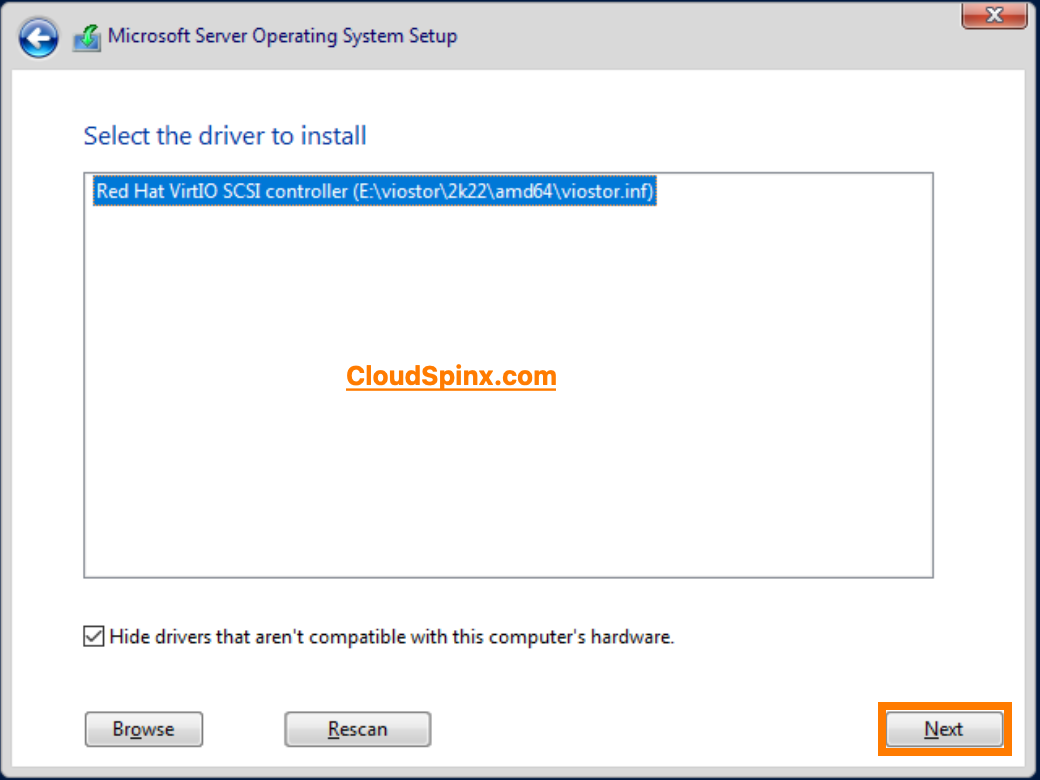
Now the VirtIO disk is displayed.
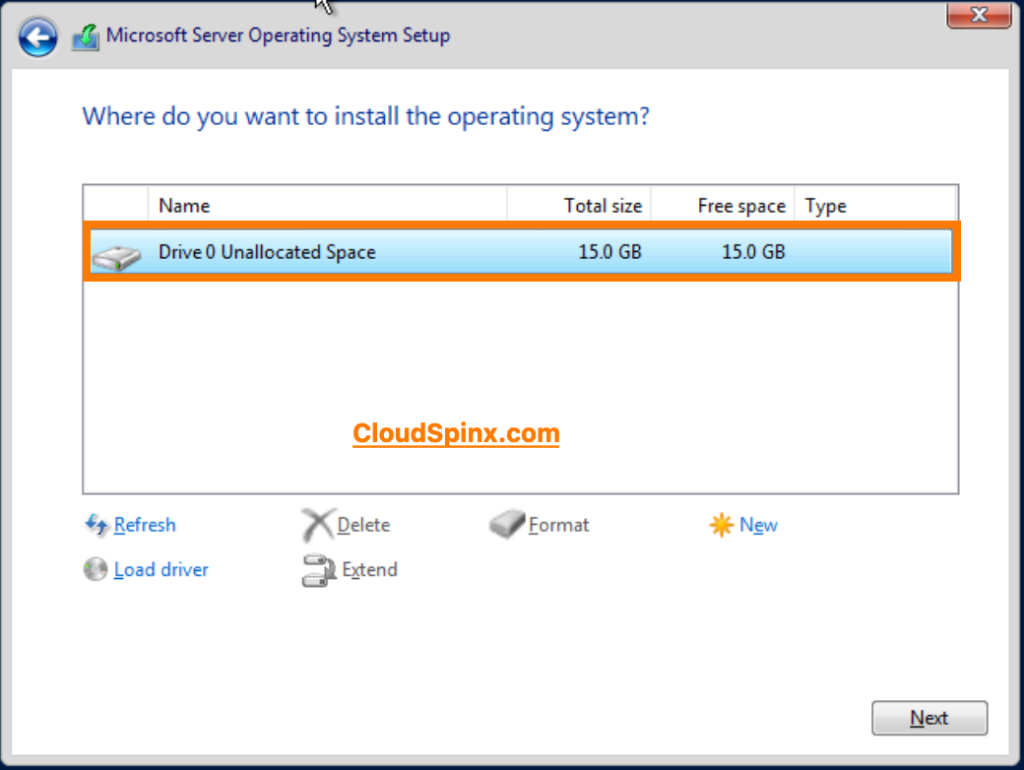
Click next and the installation process begins:
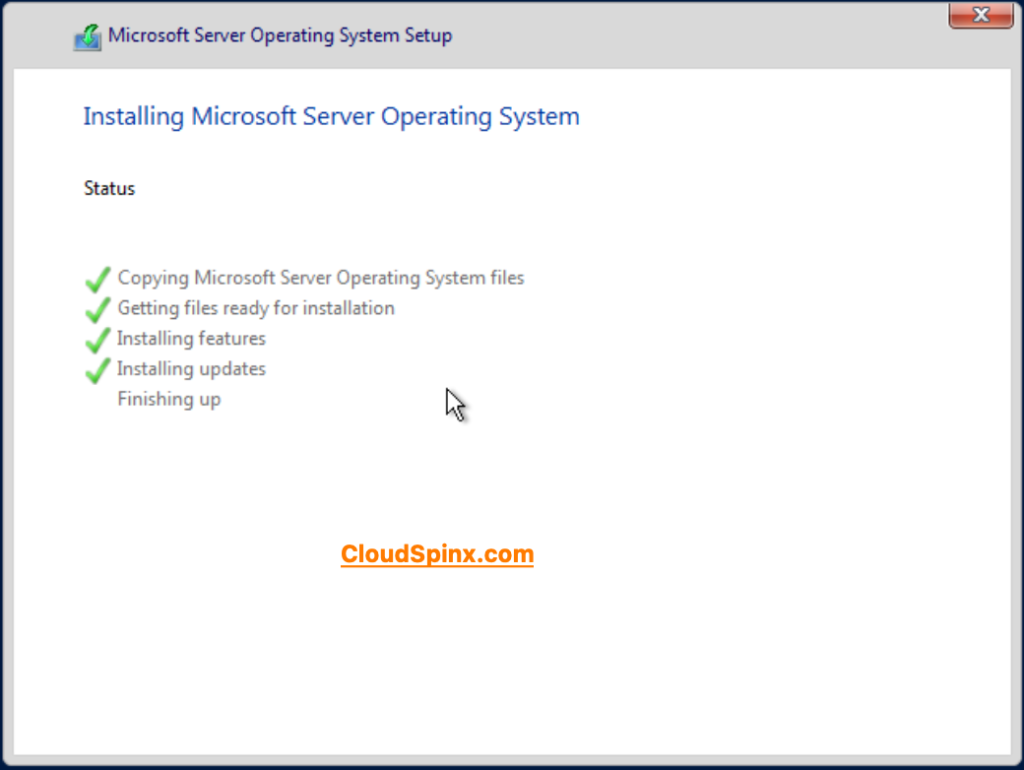
After the installation process is complete, Windows Server 2022 will restart and you can set your administrator password:
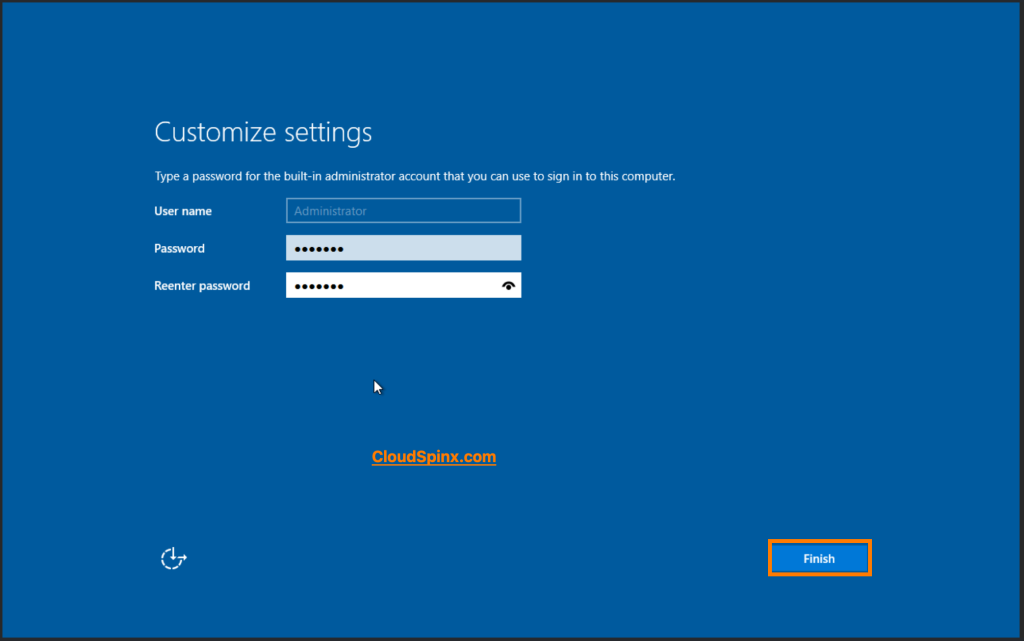
Click Finish, and you can go ahead an login to the server:
Step 4: Enable Remote Desktop
Later, we might want to use RDP, for easier maintenance management and other conveniences. To be able to use RDP, we have to do a few things:
Start Powershell and open the firewall for RDP;
Set-ItemProperty -Path "HKLM:\SYSTEM\CurrentControlSet\Control\Terminal Server" -Name "fDenyTSConnections" -Value "0"
Set-NetFirewallRule -Name "RemoteDesktop-In-TCP-WS" -Enabled True
Get-NetFirewallRule | Where-Object Name -like 'RemoteDesktop*' | Set-NetFirewallRule -Enabled True
You can also do it from GUI, click on Start > Control Panel, and search for Remote Desktop. Now choose Allow remote desktop access to your computer. Then in the popup choose for Allow remote connections to this computer, Click OK to close the popup.
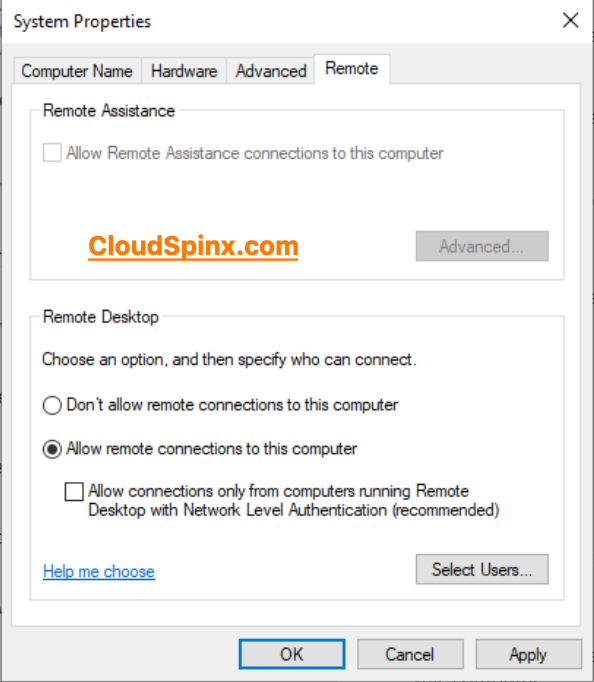
Uncheck “Allow connections only from computers running Remote Desktop with Network Level Authentication“. Click on Apply and then OK to close the popup.
Step 5: Cloud-Init and QEMU guest agent configurations
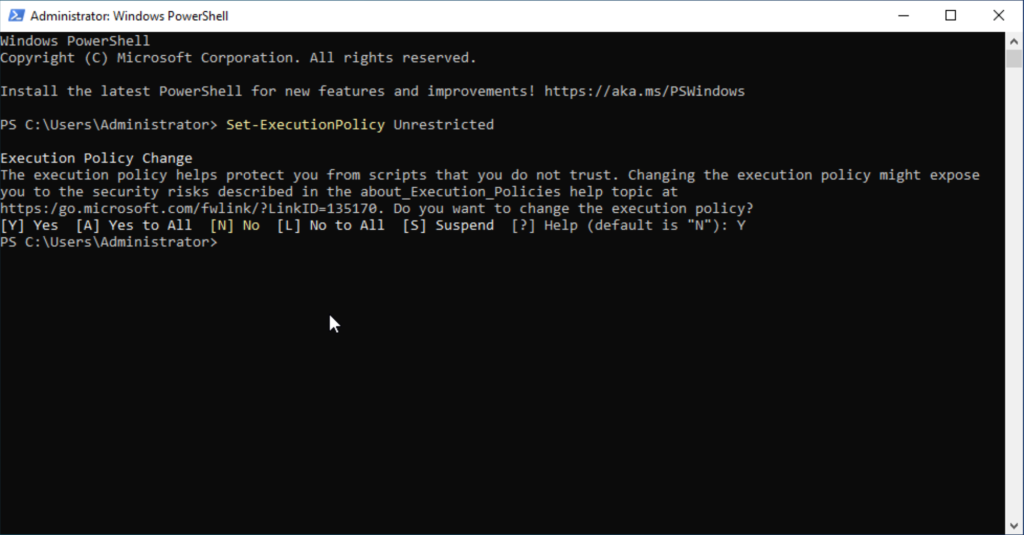
To be able to use Cloud-Init we have to configure set the following policy from PowerShell:
Set-ExecutionPolicy Unrestricted
We need Cloud-init to be able to, for example, set an admin passphrase when deploying.
Install VirtIO-Win Drivers
We will start by installing Virtio-win drivers, that permit your Windows VMs to communicate efficiently with virtualized hardware on KVM/QEMU. The Virtio-win drivers provide improved disk I/O, faster networking, and memory ballooning.
Navigate to your CDROM and you’ll find that the Installer package is already there.
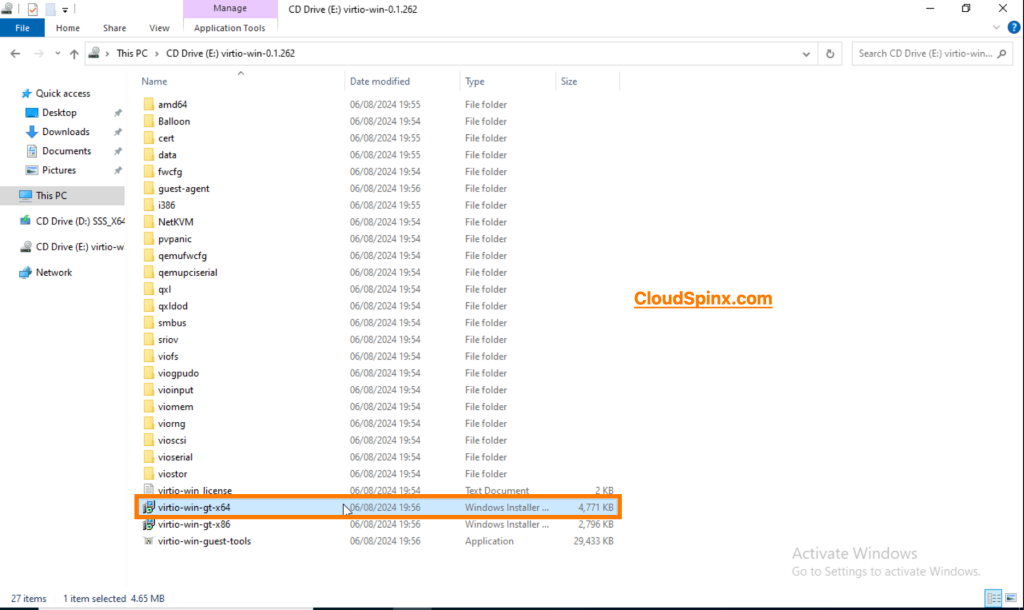
Start the installer by right-clicking on the package and clicking Install.
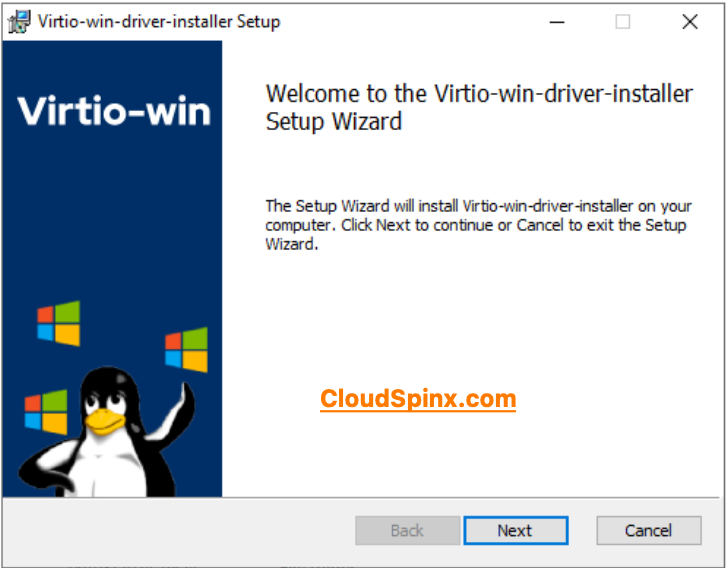
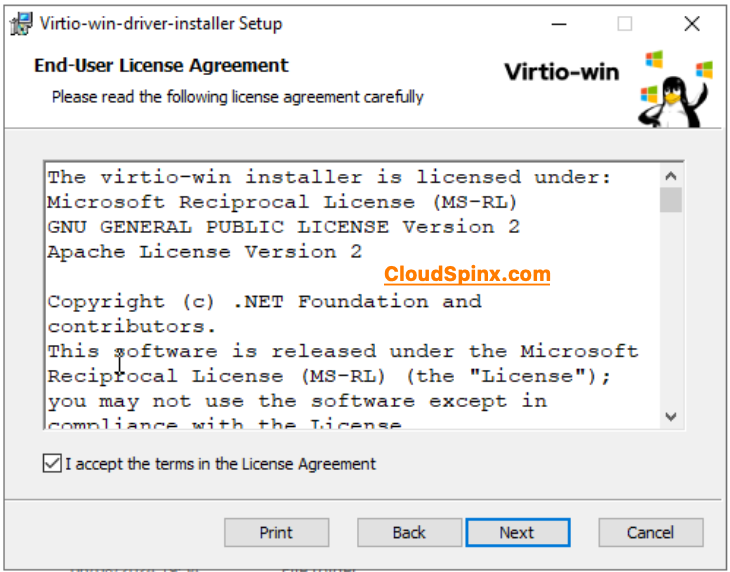
Read the License Agreement and check the box to agree to the terms.
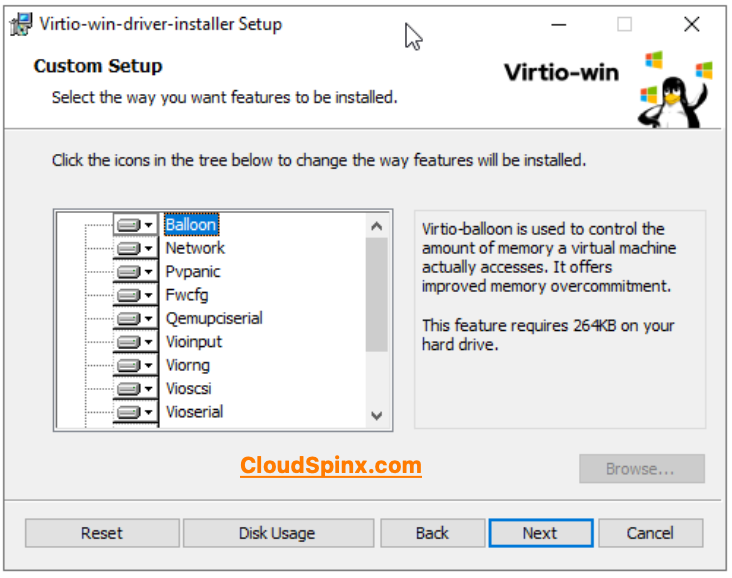
In the next window, leave everything as is and click Next.
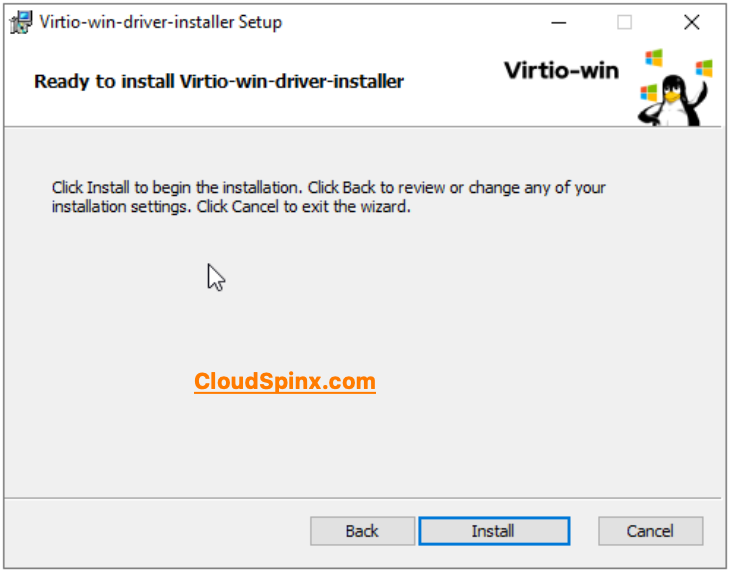
Now click on Install to install the drivers.
Install qemu-guest-agent
Now we need to install the Qemu guest agent using the Qemu guest tools application. This Qemu guest agent enables more effective interaction between the host and the guest, which enables the possibility of better features such as automatic shutdown and resource management.
The application is located in your CDROM.
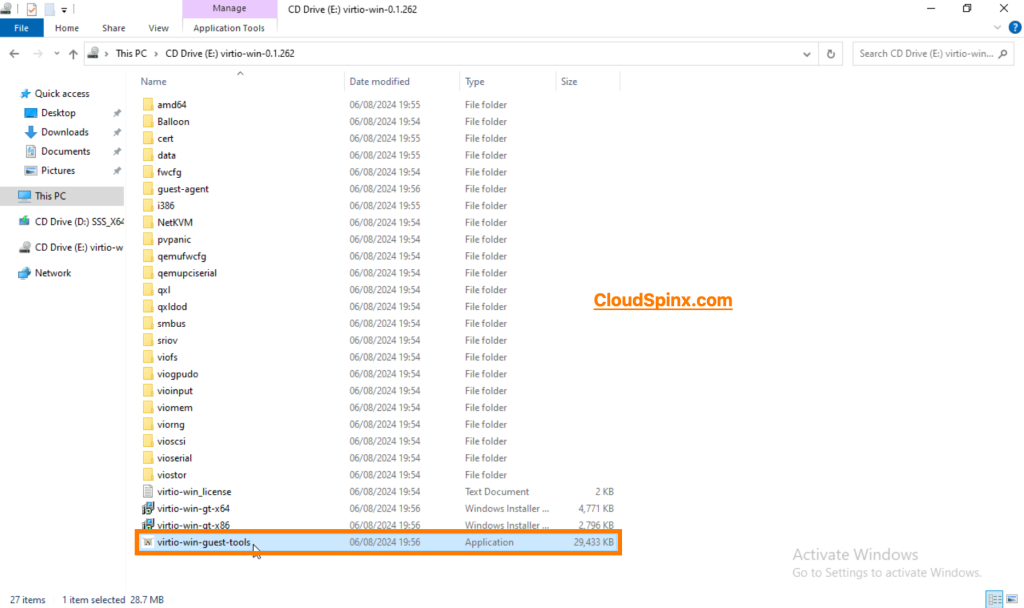
To install the guest tools, run the application, the check the terms and conditions checkbox and click Install.
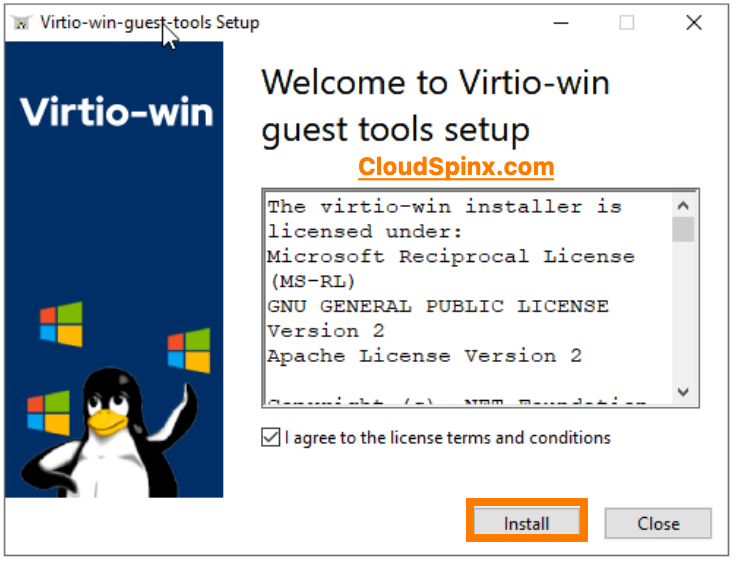
You are done.
Step 6: Delete Recovery Partition
In Cloud Infrastructures such as OpenStack, recovery partitions are not necessary. This is because there are backups and snapshots that are managed at the hypervisor. Having said that, we’ll just delete it to free up more space.
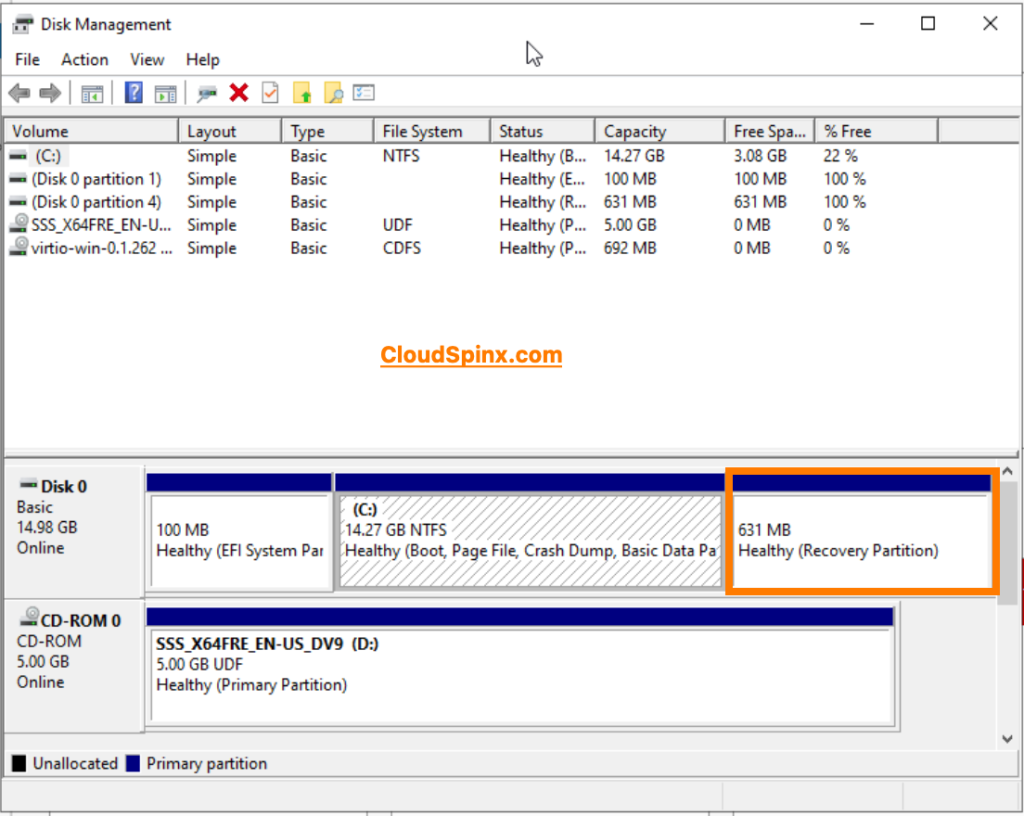
Let’s launch powershell so that we can use diskpart to delete the recovery partition.
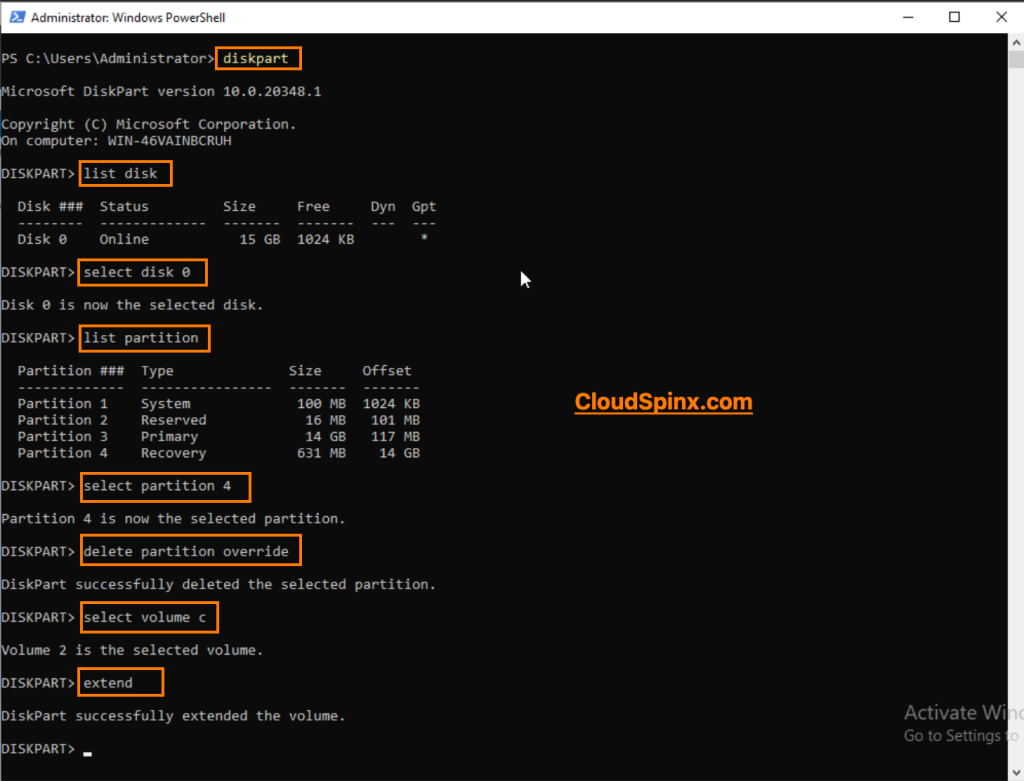
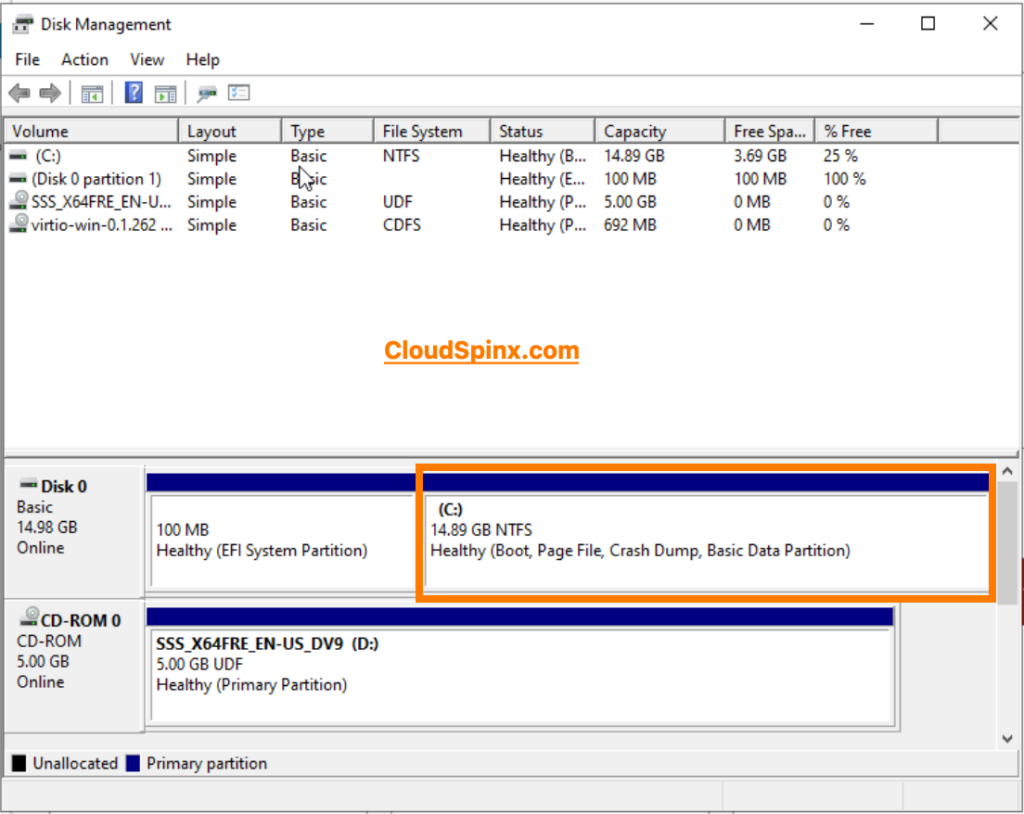
You can list partitions in Powershell and you’ll see that the recovery partition has been removed. You can also check it using the disk manager.
Step 7: Install Cloudbase-Init
Cloudbase-Init is basically the same thing as cloud-init, but for Windows operating systems. This tool is required for initializing and configuring VMs in cloud environments, and in our case, OpenStack cloud. This tool also automates tasks such as hostname setup, SSH keys setup and running user scripts.
So, we’ll need to download Cloudbase-init installer and then run the setup: https://cloudbase.it/downloads/CloudbaseInitSetup_Stable_x64.msi
Follow the following steps:
- Click Next
- Read the terms and conditions agreement and check the box to agree, the click Next
- Click Next in the Custom Setup window.
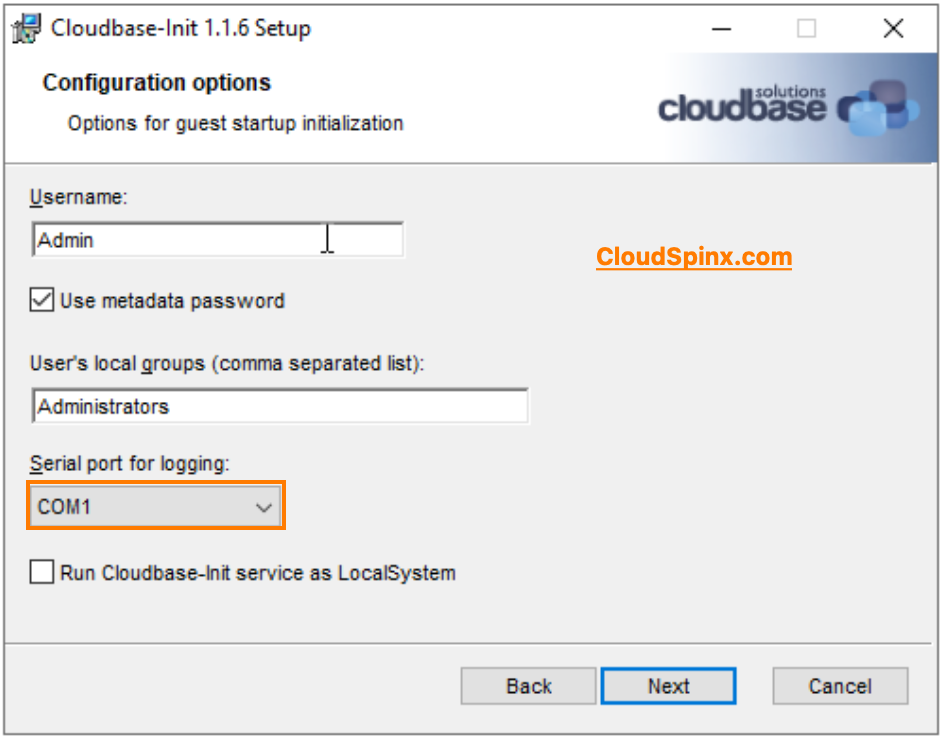
- Leave evrything as it is except for the Serial port for logging, which you’ll set to COM1.
- In my case, the username has set to Admin , Openstack password retriever(private key) will work on this account
Click Install in the next window to start the Installation. When the installation is finished, select both run Sysprep and Shutdown when Sysprep terminates.
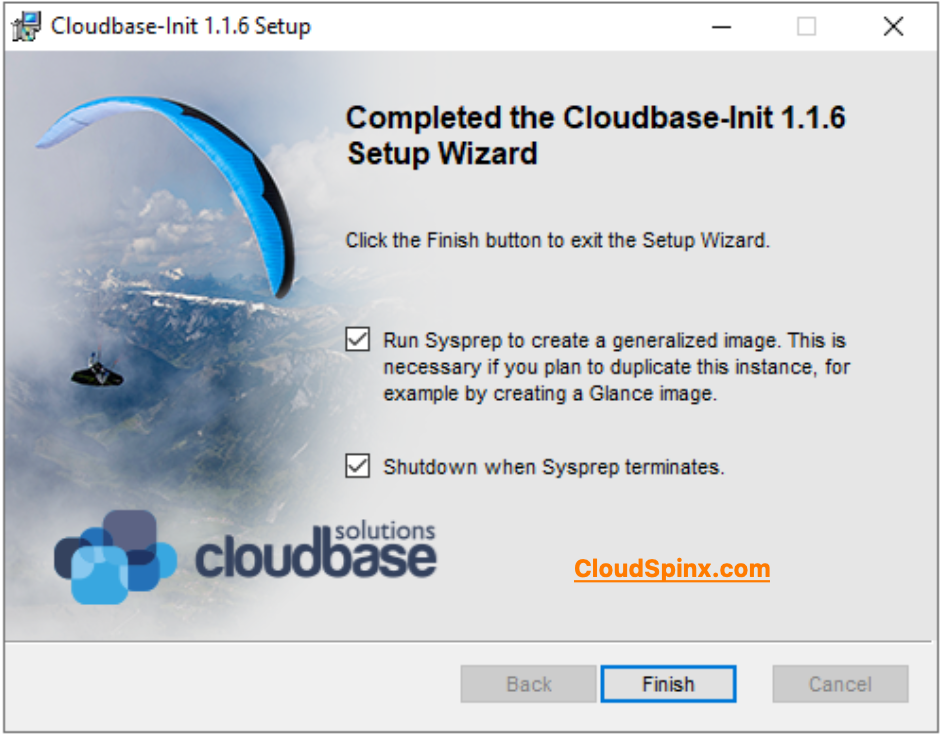
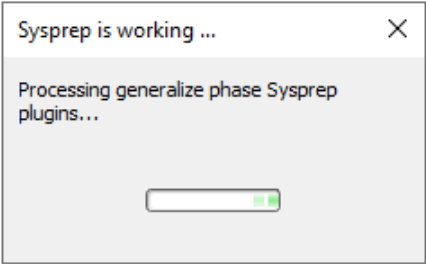
Then click on Finish and Sysprep will prepare the Windows installation for use as an image and then it will shutdwon the VM.
Step 8: Uploading the Image to OpenStack Glance
To upload our image, we are going to use OpenStack CLI tools. Basically, what we are doing is creating a new image and then referencing the path of the file to be used.
We’ll just SSH to our OpenStack server, and run the command with the syntax below to create a new image:
openstack image create "imagename" --disk-format qcow2 --min-ram 4096 --min-disk 20 --file /path/to/image/imagename.qcow2So, we’ll just provide the path to our Windows server image, and then run the command. We’ll run the command inside a tmux session to avoid any upload interruptions since we are accessing the server remotely:
openstack image create "Windows-Server-2022" \
  --disk-format qcow2 \
  --container-format bare \
  --file windows-server-2022-cloud.qcow2 \
  --min-ram 4096 \
  --min-disk 20 \
  --property os_type=windows \
  --property hw_disk_bus=virtio \
  --property hw_vif_model=virtio \
  --property hw_firmware_type=uefi \
  --property hw_machine_type=q35 \
  --property hw_rng_model=virtio
Sample Output:
+------------------+-------------------------------------------------------------------------------------------------------------------------------------------------------------------------------------+
| Field            | Value                                                                                                                                                                               |
+------------------+-------------------------------------------------------------------------------------------------------------------------------------------------------------------------------------+
| checksum         | 124f58dfce05e1d710433002ee52f3e6                                                                                                                                                    |
| container_format | bare                                                                                                                                                                                |
| created_at       | 2025-10-14T22:15:08Z                                                                                                                                                                |
| disk_format      | qcow2                                                                                                                                                                               |
| file             | /v2/images/0c5a775a-2913-4e36-af2a-7dc7bfc5ef55/file                                                                                                                                |
| id               | 0c5a775a-2913-4e36-af2a-7dc7bfc5ef55                                                                                                                                                |
| min_disk         | 20                                                                                                                                                                                  |
| min_ram          | 4096                                                                                                                                                                                |
| name             | Windows-Server-2022                                                                                                                                                                 |
| owner            | 095ede96db1e48a388b40dcacb2a97b6                                                                                                                                                    |
| properties       | hw_disk_bus='virtio', hw_firmware_type='uefi', hw_machine_type='q35', hw_rng_model='virtio', hw_vif_model='virtio', os_hash_algo='sha512',                                          |
|                  | os_hash_value='b3682abe0c9b862811b93aaf8991d8fd7f2df429ff19eac105f311a2d2fa6b5e33cad1e89ad31f8089b4b78af92805ac18f91f366d033929cf4c2db3030c4b34', os_hidden='False',                |
|                  | os_type='windows', owner_specified.openstack.md5='', owner_specified.openstack.object='images/Windows-Server-2025', owner_specified.openstack.sha256='', stores='file'              |
| protected        | False                                                                                                                                                                               |
| schema           | /v2/schemas/image                                                                                                                                                                   |
| size             | 14582808576                                                                                                                                                                         |
| status           | active                                                                                                                                                                              |
| tags             |                                                                                                                                                                                     |
| updated_at       | 2025-10-14T22:16:34Z                                                                                                                                                                |
| virtual_size     | 16106127360                                                                                                                                                                         |
| visibility       | shared                                                                                                                                                                              |
+------------------+-------------------------------------------------------------------------------------------------------------------------------------------------------------------------------------+
When the upload is complete, run the command below to confirm the the image was created:
[root@osp01 ~(keystone_admin)]# openstack image list
+--------------------------------------+---------------------+--------+
| ID                                   | Name                | Status |
+--------------------------------------+---------------------+--------+
| 7dbabbc7-0e54-4a3a-8936-d844ab1e151b | Cirros              | active |
| 9940658f-3ba2-4830-8355-7fa95116aca5 | Debian-12           | active |
| 0b3cec63-2549-4834-8be1-902a8260991c | Ubuntu-24.04        | active |
| f483321f-8470-43f2-9e6f-9ece12291997 | Windows-server-2022 | active |
+--------------------------------------+---------------------+--------+
And that’s just about it guys, now we have successfully created a Windows server image, which is based upon a raw file, and uploaded it to our OpenStack cloud.
You don’t need to perform these operations on your own, CloudSpinx Engineers are available to help you out. Drop us a message and we will respond ASAP.

