Couldn’t wait could you? Fedora 39 is a fascinating update that has a ton of functionality and eye-catching graphics. The Fedora 39 workstation edition is the primary target of this post-install tutorial. Not everyone finds these suggestions ideal. However, it ought to be a solid beginning point for all varieties of Fedora users. We advise doing the following crucial steps to improve your desktop experience with Fedora 39 if you have already installed or updated to Fedora 39.
Here are the top must-do things you have to do after installing Fedora 39 Workstation Edition (GNOME).
1: Update and Upgrade
The first thing you have to do after installing Fedora 39 is to update and upgrade your system. Run the following command:
sudo dnf update && sudo dnf upgrade2: Adding sudo user and common user
If you missed the chance to add a user during the setup, have no worries, I’ve got your back. Use the following commands:
To add admin user with sudo privileges and set password for admin user:
sudo useradd -m <adminuser> -G wheel
sudo passwd <adminuser>
Add user without sudo privileges and set password for standard user:
sudo useradd -m <standarduser>
sudo passwd <standarduser>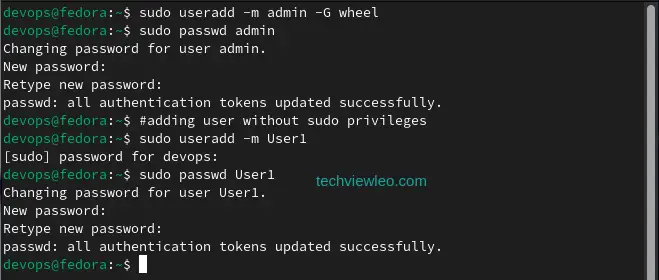
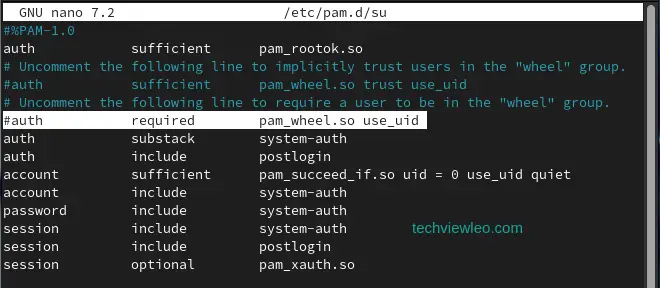
If you’d like to limit users to run [su] command, configure like follows. Open the file /etc/pam.d/su and uncomment the line shown. On the example below, only users in [wheel] group can run [su] command.
If you’d like to remove a user account, use the commands below:
# remove a user [username] (only removed user account)
sudo userdel <username>

# remove a user [username] (removed user account and his home directory both)
sudo userdel -r <username>
3. Enable and use firewalld
Using the firewall-cmd command-line interface or graphical tools like firewall-config, users can configure and manage firewalls with firewalld, a dynamically managed firewall. See the commands below:
#check the status of firewalld
sudo systemctl status firewalld

#start and stop firewalld
sudo systemctl start firewalld
sudo systemctl stop firewalld

#enable or disable firewalld during boot
sudo systemctl enable firewalld
sudo systemctl disable firewalld

#reload firewalld to apply changes without restarting
sudo firewall-cmd --reload
By default, [public] zone is applied with a NIC, and cockpit, dhcpv6-client, ssh are allowed. When operating with [firewall-cmd] command, if you input the command without [–zone=***] specification, then, configuration is set to the default zone.
# display the default zone
sudo firewall-cmd --get-default-zone

# display current settings
sudo firewall-cmd --list-all

# display all zones defined by default
sudo firewall-cmd --list-all-zones

# display allowed services on a specific zone
sudo firewall-cmd --list-service --zone=external

# change default zone
sudo firewall-cmd --set-default-zone=external

# change zone for an interface
sudo firewall-cmd --change-interface=enp1s0 --zone=external
sudo firewall-cmd --list-all --zone=external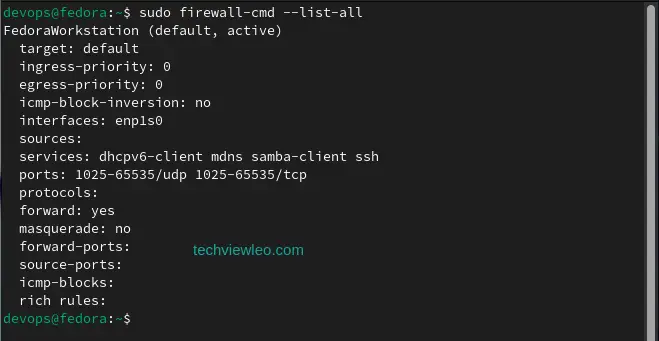
4. Using cockpit
Cockpit is an administrative Linux tool that allows you to perform administrative server tasks via your web browser, which offers a user-friendly GUI. Cockpit comes installed by default in Fedora Server.
To install cockpit:
sudo dnf install cockpitTo enable cockpit:
sudo systemctl enable --now cockpit.socketOpen the firewall if necessary:
sudo firewall-cmd --add-service=cockpit
sudo firewall-cmd --add-service=cockpit --permanent
sudo firewall-cmd --reload
Access through the web interface:
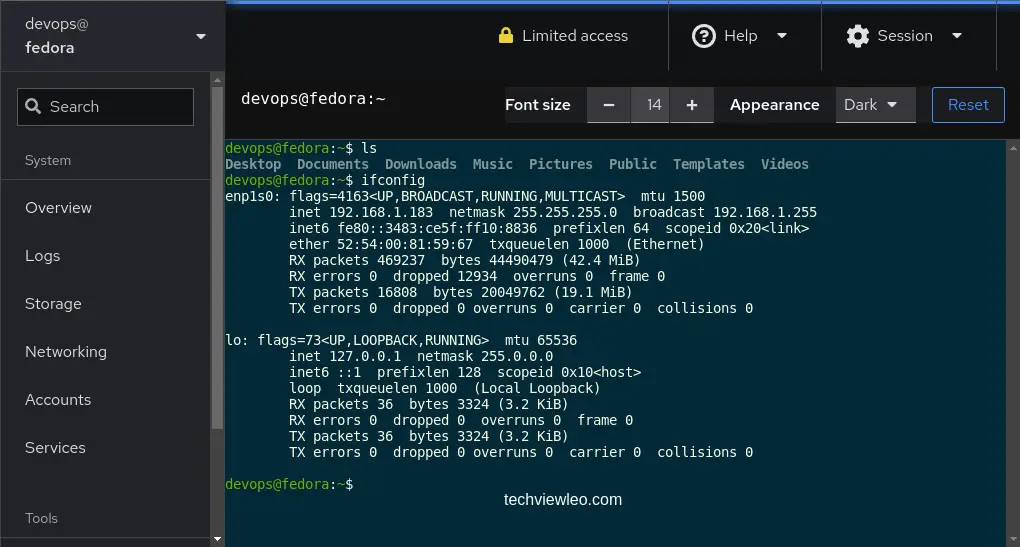
https://IP_ADDRESS_OF_MACHINE:9090Go to your browser and input the URL above, and replace IP_ADDRESS_OF_MACHINE with the actual address of your server or workstation. Cockpit will provide an interface and you’ll be prompted to login to your machine.
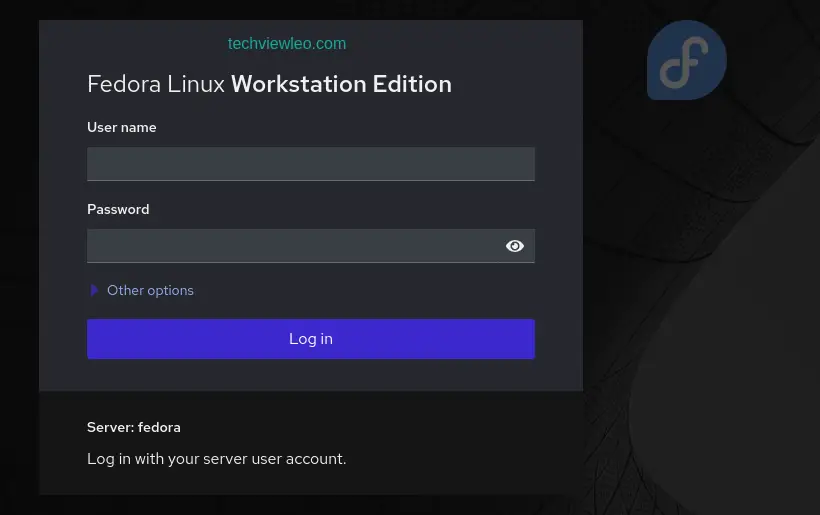
Enter the credentials for one of the users you created and hit login. You are now logged into Fedora on cockpit, you can access the terminal at the bottom left corner.
5. OpenSSH: SSH Key-Pair Authentication
OpenSSH is already installed by default even if you installed Fedora with Minimal Install, so it does not need to install new packages. But just in case;
To install OpenSSH:
sudo dnf install openssh-serverStart and Enable the OpenSSH Service:
sudo systemctl start sshd
sudo systemctl enable sshd
Check the Status to Ensure It’s Running:
sudo systemctl status sshdNow you need to create a private key for client and a public key for server. Create Key-Pair by each user, so login with a common user on SSH Server Host and execute the following commands:
# create key-pair
sudo ssh-keygen -t ecdsa
ll ~/.ssh
mv ~/.ssh/id_ecdsa.pub ~/.ssh/authorized_keys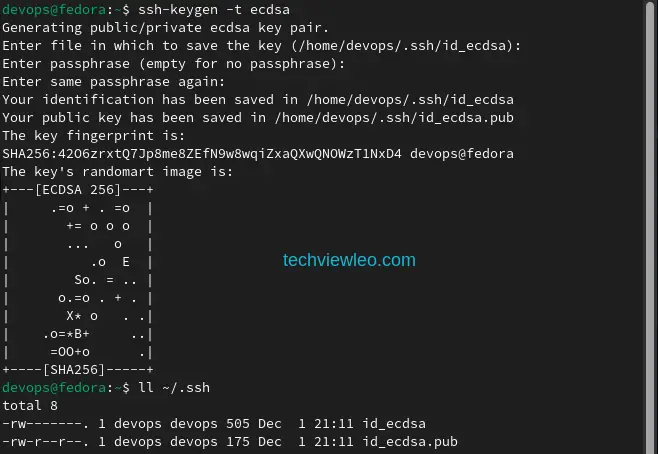
Transfer the private key created on the Server to a Client, then it’s possible to login with Key-Pair authentication.
 mkdir ~/.ssh
 chmod 700 ~/.ssh

# transfer the private key to the local ssh directory
sudo scp username@server-ip:/home/username/.ssh/id_ecdsa ~/.ssh/
sudo ssh username@server-ip
6. Configure static IP address using nmcli
To configure a static IP address using nmcli (Network Manager command-line interface) in Fedora, you can follow these steps.
List Available Connections and identify the name of the network connection for which you want to configure a static IP address.
nmcli connection showEdit the Connection: Replace <connection-name> with the name of your network connection.
nmcli connection edit 'connection-name'Set IPv4 Method to Manual:
nmcli> set ipv4.method manualSet IP Address, Subnet Mask, and Gateway: Replace <ip-address>, <subnet-mask>, and <gateway-ip> with your desired values.
nmcli> set ipv4.addresses <ip-address>/<subnet-mask>
nmcli> set ipv4.gateway <gateway-ip>
Save Changes: and quit the Editor:
nmcli> save
nmcli> quit
Activate the Connection: Replace <connection-name> with the name of your network connection.
nmcli connection up <connection-name>After completing these steps, your network connection should be configured with the static IP address you specified. You can check the connection status and verify the IP configuration using:
nmcli connection show <connection-name>Remember to replace <connection-name> with the actual name of your network connection.
7. Setting Timezone and NTP Chrony configurations
Use the commands below to check the current Timezone and list Available Timezones:
timedatectl
timedatectl list-timezones
Set the Timezone using the command below: Replace with the appropriate timezone from the list.
sudo timedatectl set-timezoneVerify the Changes:
timedatectlConfigure NTP (Chrony):
Install Chrony (if not installed), then start and enable Chrony service.
sudo dnf install chrony
sudo systemctl start chronyd
sudo systemctl enable chronyd
Check Chrony Status:
sudo systemctl status chronydCheck Chrony Synchronization Status:
chronyc sources -vThis command should display information about the NTP servers Chrony is syncing with.
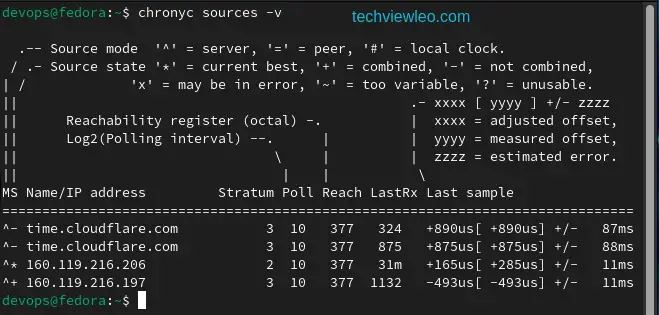
Verify System Time:
timedatectlEnsure that the system time is synchronized with the NTP servers.

8. Install other Desktop environments
Fedora’s default desktop environment is GNOME 3 in the Workstation spin, but it is very easy to try any of the many other desktop environments that are available without affecting your current desktop environment.
To Install a specific selected desktop environment use, the dnf install command. Ensure to prefix with the @ sign, for example:
#KDE Desktop environment
sudo dnf install @kde-desktop-environment
#Xfce Desktop environment
sudo dnf install @xfce-desktop-environment
#Cinnamon Desktop environment
sudo dnf install @cinnamon-desktop-environment
#Mate Desktop environment
sudo dnf install @mate-desktop-environment
#Lxde Desktop environment
sudo dnf install @lxde-desktop-environment
#Lxqt Desktop environment
sudo dnf install @lxqt-desktop-environment
#Hawaii Desktop environment
sudo dnf install @hawaii-desktop-environment
Let’s see below example:
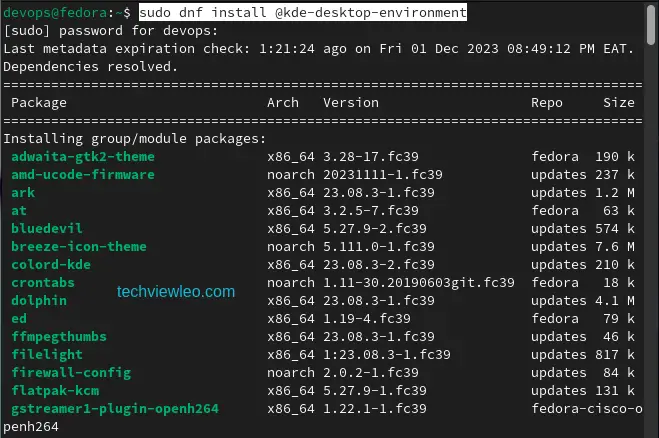
To switch to your new desktop environment for a single session, logout and on the login screen, select a user from the list if you have several, then click on the Preferences icon right below the password field. A window appears with a list of several different desktop environments. Choose one, and enter password as usual.
9. Enable automatic security updates
Unlike several other Linux distributions, Fedora lacks an integrated mechanism for automatic security upgrades. However, external programs like dnf-automatic might help you achieve automated updates.
The dnf-automatic package is a component that allows automatic download and installation of updates. It can automatically monitor and report, via e-mail, the availability of updates or send a log about downloaded packages and installed updates.
To install dnf-automatic:
sudo dnf install dnf-automaticConfigure dnf-automatic
Open and edit the configuration file:
sudo nano /etc/dnf/automatic.confModify the configuration according to your preferences. For automatic security updates, you can change the script as follows:
apply_updates = yes
emit_via = email
email_to = [email protected]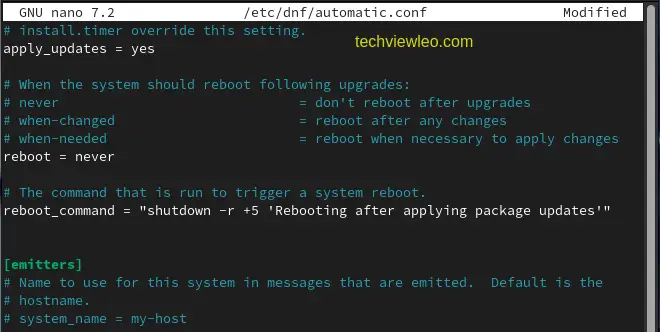
Adjust the email_to field to receive notifications about updates. You can customize other settings in the configuration file based on your needs.
Now save the changes and exit.
To start and enable the dnf-automatic timer:
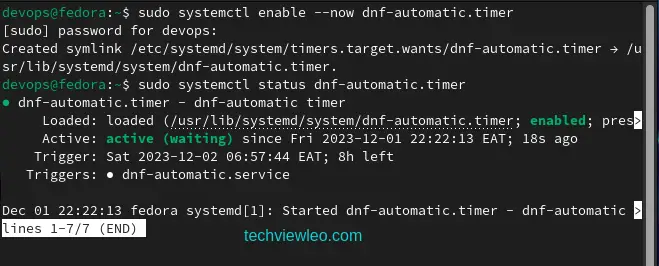
sudo systemctl enable --now dnf-automatic.timerThis command starts the timer and enables it to run at boot.
Check the status of the timer:
sudo systemctl status dnf-automatic.timerVerify that the timer is active and waiting to run.
10. Shell customization with oh my bash
Oh My Bash is an open source, community-driven framework for managing your bash configuration. It provides a collection of community-driven plugins, themes, and helpers to make your Bash shell more powerful and enjoyable to use.
Install Oh My Bash
Oh My Bash is installed by running one of the following commands in your terminal. You can install this via the command-line with either curl or wget.
#via curl
bash -c "$(curl -fsSL https://raw.githubusercontent.com/ohmybash/oh-my-bash/master/tools/install.sh)"
#via wget
bash -c "$(wget https://raw.githubusercontent.com/ohmybash/oh-my-bash/master/tools/install.sh -O -)"
Each of the above command downloads and runs the Oh My Bash installation script.

Configure Oh My Bash
After the installation, Oh My Bash creates a configuration file called ~/.bashrc. Open this file in a text editor to customize your settings:
nano ~/.bashrcCustomize your prompt theme by setting the OSH_THEME variable. Find the line that looks like this:
export OSH_THEME="agnoster"Replace "agnoster" with the name of the theme you want. You can find available themes in the ~/.oh-my-bash/themes directory. You can make more changes to fit your preferences by just editing the configuration file. When you are done, save the file and exit the editor.
Restart your terminal or run the following command to apply the changes:
source ~/.bashrc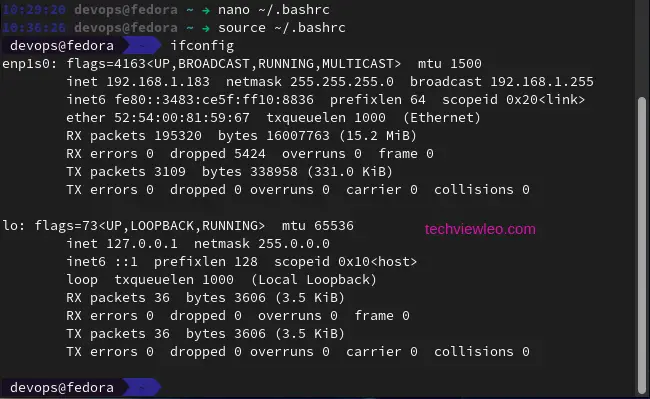
11. Using Zsh with oh my zsh
Oh My Zsh is a framework for managing your Zsh configuration, and it comes with a variety of themes, plugins, and features. Using Zsh with Oh My Zsh on Fedora Linux is a great way to spice up your shell experience.
Install Zsh
Open your terminal and install Zsh using the package manager (dnf):
sudo dnf install zshSet Zsh as your default shell:
chsh -s $(which zsh)You may need to log out and log back in for the changes to take effect.
Install Oh My Zsh
Oh My Zsh is installed by running one of the following commands in your terminal. You can install this via the command-line with either curl, wget or another similar tool.
#via curl
sh -c "$(curl -fsSL https://raw.githubusercontent.com/ohmyzsh/ohmyzsh/master/tools/install.sh)"
#via wget
sh -c "$(wget -O- https://raw.githubusercontent.com/ohmyzsh/ohmyzsh/master/tools/install.sh)"
#via fetch
sh -c "$(fetch -o - https://raw.githubusercontent.com/ohmyzsh/ohmyzsh/master/tools/install.sh)"
Follow any prompts or instructions provided during the installation process.
Configure Oh My Zsh
Oh My Zsh creates a configuration file called ~/.zshrc. Open this file in a text editor:
nano ~/.zshrcCustomize your Zsh theme by setting the ZSH_THEME variable. Find the line that looks like this:
ZSH_THEME="robbyrussell"Replace "robbyrussell" with the name of the theme you want. You can find available themes in the ~/.oh-my-zsh/themes directory.
Save the changes and exit the text editor.
Restart your terminal or run the following command to apply the changes:
source ~/.zshrc12. Using Vim distribution
SpaceVim is a distribution of Neovim and Vim that has a unified user interface and a number of pre-configured plugins.
Install Vim or Neovim
Choose whether you want to use Vim or Neovim. Use the commands below to install them:
#Install neovim
sudo dnf install neovim
#Install spacevim
curl -sLf https://spacevim.org/install.sh | bash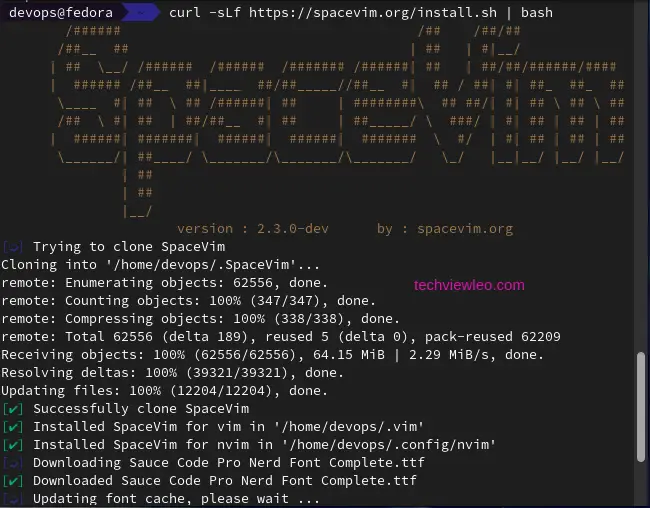
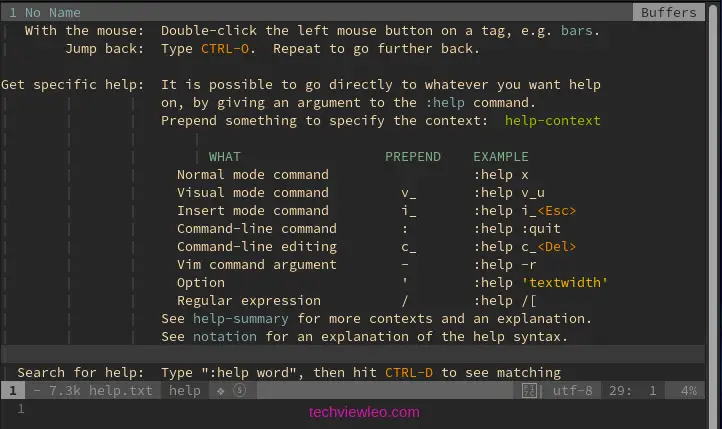
Have a look at the help page:
Wrapping Up
This was our list of things to do after installing Fedora 39. Now you should be ready to start using your new OS on a daily basis according to your needs. Per your use case, you can do countless more things with your Fedora 39 system.

