Tmux is a terminal multiplexer tool that allows users to create and maintain multiple “pseudo-terminals” from one single terminal. It functions as a window manager for the terminal, which enables you to partition the tmux window into multiple “panes”, each with its own command line. This feature is extremely useful for running multiple programs with a single connection, more specifically when connecting to a machine using SSH.
Tmux also protects your programs from accidentally disconnecting by detaching them from the main terminal. Another thing about tmux is it’s speed and flexibility, which make it suitable for managing multiple terminals from your local machine remotely.
Tmux can be detached and reattached from the terminal at any time without interfering with any running programs since they continue to run safely in the background after detaching.
Here are some of the key features of tmux:
- Multitasking: Tmux allows you to run multiple processes inside the terminal. This is achieved by splitting the terminal into multiple terminals using tmux, where applications and processes can be run in the background.
- Scriptable and configurable: Tmux is scriptable and configurable, and has a powerful command system that allows you to retrieve and manipulate information on it’s objects.
- Sessions, windows, and panes: These are the key elements when using tmux. A session is a collection of windows, and a window is a collection of panes.
- Plugins: You can expand tmux’s functionality using external official plugins which add more commands and integrate with multiple applications.
Why use tmux?
Lets take a look at some of the top reasons why you might want to use tmux:
- Increased Productivity: With tmux, you can create and manage multiple terminal sessions within a single window. This is useful when working on multiple projects or tasks simultaneously.
- Session Persistence: Tmux allows you to detach from a session and reattach to it later without losing any progress with your work.
- Remote Access: If you are running on a remote server via SSH, tmux allows you to keep your sessions running even when your connection is down.
- Scripting and automation: Tmux can be scripted, which means you can automate the setup of specific sessions, panes, and commands, which is particularly useful for repetitive tasks and processes.
- Pair Programming: This is a collaboration technique for coding tasks, which tmux highly supports through sharing of tmux sessions.
- Customization: Tmux is highly customisable and can be tweaked to suit your preferred workflow by defining keybindings and other various options.
Installing tmux on Linux and MacOS
In this tutorial, am going to show you a cheat sheet on how to Install tmux on your linux and macOS system and the relevant commands that go hand in hand with the use of tmux. Lets take a look at how to install tmux.
Debian based Linux / Ubuntu
To install tmux on Debian/Ubuntu, run the following commands on your terminal:
sudo apt update && sudo apt install tmuxRHEL based / Fedora / CentOS
For then RHEL based Linux distros, use the commands below to install tmux:
# CentOS / RHEL 7
sudo yum -y install tmux

# Fedora / Rocky / AlmaLinux / RHEL 8
sudo dnf -y install tmux
Arch based / EndeavourOS
To install tmux on Arch Linux, run the following command:
sudo pacman -S tmuxAlpine Linux
Use the following command to install tmux on Alpine Linux:
sudo apk add tmuxInstall on macOS
To install tmux on macOS, you can use Homebrew. Open your terminal and install the Xcode command line tools package using the command below:
xcode-select --install Now run the following command to install Homebrew on your macOS system:
/usr/bin/ruby -e "$(curl -fsSL https://raw.githubusercontent.com/Homebrew/install/master/install)"Once Homebrew is installed , you can use it to install tmux. Open your terminal and run the following command:
brew install tmuxHomebrew will download and install tmux along with all of it’s dependencies. You can verify the installation by running:
$ tmux -V
tmux 3.3a
Using tmux on Linux – Ubuntu, Fedora, CentOS and EndeavourOS
After a successful installation, you can now start using tmux. Lets get started with the cheat sheet on how to use tmux.
| Session Command | Function |
| tmux | Start a new session |
| tmux new -s <name> | Start a new <named> session |
| tmux ls | List sessions |
| tmux a tmux at tmux attach tmux attach-session | Attach to the most recently used/last session |
| tmux a -t <name> tmux attach -t <name> | Attach to a <named> session |
| tmux kill-session -t <name> | Kill a named session |
| tmux kill-session -a | Kill/delete all sessions but the current one |
| tmux kill-session -a -t <name> | Kill/delete all sessions but <named> session |
| Windows/Pane Commands | Functions |
| tmux new -s mysession -n mywindow | Start a new session with the name mysession and window mywindow |
| Ctrl+b ( | Move to previous session |
| Ctrl+b ) | Move to next session |
| Ctrl+b & | Close current window |
| Ctrl+b p | Previous window |
| Ctrl+b n | Next window |
| swap-window -t -1 | Move current window to the left by one position |
Tmux also has several keybindings used to manage all sessions and windows. I’m going to give you the essential bindings that you should know.
Key bindings
| Key binding | Function |
| Ctrl+b ? | List all the key bindings |
| Ctrl-b d | Detach from the current session |
| Ctrl+b % | Add a new pane to the right/ split vertically |
| Ctrl+b “ | Add a new pane to the bottom/ split pane horizontally |
| Ctrl+b { | Move the current pane to the left |
| Ctrl+b } | Move the current pane to the right |
| Ctrl+b o | Switch to the next pane |
| Ctrl+b ; | Move between current and previous pane |
| Ctrl+b >/< | Navigate between panes |
| Ctrl+b x | Close the current pane |
| Ctrl+b z | Toggle pane zoom |
| Ctrl-b c | Create a new window |
| Ctrl-b w | Switch between sessions and windows |
Using tmux commands
Tmux functions in the same way in all of the Linux distributions, whichever distribution you are using, the functionality and the commands are one and the same. Here, am going to be demonstrating using Ubuntu.
1. Start tmux
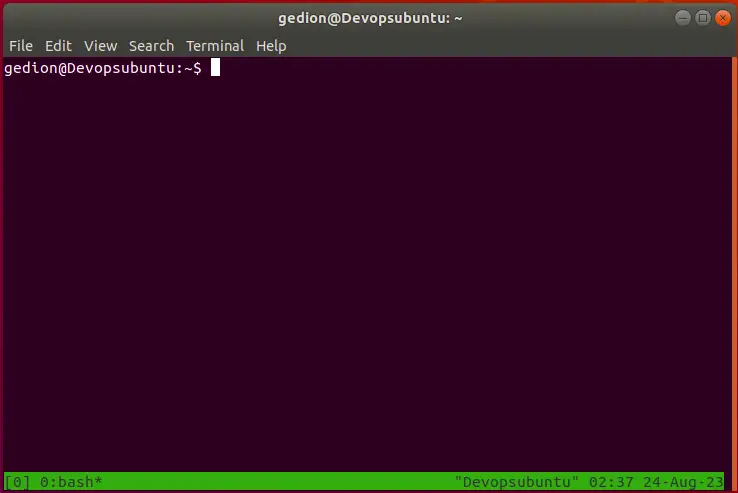
To start using tmux, run the command tmux on your terminal, which launches a tmux server, creates a default session (number 0) with a single window, and attaches to i.
2. Detach from a session
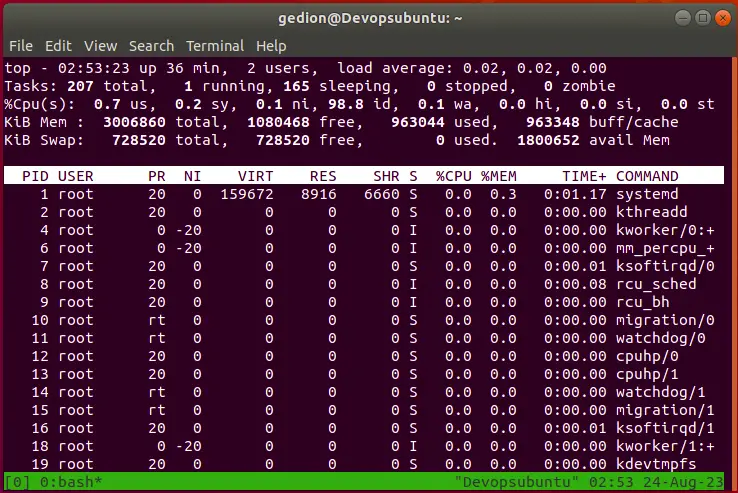
Detach from the session by pressing Ctrl+b followed by d. You can reattach again using the command tmux attach or to be more specific, tmux attach -t <name>
3. Create a new named session
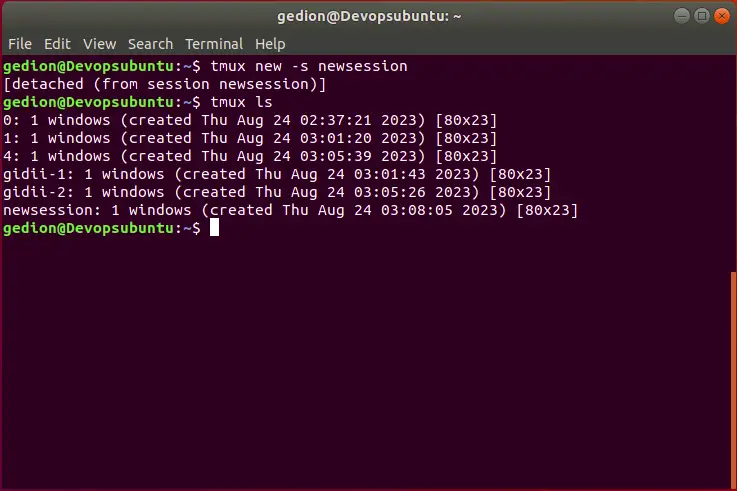
To create a new named session, use the command tmux new -s <named> then check the sessions using the ls command.
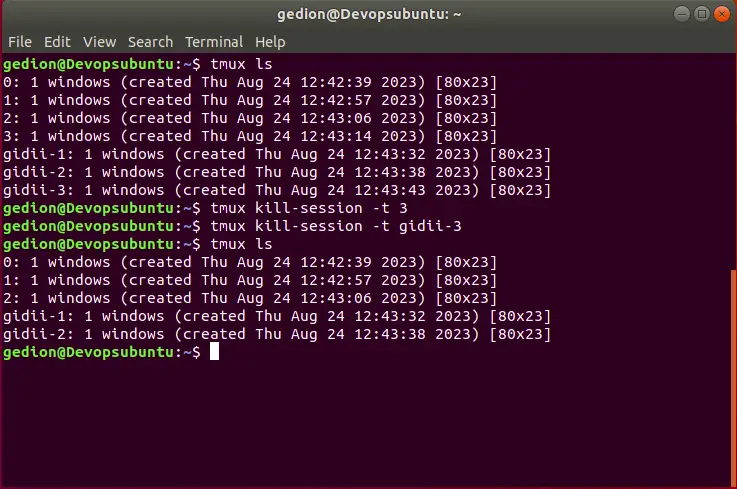
4. Kill a session
To kill a session, use the command tmux kill-session -t <name> . You can specify the session either by name or by the index assigned to it if you didn’t name it.
5. Add new Window Pane
You can also create multiple panes in a tmux session using the Ctrl+b % command:
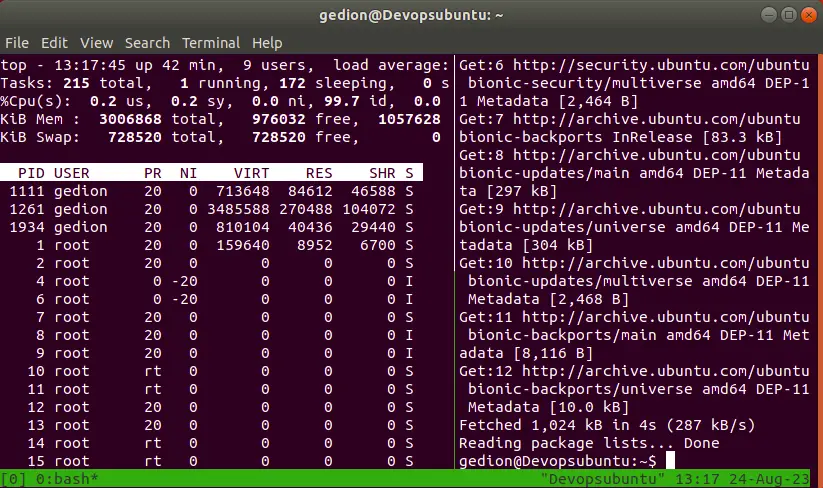
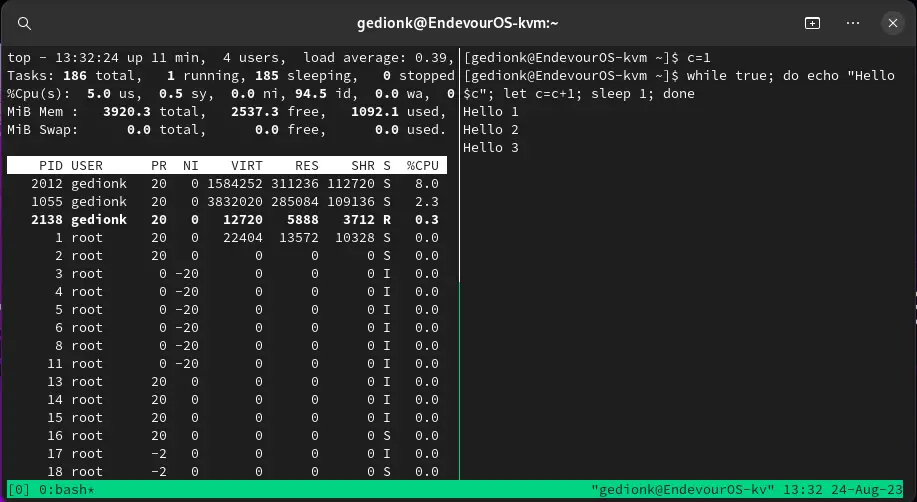
As I mentioned earlier, the operations of tmux are all the same in each of the Linux distributions, for instance, let’s take a look at tmux in EndeavourOS, Arch Linux:
6. List sessions
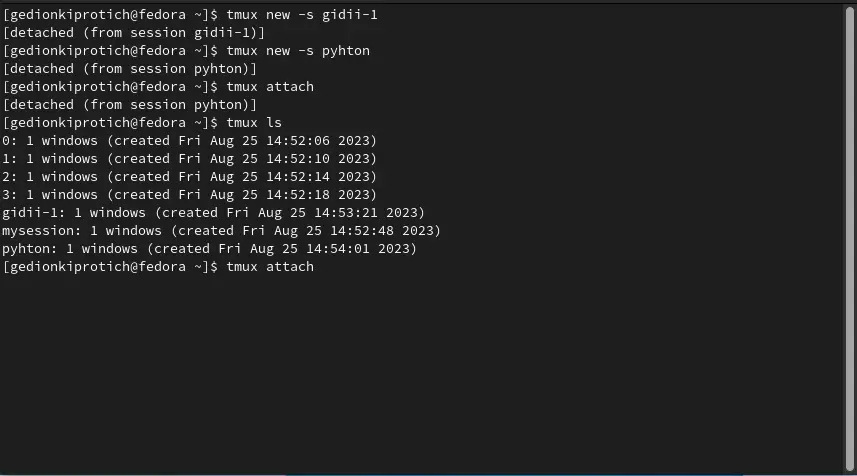
When you want to look at all the sessions that are currently running, you can do so by running the command tmux ls
7. Attach to last session
When you detach from a session, tmux allows you to attach to it by running the command tmux a, tmux at, tmux attach, or tmux attach-session. Whichever command you prefer, they all do the same thing.
When I run the command, it attaches to the last session I was, which was “python” as you can see from the previous image:
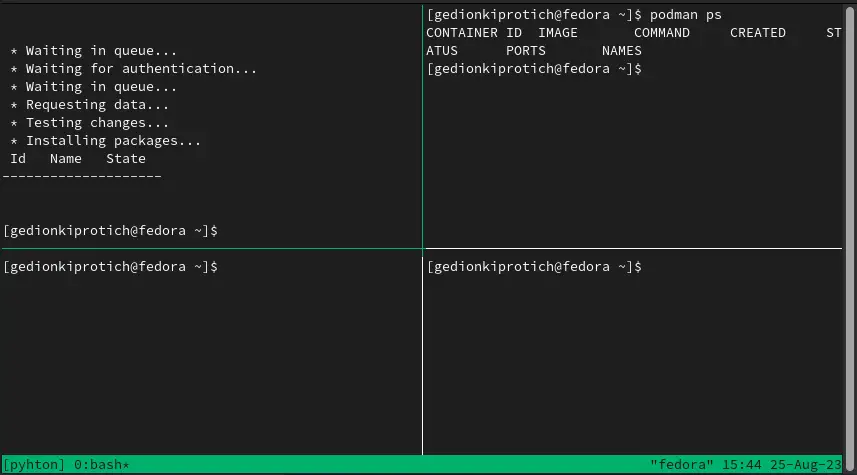
When dealing with sessions, you can also move to the next and previous sessions using the commands Ctrl+b ( and Ctrl+b ). Let’s attach to a session named ‘mysession‘ and move from there. The name of the session is shown in the bar at the bottom of the window.
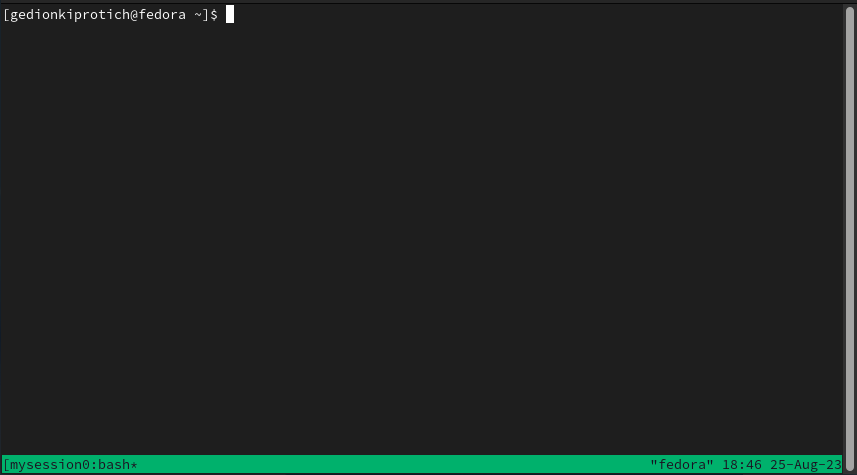
From here you can move either to the next or the previous session, let’s move to the previous session named ‘gidii-1‘:
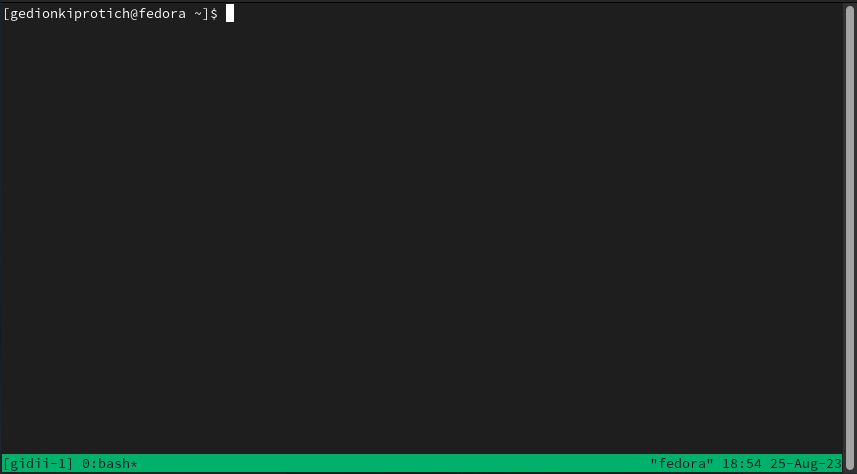
From there you can move either to the previous one or next one.
8. Splitting panes horizontally and vertically
A pane can also be split horizontally by pressing Ctrl+b followed by %. Take a look at the terminal below:
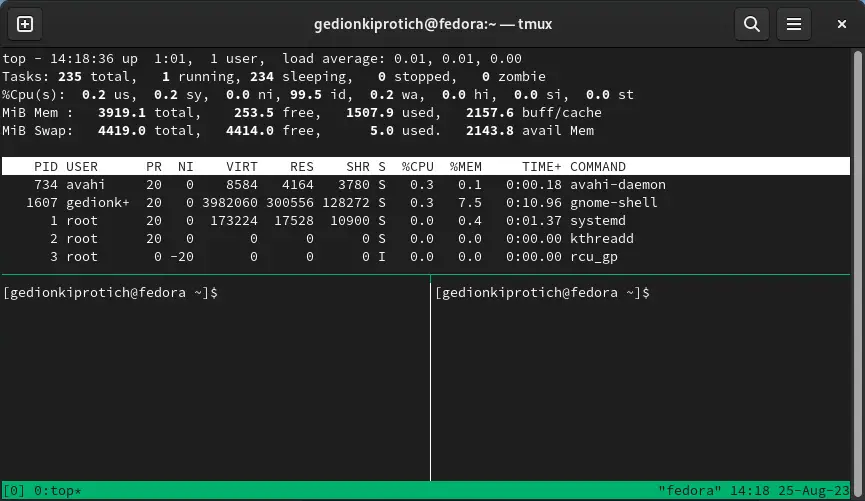
You can also split the pane vertically by pressing Ctrl+b followed by “.
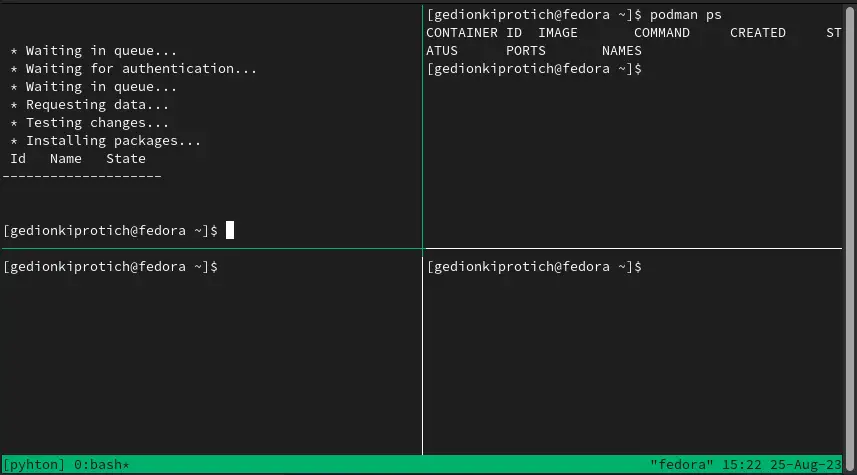
Tmux also allows you to move your panes either to your right or left. You can do so using the following key commands: to move to the right, press Ctrl+b } and to move to the left, press Ctrl+b {
Lets try to move the panes in the terminal below and switch them up a bit.
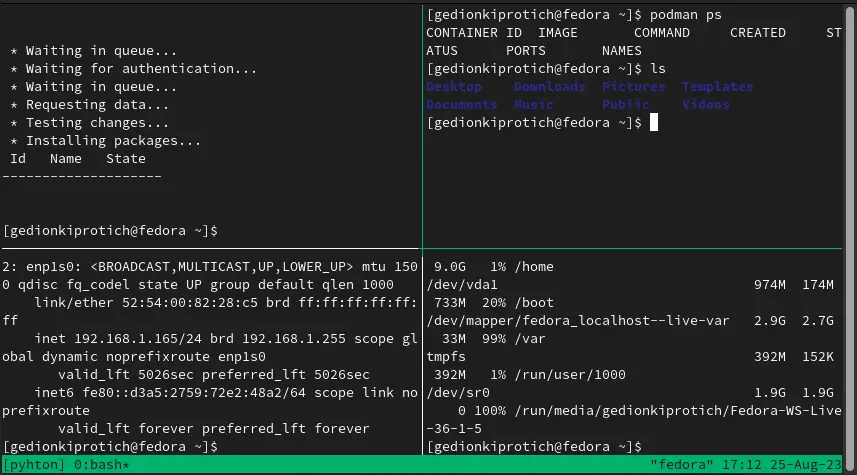
Let’s start by switching the top panes, we can do that by either moving the right pane to the left or the left pane to the right. So, let’s move the right pane to the left.
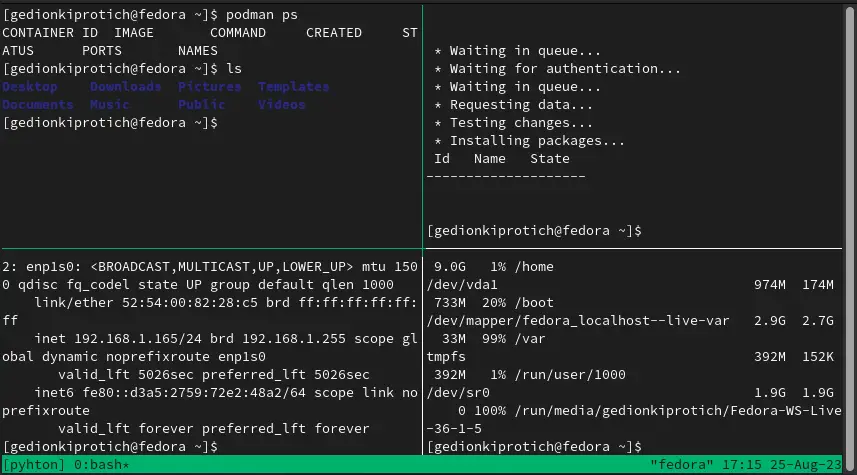
We can switch up the bottom panes by moving the left pane to the right:
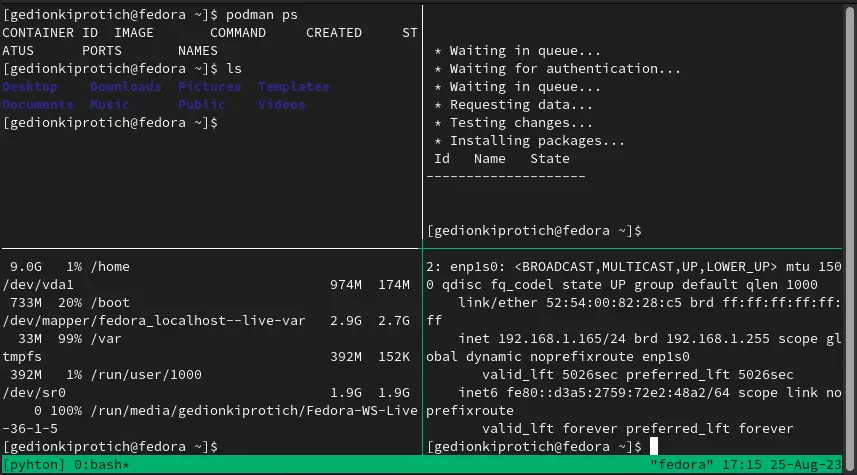
So there you have it, the panes have been completely switched and the window look different when you look at it.
9. Enter command mode
Now, command mode in tmux is similar to the command mode in vi or Emacs. It allows users to enter commands to manipulate tmux sessions, windows, and panes. To enter command mode in tmux, press Ctrl+b key followed by a colon (:). This will open a command prompt at the bottom of the screen where users can type commands. Let’s take a look:
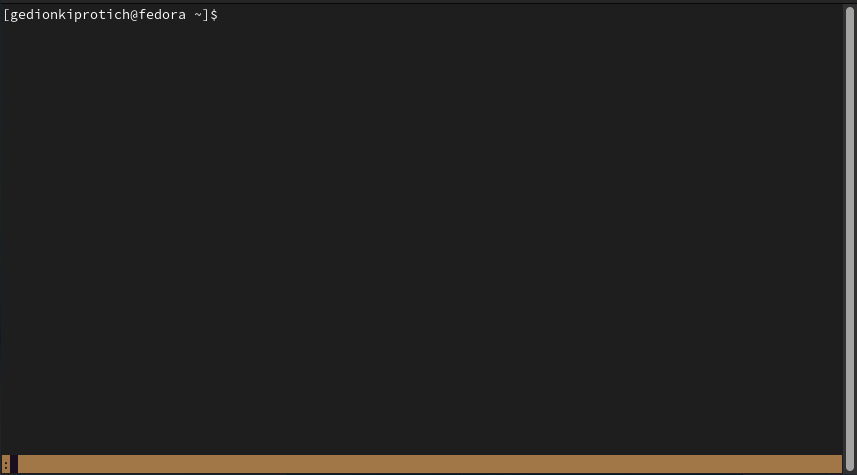
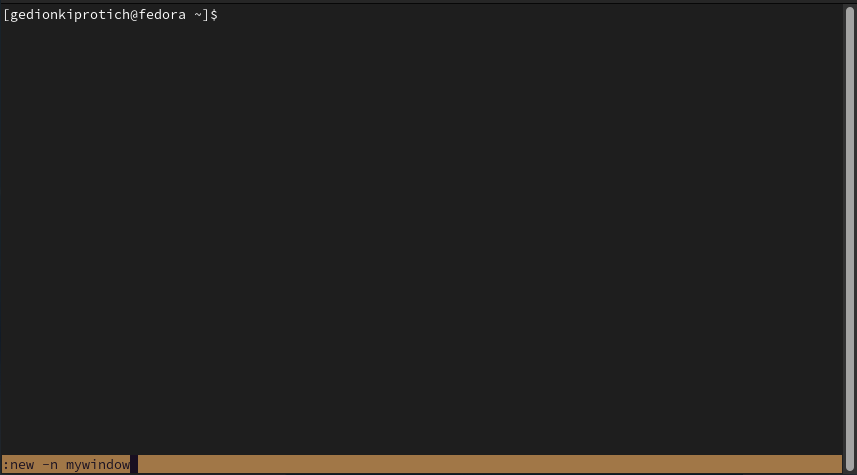
Some common tmux commands include creating new windows or panes, resizing panes, and detaching or attaching sessions. Let’s create some new windows while in command mode. Typically, to create a new window, we’d use the command tmux new -n mywindow but since we are in command mode, we will leave out the tmux part of the command an just run the new -n mywindow part.
When you type in the command, you can see it in the command prompt at the bottom of the screen after the colon (:):
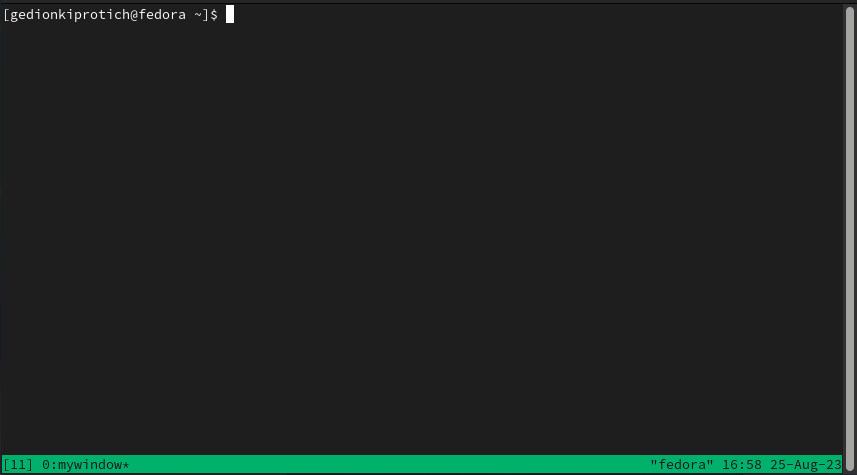
When you run the command, it creates a new window named mywindow:
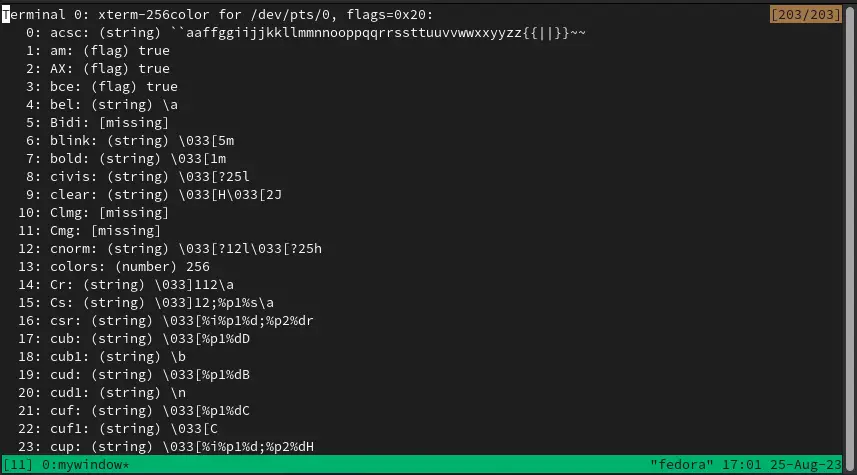
Even in the current window, you can switch to command mode and run any command. Let’s try the tmux info command and have a look:
10. Synchronize Panes
The term synchronize panes is a giveaway and I am very sure that you already have an idea of what it means. It means to have all your panes in sync, taking the same input and running the same commands, let me show you what I mean by that:
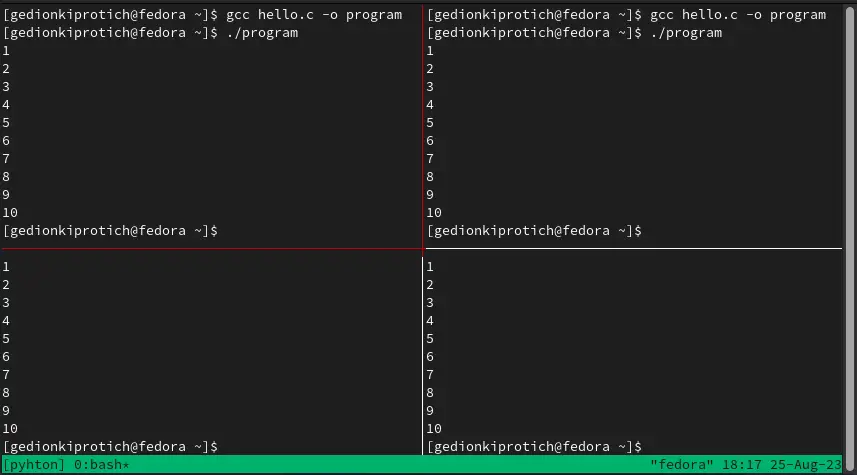
Here, I have four panes which can each pretty much do different tasks at the same time, but what if I want them to do the same task. I can achieve this by switching to command mode in the same window and executing the command setw synchronize-panes:
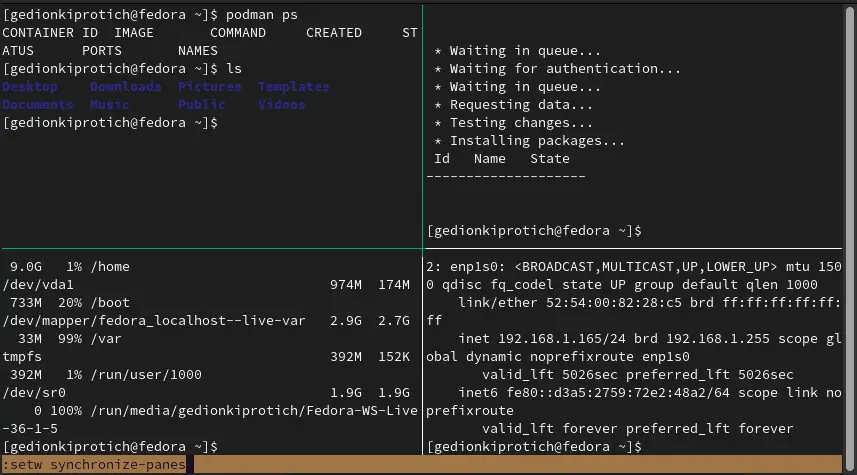
When I run the command, it’s like it gives super-user privileges to the pane I was operating from, in this case, is the pane on the top-left an the border lines change color to red, to indicate so.
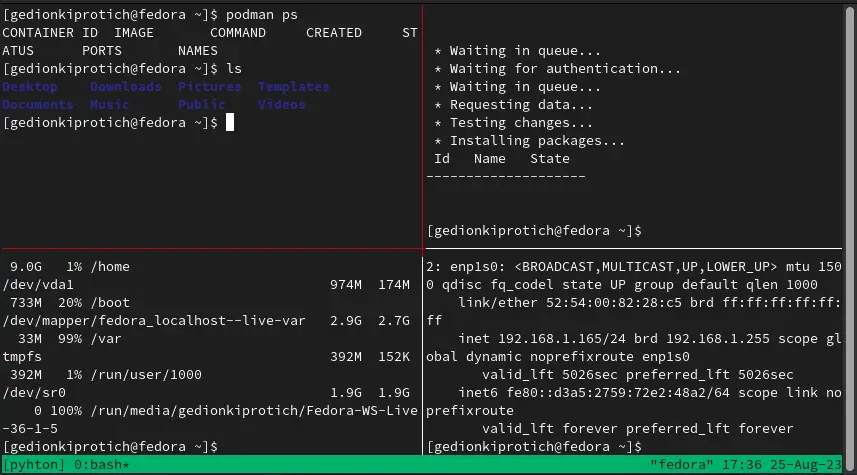
From that “super-user” pane, I can issue commands which run across all the panes in this window. Let’s try out some commands:
- When I execute the command
clear, it clears the output from all the panes:
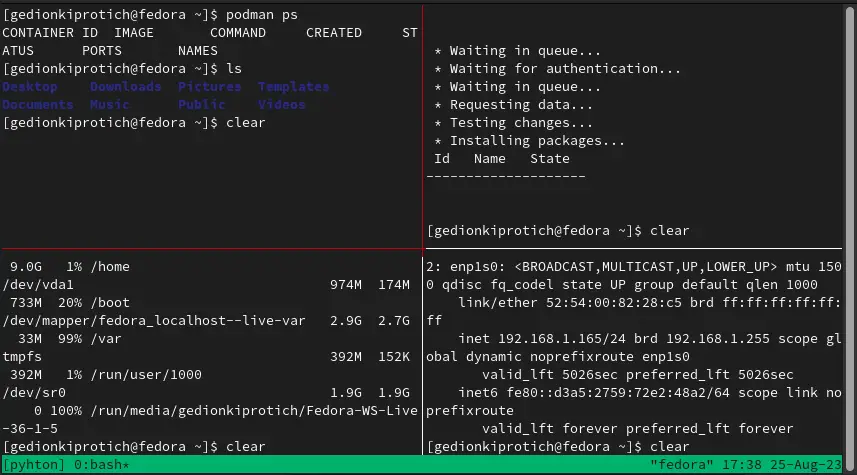
All the panes are cleared when the command executes:
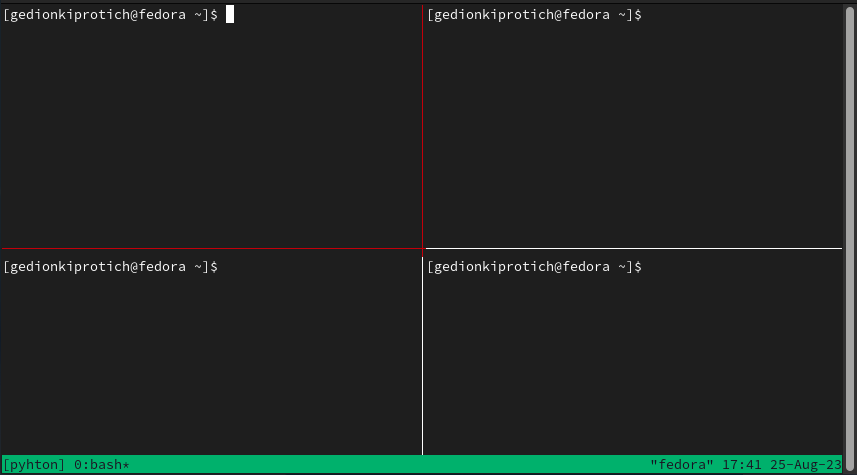
You can go ahead and run any command you want and see the behavior of the panes. For example, you can create a C file using vi and save it, then compile it and run it.
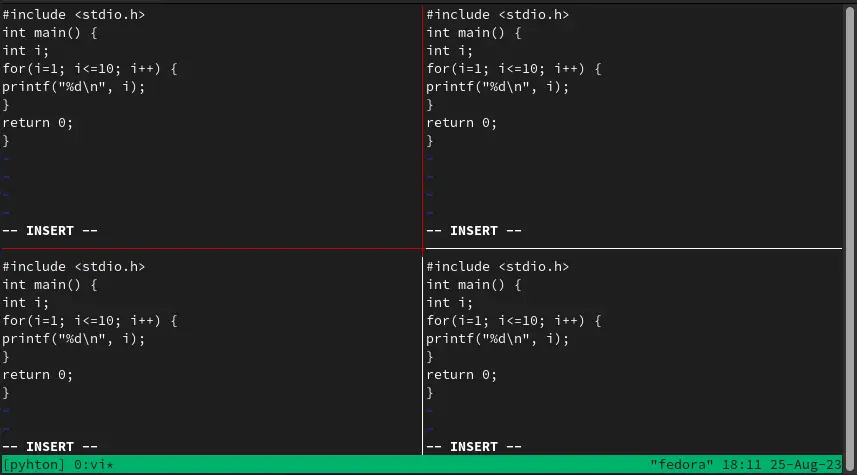
Then you compile and run it:
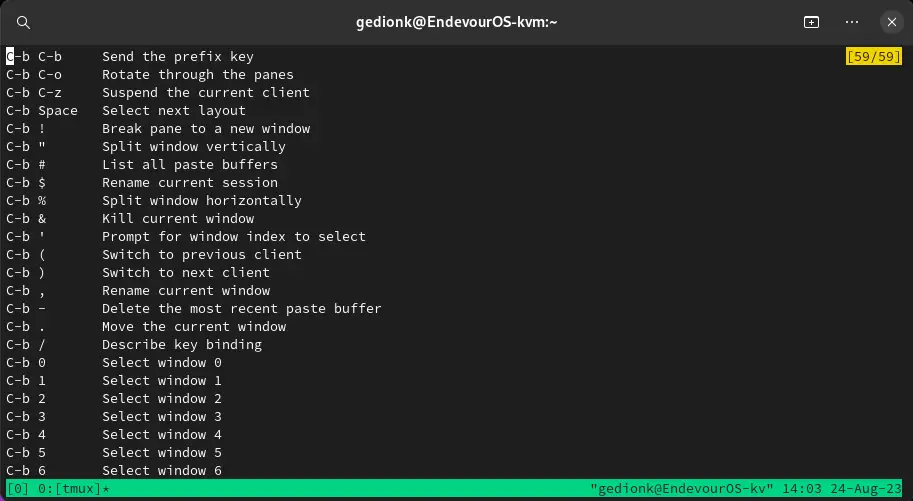
You can go ahead and take a look at all the other keybindings provided by tmux by pressing Ctrl+b followed by ? and scroll down. It provides a long list of key bindings that help you navigate while using tmux.
Wrapping Up
This tmux cheat sheet guide provides a comprehensive reference to help users navigate the world of terminal multiplexing with ease. From mastering essential commands for session creation and management to effectively dividing and organizing terminal panes. With a clear overview of key shortcuts, window navigation, and practical tips for detaching and reattaching sessions, you are going to exploit full potential of tmux.

