

Virtualization is the technology that allows you to create a simulated computing environment instead of a real physical environment. The hardware elements of a computer including processors, memory, and storage are divided into several virtual machines. Virtualization includes the host machine which is the physical underlying machine with the resources to be shared, virtual machines which are the units of resources that have been abstracted from the host, and hypervisors that create and run the virtual machines.
Virtualization improves scalability as each of these virtual machines runs independently and shares resources. There are 2 types of hypervisors;
- Type 1 hypervisor – run directly on the system hardware. They are also known as bare metal. They include VMware ESX ESXi and Oracle VM.
- Type 2 hypervisor – runs as normal programs on a host operating system and provides virtualization services. They include VirtualBox, VMware Workstation, and KVM.
Vagrant
Vagrant is open-source software that is used to create and manage virtual software development environments across multiple operating systems. Vagrant works with virtualization products like VirtualBox, KVM, Hyper-V, Docker containers, VMware, and AWS. This virtualization software comes with utilities like the command line tools that Vagrant provides but what makes Vagrant unique is that it builds on top of these utilities and still provides a consistent workflow.
Vagrant aims to mirror production environments by providing the same operating system, users, packages, and configurations which gives users the flexibility to use their favourite IDE, editor, and browser on a local system. However, in remote development environments, users are forced to give up their favourite editors and programs.
Vagrant is a simple and powerful tool that provides easy workflow regardless of your role as a developer, operator, or designer and increases development productivity. It has a simple configuration file that describes all your software requirements, packages, operating system configuration, users, and more. Vagrant works on macOS, Linux, and Windows Operating systems.
Some of its unique features include;
- Vagrant supports multiple synced folder types.
- Supports automatic SSH setup.
- Vagrant creates HTTP tunnels into your development environment.
- Provides multiple provisioners to set up the virtual machine.
We are going to see how to use Vagrant With VirtualBox on RHEL 9|CentOS Stream 9. For this, you should have a virtualization product like VirtualBox installed on your system. If not follow through with the guides to perform the installation.
- For VirtualBox installation, refer to the guide:
Install Vagrant on RHEL 9| CentOS Stream 9
First, install the YUM utilities that will be needed for a successful installation:
sudo yum install -y yum-utilsThen add the official repository of Vagrant.
sudo yum-config-manager --add-repo https://rpm.releases.hashicorp.com/RHEL/hashicorp.repoThen install Vagrant with the following command.
sudo yum -y install vagrantYou can confirm installation by checking the version of the Vagrant.
$ vagrant --version
Vagrant 2.4.7
Initialize a Project Directory
After installing Vagrant, we need to create a project directory where we will work on.
mkdir /tmp/vagrant && cd /tmp/vagrantAdding Vagrant Boxes
Vagrant boxes are pre-built virtual machines or images for Vagrant environments. They can be operating system installations or have whole environments installed on them. You can find lots of pre-built boxes online from the Catalog of Vagrant boxes or build one of your own. Boxes can be used by anyone on any platform that Vagrant supports to bring up an identical working environment.
To add a Vagrant Box, use the add option and the vagrant box command with any of the three things;
- Box name like “hashicorp/bionic64”
- The File Path to HTTP URL to a box in the catalog.
- URL directly a box file with the –name flag
An example of adding a box to the Vagrant environment would be as follows. When prompted to choose option 2 fro VirtualBox as the provider.
$ vagrant box add hashicorp/bionic64
==> box: Loading metadata for box 'hashicorp/bionic64'
    box: URL: https://vagrantcloud.com/api/v2/vagrant/hashicorp/bionic64
This box can work with multiple providers! The providers that it
can work with are listed below. Please review the list and choose
the provider you will be working with.

1) hyperv
2) virtualbox
3) vmware_desktop

Enter your choice: 2
==> box: Adding box 'hashicorp/bionic64' (v1.0.282) for provider: virtualbox
    box: Downloading: https://vagrantcloud.com/hashicorp/boxes/bionic64/versions/1.0.282/providers/virtualbox/unknown/vagrant.box
==> box: Successfully added box 'hashicorp/bionic64' (v1.0.282) for 'virtualbox'!
This adds a basic Ubuntu 18.04 64-bit box that is available for minimal use cases in your vagrant environment.
To list the available boxes installed into Vagrant. use the following command.
$ vagrant box list
hashicorp/bionic64 (virtualbox, 1.0.282)
Configure Boxes
After adding a box by either adding or initializing it, we will configure our project to use it as the base image. This is done by using a Vagrantfile.
If you add a box without initializing it, one has to issue the following command to create a Vagrantfile.
$ vagrant init
A `Vagrantfile` has been placed in this directory. You are now
ready to `vagrant up` your first virtual environment! Please read
the comments in the Vagrantfile as well as documentation on
`vagrantup.com` for more information on using Vagrant.
Open the file to edit the image as the base image
vim VagrantfileEdit the contents as shown:
Vagrant.configure("2") do |config|
  config.vm.box = "hashicorp/bionic64"
end
Save and exit the file.
To check for updates available:
$ vagrant box outdated
Checking if box 'hashicorp/bionic64' version '1.0.282' is up to date...
To update a box for the current Vagrant environment:
$ vagrant box update
==> default: Checking for updates to 'hashicorp/bionic64'
    default: Latest installed version: 1.0.282
    default: Version constraints:
    default: Provider: virtualbox
    default: Architecture: :auto
==> default: Box 'hashicorp/bionic64' (v1.0.282) is running the latest version.
To update a specific box use the –box flag.
$ vagrant box update --box hashicorp/bionic64
Checking for updates to 'hashicorp/bionic64'
Latest installed version: 1.0.282
Version constraints: > 1.0.282
Provider: virtualbox
Box 'hashicorp/bionic64' (v1.0.282) is running the latest version.
To remove a box, use the following command.
$ vagrant box remove hashicorp/bionic64
Removing box 'hashicorp/bionic64' (v1.0.282) with provider 'virtualbox'...
Boot the Environment
To start up the virtual environment, run the following command
$ vagrant up
Bringing machine 'default' up with 'virtualbox' provider...
==> default: Importing base box 'hashicorp/bionic64'...
==> default: Matching MAC address for NAT networking...
==> default: Checking if box 'hashicorp/bionic64' version '1.0.282' is up to date...
==> default: Setting the name of the VM: vagrant_default_1753167704755_16000
==> default: Clearing any previously set network interfaces...
==> default: Preparing network interfaces based on configuration...
default: Adapter 1: nat
==> default: Forwarding ports...
default: 22 (guest) => 2222 (host) (adapter 1)
==> default: Booting VM...
==> default: Waiting for machine to boot. This may take a few minutes...
default: SSH address: 127.0.0.1:2222
default: SSH username: vagrant
default: SSH auth method: private key
default: Inserting generated public key within guest...
default: Removing insecure key from the guest if it's present...
default: Key inserted! Disconnecting and reconnecting using new SSH key...
==> default: Machine booted and ready!
==> default: Checking for guest additions in VM...
default: Guest Additions Version: 6.0.10
default: VirtualBox Version: 7.1
==> default: Mounting shared folders...
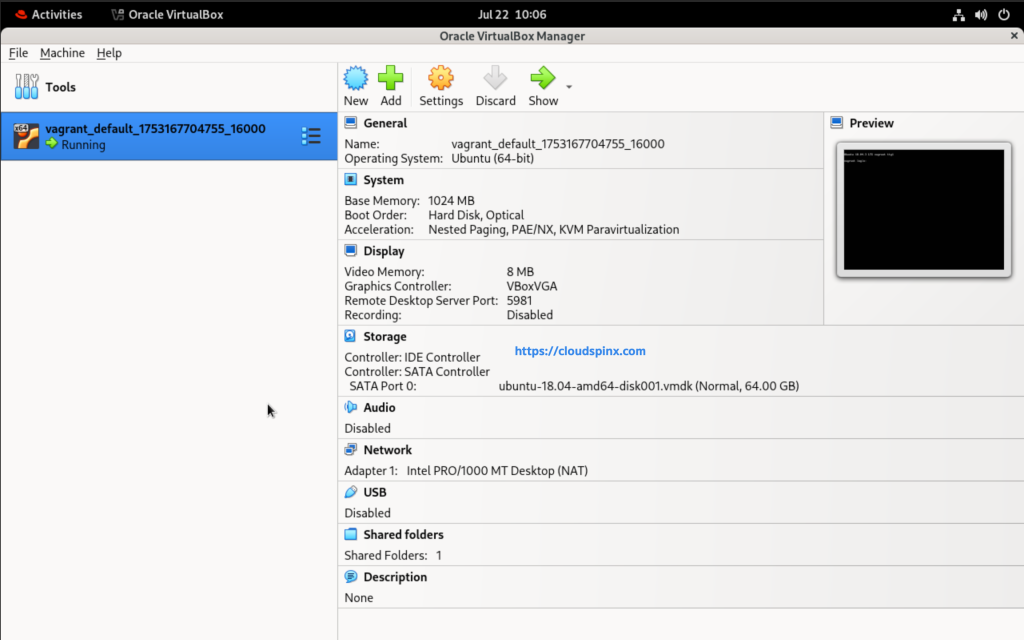
default: /vagrant => /tmp/vagrantFrom the scripts running above, The VM is created and booted with a username and an authentication method. If you check your VirtualBox, You will see the VM running as shown below.
Alternatively, you can check the status of the machine using the following command:
$ vagrant status
Current machine states:

default                   running (virtualbox)

The VM is running. To stop this VM, you can run `vagrant halt` to
shut it down forcefully, or you can run `vagrant suspend` to simply
suspend the virtual machine. In either case, to restart it again,
simply run `vagrant up`.
To confirm the virtual machine is running, SSH into the machine.
$ vagrant ssh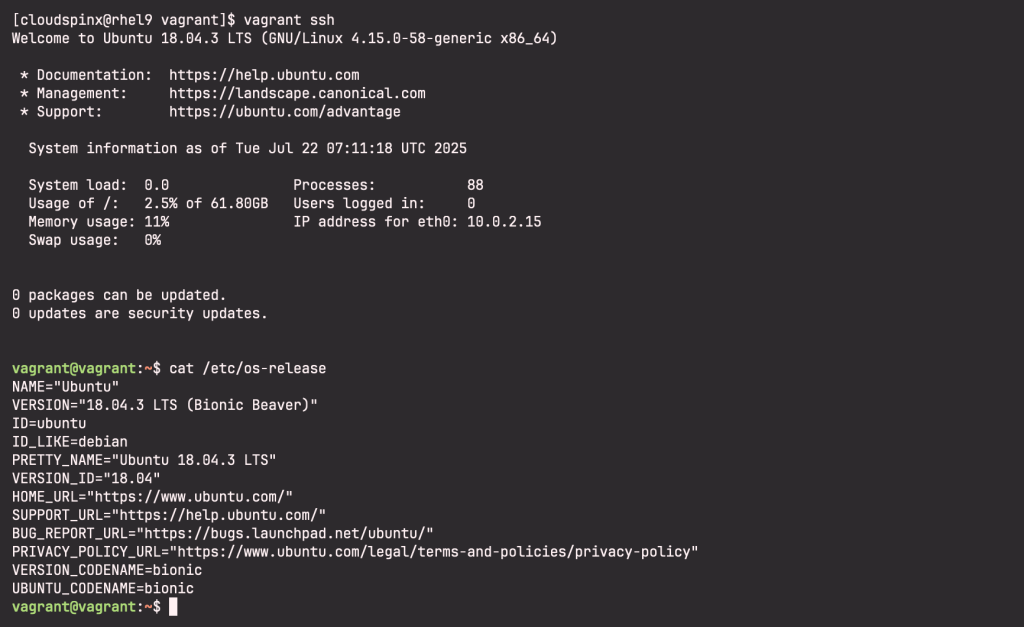
To test the folder sync between the guest and host machine, create a folder in the guests’ vagrant folder:
vagrant@vagrant:~$ touch /vagrant/Folder1Then exit the SSH session.
vagrant@vagrant:~$ exit
logout
Connection to 127.0.0.1 closed.
Back to your host machine, list down the contents in the vagrant folder.
$ ls
Folder1  Vagrantfile
Install Plugins
Plugins for Vagrant are easily installed and automatically loaded in the Vagrant environment. Use the following command to install a plugin:
vagrant plugin install NAMETo list down plugins:
vagrant plugin listTo update all plugins:
vagrant plugin updateTo update a specific plugin, specify the name
vagrant plugin update NAMETo uninstall a plugin:
vagrant plugin uninstall NAMEProvisioning
Provisioning allows you to install software and alter configurations on the virtual machine in the Vagrant environment. One way of provisioning the machine is by the use of simple shell scripts. This is done by editing the Vagrantfile to include scripts.
I will include a simple inline script in the Vagrantfile
$ vim Vagrantfile
config.vm.provision "shell",
    inline: "echo Hello, World"
Save and exit the file. To destroy the Machine.
vagrant destroy -fRebuild the environment again:
$ vagrant up
...
    default: Guest Additions Version: 6.0.10
    default: VirtualBox Version: 7.1
==> default: Mounting shared folders...
    default: /vagrant => /tmp/vagrant
==> default: Running provisioner: shell...
    default: Running: inline script
    default: Hello, World
Stop, Shutdown, Terminate Environment
To stop a virtual machine, use the suspend option to stop and save its current running state.
$ vagrant suspend
==> default: Saving VM state and suspending execution...
To shut down the machine, use the following command
$ vagrant halt
==> default: Attempting graceful shutdown of VM...
To start the machine again after stopping it, run the following command.
$ vagrant up
Bringing machine 'default' up with 'virtualbox' provider...
==> default: Checking if box 'hashicorp/bionic64' version '1.0.282' is up to date...
==> default: Clearing any previously set forwarded ports...
==> default: Clearing any previously set network interfaces...
==> default: Preparing network interfaces based on configuration...
    default: Adapter 1: nat
==> default: Forwarding ports...
    default: 22 (guest) => 2222 (host) (adapter 1)
==> default: Booting VM...
==> default: Waiting for machine to boot. This may take a few minutes...
    default: SSH address: 127.0.0.1:2222
    default: SSH username: vagrant
    default: SSH auth method: private key
==> default: Machine booted and ready!
==> default: Checking for guest additions in VM...
    default: Guest Additions Version: 6.0.10
    default: VirtualBox Version: 7.1
==> default: Mounting shared folders...
    default: /vagrant => /tmp/vagrant
==> default: Machine already provisioned. Run `vagrant provision` or use the `--provision`
==> default: flag to force provisioning. Provisioners marked to run always will still run.
To destroy the virtual machine, use the following command and when prompted confirm with a yes.
$ vagrant destroy
default: Are you sure you want to destroy the 'default' VM? [y/N] y
==> default: Forcing shutdown of VM...
==> default: Destroying VM and associated drives...
Uninstalling Vagrant
To uninstall Vagrant, use the following command:
sudo rm -rf /opt/vagrant
sudo rm -f /usr/bin/vagrant
You would have to remove the user data manually by deleting the directory with the user data.
sudo rm -rf ~/.vagrant.dConclusion
We have seen how to install and use Vagrant With VirtualBox on RHEL |CentOS Stream. Vagrant is a tool that is focused on managing and providing a consistent development environment.
More on Virtualization:


1 thought on “Using Vagrant With VirtualBox on RHEL 9 |CentOS Stream 9”
Pingback: Install ADB and Fastboot Drivers on Linux Mint - CloudSpinx