One of the best things about running Windows 11 in a virtualized environment is that you can try applications and new features, or just have a separate workspace, without interfering with your day-to-day computer. KVM (between Kernel Virtual Machine) is a powerful virtualization software integrated directly into the Linux kernel which acts as a hypervisor, and Virt-Manager is an easy-to-use desktop environment for managing virtual machines. In this guide we are going to work through the steps to create a Windows 11 virtual machine using virt-manager on a KVM host.
Mastering KVM Virtualization - The Ultimate eBook
From home labs to production clouds - master KVM Host management, automating KVM administration using Terraform, Vagrant, and cloud automation. This eBook will enable you to build scalable virtual infrastructure that works whether you're learning at home or deploying enterprise solutions. Get your full copy today
Pre-requisites
With all the prerequisites met, let’s proceed to start configuration of the VM.
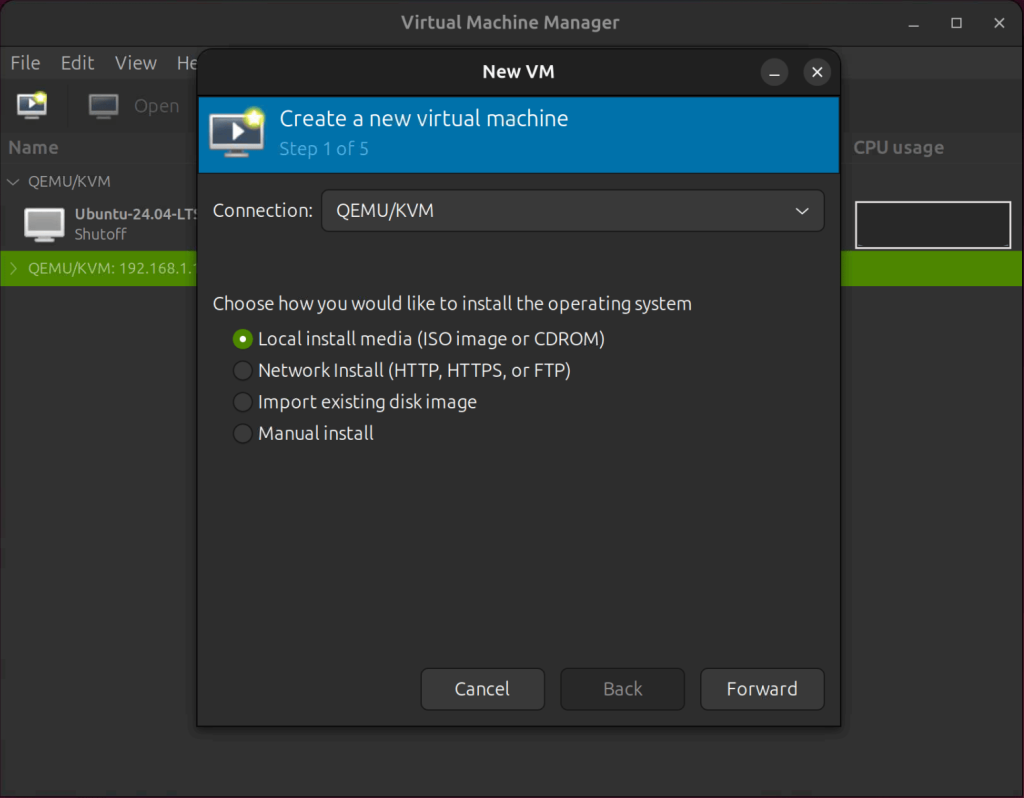
Choose installation type
Since we are installing Windows 11 from an ISO image, we’ll choose the Local Installation option.
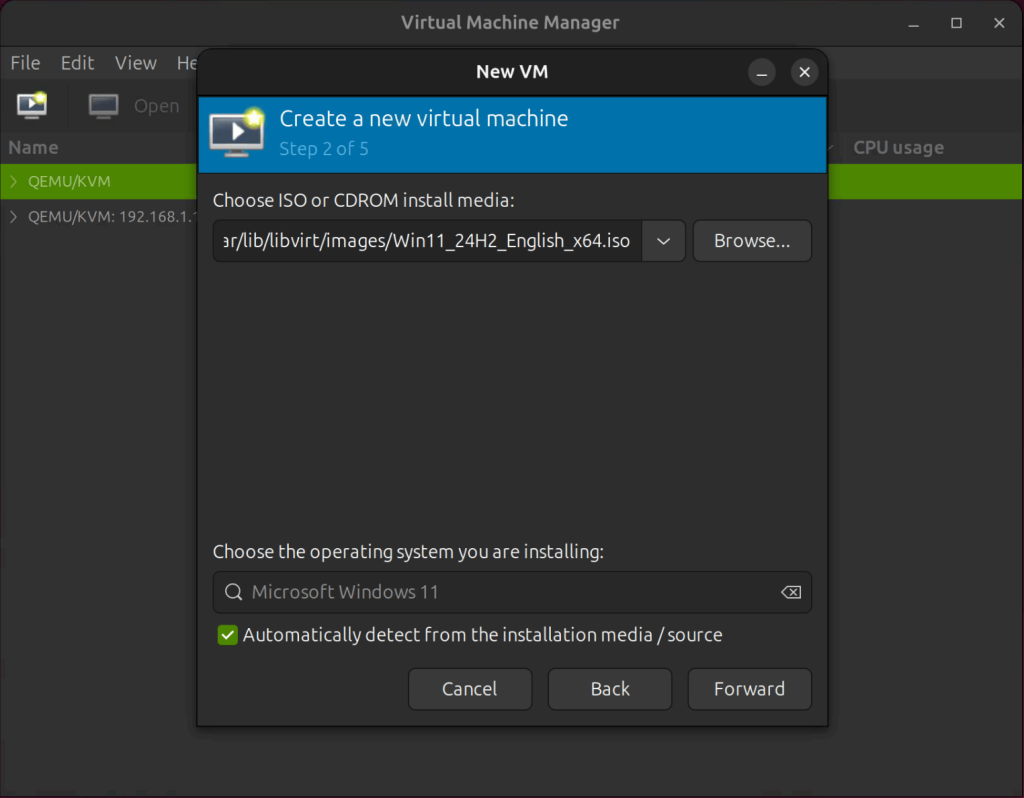
Choose ISO installation media
Browse to the Windows 11 ISO and select it or provide the direct path:
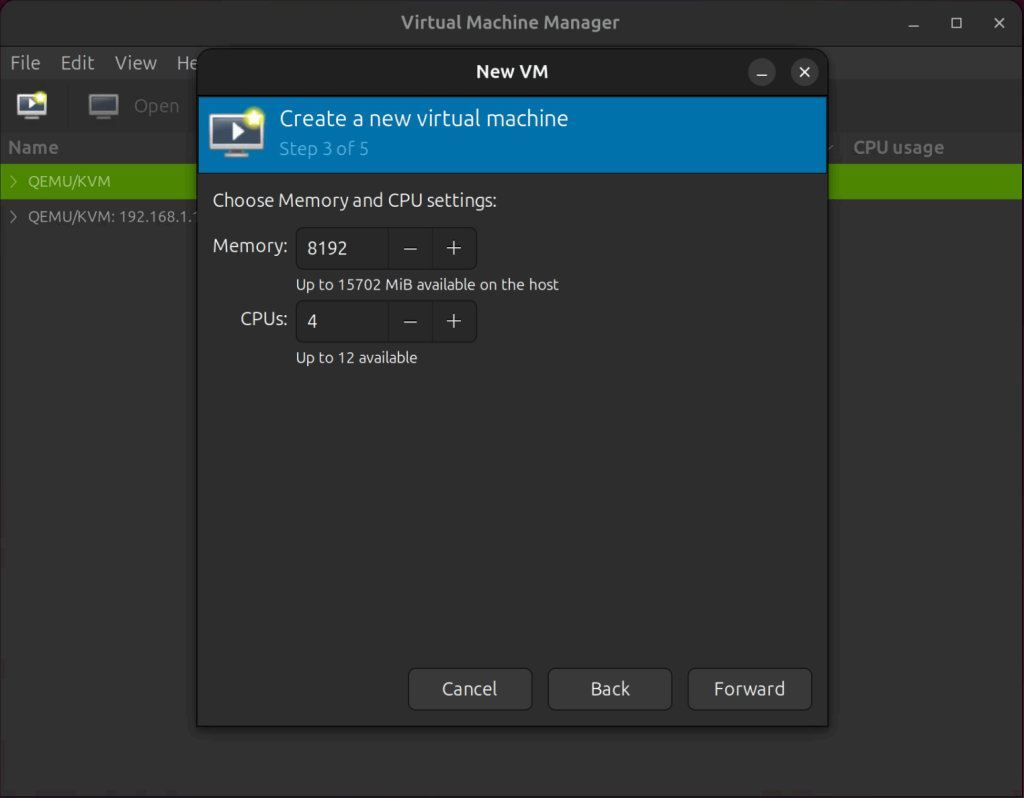
Memory and CPU Settings
Set the amount of host memory and virtual CPUs that will be assigned to the guest virtual machine. I’ll set the guest memory to 8 GiB and the virtual CPUs to 4. You can, however, change this based on your RAM and CPU availability.
Storage Settings
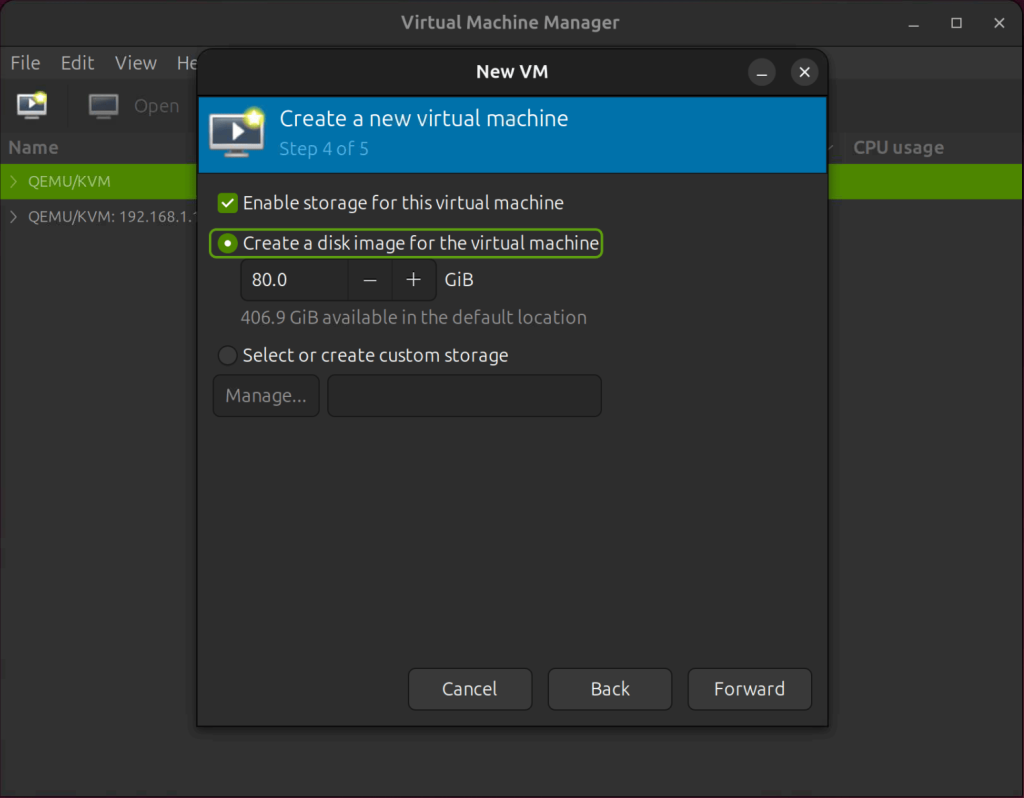
Set the disk image size for the virtual machine. The disk image that is created will be of the type QCOW2, which is a copy-on-write format. Since the minimum disk space required to install Windows 11 is 64GiB, let’s assign 80GiB.
VM Name Settings
This is the final configuration screen of the Virtual Machine Creation Wizard. Give the guest virtual machine a name.
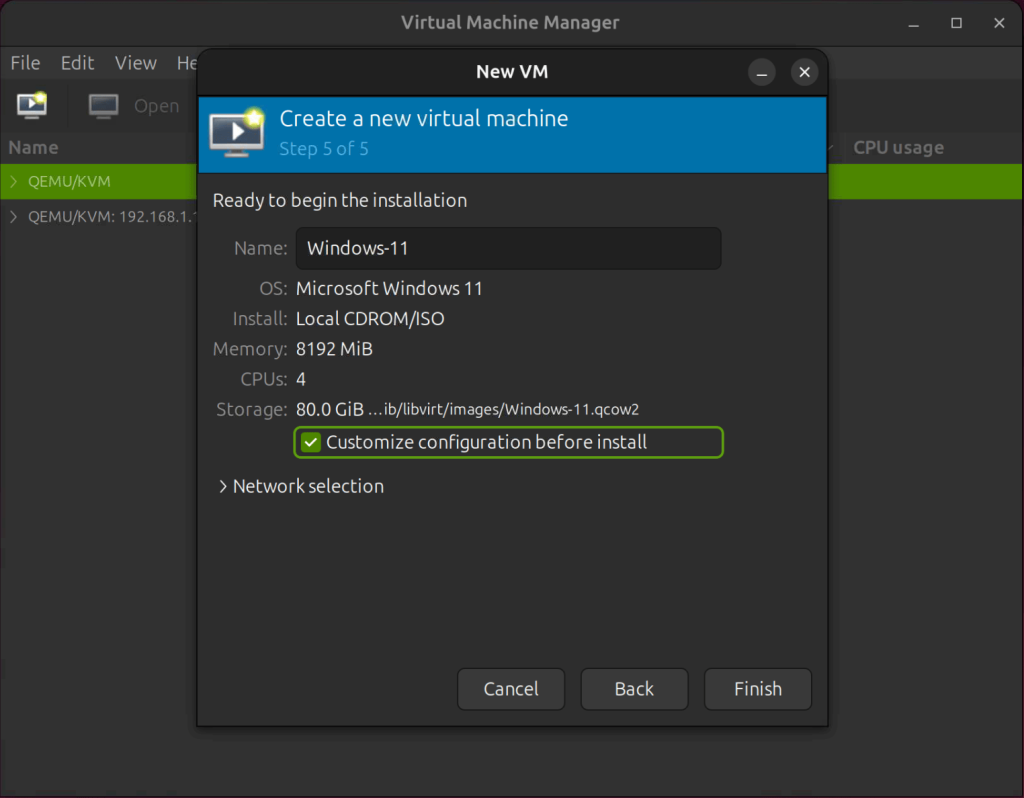
Also, ensure to check the box that says Customize configuration before install. Click the Finish button to finish the wizard and proceed to the advanced options.
Configure Chipset and Firmware
In the Overview section, make sure the chipset is set to Q35 and the firmware is set to UEFI. The Q35 chipset natively supports PCIe and provides improved PCI-E pass-through support.
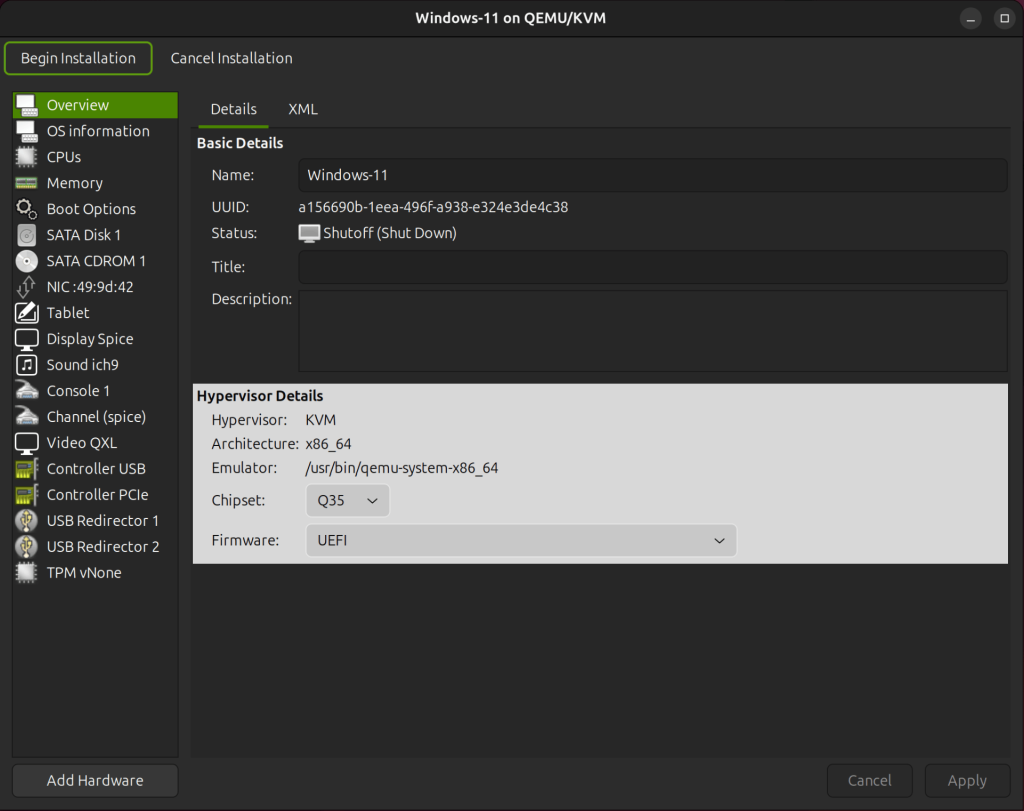
The UEFI firmware option, on the other hand, enables Secure Boot, which is required for Windows 11. When using the UEFI firmware, you can take internal snapshots while the guest is shut down but not while it is running.
Enable CPU Host-Passthrough
Select the CPUs section in the left panel and make sure that host-passthrough is enabled.
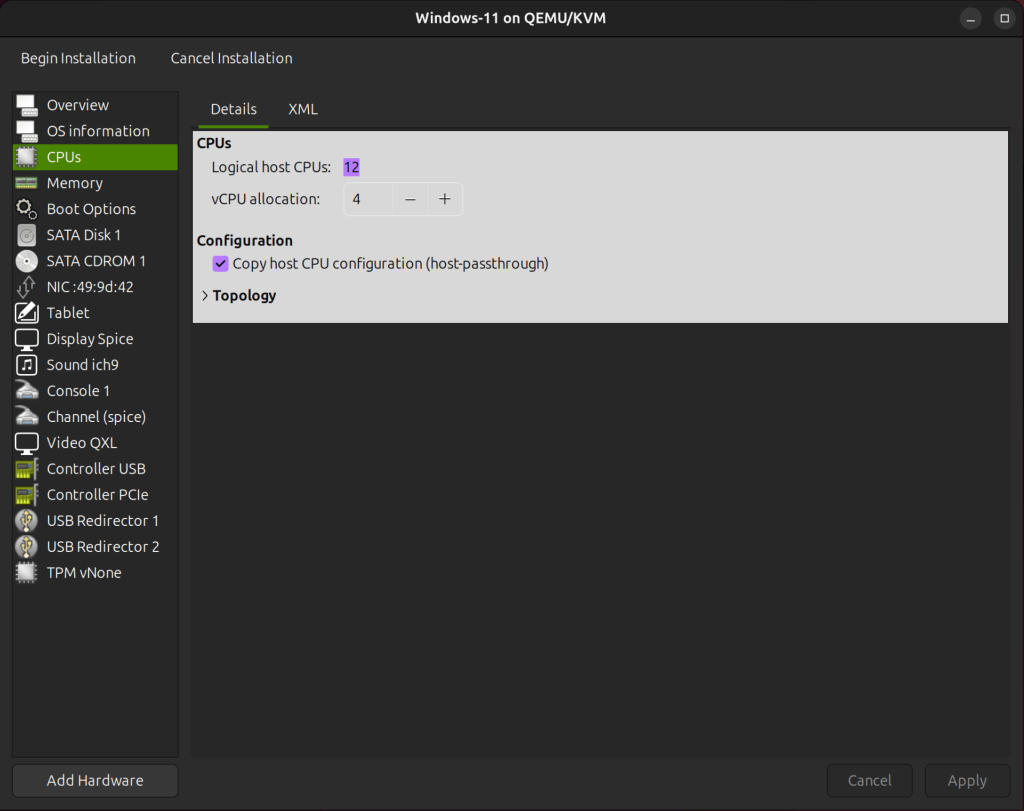
When the mode is set to host-passthrough, the host CPU’s model and features are exactly passed on to the guest virtual machine. This causes the virtual machine to run close to the host’s native speed.
Configure the Storage
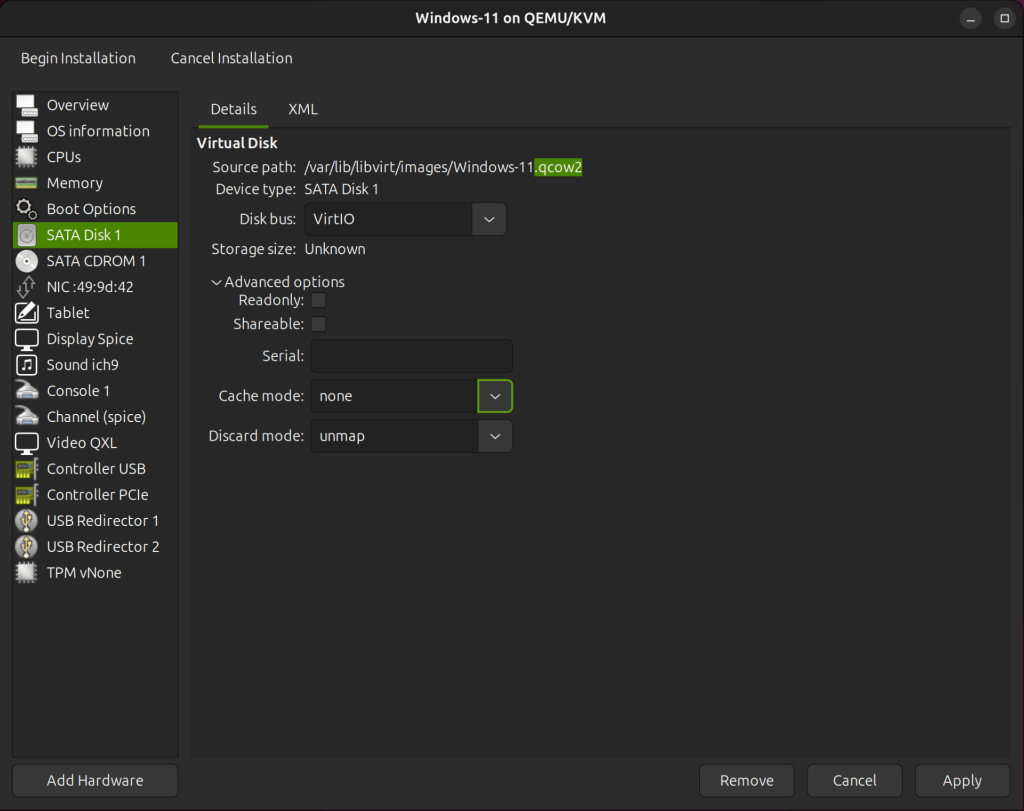
Click on SATA Disk 1 from the left panel. Change the disk bus from SATA to VirtIO. VirtIO is preferred as it is specifically designe for virtualization.
Set the cache mode to none where the host page cache is bypassed, and I/O occurs directly between the hypervisor user space buffers and the storage device. In terms of performance, it is equivalent to direct disk access on your host.
Set the discard mode to unmap. When set to unmap, the qcow2 disk image will automatically shrink to reflect any newly freed space, such as from deleted files.
Mount the VirtIO-Win.ISO Image
VirtIO drivers are para-virtualized drivers for KVM guests. Unfortunately, Microsoft does not provide these drivers out of the box. When installing a Microsoft Windows virtual machine, you must install certain VirtIO drivers.
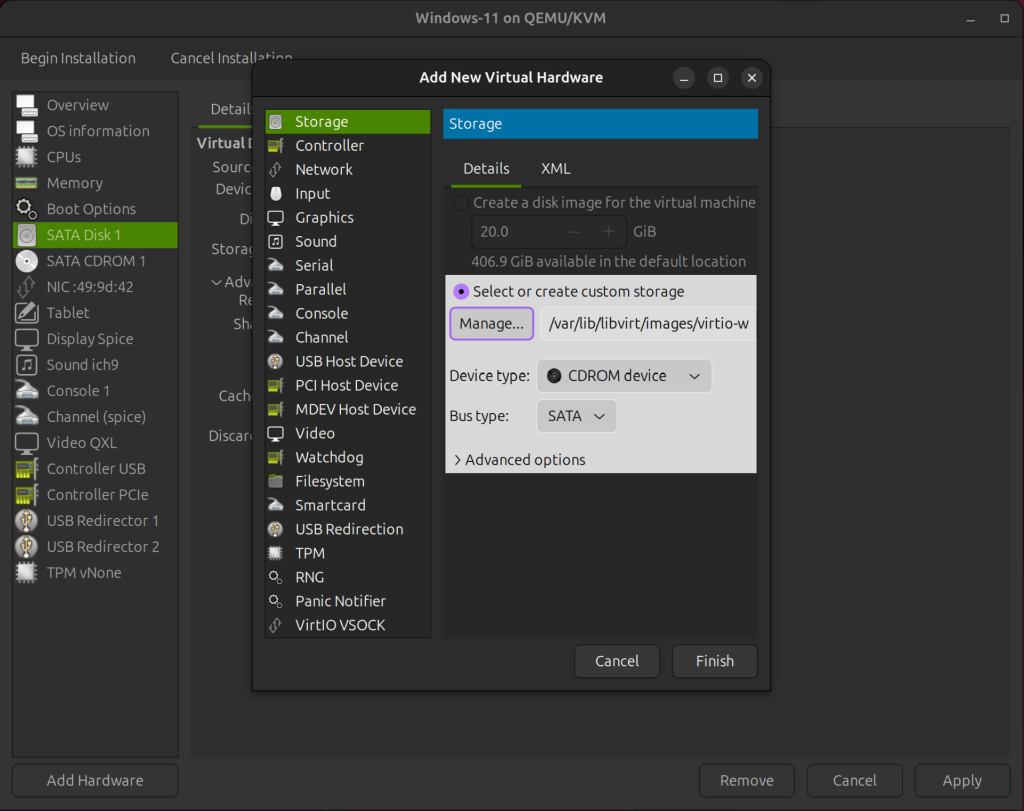
As a result, you must mount the virtio-win.iso image file, which contains the VirtIO drivers for Windows. To mount this VirtIO image file, we must add a second CDROM.
Click the Add Hardware, then select CDROM device as the Device type and mount the virtio-win.iso image file. Click Finish.
Configure Virtual Network Interface
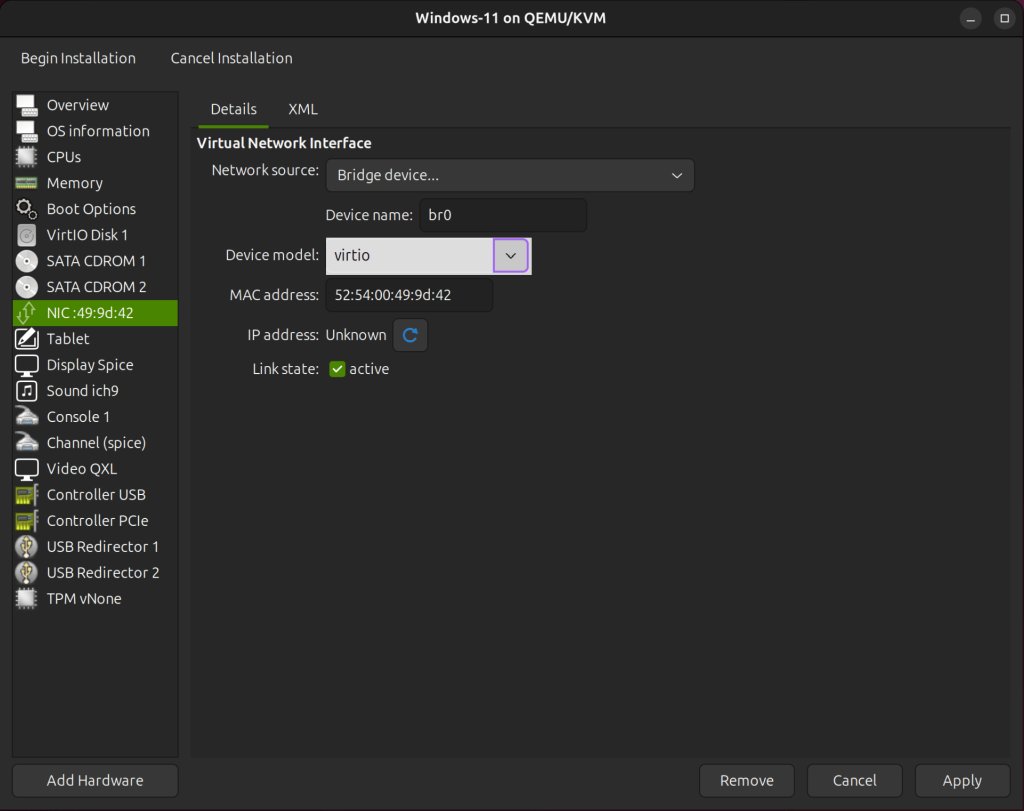
Click on NIC and change the device model to virtio. The network VirtIO driver is specifically designed and optimized for virtualization. As a result, there will be no processing overhead, and the performance of the guest virtual machine will naturally improve.
Configure Trusted Platform Module(TPM)
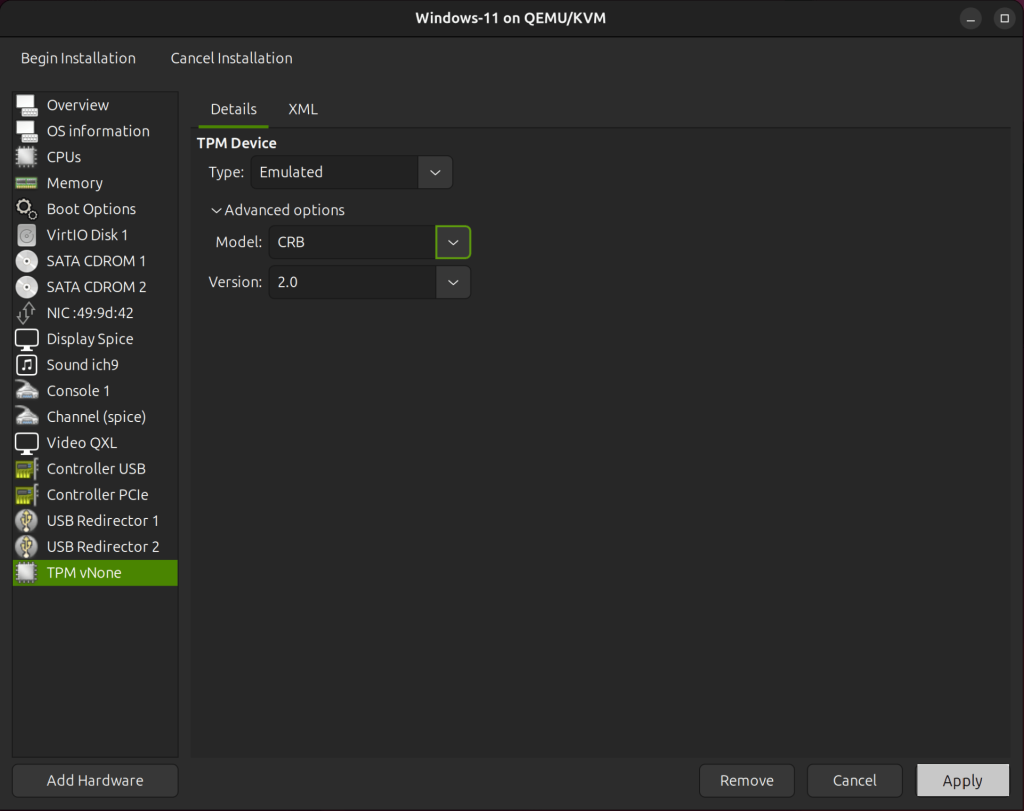
TPM technology is designed to provide hardware-based, security-related functions and Windows 11 requires TPM version 2.0.
- Type: Emulated
- Model: CRB
- Version: 2.0
Now that all the virtual hardware settings have been configured, you can begin the installation. Click on Apply and then Begin Installation.
Install Windows 11 VM with VirtIO Drivers
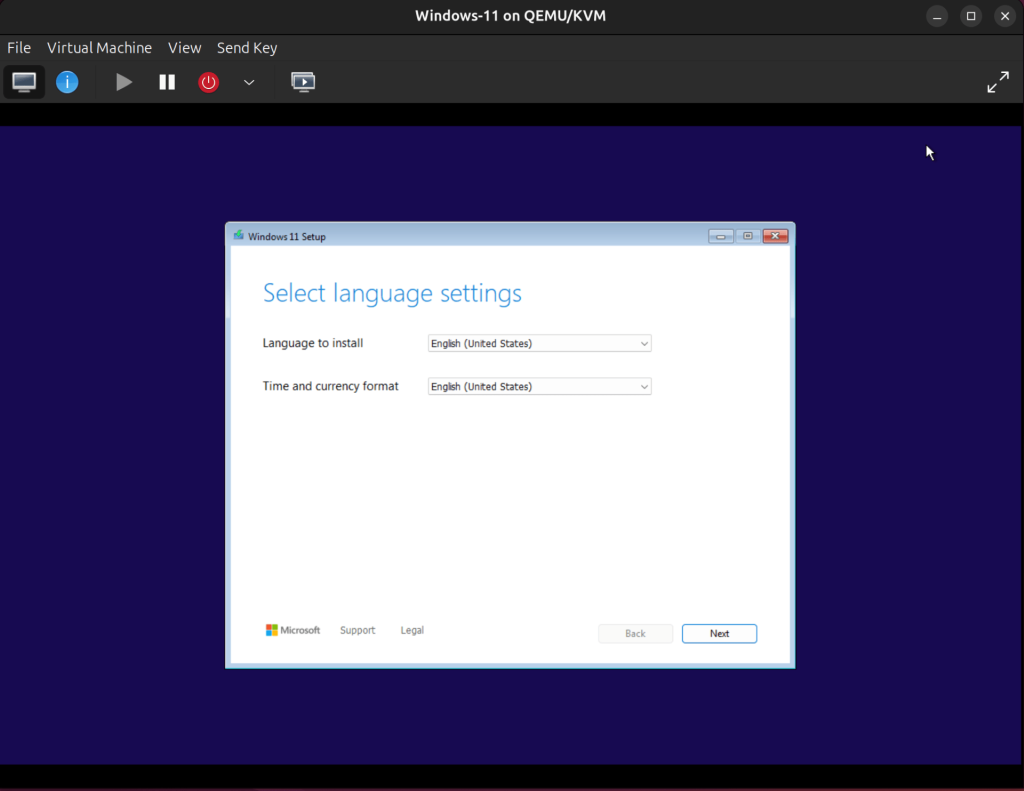
After clicking on begin installation, the Windows Installer begins. On the screen that appears, choose your language, time and currency format, and keyboard from the list of available options. Then click on the Next button.
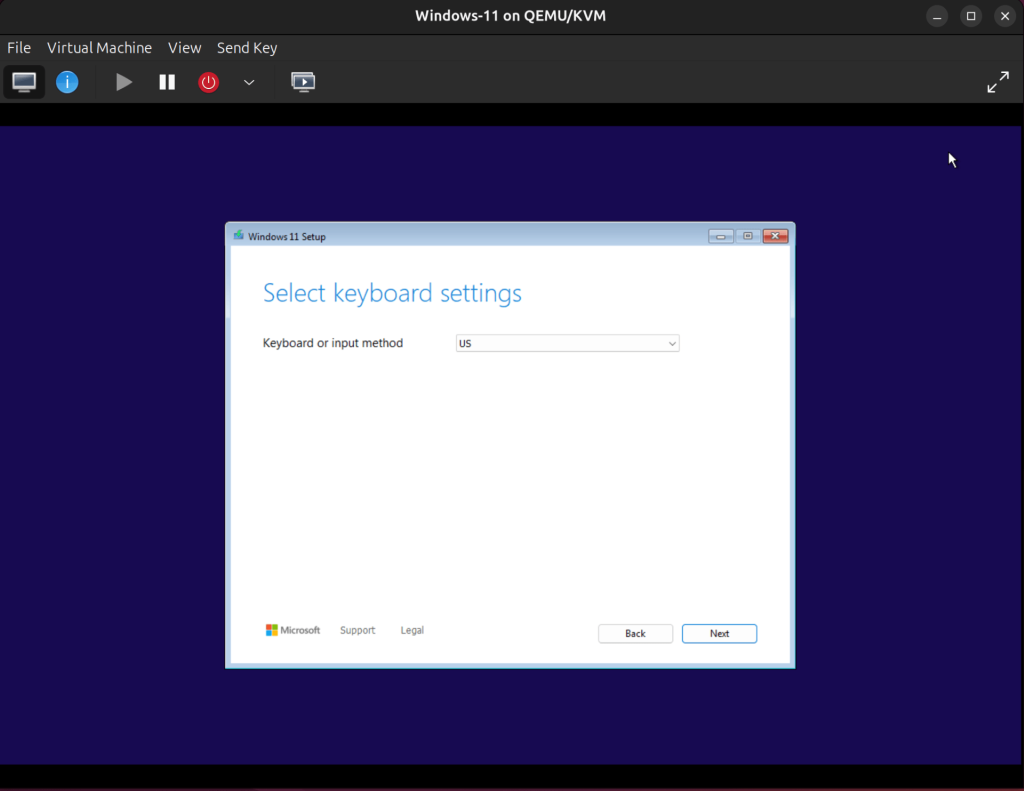
Select your keyboard from the list then click Next.
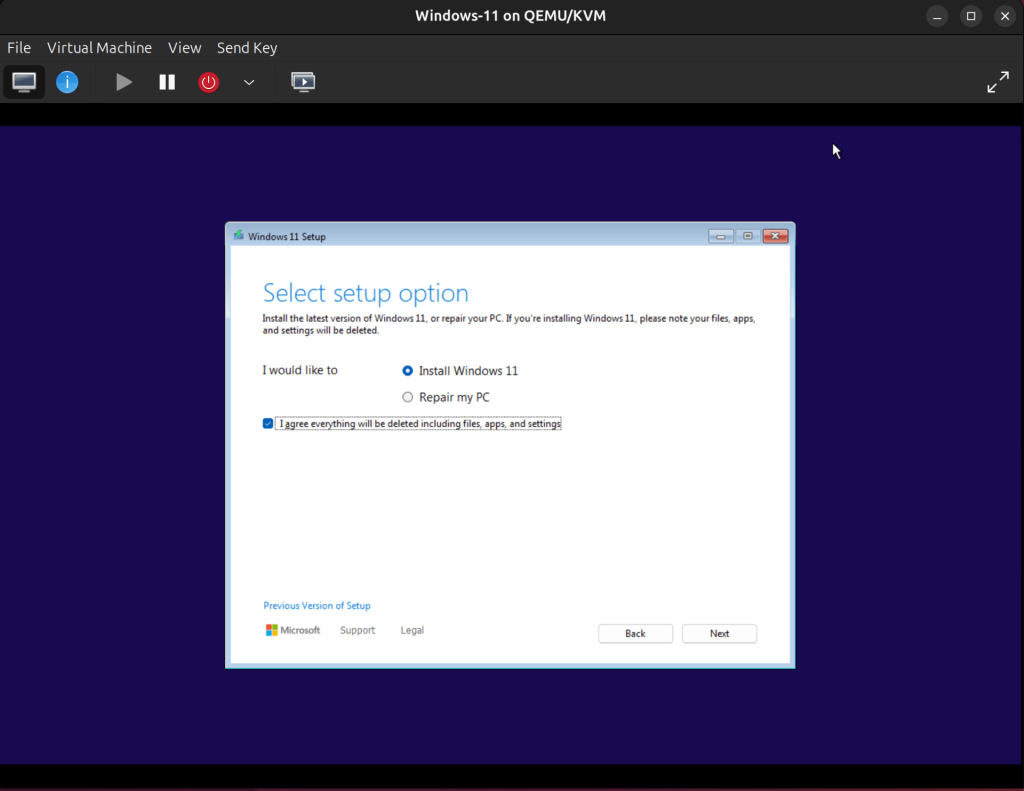
Choose Install Windows 11 on the next screen and agree to the deletion of everything including files, apps, and settings.
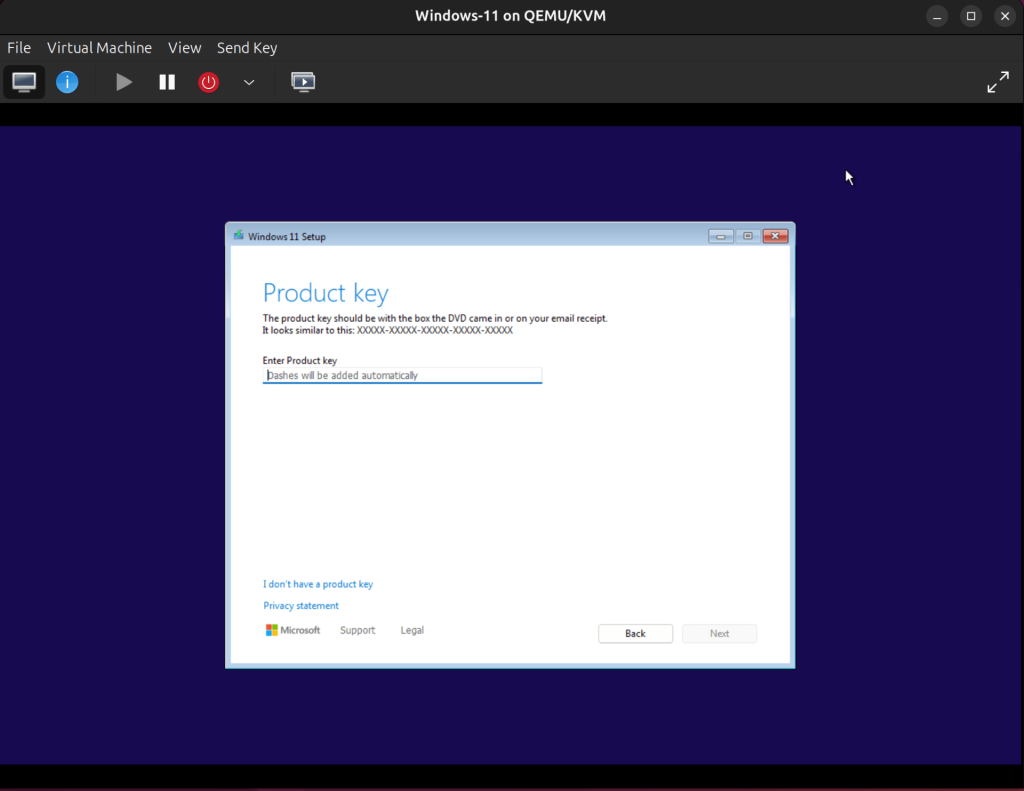
The Windows activation screen will appear. Proivide a product key of you have one, otherwise, click I don’t have a product key.
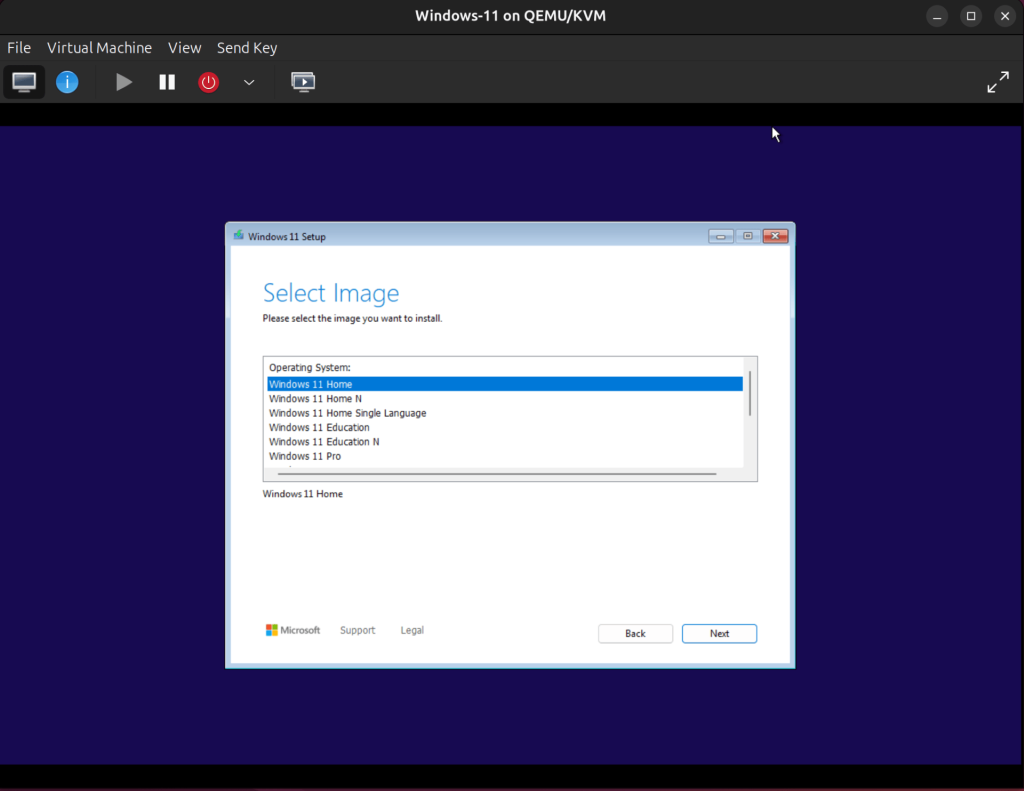
Choose the Windows version you want to install. In our case, we’ll be installing Windows 11 Home.
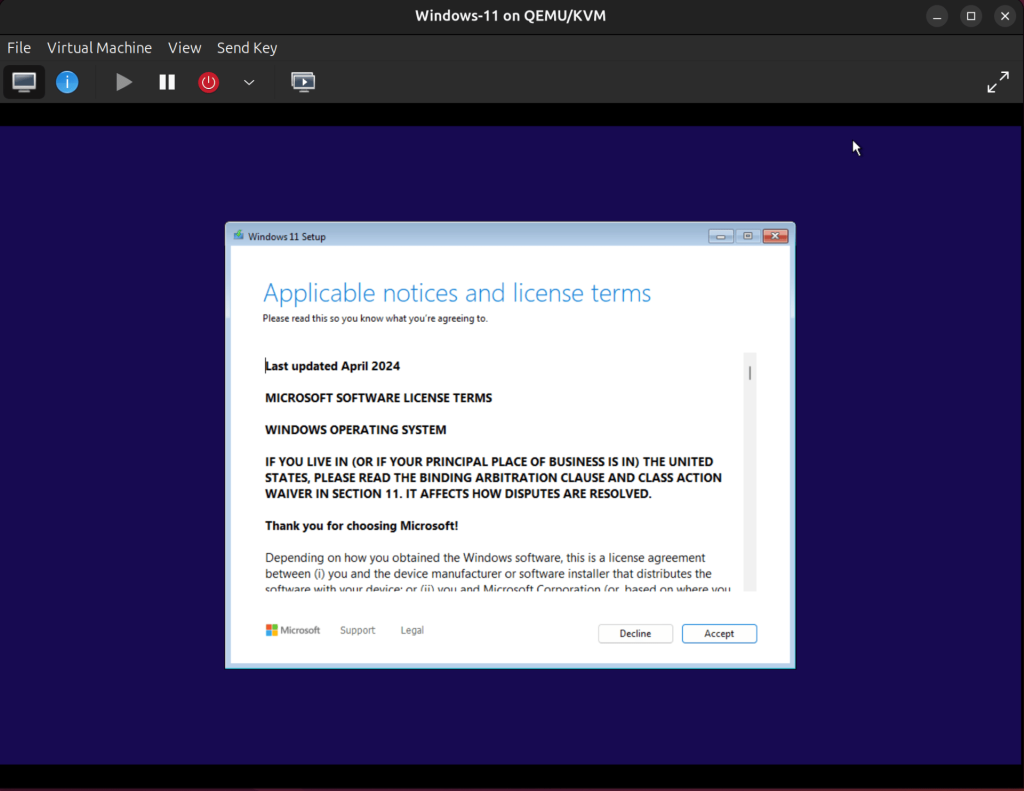
Accept the license terms to proceed.
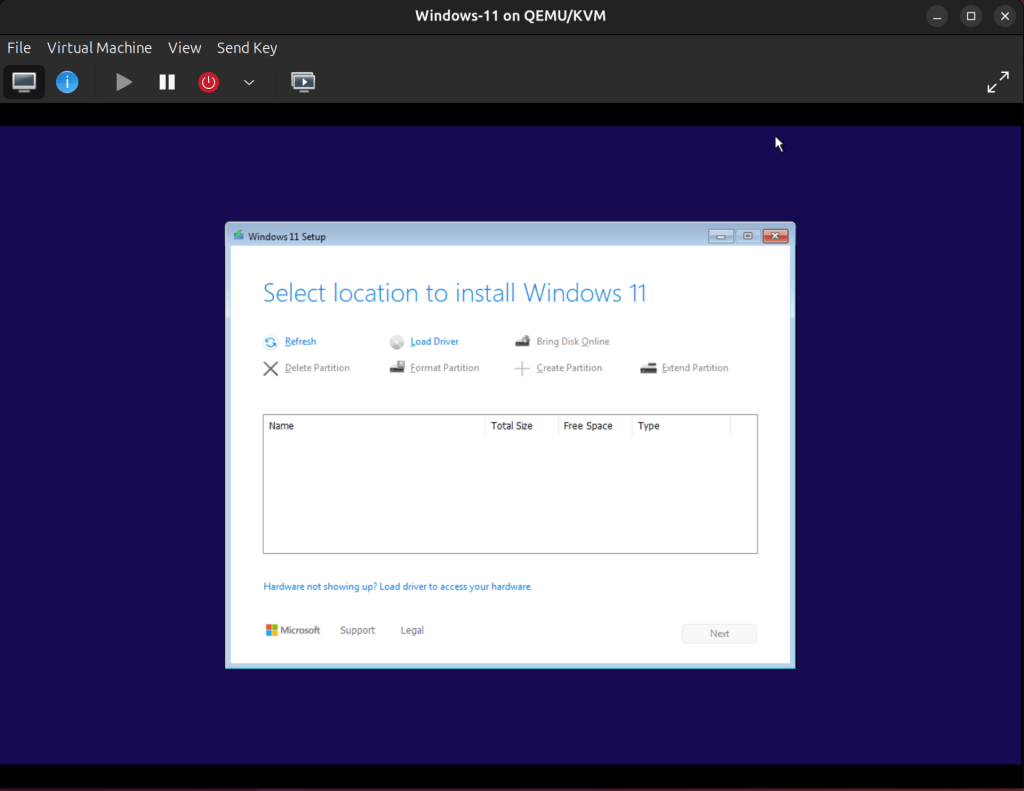
Now select the disk on which Windows 11 will be installed, but since we selected VirtIO disk bus, it is not natively recognized by Windows and the drivers must be installed manually.
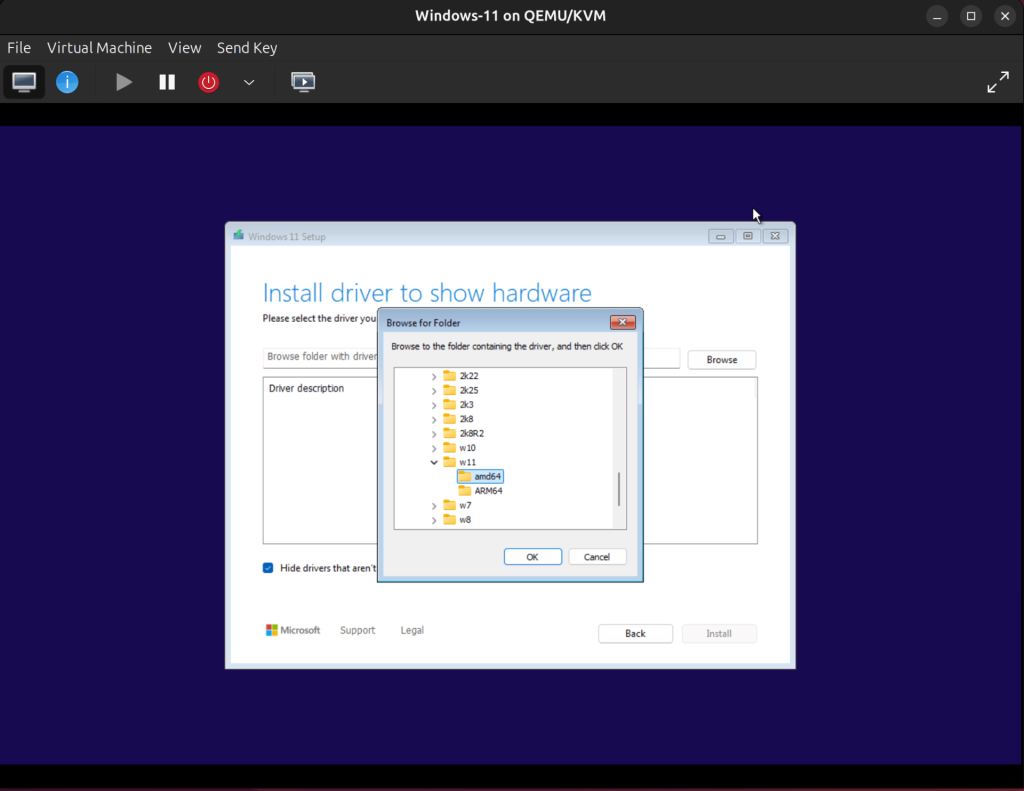
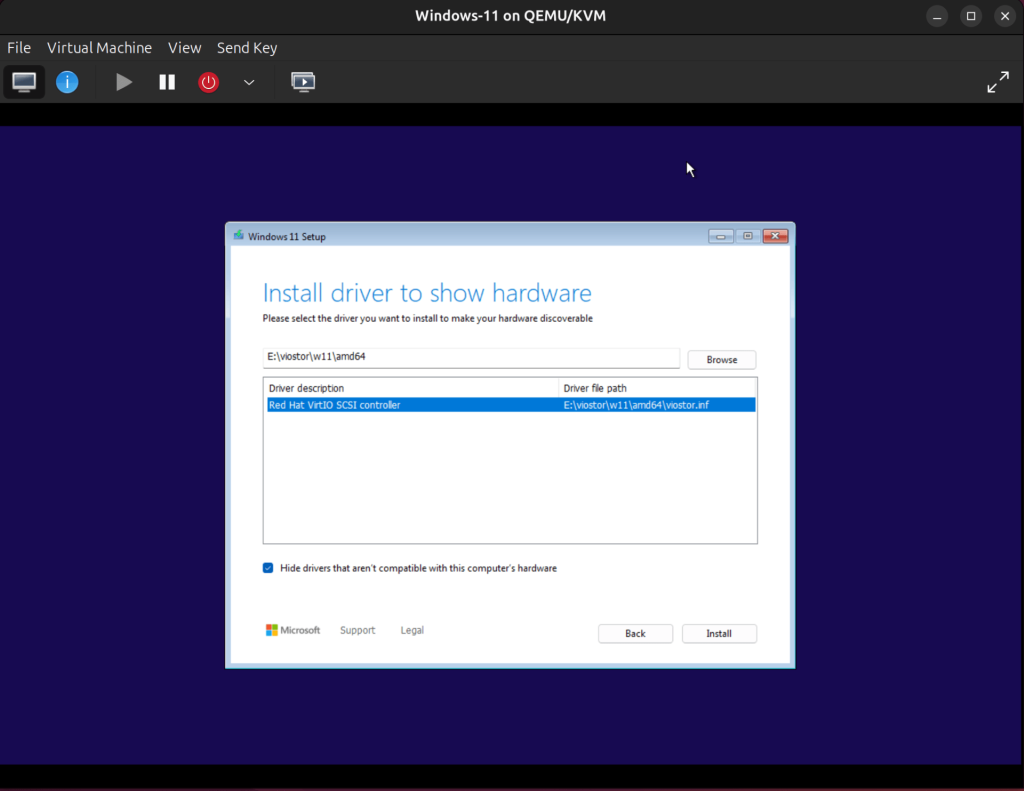
To install the VirtIO disk driver, click Load driver, then Browse, go to CD Drive (E:)→Viostor→w1→amd64, and click OK.
Then select Red Hat VirtIO SCSI Controller and click Install.
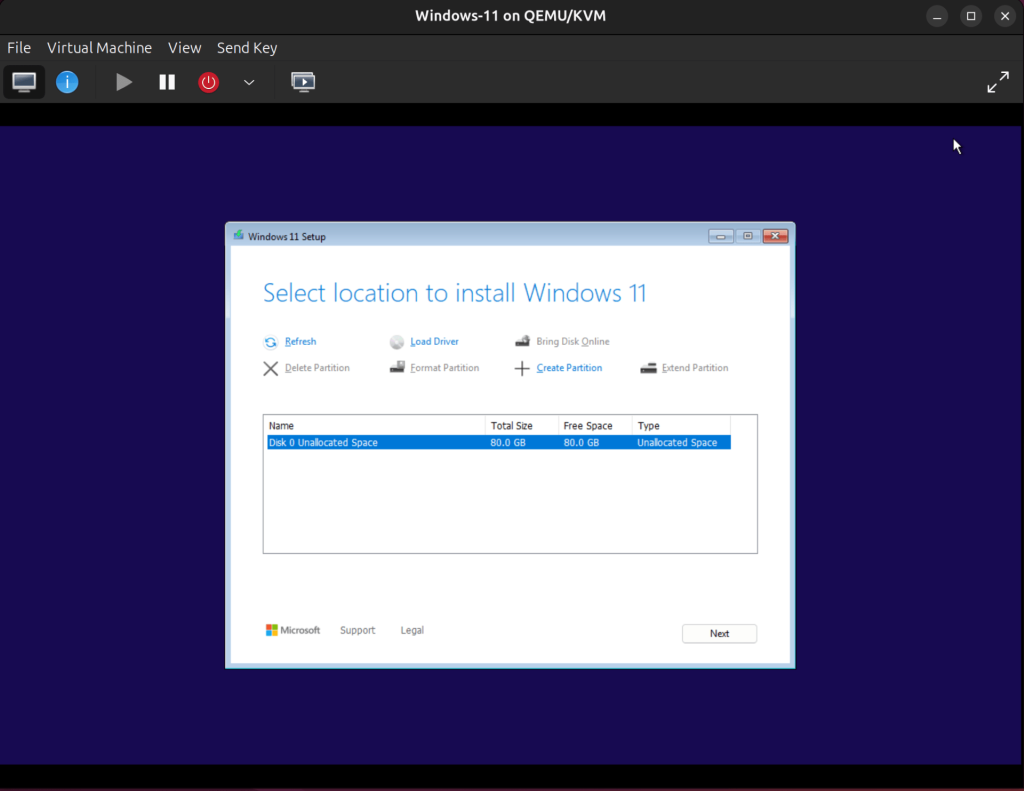
The disk is now visible after installing the VirtIO disk driver.
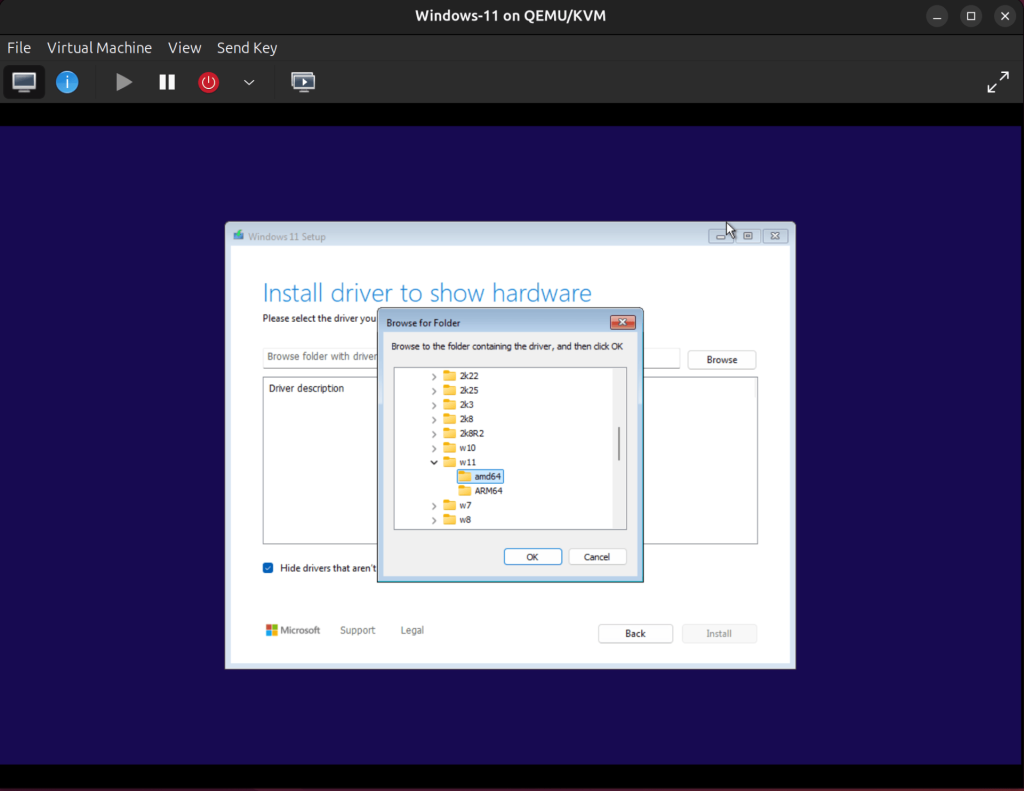
Before we can proceed with the installation, we need to install the VirtIO Network driver. Click Load driver again, then Browse, go to CD Drive (E:)→NetKVM→w11→amd64, and click OK.
Select Red Hat VirtIO Ethernet Adapter then click Install.
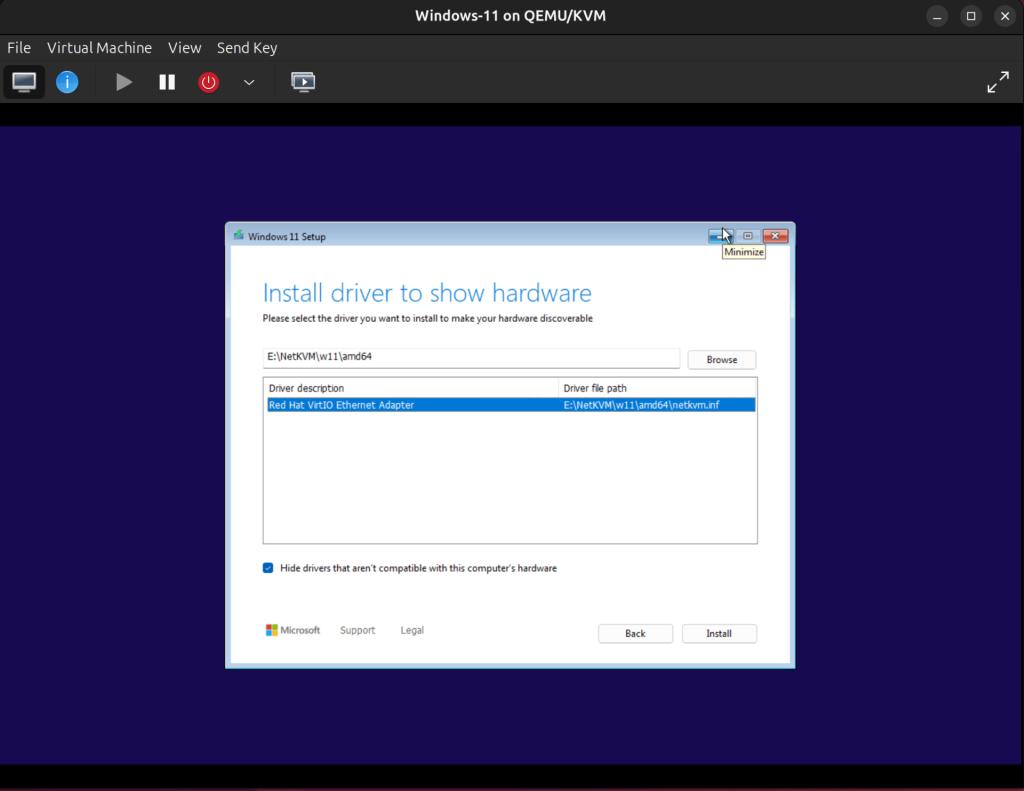
After installing the VirtIO network device driver, click Next to proceed. The installer loads a bit and let’s you know that Windows is ready to install.
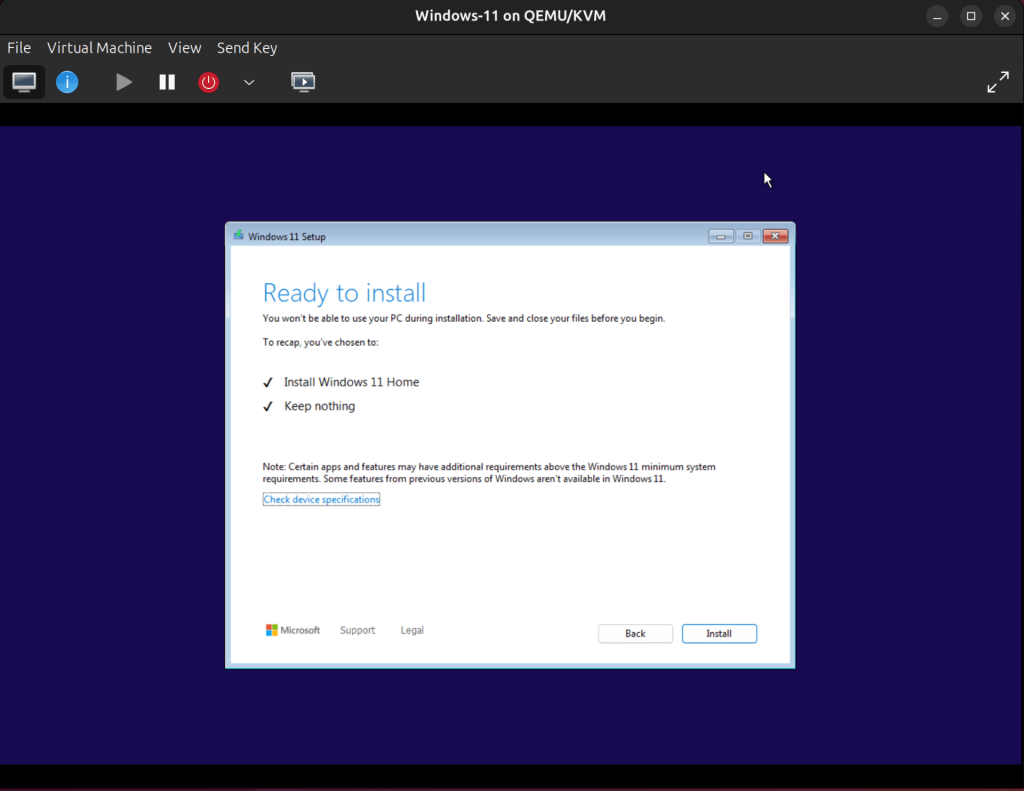
Click on Install to begin Installing Windows 11.
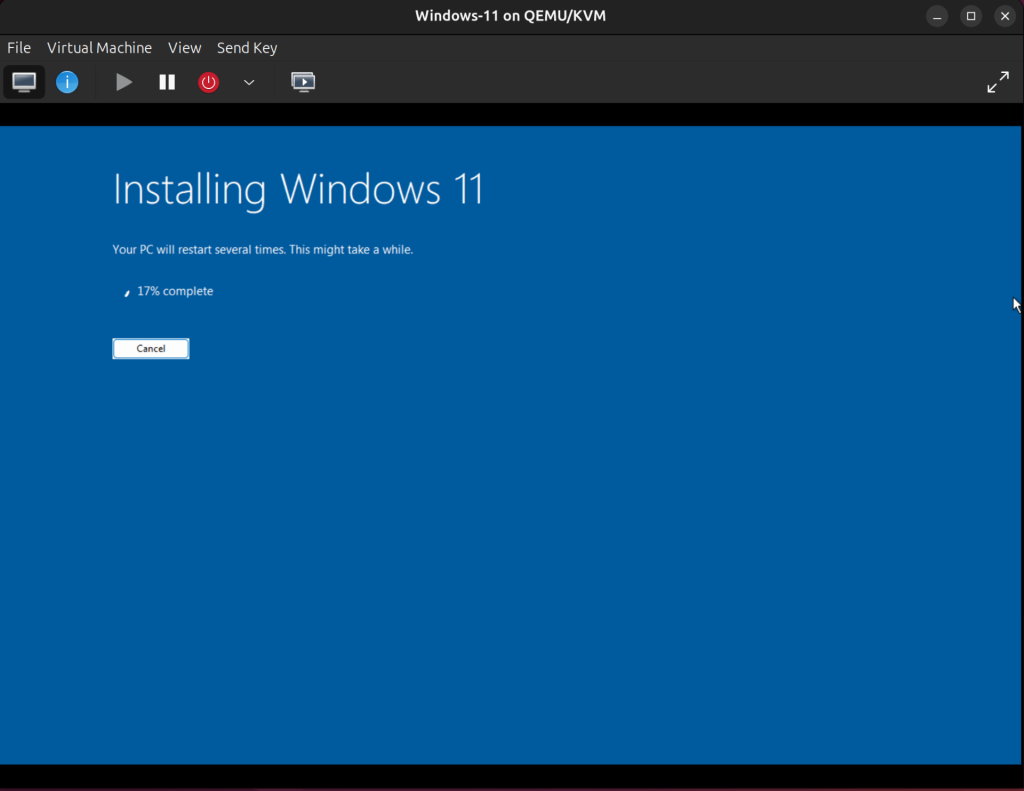
The installation may take a while to complete and the VM might restart a couple of times.
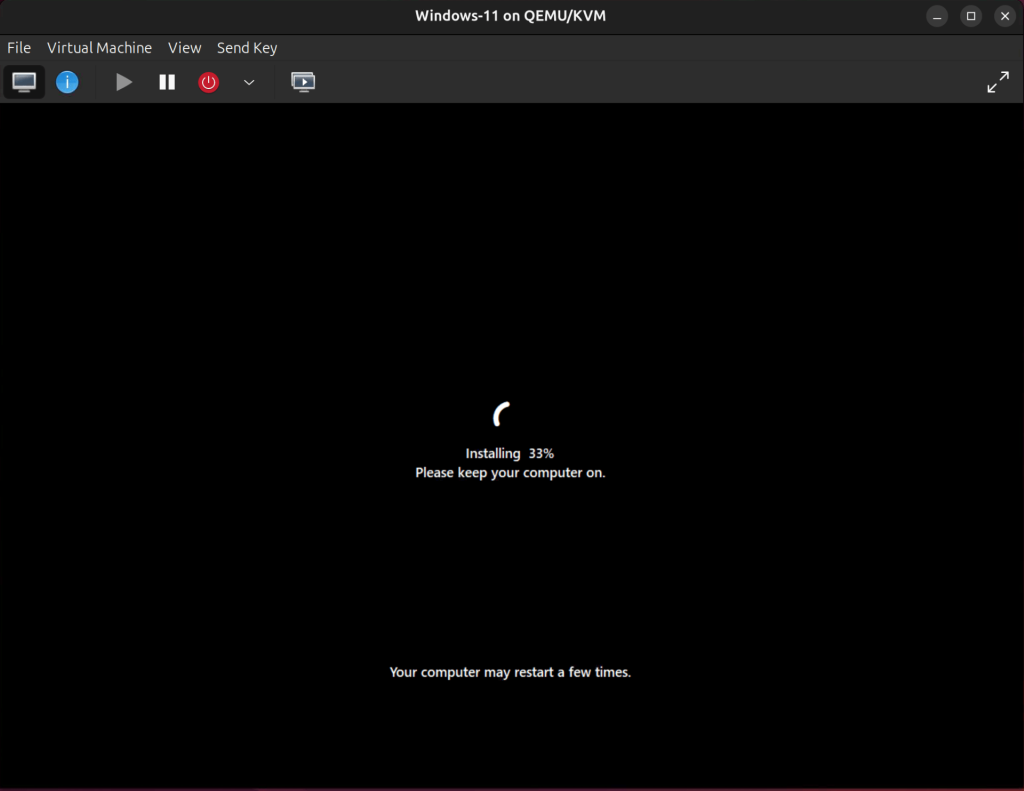
Allow all the updates to complete.
When the install is done, proceed with the personalized configurations for the next few steps to fit your requirements.
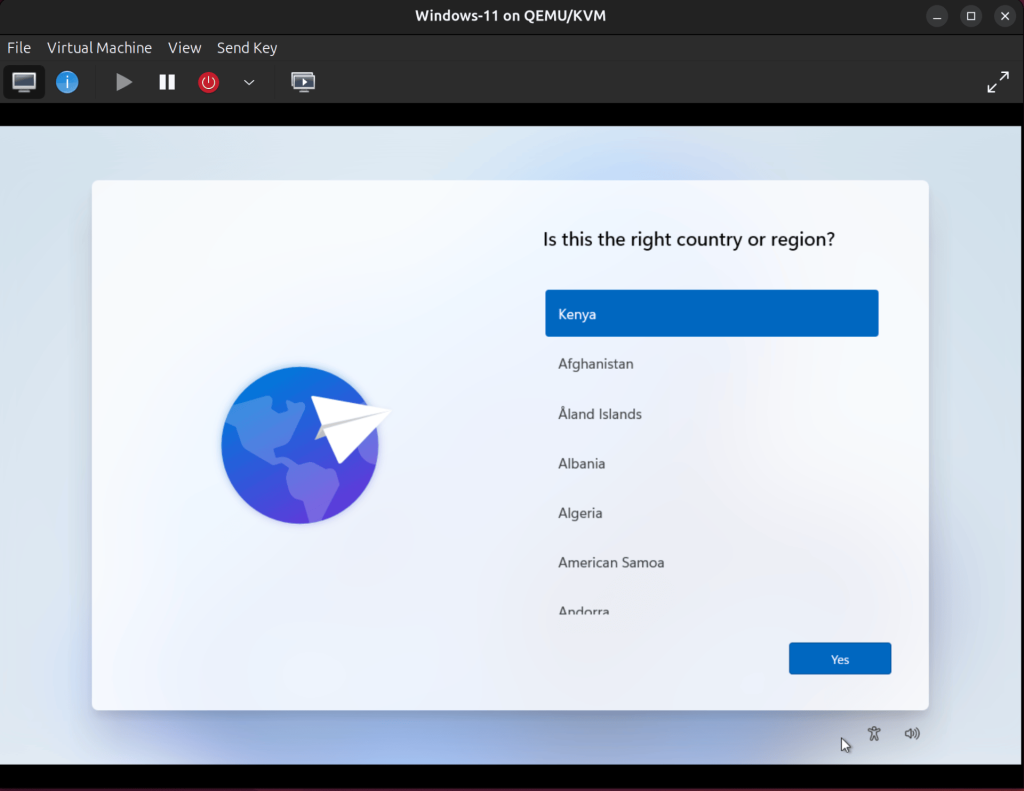
When done with the persoalized configurations Windows will get things ready for you. Be patient and wait.
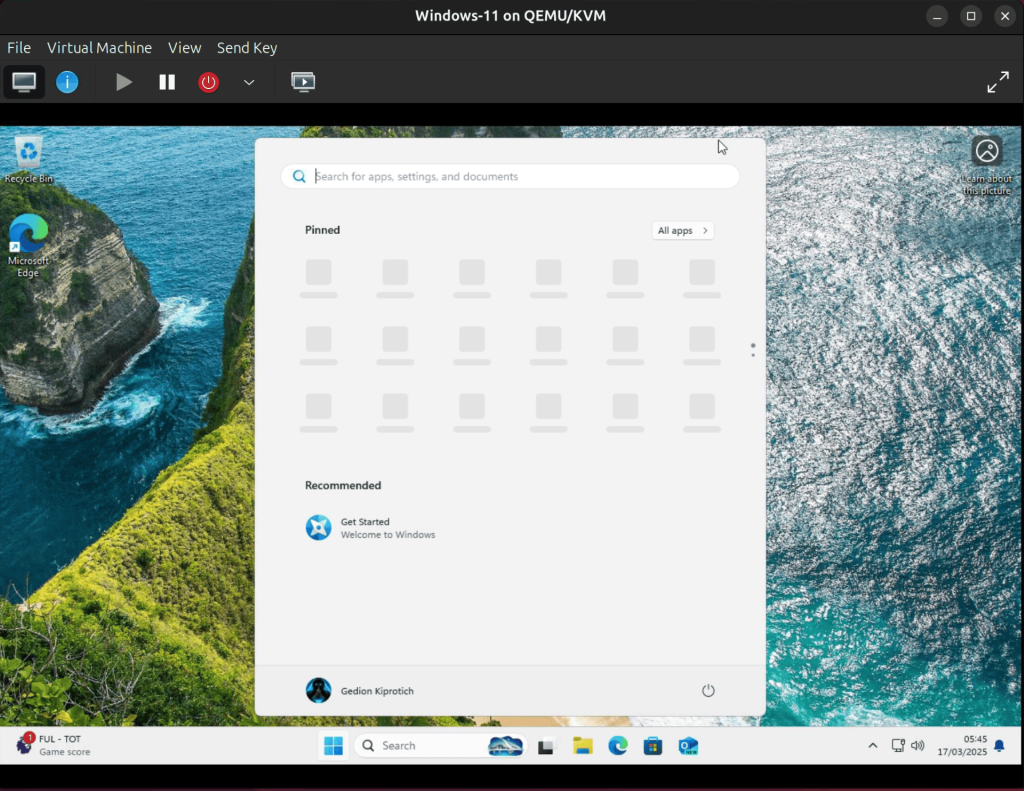
When it’s done, your device will load up and you can start using it.
Configure VirtIO Guest Tools
The last step is to install VirtIO Windows Guest Tools. The package includes some optional drivers and services that will boost SPICE performance and integration. This includes the QXL video driver as well as the SPICE guest agent for copy and paste, automatic resolution switching, and other features.
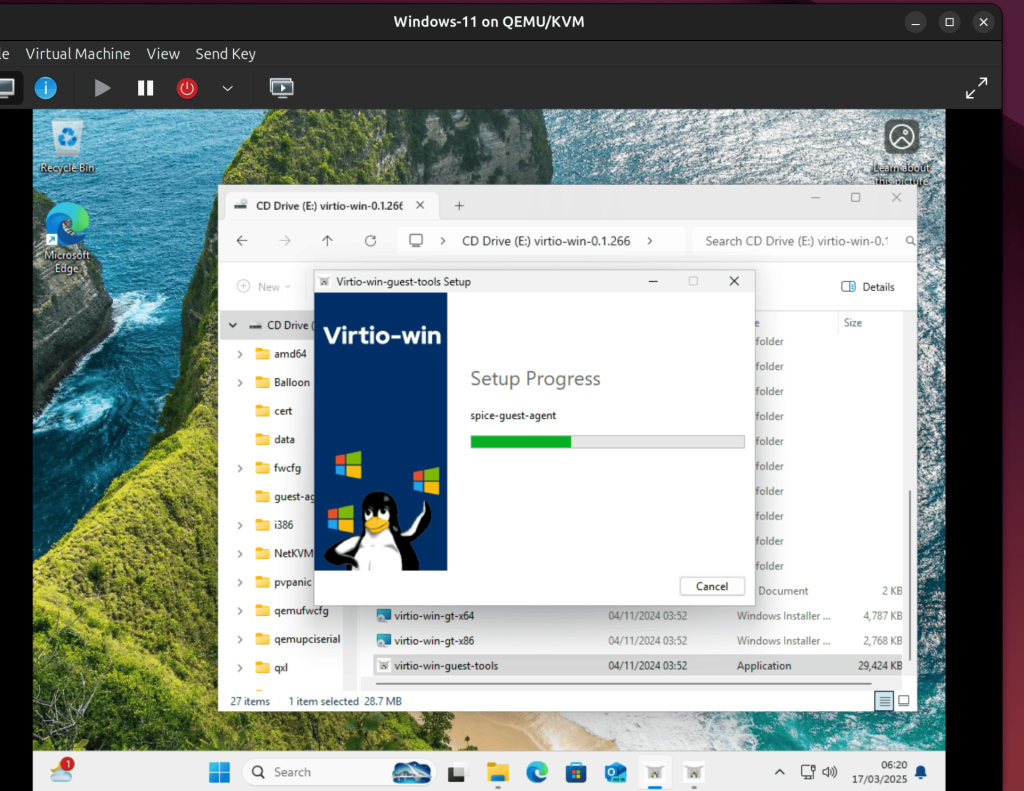
Open Windows Explorer and navigate to the CD Drive (E:), and double-click the virtio-win-guest-tools application to install it.
Agree to the License Agreement then click Install.
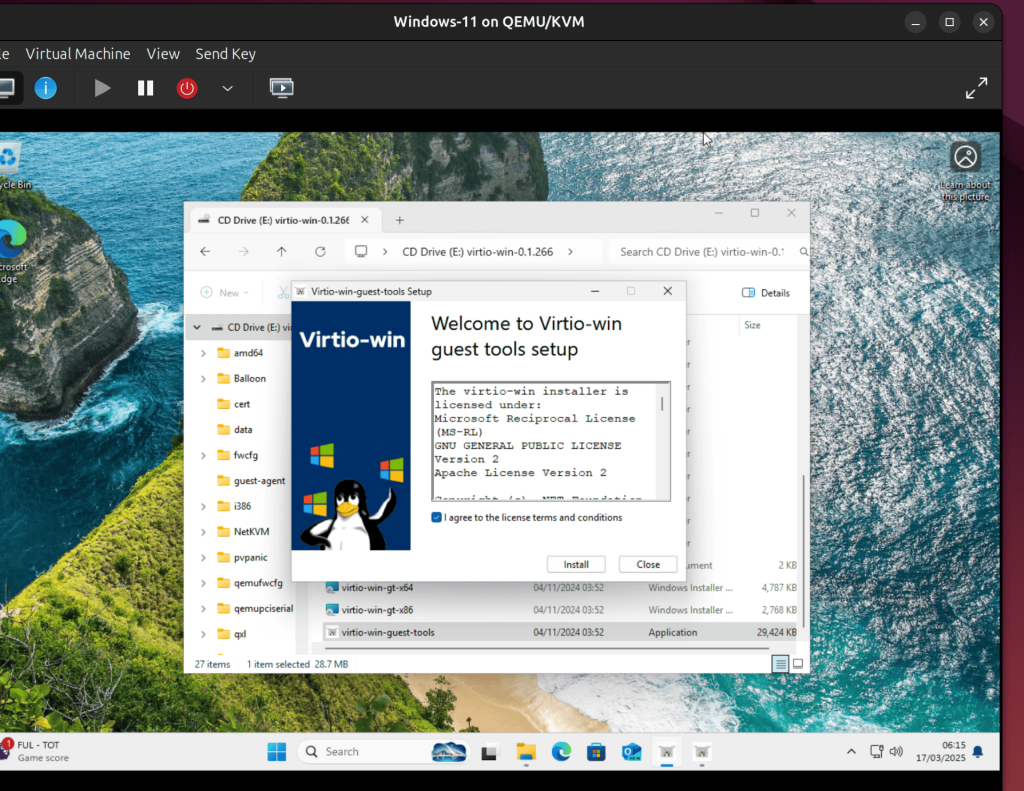
Wait for the installation to complete to proceed.
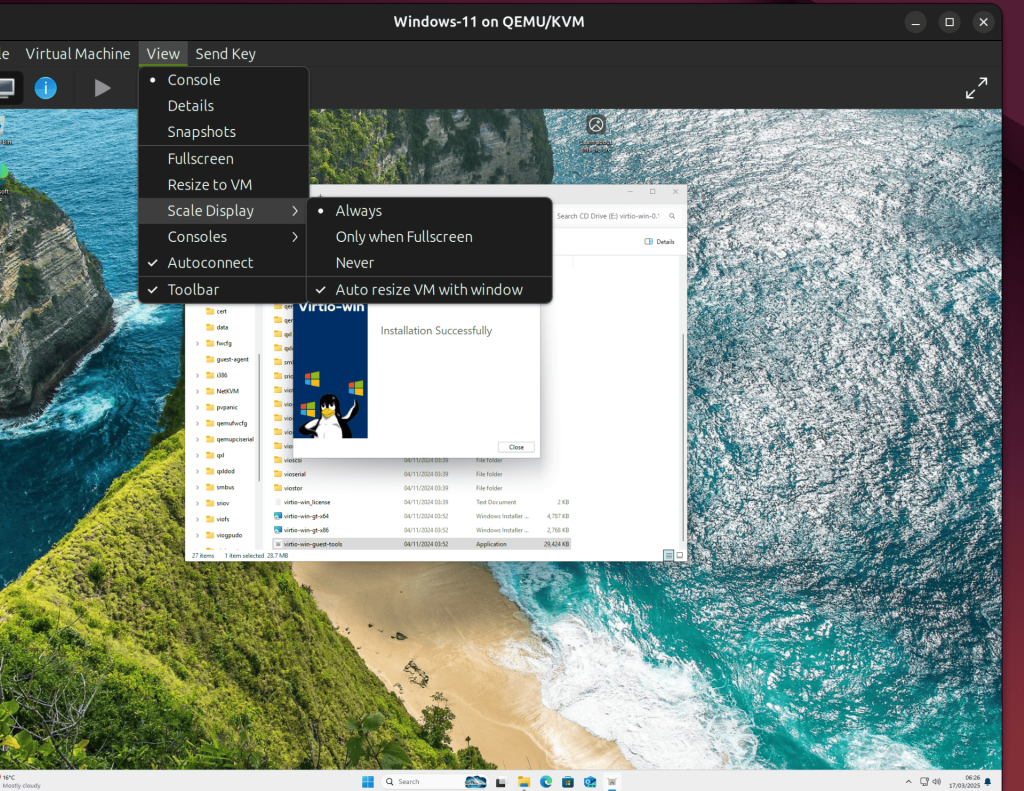
After installing the guest tools, on the Windows-11 KVM window, click View, Scale Display, and check the ‘Auto resize VM with window‘ option. This will enable the Windows 11 guest window to automatically resize as you scale it.
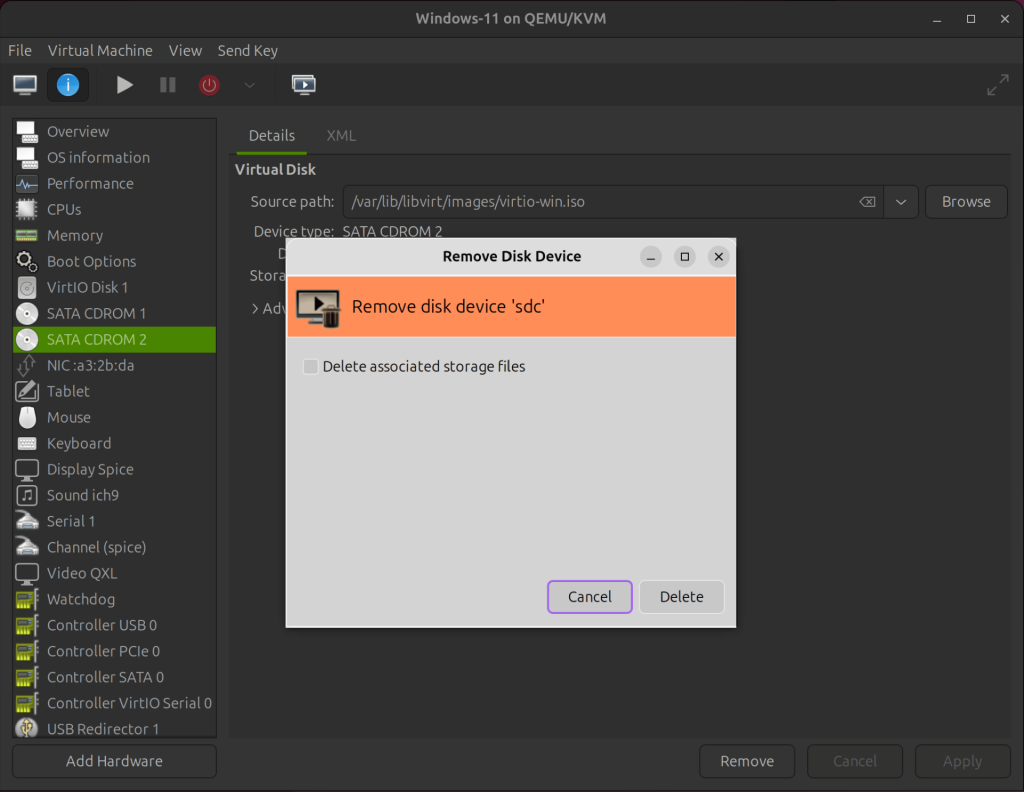
You are now done with the installation of Windows 11, shut the VM down to unmount the Windows 11 ISO installer and the VirtIO ISO image as well.
Everything is now ready, enjoy your Windows 11 VM.

