In this article, you will learn how to install Nodejs on Rocky Linux / AlmaLinux 8 with NPM. Nodejs is a cross-platform with JavaScript runtime built on Chrome’s V8 JavaScript engine and is used to build scalable network applications. Node.js is not only used on the back-end, but also as a full-stack and front-end solution.

npm, an abbreviation of Node Package Manager is the default package manager for Node.js and also the largest repository for open-source Node.js packages.
Before we commence on Node.js installation, ensure that;
- You have a user with sudo privileges
- Your system is updated
Install Node.js on Rocky Linux 8 / AlmaLinux 8
There are two main installation methods:
1. Install Node.js on Rocky 8 / Alma 8 from OS repos
Nodejs is available in the default Rocky Linux repositories. But the available versions are not up to date. To view the available list, run:
sudo dnf module list nodejsSample output:
....
Name                                   Stream                                 Profiles                                                              Summary
nodejs                                 10 [d]                                 common [d], development, minimal, s2i                                 Javascript runtime
nodejs                                 12                                     common [d], development, minimal, s2i                                 Javascript runtime
nodejs                                 14                                     common [d], development, minimal, s2i                                 Javascript runtime
nodejs                                 16                                     common [d], development, minimal, s2i                                 Javascript runtime
nodejs                                 18                                     common [d], development, minimal, s2i                                 Javascript runtime
nodejs                                 20                                     common [d], development, minimal, s2i                                 Javascript runtime

Hint: [d]efault, [e]nabled, [x]disabled, [i]nstalled- Install Nodejs v20:
sudo dnf module -y reset nodejs
sudo dnf module install nodejs:20- Install Nodejs v18:
sudo dnf module -y reset nodejs
sudo dnf module install nodejs:18- Install Nodejs v16
sudo dnf module -y reset nodejs
sudo dnf module install nodejs:16- Install Nodejs v14
sudo dnf module -y reset nodejs
sudo dnf module install nodejs:14- Install Nodejs v12:
sudo dnf module -y reset nodejs
sudo dnf module install nodejs:12- Install Nodejs v10:
sudo dnf module -y reset nodejs
sudo dnf module install nodejs:10
After a successful installation, check the installed version of Node.js installed.
$ node -v
v20.12.2
2. Install Node.js on Rocky 8 / Alma 8 using NVM
With NVM (Node Version Manager), one can install and uninstall a specific version of Node.js. This is achieved in a series of steps as demonstrated below:
Step 1: Install NVM
Download and install NVM with the following command:
curl -o- https://raw.githubusercontent.com/nvm-sh/nvm/master/install.sh | bashSample output:
=> Close and reopen your terminal to start using nvm or run the following to use it now:

export NVM_DIR="$HOME/.nvm"
[ -s "$NVM_DIR/nvm.sh" ] && \. "$NVM_DIR/nvm.sh"  # This loads nvm
[ -s "$NVM_DIR/bash_completion" ] && \. "$NVM_DIR/bash_completion"  # This loads nvm bash_completion
As per the output running the above commands adds the path to nvm to the current session. After running the above commands from the output. Check the installed version of nvm.
$ exit
$ nvm --version
0.39.7
Step 2: Install Nodejs and npm
Now with nvm installed, we can proceed and install the latest release of Node.js:
nvm install nodeSample output:
Downloading and installing node v22.4.1...
Downloading https://nodejs.org/dist/v22.4.1/node-v22.4.1-linux-x64.tar.xz...
############################################################################################################################################################################################### 100.0%
Computing checksum with sha256sum
Checksums matched!
Now using node v22.4.1 (npm v10.8.1)
Creating default alias: default -> node (-> v22.4.1)
As seen, the above command installs the latest version of Node.js
Check the installed version
$ node --version
v22.4.1
With NVM, one can still install multiple Node.js versions. Let us say we want to install the latest (LTS) version of Node.js
$ nvm install --lts
Installing latest LTS version.
Downloading and installing node v20.15.1...
Downloading https://nodejs.org/dist/v20.15.1/node-v20.15.1-linux-x64.tar.xz...
############################################################################################################################################################################################### 100.0%
Computing checksum with sha256sum
Checksums matched!
Now using node v20.15.1 (npm v10.7.0)
Now let us install a multiple Node.js (Node.js 18)
$ nvm install 18
Downloading and installing node v18.20.4...
Downloading https://nodejs.org/dist/v18.20.4/node-v18.20.4-linux-x64.tar.xz...
############################################################################################################################################################################################### 100.0%
Computing checksum with sha256sum
Checksums matched!
Now using node v18.20.4 (npm v10.7.0)
With the multiple versions installed, list the installed Node.js versions using:
$ nvm ls
->     v18.20.4
       v20.15.1
        v22.4.1
         system
default -> node (-> v22.4.1)
...
From the output, v22.4.1 is the default version of Node.js used in the current shell. To switch to another version say we want use:
nvm use <VERSION>To make a version of Node.js the default version:
nvm alias default <VERSION>Install Node.js development Tools
To use npm to build native modules, one requires development tools and libraries.Install them using this command:
sudo yum install gcc-c++ makeDependency Tree:
....
Transaction Summary
================================================================================
Install  16 Packages
Upgrade   6 Packages

Total download size: 71 M
Is this ok [y/N]: y
Getting started with Node.js
Once we have installed Node.js, let us build a simple web server. First let us create a file example.js
vim example.jsIn the file add the content below.
const http = require('http');

const hostname = '0.0.0.0';
const port = 3000;

const server = http.createServer((req, res) => {
  res.statusCode = 200;
  res.setHeader('Content-Type', 'text/plain');
  res.end('Hello World');
});

server.listen(port, hostname, () => {
  console.log(`Server running at http://${hostname}:${port}/`);
});
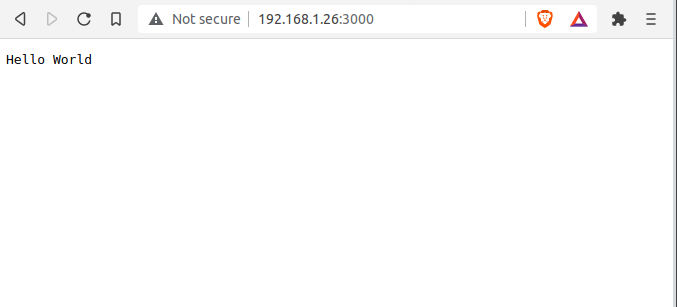
Here we have created a simple web server to print hello word. Let’s run the web server:
node example.jsThe server is running on port 3000
Now allow the port through the firewall
sudo firewall-cmd --zone=public --add-port=3000/tcp --permanent
sudo firewall-cmd --reload
Access the web server using http://IP_Address:3000 on your browser.

Conclusion
In this article, we have installed various versions of Node.js on Rocky Linux 8. I have demonstrated different ways of installing Node.js and npm on Rocky Linux 8. I have also demonstrated how to switch between Node.js versions and how to make a version default. I hope this was helpful.
Explore More with CloudSpinx
Looking to streamline your tech stack? Look no further, at CloudSpinx, we deliver robust solutions tailored to your needs.
Check out more articles:


