
Both VirtualBox and KVM are hypervisors that can be installed on our local systems as type 2 hypervisors. A hypervisor is a software used to abstract the resources of a host computer in order to create virtual machines that run different operating systems. A type 2 hypervisor runs on top of an operating system as opposed to type 1 that runs on bare metal.
VirtualBox is a free open-source hypervisor that can be installed on Linux, MacOS, Windows and Solaris systems. KVM, short for Kernel-based Virtual Machine is a free and open source virtualization platform for Linux and owned by Red Hat. With KVM, every virtual machine is implemented like a regular Linux process but with isolated resources such as network card, memory and CPU. It is part of Linux and is faster than its counterparts. It is referred to as Kernel-based virtual machine because once installed a kernel module (kvm-intel.ko / kvm-amd.ko) is loaded into the kernel.
We need to note that both KVM and VirtualBox use different disks formats. To be able to reuse the disks in either of the platforms, we need to be able to convert to the supported format. In this guide, we are going to look at how to convert VirtualBox VDI disks to KVM QCOW2 disks and import them to run virtual machines on KVM.
🔥 Check out the #1 best-selling eBook on KVM Virtualization – your ultimate guide to mastering it!
Convert VirtualBox VDI disks to KVM QCOW2 disks
There are two methods to achieve the conversion of virtualbox disks formats to KVM disk formats:
- Convert VDI to raw disk image (.img) and then convert the raw disk image to QCOW2.
- Directly convert VDI to QCOW2 using the qemu-img command.
Let us look at the first method of converting VirtualBox VDI first to a raw disk and later to KVM format.
Convert VirtualBox VDI to Raw Disk Image
In my local machine, I have installed Oracle 9 in VirtualBox and I have its virtual disk images stored in ~/VirtualBox VMs/Oracle8. I am changing into this directory and convert the Oracle 8.vdi image to raw image as below:
$ sudo vboxmanage clonemedium --format RAW Oracle-8.vdi Oracle8.img
0%...10%...20%...30%...40%...50%...60%...70%...80%...90%...100%
Clone medium created in format 'RAW'. UUID: 49451559-be0f-49d2-b804-41c62e266760
You should notice a ram image created.
$ ls
Oracle8.img
Note that /home/lorna/KVM/ is just a directory which I created to hold the converted images. Now we are going to convert .img to KVM format, qcow2, by executing the below command in the directory where the raw image is saved:
sudo qemu-img convert -f raw Oracle8.img -O qcow2 Oracle8.qcow2You should notice two images in the directory.
$ ls
Oracle8.img  Oracle8.qcow2
Convert VDI images directly to QCOW2
You can directly and simply convert a vdi image to qcow2 by running the below command:
sudo qemu-img convert -f vdi -O qcow2 vm-disk-name.vdi vm-disk-name.qcow2Run a VM on KVM by importing an Image
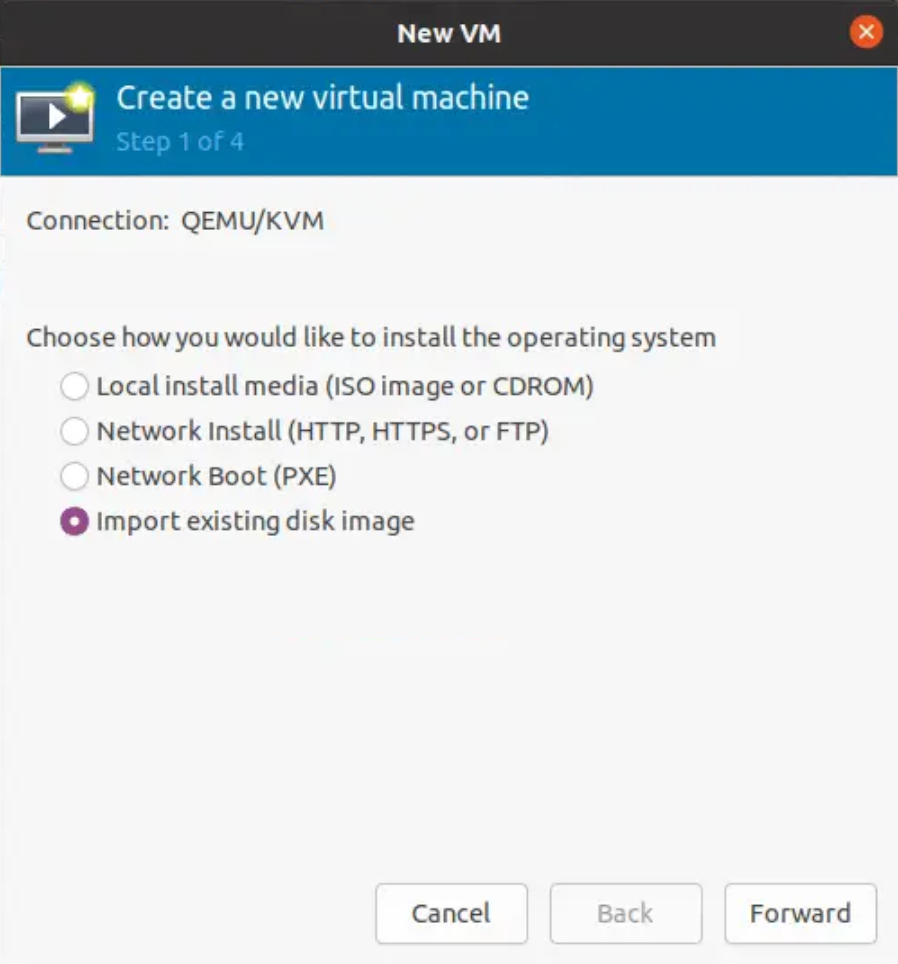
To use the created Image to create a VM on KVM, open virt manager and click on the VM icon to create a new virtual machine. Choose Import Existing Disk Image and click Forward.
Next, browse to the location of the image then click Forward.

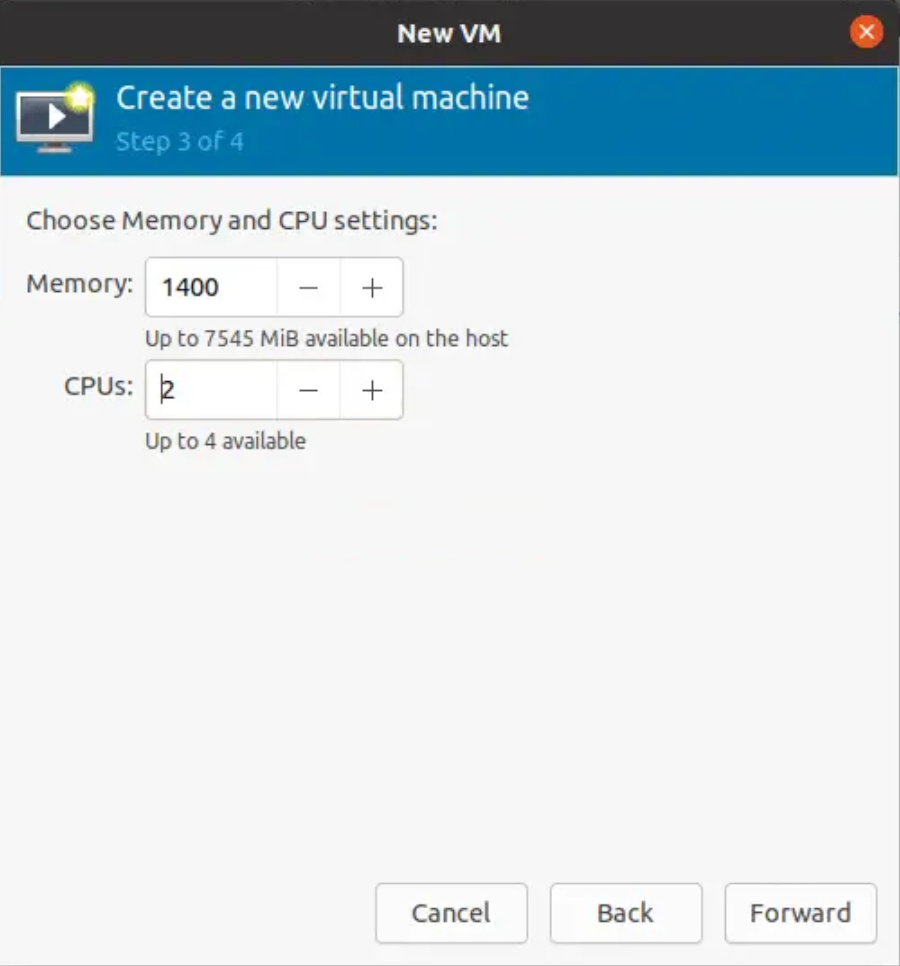
Specify CPU and RAM for your VM and click Forward.
Next, verify settings and click Finish.
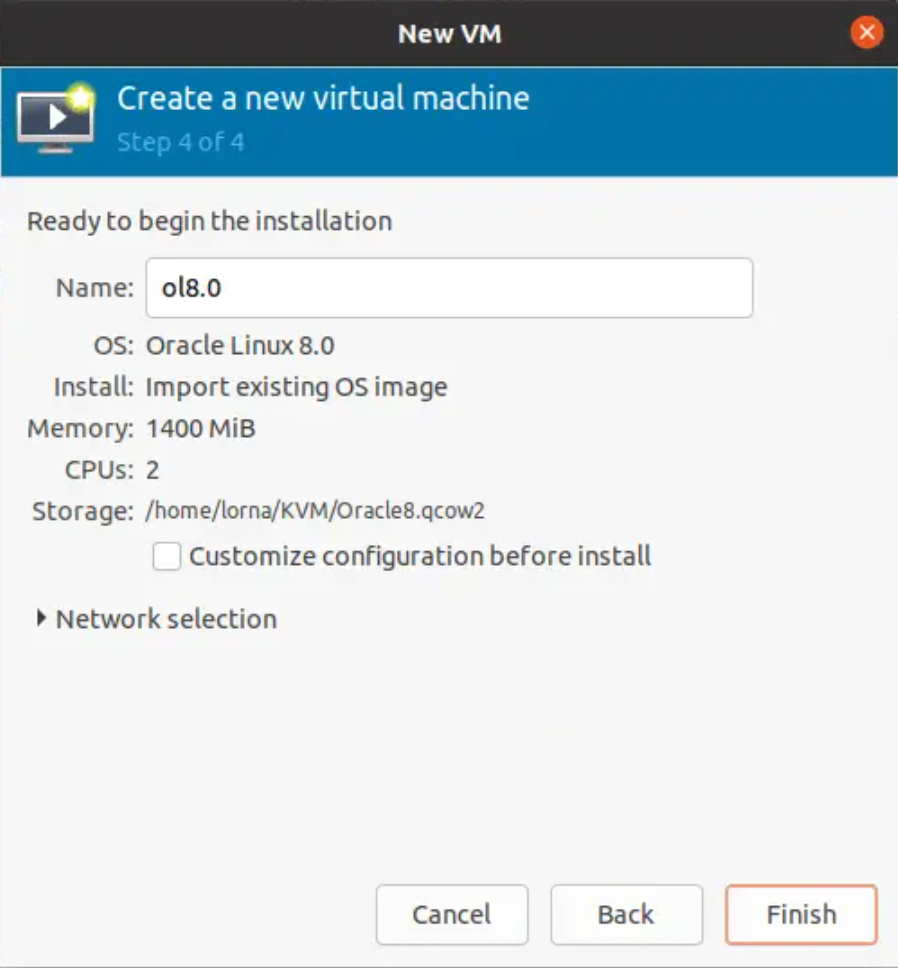
Your VM will begin creating.
We have successfully learned how to convert VirtualBox disk images to KVM format. You may also need to check on how to install Virtualbox and KVM hypervisors. Click the links below:


