This post has been created to guide users of Ubuntu and Debian Linux operating systems through the installation of PHP, common PHP extensions, and integrate it with Apache httpd web server. Ubuntu and Debian has proven over time to be the powerhouse for developers of all levels. This is mostly attributed to its simplicity, active community, and plethora of tools available for installation using robust apt package management tool.
🚀 Ready to master Ubuntu? This content is an extract from The Ultimate Ubuntu Desktop Handbook. Discover the complete guide today.
Apache is a dominant web server used around the world. It is used to host a wide variety of applications and services such as ones written in PHP, hosting industry standard applications with web-based interfaces, to running widely used CMS platforms like WordPress. Apache is known to deliver best performance, it’s reliable and scalable. It’s also a go-to choice for most developers and system administrators because of its robust and extensible architecture which allow for feature extension to meet different dynamic requirements.
Installation Pre-requisites
For this setup you will need:
- A running Ubuntu / Debian system
- Root or sudo access on the server for running privileged commands
- Internet connectivity or local APT mirrors to download packages from
Step 1: Package repository update
Ensure your package repository and system is updated to the latest versions.
sudo apt update && sudo apt upgrade -yCheck if there are any kernel related updates that necessitates a system reboot.
Step 2: Install PHP and extensions
A default version of PHP available in your OS repositories is installed using apt package manager.
sudo apt install -y phpInstalled version can be confirmed using php --version command:
$ php --version
PHP 8.3.6 (cli) (built: Dec  2 2024 12:36:18) (NTS)
Copyright (c) The PHP Group
Zend Engine v4.3.6, Copyright (c) Zend Technologies
    with Zend OPcache v8.3.6, Copyright (c), by Zend Technologies
Here is the list of standard PHP extensions applicable to many uses.
sudo apt install php-{cli,mbstring,mysql,curl,xml,zip,gd}Step 3: Install Apache and PHP module
When you install Apache, you don’t automatically get PHP module since it’s not bundled with it. As such, install it as an addition to the apache2 package.
sudo apt install apache2 libapache2-mod-phpThe libapache2-mod-php is the module that enables Apache to support PHP.
After the installation apache2 service is started automatically and enabled to start on system boot. However, the PHP module can be enabled and disabled on demand using a2enmod and a2dismod respectively.
sudo a2enmod php rewriteApache needs to be restarted once the modules are enabled.
sudo systemctl reload apache2Step 4: Create a PHP Info Page
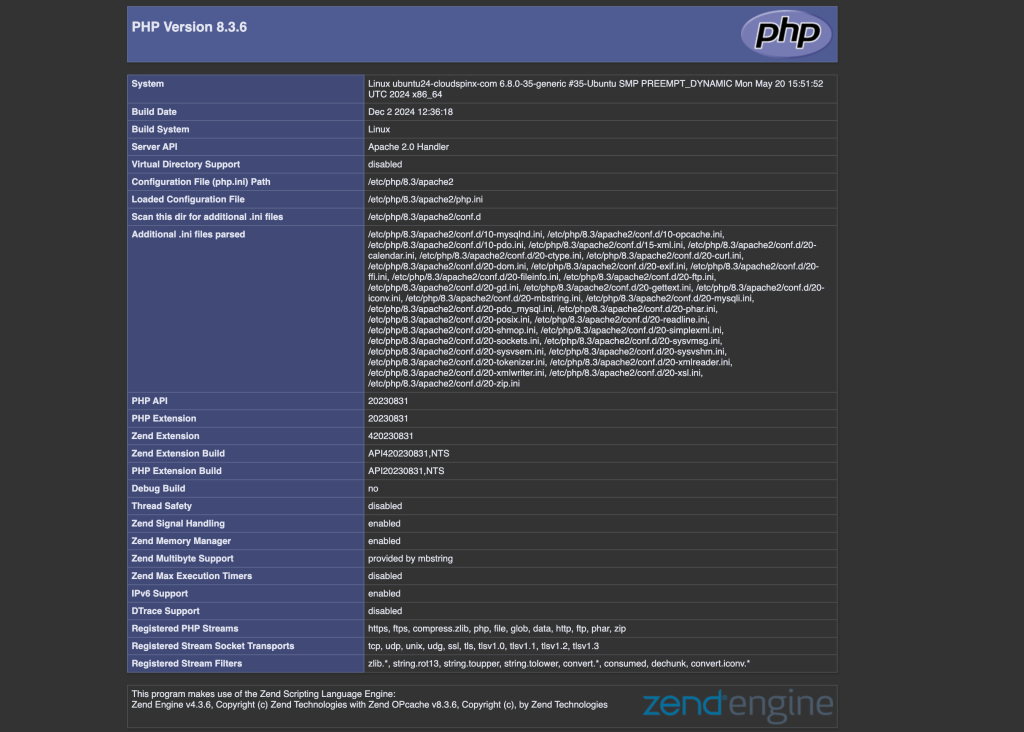
To demonstrate our installation is functioning, let’s create a test PHP file in the default Apache web document root directory.
echo "<?php phpinfo(); ?>" | sudo tee /var/www/html/info.phpSet permissions to allow www-data user read access to the file. This is the user is used by Apache process.
sudo chmod 644 /var/www/html/info.phpOpen your browser and navigate to http://<server-ip>/info.php to confirm it is working.

Step 5: PHP Configuration optimizations
Locate the default PHP configuration file.
php --ini | grep "Loaded Configuration File"From the file you can modify default parameters used by PHP. For example max memory, execution time, e.t.c.
$ sudo vim /etc/php/*/apache2/php.ini
memory_limit = 256M
max_execution_time = 120
upload_max_filesize = 10M
post_max_size = 10M
Whenever changes are made in the PHP configuration file, a restart of apache2 service must be done.
sudo systemctl restart apache2Logs relating to Apache web servers errors is found at /var/log/apache2/error.log
sudo tail -f /var/log/apache2/error.logIf the output displays detailed information about your PHP installation, it is enough confirmation the setup is functioning correctly. Delete test file.
sudo rm /var/www/html/info.php


