DigitalOcean is a cloud infrastructure provider with data centers around the world. DigitalOcean helps millions of developers to easily and quickly build, test, deploy, scale and manage applications of any size at any capacity requirements. DigitalOcean is created to be easy to use, understand and with great performance.
This tutorial has been written to guide you through the steps of running an openSUSE 15 instance on DigitalOcean. Cloud servers in DigitalOcean are referred to as Droplets. A droplet is created from a Linux distribution or BSD system image. The standard OS images provided are for Ubuntu, Fedora, Debian, CentOS and FreeBSD.
The nice part is that DigitalOcean support importation of Custom images. Once the image is imported you can create Droplets based on the custom image.
Images you upload to DigitalOcean must meet the following requirements:
- Operating system. Images must have a Unix-like OS.
- File format. Images must be in one of the following file formats:
- Raw (
.img) with an MBR or GPT partition table - qcow2
- VHDX
- VDI
- VMDK
- Raw (
- Size. Images must be 100 GB or less when uncompressed, including the filesystem.
- Filesystem. Images must support the ext3 or ext4 filesystems.
cloud-init. Images must have cloud-init 0.7.7 or higher, cloudbase-init, coreos-cloudinit, ignition, or bsd-cloudinit installed and configured correctly.- SSH configuration. Images must have sshd installed and configured to run on boot.
Uploading openSUSE 15 qcow2 image to DigitalOcean
The first step is the uploading of qcow2 image to DigitalOcean. In this guide we will use the publicly available qcow2 images provided for OpenStack.
The full image link I’ll use is:
# OpenSUSE 15.2
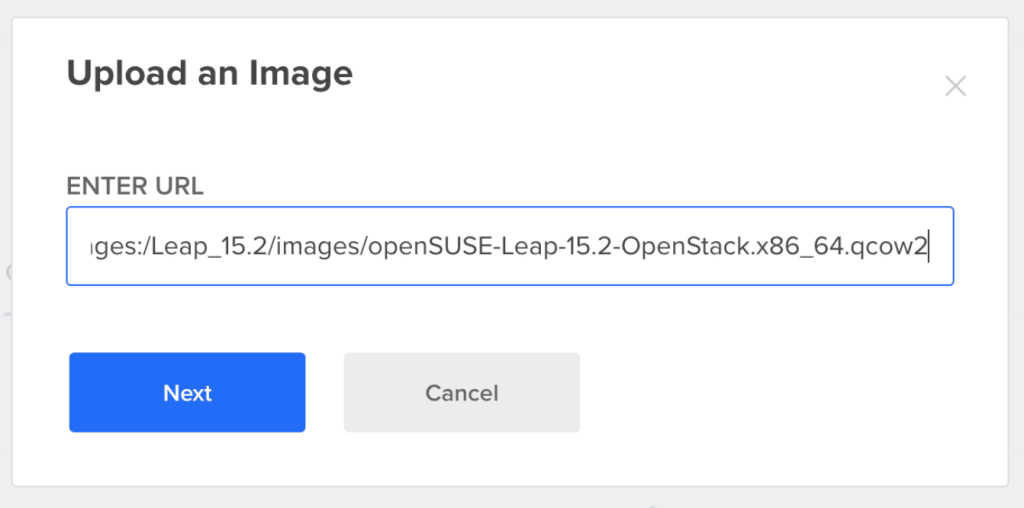
https://download.opensuse.org/repositories/Cloud:/Images:/Leap_15.2/images/openSUSE-Leap-15.2-OpenStack.x86_64.qcow2

# OpenSUSE 15.3
https://download.opensuse.org/repositories/Cloud:/Images:/Leap_15.3/images/openSUSE-Leap-15.3.x86_64-NoCloud.qcow2
Login to your DigitalOcean console and navigate to Images > Custom Images > Import via URL.

Paste the Image URL in the box.

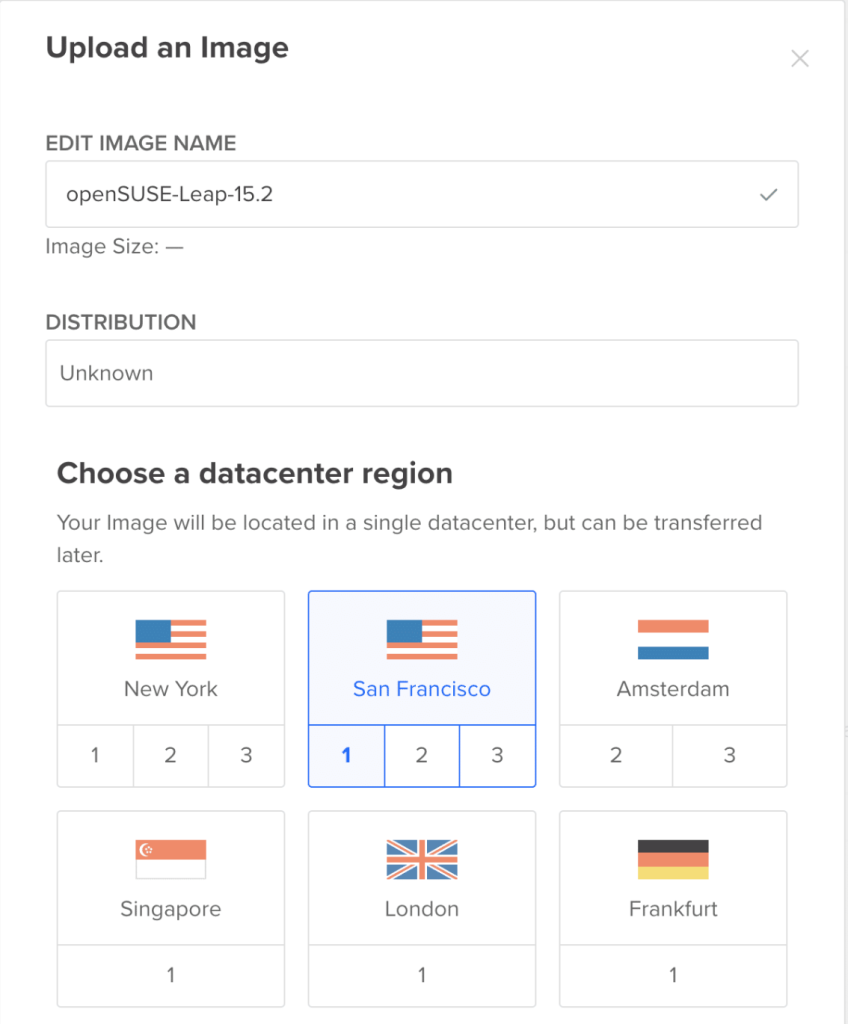
Hit Next then fill in the additional information to import the image – Name, Distribution, DC e.t.c.

Confirm the image is imported without any errors.

Create DigitalOcean Droplet from openSUSE 15 custom image
Now that the image is imported we can start creation of droplet. This can be done under Droplets > Create > Droplets > Custom images. Choose the image you imported.

Choose a plan, cpu & memory, dc region,SSH Keys e.t.c.

When done with the settings create the droplet.

Test ssh to the openSUSE instance created.
$ ssh [email protected]
Warning: Permanently added '174.138.42.112' (ECDSA) to the list of known hosts.
openSUSE Leap 15.2 x86-64

As "root" use the:
  - zypper command for package management
  - yast command for configuration management

Have a lot of fun...
Update the OS
opensuse-15:~ # zypper refresh
opensuse-15:~ # zypper up
Accept the upgrade prompt:
The following product is going to be reinstalled:
  "openSUSE Leap 15.2"

The following 7 packages require a system reboot:
  dbus-1 glibc kernel-default-5.3.18-lp152.50.1 kernel-firmware libopenssl1_1 systemd udev

271 packages to upgrade, 144 new, 1 to remove.
Overall download size: 407.9 MiB. Already cached: 0 B. After the operation, additional 1.1 GiB will be used.

    Note: System reboot required.
Continue? [y/n/v/...? shows all options] (y): y
You have now deployed an openSUSE 15 Linux droplet on DigitalOcean. Check other guides below available in our website.


