An ISO file, also known as disc image, is a complete duplicate of the contents of an optical disc, such as a CD or DVD. This is required when installing an operating system offline, such as Windows, FreeBSD, Linux e.t.c. ISO images are expected to contain the binary image of an optical media file system (usually ISO 9660 and its extensions or UDF), including the data in its files in binary format, copied exactly as they were stored on the disc.
In this article we show you how to upload operating system’s ISO image file and usage in Proxmox Virtualization environment. We expect you have a working installation of Proxmox VE in your environment before you can proceed. Proxmox VE web console is accessible on below URL:
https://[server_ip_or_hostname]:8006For a default proxmox VE installation, ISO files are stored in the directory below:
/var/lib/vz/template/isoUpload ISO file from Proxmox Web console
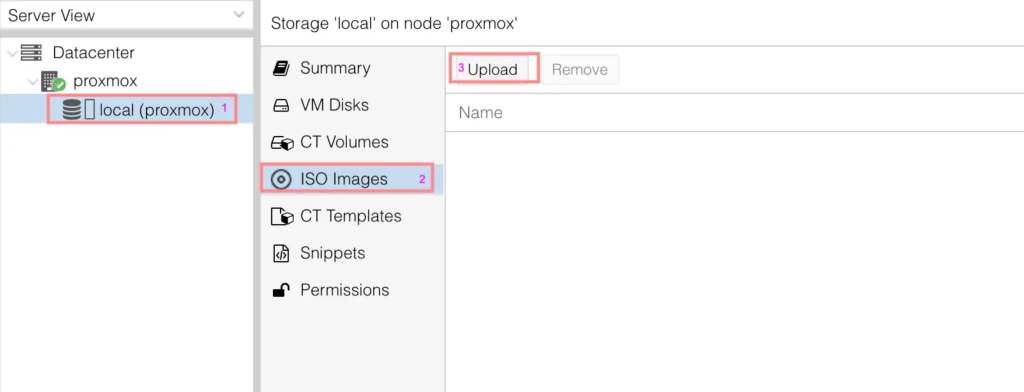
Login to Proxmox web management interface and navigate to Proxmox > ISO images > Upload
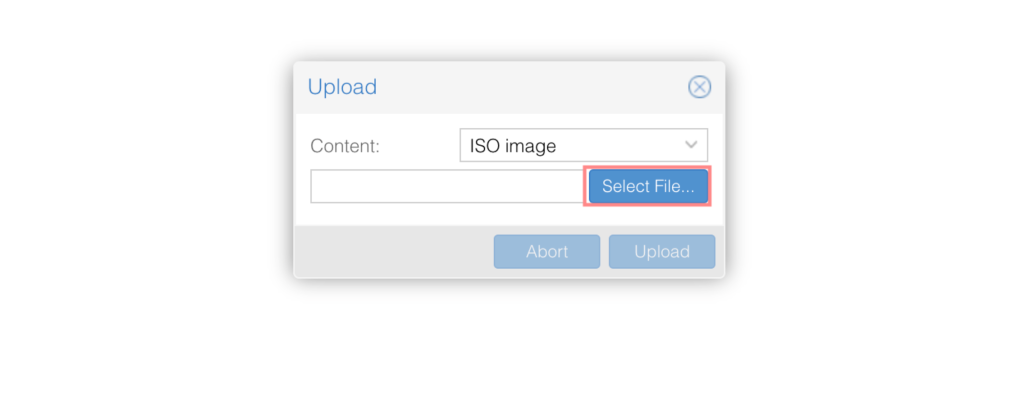
Select the ISO image to upload.
Download ISO file from Proxmox Server CLI
You can download any ISO file available on an http or ftp server from the command line.
Switch to ISO files storage directory:
cd /var/lib/vz/template/isoDownload your OS ISO files with wget or curl. See below example:
#Ubuntu 22.04 server edition:
wget https://releases.ubuntu.com/22.04/ubuntu-22.04-live-server-amd64.iso

#Ubuntu 20.04 server edition
wget https://releases.ubuntu.com/20.04/ubuntu-20.04.4-live-server-amd64.iso
Screenshot:

The same can be uploaded via scp or winscp tools if the file is available locally.
scp ubuntu-22.04-live-server-amd64.iso root@proxmox_server:/var/lib/vz/template/iso/If you login to web console the files should be visible and available for use.

You’ve learned how to successfully upload OS ISO files to Proxmox data store both from command-line interface and web console. You can use the option that works best for you. We hope this guide was of help to you.
Similar articles: